
-
Modelers Alliance has updated the forum software on our website. We have migrated all post, content and user accounts but we could not migrate the passwords.
This requires that you manually reset your password.
Please click here, http://modelersalliance.org/forums/login to go to logon page and use the "Forgot your Password" option.
You are using an out of date browser. It may not display this or other websites correctly.
You should upgrade or use an alternative browser.
You should upgrade or use an alternative browser.
1/24 MPC/Airfix JU 87B Finished
- Thread starter fightnjoe
- Start date
1/24 MPC/Airfix JU 87B Good Nature Ribbing
You are all very kind and I am very late to reply.
I have several drawings found online that show different versions of the aircraft cut away. I am trying to make the structure look similar to what I am seeing in those.
Joe
You are all very kind and I am very late to reply.
That's impressive!What are you using as reference for the internal structure?
I have several drawings found online that show different versions of the aircraft cut away. I am trying to make the structure look similar to what I am seeing in those.
Joe
1/24 MPC/Airfix JU 87B Some Color
After nearly two weeks of being sick I am able to show a bit of progress.
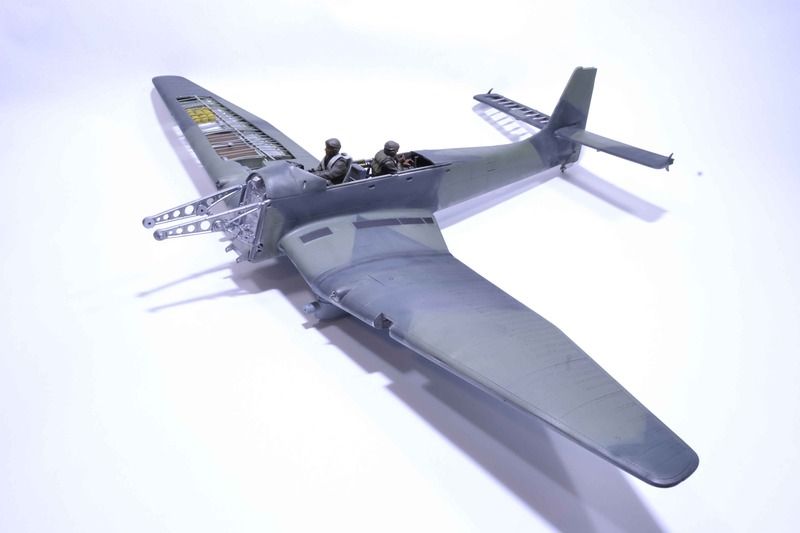
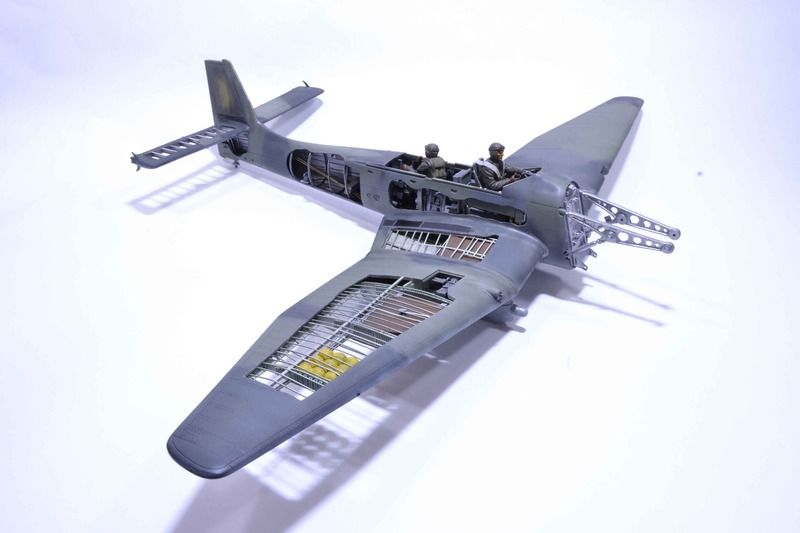
I began the process of preparing to get some color on the build. I did this just a bit different than previous builds. I began with a Gloss Black base. I then shot Alclad Polished Aluminium. Mind you this was not done to be a high gloss, mirror finish. Just a base for the color to come.


Once dry the real colors make their appearance. RLM 70 and 71 for the upper and RLM 65 for the lower. I began by taping off the shapes and then shot a lightened version of each of the top colors to get a first color. I then went back through with thinned coats of the colors to darken up the cammo. For the lower I shot several layers of thinned color.
This was done over the cut away sections. I did this to try to minimize any overspray to the interior.
I did have a bit of a mishap. Prior to getting sick I scanned the decal sheet. My son touched up the image to give the best possible color. I then printed off the decals on two sheets, my only two sheets, of decal paper. Once I thought it was dry I sprayed decal bonder. Once I felt up to doing anything again I checked on the decals and found that they had a reddish tint. Not sure if the ink had not dried or what happened. I do need to redo these.
This is good progress and hopefully the momentum can continue for a while.
All comments, critiques, and criticism are encouraged.
Joe
After nearly two weeks of being sick I am able to show a bit of progress.
I began the process of preparing to get some color on the build. I did this just a bit different than previous builds. I began with a Gloss Black base. I then shot Alclad Polished Aluminium. Mind you this was not done to be a high gloss, mirror finish. Just a base for the color to come.
Once dry the real colors make their appearance. RLM 70 and 71 for the upper and RLM 65 for the lower. I began by taping off the shapes and then shot a lightened version of each of the top colors to get a first color. I then went back through with thinned coats of the colors to darken up the cammo. For the lower I shot several layers of thinned color.
This was done over the cut away sections. I did this to try to minimize any overspray to the interior.
I did have a bit of a mishap. Prior to getting sick I scanned the decal sheet. My son touched up the image to give the best possible color. I then printed off the decals on two sheets, my only two sheets, of decal paper. Once I thought it was dry I sprayed decal bonder. Once I felt up to doing anything again I checked on the decals and found that they had a reddish tint. Not sure if the ink had not dried or what happened. I do need to redo these.
This is good progress and hopefully the momentum can continue for a while.
All comments, critiques, and criticism are encouraged.
Joe
1/24 MPC/Airfix JU 87B Gap and Putty Show
Time for just a very brief update.
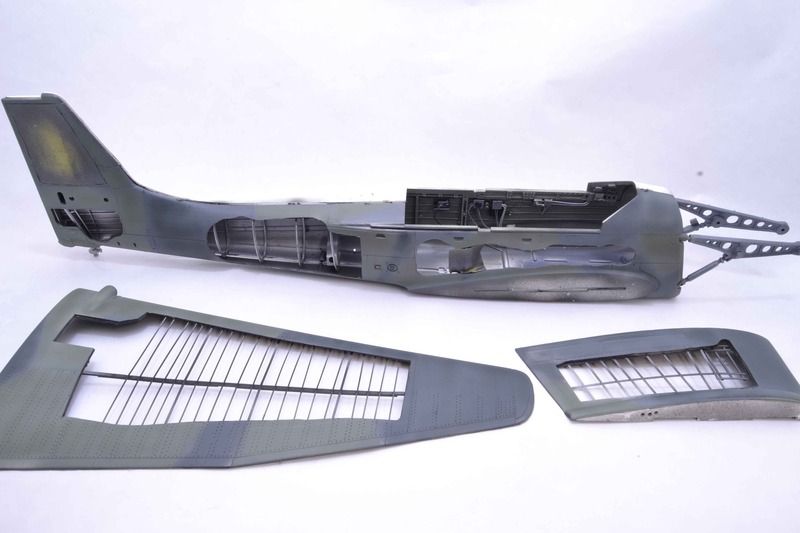
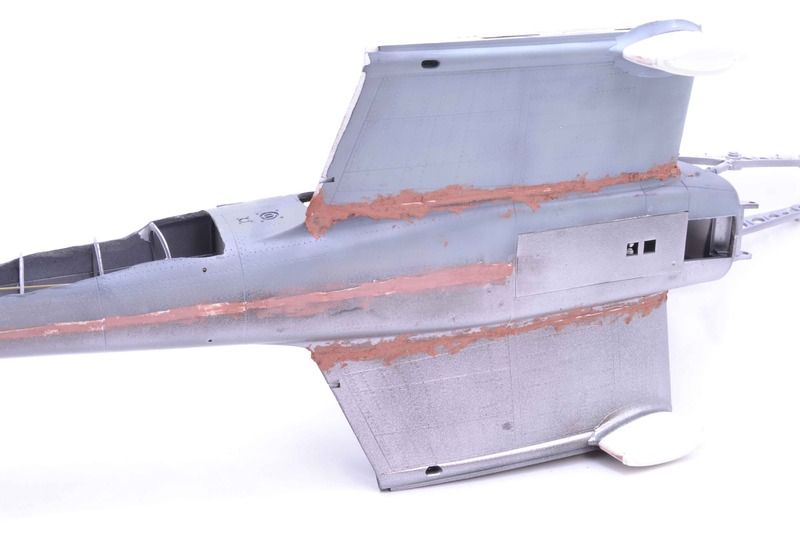
Big news as the fuselage is now closed and the inner wing sections are attached. Not so happy news is the gaps for the fuselage halves and the wing roots were at the very least and eighth of an inch in width. This thing needed about a third of a container of putty to actually fill them. That was even after using some styrene to try to fill the gap.
In the end though the inner wings are on and the fuselage is closed. I did add the detail to the interior of the cut wing section. More on that later.
Pictures of the gap and putty show.

I did spend a little time on the engine. Nothing worthy of pictures yet but soon I hope.
All comments, critiques, and criticism are encouraged.
Joe
Time for just a very brief update.
Big news as the fuselage is now closed and the inner wing sections are attached. Not so happy news is the gaps for the fuselage halves and the wing roots were at the very least and eighth of an inch in width. This thing needed about a third of a container of putty to actually fill them. That was even after using some styrene to try to fill the gap.
In the end though the inner wings are on and the fuselage is closed. I did add the detail to the interior of the cut wing section. More on that later.
Pictures of the gap and putty show.
I did spend a little time on the engine. Nothing worthy of pictures yet but soon I hope.
All comments, critiques, and criticism are encouraged.
Joe
1/24 MPC/Airfix JU 87B On to the Engine
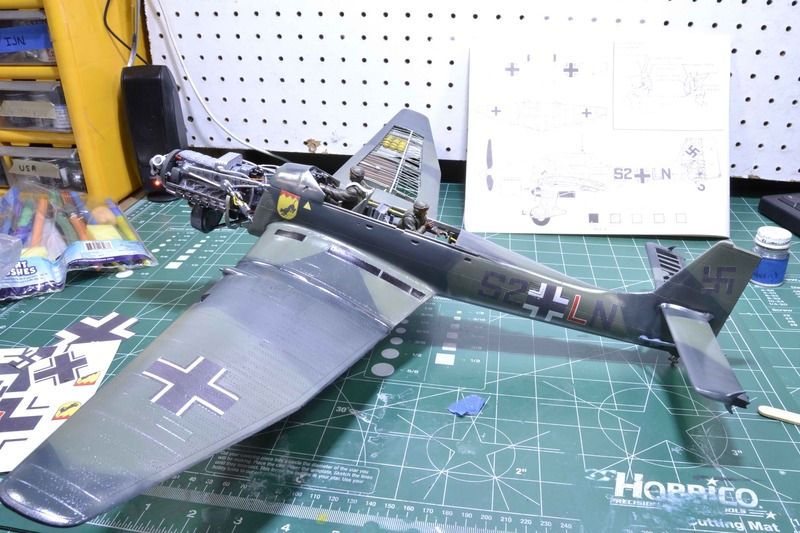
We have progress.
Yes my friends we have progress. The pictures show the tale.
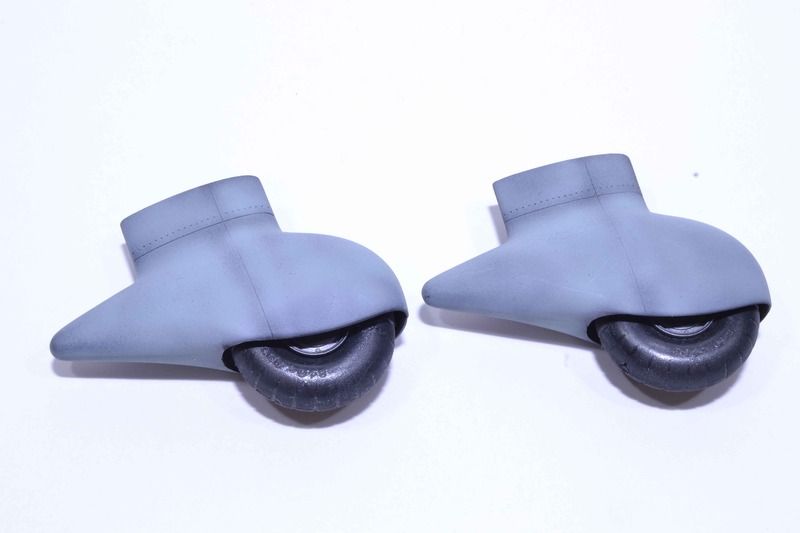
The fuselage and wings are attached. The gaps, and there were some interesting gaps, were puttied and then sorted. The paintwork was then touched up. While I waited for the putty to dry I spent some time on the landing gear.
And just a bit to prep for the next step. The engine and the engine compartment.
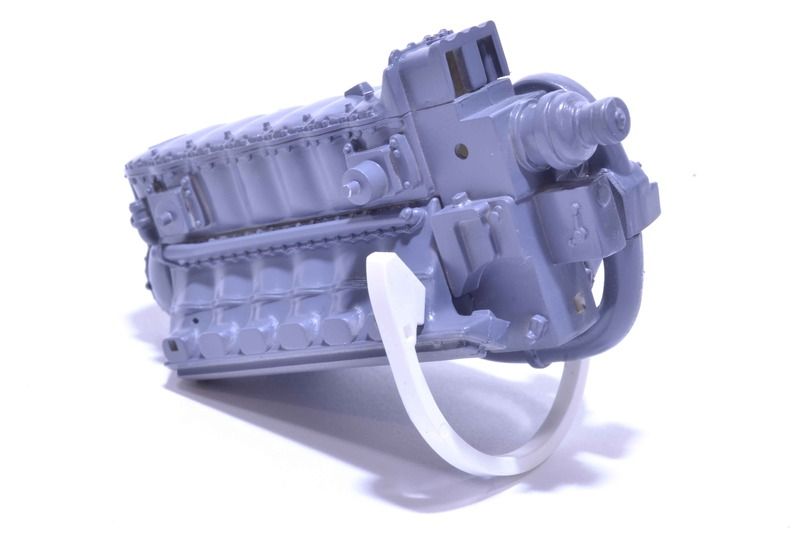
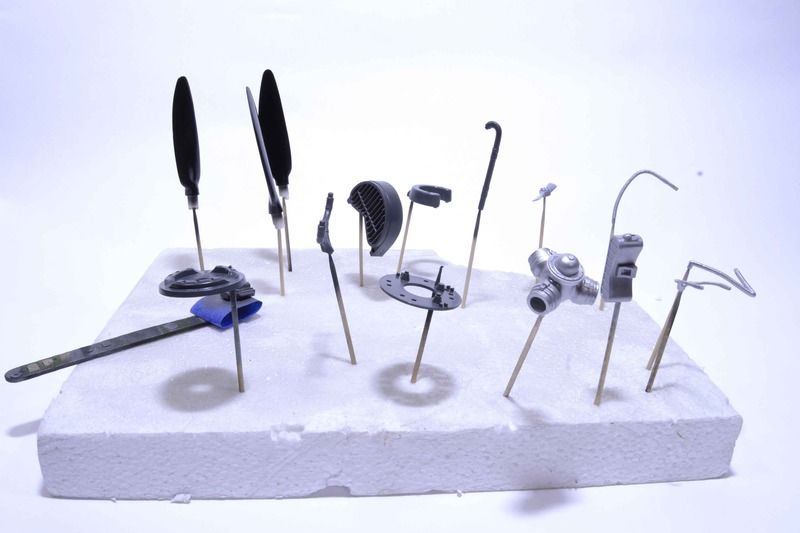
And that is now ready for my attention. I have a few things to finish prepping but I am ready to move forward.
All comments, critiques, and criticism are encouraged.
Joe
We have progress.
Yes my friends we have progress. The pictures show the tale.
The fuselage and wings are attached. The gaps, and there were some interesting gaps, were puttied and then sorted. The paintwork was then touched up. While I waited for the putty to dry I spent some time on the landing gear.
And just a bit to prep for the next step. The engine and the engine compartment.
And that is now ready for my attention. I have a few things to finish prepping but I am ready to move forward.
All comments, critiques, and criticism are encouraged.
Joe
1/24 MPC/Airfix JU 87B On to the Engine
Nice job Joe.
Nice job Joe.
1/24 MPC/Airfix JU 87B Legs and VROOOOOM
Well I have been a bit fortunate in that I have had some quality time at the bench over the last couple of days. With that how about an update.
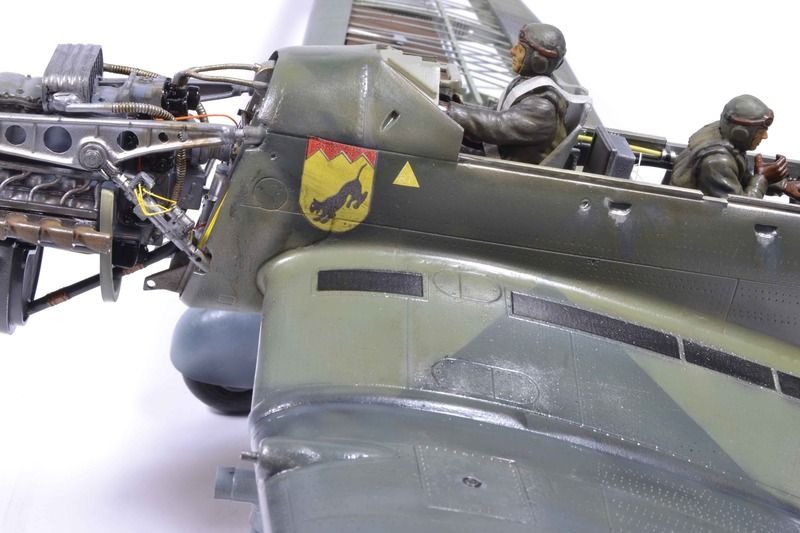
The Stuka now has her main legs as well as her engine.
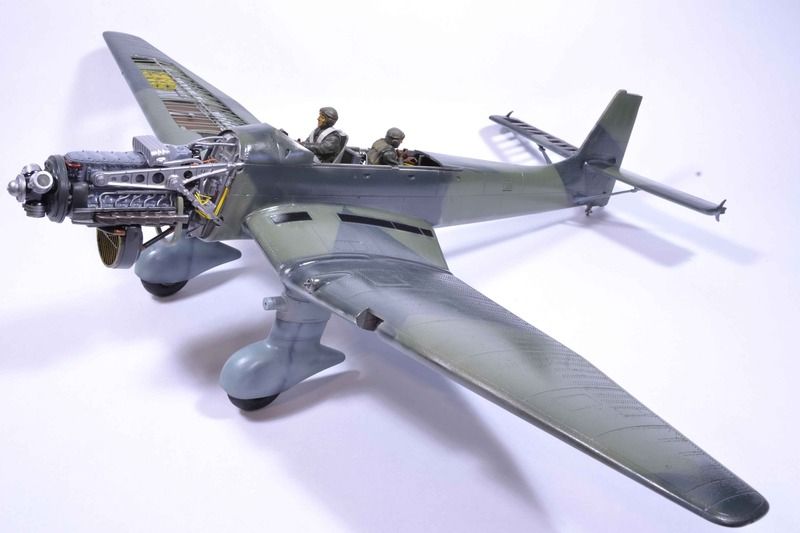

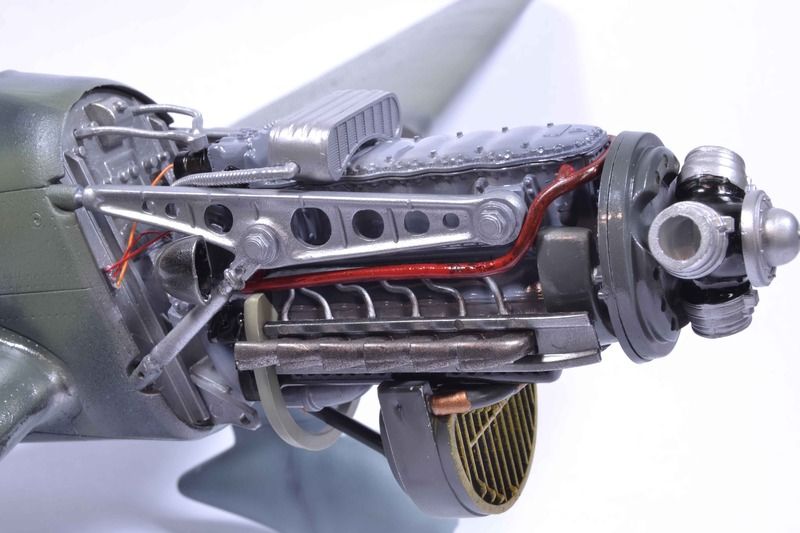
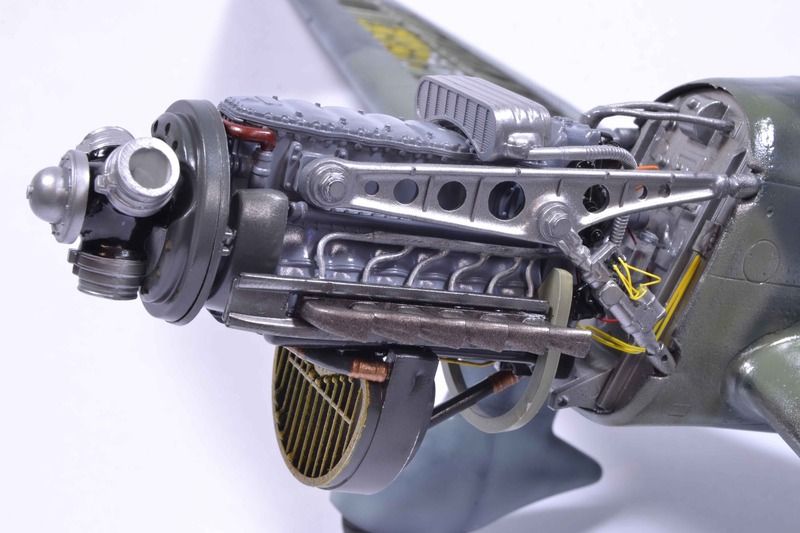
I did add a few things to the frame and the firewall. A few things to give the illusion of wires and hoses. Today was the big day. It was sink or swim. Time to see if my homemade decals were up to the game or not.
Honestly they are not very good. The letters other than the "L" should have been on a clear sheet but I only had the white backing sheet. Still they should work for my purposes and I should be able to hide the issues caused by my jumping to them too quickly.
Now to let these dry for a day or two. You see they did not want to lie down without a fight. One in particular may not even play nice after a generous amount of solvent was applied. Homemade decals are generally very thin and react well with the surface. These did not.
Next up however after they dry is to seal it in with a nice coat of clear and then I can work on weathering the fuselage, engine, and wings.
All comments, critiques, and criticism are encouraged.
Joe
Well I have been a bit fortunate in that I have had some quality time at the bench over the last couple of days. With that how about an update.
The Stuka now has her main legs as well as her engine.
I did add a few things to the frame and the firewall. A few things to give the illusion of wires and hoses. Today was the big day. It was sink or swim. Time to see if my homemade decals were up to the game or not.
Honestly they are not very good. The letters other than the "L" should have been on a clear sheet but I only had the white backing sheet. Still they should work for my purposes and I should be able to hide the issues caused by my jumping to them too quickly.
Now to let these dry for a day or two. You see they did not want to lie down without a fight. One in particular may not even play nice after a generous amount of solvent was applied. Homemade decals are generally very thin and react well with the surface. These did not.
Next up however after they dry is to seal it in with a nice coat of clear and then I can work on weathering the fuselage, engine, and wings.
All comments, critiques, and criticism are encouraged.
Joe
Heavens Eagle
Well-known member
1/24 MPC/Airfix JU 87B Legs and VROOOOOM
Looks good from here Joe.")
I still have the one of these I build back in 1980. (in pieces :facepalm ) Back then the HORRIBLE decals just would not even attach. That was the days before aftermarket. I made paper patterns with double sticky tape under them and airbrushed all the markings. It really ended up looking great. Same markings as you have so it is taking me back to those days.
Looks good from here Joe.
I still have the one of these I build back in 1980. (in pieces :facepalm ) Back then the HORRIBLE decals just would not even attach. That was the days before aftermarket. I made paper patterns with double sticky tape under them and airbrushed all the markings. It really ended up looking great. Same markings as you have so it is taking me back to those days.
1/24 MPC/Airfix JU 87B Legs and VROOOOOM
Looks good Joe but that engine is just too clean. Need a wash or 4 in there. Get those detail a poppin'
Looks good Joe but that engine is just too clean. Need a wash or 4 in there. Get those detail a poppin'
Skinny_Mike
Well-known member
1/24 MPC/Airfix JU 87B Legs and VROOOOOM
Flyingbabydoc
Well-known member
1/24 MPC/Airfix JU 87B Legs and VROOOOOM
That is an amazing Job Joe. I cannot imagine building something that huge.
Cheers
Alex
That is an amazing Job Joe. I cannot imagine building something that huge.
Cheers
Alex
1/24 MPC/Airfix JU 87B Chips and Grime.
Back with a quickie type of update.
A couple of hours has been spent with oils, paint, and pastels. Streaking, chipping, and a bit of grime and streaking is the result. To be honest it is not over the top. I had to make sure I didn't take it too far. I did use caution.
First the engine. Oils and pastels were used. Oils for the grime and dirty look and pastels for the exhaust stubs.
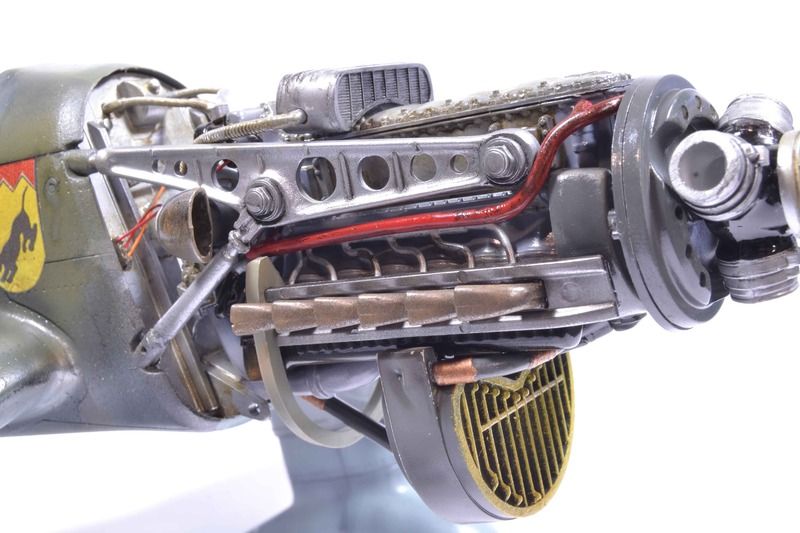
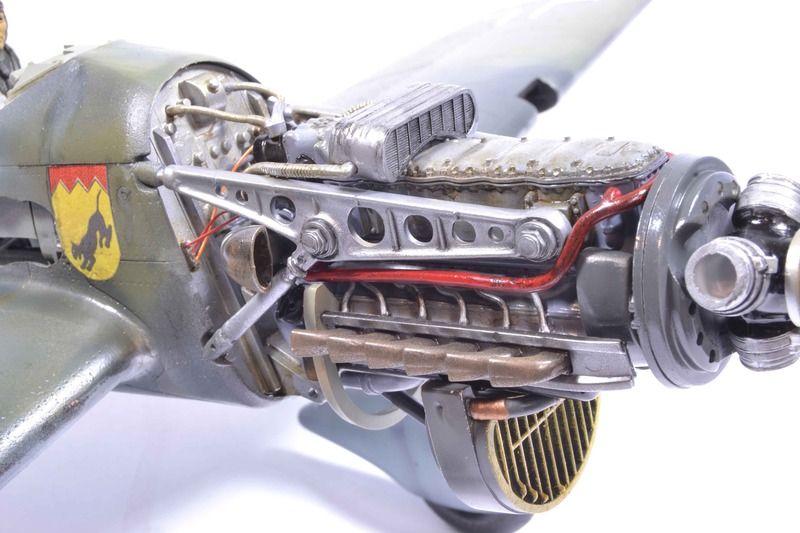
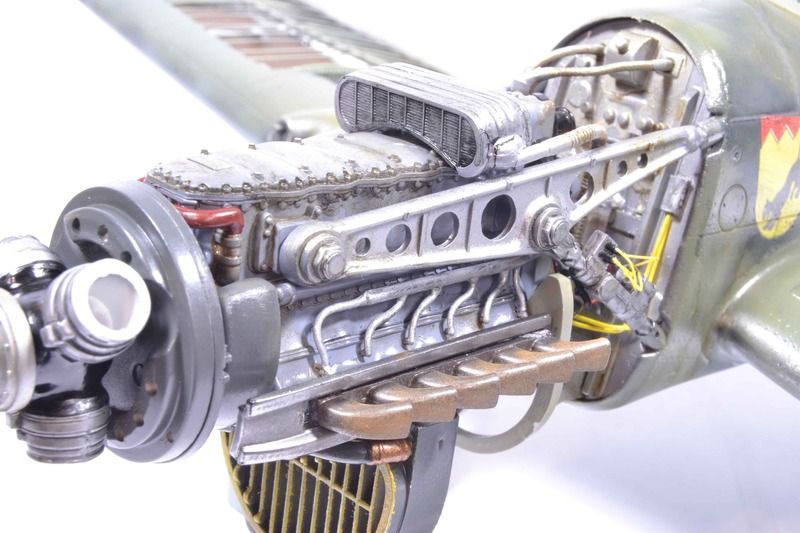

I used oils and enamels to do the chipping and the streaking. The streaking is tough to see in the pictures.
Now to let that dry out so I can hit it with a flat coat.
All comments, critiques, and criticism are encouraged.
Joe
Back with a quickie type of update.
A couple of hours has been spent with oils, paint, and pastels. Streaking, chipping, and a bit of grime and streaking is the result. To be honest it is not over the top. I had to make sure I didn't take it too far. I did use caution.
First the engine. Oils and pastels were used. Oils for the grime and dirty look and pastels for the exhaust stubs.
I used oils and enamels to do the chipping and the streaking. The streaking is tough to see in the pictures.
Now to let that dry out so I can hit it with a flat coat.
All comments, critiques, and criticism are encouraged.
Joe
Similar threads
- Replies
- 54
- Views
- 11K
- Replies
- 4
- Views
- 2K