• Modelers Alliance has updated the forum software on our website. We have migrated all post, content and user accounts but we could not migrate the passwords.
    This requires that you manually reset your password.
    Please click here, http://modelersalliance.org/forums/login to go to logon page and use the "Forgot your Password" option.

1/35 Brummbar Early, Mid and Late Models : an Overview with builds. 29th Nov UPDATE

Brokeneagle

Master at Arms
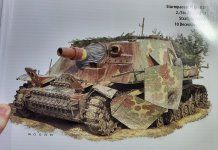
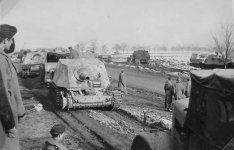
I had an urge to do one of the late war Brummbars, as I have never built one and after recieving my book from Panzerwrecks on Abtielung 217 the cover photo had me down for a quick single vehicle dio!

Well, that was how it all started and then I went down the 'rabbit hole' and has now turned into a similar monster as my Pnzr 3 thread. So what started as a quick build has turned into 4 and a re-arrangement of this post.
There will now be a technical historical rundown on the vehicle and 4 kits covered with photos/builds, so if you like Brummbars or would like to find out a bit more stay tuned here!
I never really found them to be of interest until I got the 217 book and went down the detail hole - beware though, it may have a similar effect on you! :hmm:
Continue at your own risk. o_O:coolio2:

The Kits
20230809_202052w.jpg

T35353.jpgdragon_35_brummbar-mid-boxart_t.jpgH80135-1_1024x1024_019ee648-ae30-4163-a873-cdb70f4316b1_999x999.jpg
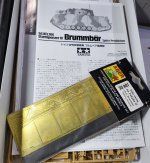
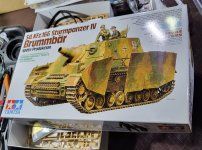
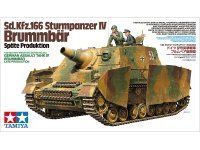
The Tamiya kit is very good and simple but has the rubber band style tracks. It represents a late model version but not the final version.
I have 2 of the late model Tamiya kits as I plan to do 2 of the late versions.
The Dragon kit is also very good representing the mid version, with more detail, individual link tracks and PE details.
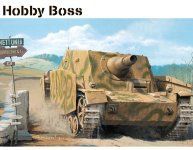
The Hobby Boss kit is another excellent kit, representing an early version as well as an early /Mid crossover version. In some ways it is a better kit than the other two. It was originally a tristar kit which means it is very accurate but has overly complicated and fiddly suspension construction but has indivual link track, a lot of PE and a bonus fighting compartment interior.
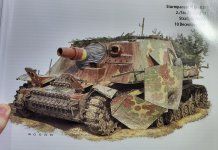
Late Version 1 - vertical stack exhaust pipes, no Zimmerit
T35353.jpg20230504_122733.jpg20230503_223150.jpg
Late version 2 - Drum exhaust, Zimmerit coating
T35353.jpg20230809_192645.jpg20230809_192737.jpg
Early Version - (early barrel and roof) with initial superstructure shape, Tiger 1 armoured drivers visor.
H80135-1_1024x1024_019ee648-ae30-4163-a873-cdb70f4316b1_999x999.jpg363838734_652818296561135_2000166759115233347_n.jpg365127786_190355070537208_7815512672746846117_n.jpg
If I 'short track' it I will do the 653 version at the railhead at Nikopol in Russia, Dec '43.
Mid version - initial superstructure shape, new barrel, newly designed armoured drivers visor block and Zimmerit.
dragon_35_brummbar-mid-boxart_t.jpg364545925_1457238361764388_8885124337430259194_n.jpg363949006_1361594694765059_3359849995828447586_n.jpg

There are a number of detail changes that I will go into from here so strap In!
To Be continued.................................. the details part.
 
Last edited:
Build 1 - the late version
vertical stack exhaust pipes, no Zimmerit

20230503_223150.jpg20230504_122733.jpg
Identifying details for this Version.
- remodled rectangular fighting compartment superstructure[moved 45mm to the rear].
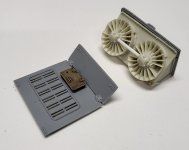
- redesigned superstructure roof with 2x extractor fans, 2x small ventilator hatches at the rear.
- Bow MG added above the drivers compartment with new vertical armour plate.
- sun visor added to drivers periscope.
- rear fighting compartment plate redesigned with larger armoured entrance.
- horizontal side support plates added to the space between the side skirts and the hull side supports.
- some later variants( especially the final model) had vertical exhaust pipes to replace the drum muffler/exhaust.
- variation in road wheels creating a mix of steel and rubber. common variation - 4 forward steel wheels for post Zimmerit prod. versions.
- Stug 3 commanders cupola on the lowered roof design.
- no Zimmerit applied on vehicles built after Sept. 1944.
- storage of spare road wheels on the rear chassis plate reduced to 2 only (matching steel wheel introduction)
- Final variant had the J chassis with extended hull sides drilled for tow shackles and only 3 return rollers.
MODS.jpg

THE AREAS MARKED IN RED REPRESENT THE CHANGES FOR THE LATE & FINAL VERSIONS - this is depicted on the J chassis.

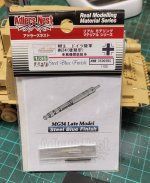
I already had some juicy extras for this one but grabbed a few others on the fly........
20230503_223039w.jpg20230505_152249.jpg20230505_152931w.jpg20230508_015505w.jpg
20230503_223103w.jpg
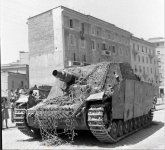
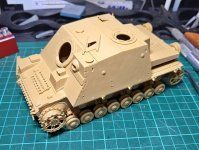
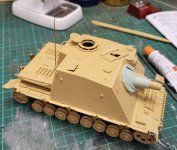
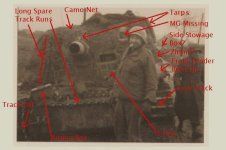
The tank in the photo had some features that presented it as a slight variation to the Tamiya version, straight out of the box, so mods were in order. I decided I was not going to have the access hatches open, as this would require further mods and expense [with a front interior] and these hatches may have been opened by allied troops or blown open...gives me some room though.
20230505_153155w.jpg20230505_153205w.jpg
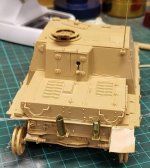
The rear wheel of the ealier version was the welded pipe and this could still appear on the later ones but the vehicle I am doing is the more square, cast, late version. If you check the photo you can just see the more square edge on the rear wheel. You can also see that it has sagged to its lowest postion . To get this effect I needed to cut the rear axle arm and adjust (I should have realised before I attached the part). I also worked out it still has 4 return rollers due to the fact that it still has the H chassis chassis without the front hull exstension and the last return roller is still situated abovethe last 2 road wheels.
20230506_224603w.jpg
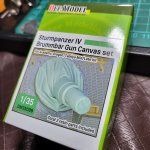
The barrel also needed to be measured off in the sleeve assembly so that I could replace it correctly with the Def model, resin update.
20230506_224524.jpg20230508_015155w.jpg20230508_015719w.jpg20230508_015202w.jpg
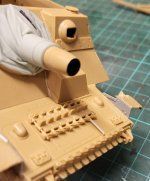
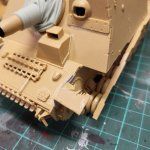
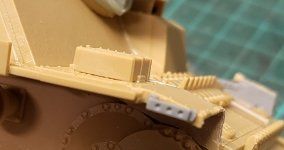
I also added a Dragon sheet metal inner for the front, inside track guard, as the detail is better and the build required I destroy the kit part (refer to the photo). Dragon add-ons on the front track mount shacles and a home made track pin sitting out of the last spare track.

20230508_015133w.jpg20230508_015222w.jpg20230508_015709w.jpg20230509_123437w.jpg
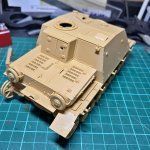
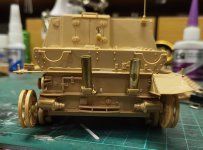
The rear door panel has a beautifly moulded plug that is a seperate part, so it was the perfect opportunity to 'pop it' and add a chain. The top plate has very nice detail as well, with the late model double visor hatches and redesigned roof detail captured perfectly.

20230509_123450w.jpg20230508_015126w.jpg20230508_015103w.jpg
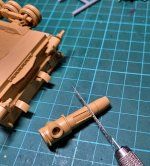
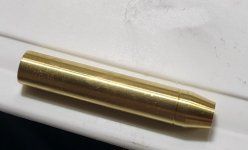
I also figured that this tank has the late J model exhausts, being a post zimmerit build (after Sept. '44) with the late superstructure and 4 front steel wheels. This was not a hard rule but without a rear photo, I followed the pattern of details I have seen in reference photos and tech info. The kit has the drum exhaust with the overhead plate, so this has to go to be replaced by late model, vertical pipes, which I made from brass tubing.

20230509_123600w.jpg20230806_192133w.jpg
I then added the shot hit that can't be seen in the photo but which must be there when looking at the state of the side schurzen.
The Base
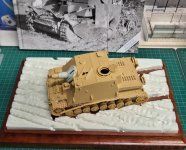
My next bit of progress was on the base, though the vehicle is not finished, I needed to create its postion in the ploughed field.
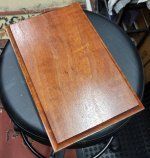
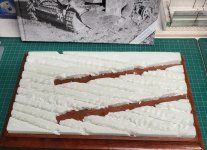
I used a thin sheet of high density foam for the field base and cut it to size with my new hot foam cutter, to fit the wooden mounting. The plough lines were then marked up with a pencil and pushed in with a smooth wedge shaped sculpting tool.
20230508_015604.jpg20230508_015617.jpg20230521_232221.jpg20230521_232202.jpg20230508_014928w.jpg
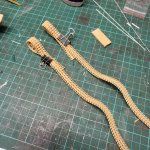
Once the shape and impressions were finished in the field, I continued to modify the tank lines until it sat in the depressions properly. The lower part of the tracks will be hidden in the dirt, so I didn't need to have these, which allowed me to keep the bottom section open, making them easier to work with. The detailed, soft Majic Track was perfect for this so I used a spare set that I had lying around.
I then coated the foam base in a thinned solution of white glue and water, followed by a thin coat of Tamiya soil effect once dry.
20230527_183442.jpg20230527_183423.jpg20230527_183428.jpg20230508_015534.jpg
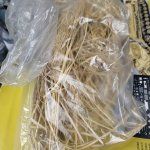
The ground work was then sprinkled with AK Dried Sea Grass with larger stalks made with a bag of my own dry grass stalks. One of the figures I will use is a Stalingrad figure of a dead German infantryman -late war.
Still in progress........
20230527_183413.jpg20230528_220315.jpg
More work to do on the field and the tank. Currently working on the PE brass side schurzen and mounts.
Back again soon......
 
Last edited:
Thanks for following and commenting :vgood:.
Rhino, don't stay out of the way, comments, chat and feedback are always welcome!
 
Thanks for following and commenting :vgood:.
Rhino, don't stay out of the way, comments, chat and feedback are always welcome!
It shall be as you say, Sir. I like a Brummbar. Like a mobile monolith with a huge howitzer.
You understand what giving me permission to make the obvious awful pun or quip means, right?!
 
Update:
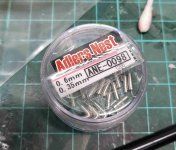
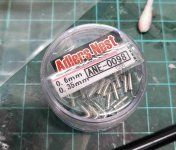
Apart from re-jigging the whole post, I have started working on the side shields and brass hangers. I have some simulated hex bolts from Alders nest which I can use to attach the brass rails to the platic kit hangers.
I have re-arranged the post into a multi - version study/build so please go back and check the start to get the new feel.
20230508_015435w.jpg20230806_192802w.jpg20230806_192143w.jpg20230806_192558w.jpg
 
Build 2 - [EARLY] late version.
Drum exhaust, Zimmerit coating

Why this vehicle?

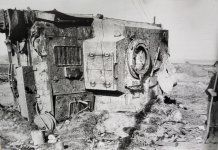
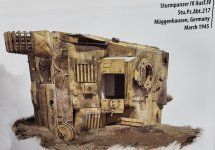
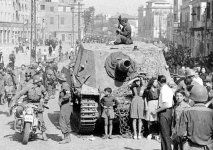
I was initially drawn in by the drama of the vehicle tipped on its side, as I have wanted to do a vehicle in this postion in a scene for some time, with the small differences to the late version, 'sealing the deal'. This one has zimmerit and all steel wheels with the side skirt mounts removed and a drum style muffler - I was in! In March 1945 this was a April to Sept '44 survivor.
The overall scene is interesting to model as well, with a civilian boy standing off to the side and the ground pushed ahead of the vehicle, building-up in front and tipping the 'on-board' details on to the dirt in front. The hatches are open as well and I will be opening them a little more to take advantage of added internal details :).
Lots of texture everywhere in this scene which will bring character.
T35353.jpg
20230809_192645.jpg

20230809_192757.jpg20230809_192832.jpgreceived_990031635454216.jpeg
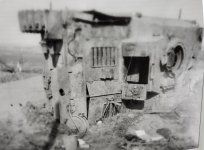
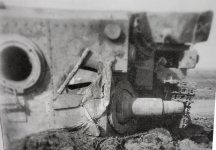
In the Sturmpanzer 217 book this photo below was placed earlier and quoted as being abandoned in the Hurtgen Forest, however it is the same tank as the photos above appearing some 80 pages later and captioned as March '45, being claimed by the 9th US Tactical Airforce near Ollheim, east of Euskirchen. Clearly they missed this match and that it was obviously pushed off the road by a bulldozer - observe the ground built -up in front, the fallen details off the tank and the 'clincher', the same name - 'JUMBO' on the barrel.
received_599682492098170.jpeg

Identifying details for this Version (
In Blue).
- Late H/ early J variant retaining 4 return rollers and 'drum' style exhaust muffler without extended tow shackle mounts.
- late 'square' or early 'sloped' model water inlet box on the rear deck.
- Zimmerit applied on vehicle surfaces.
- All Steel road wheels for Zimmerit covered versions but this varied sometimes toward the end of Zimmerit application in Sept. '44.
- Tubular welded rear wheel.
- This particular tank has had the side skirts and mounts removed - not uncommon for vehicles in this unit in 1945

Same as previous late version.
- re-modelled rectangular fighting compartment superstructure[moved 45mm to the rear].
- redesigned superstructure roof with 2x extractor fans, 2x small ventilator hatches at the rear.
- Bow MG added above the drivers compartment with new vertical armour plate.
- sun visor added to drivers periscope.
- rear fighting compartment plate redesigned with larger armoured entrance.
- horizontal side support plates added to the space between the side skirts and the hull side supports.
- some later variants( especially the final model) had vertical exhaust pipes to replace the drum muffler/exhaust.
- Stug 3 commanders cupola on the lowered roof design.
- storage of spare road wheels on the rear chassis plate reduced to 2 only (matching steel wheel introduction).

side profile 2colored.jpg
THE AREAS MARKED IN RED REPRESENT THE CHANGES FOR THE (Early)LATE VERSIONS - this is depicted on the H/ J chassis.

......some juicy extras for this one
20230923_121140W.jpg20230505_152249.jpg20230909_124257W.jpgTamiya zimm sheet web.jpg20230806_192143w.jpgbarrelw.jpg
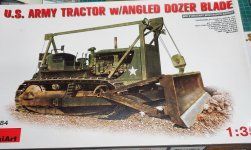
This kit will be joined by the Miniart U.S. tractor that has pushed it off the road.
20230923_010708W.jpg

The Build
This one will be the most modified , so therefore the hardest and slowest build. I still have a little more to go on the first kit (the later model) but I wanted to get cracking on this as well before Xmas, due to the difficulty level. I will be adding....
  • VLS Engine Bay and front interior with brakes visible on one side.
  • Aber ariel
  • Alders Nest bolts
  • Tristar steel wheels and workable suspension (to the high side).
  • Tristar /HobbyBoss kit's interior fighting compartment
  • Dragon engine deck.
  • Dragon front transmission deck
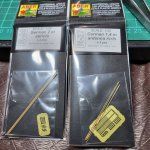
  • Orange Hobby brass barrel
  • Tamiya Zimmerit sheet
  • Tamiya square water inlet box
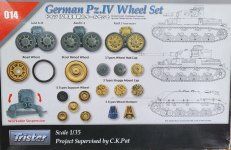
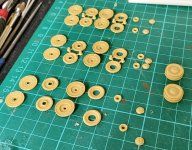
I started with the chassis and the undercarriage/ wheels, as I needed to source additional steel wheels from the Tristar wheel kit to supply all 8 in steel for each side. The Tamiya kit only gives you 8 [for the 4 each side version].
20230909_124257W.jpg20230909_124318W.jpg
WHEELS W.jpg

Tristar and Tamiya Suspension
20231002_104735W.jpg

20231013_181031w.jpg

The side against the ground retained the Tamiya kit suspension, while the upper side (in the air) needed to reflect weight and movement during its 'up-ended travels' which the Tristar wheel kit would provide. The final set being the Tamiya Kit fixed suspension.
I also ended up going with the earlier tubular welded rear wheels which was also a possibility in the German prod. system at this time (the later one got the cast ones on my first kit).
I then began fitting the VLS engine bay and forward section which both required a lot of modification to fit. I have also added the HobbyBoss fighting compartment floor.
20231002_104417W.jpg20231002_104355W.jpg
20231013_181009w.jpg
20231013_180957w.jpg

to be continued..........................
 
Last edited:
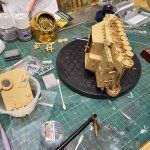
Build 2 - [EARLY] late version CONTINUED...............
The next stage involed matching the upper detail parts to the chassis, which brought it's own challenges due to me wanting to open up as much as I could.
It began with the [rear] engine deck.
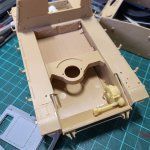
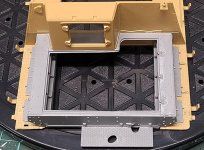
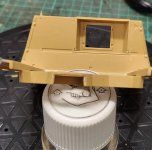
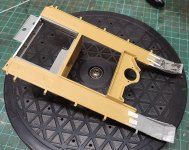
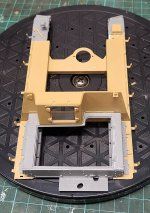
Tamiya's was sealed-up and as a result the upper chassis below was also filled to make the structure firmer. I swapped the Tamiya engine deck with the Mid Prod. Dragon kit version and worked on seperating the centre door which was molded attached. The Tamiya engine deck at the fender level was totally sealed in with solid plastic running from left to right - this had to be cut out and sanded flat and square
20230924_181407W.jpg20230924_181413W.jpg20231013_182831w.jpgrear deck w.jpg20231002_104355W.jpg
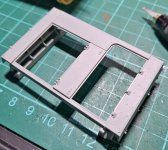
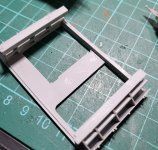
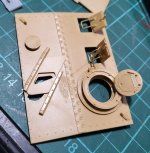
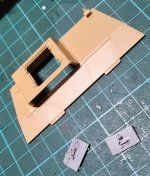
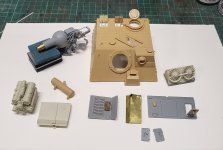
Some more modelling was then done building the roof and again, to have the rear doors open, the Dragon kit had better detail on the onside latch mechanisms and BONUS, the dragon kit gives you 2 sets [open and closed], so the Mid Production won't suffer as those rear doors will be closed.
Cross- kitting, I love it. :love:
20231004_002325w.jpg20231004_002209w.jpg20231013_183146w.jpg

This is what it looks like with the hatches in place.

20231013_184119w.jpg

Moving forward, the Tamiya gun cradle base was interfering with the transmission housing in the forward section, so it needed some trimming.

20231013_181206w.jpg
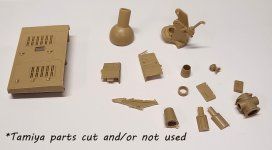
I also used a Dragon forward transmission deck, as those hatches could be opened, as well as stealing an Elefant tool box in PE(same as the Brummbar), allowing me to 'beat it up' as in the historical photo.

20231002_104649W.jpg

20231002_104245W.jpg

The front fenders now needed attention and were replacedback to the superstructure with spare dragon Pzr 4 ones - these are way more detailed and once thinned a little, are very realistic when beaten-up. The mud will go where I need to cover over punch marks and strip plastic mounts etc.
20231013_181140w.jpg20231013_181226w.jpg20231013_181129w.jpg

Next-up, the Gun Cradle.
The Tamiya kit version was extremely basic, while the Dragon version was very accurate, even simulating the rear armour and thickness of the round gun manlet correctly. I used the Orange Hobby brass barrelbut hoestly, the Dragon kit barrel is perfect - I just didn't check first as the modifications weren't thought out that far ahead.

20231013_181805w.jpg
20231013_005924w.jpg

20231013_183042w.jpg

20231013_182929w.jpg


......and now we are up to here.....
20231013_184105w.jpg

more work on both of these late model versions to come so stay tuned......and thank for stopping in!
 
Last edited:
Back
Top