• Modelers Alliance has updated the forum software on our website. We have migrated all post, content and user accounts but we could not migrate the passwords.
    This requires that you manually reset your password.
    Please click here, http://modelersalliance.org/forums/login to go to logon page and use the "Forgot your Password" option.

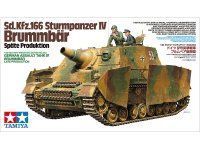
1/35 Brummbar Early, Mid and Late Models : an Overview with builds. 29th Nov UPDATE

I LIKE IT.jpg
 
Holy Guatemoles! See the rifling in the cannon barrel? I'm never going to worry about getting carried away too much again!
Ausgetzeichnet, Mein Herr! Da schitz dem Hund im Feuerzeug! :salute::Drinks:
 
Build 2 - [EARLY] late version CONTINUED...............
T35353.jpg20230809_192645w.jpg

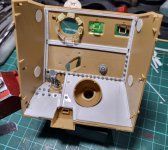
As discussed in the last part, there has been a lot of kit bashing, fitting and modifying and this has continued in ernest so that I can complete this tank to begin the groundwork for the scene. Because the rear doors will be open and the roof hatches I took the opportunity to detail the interior with parts from the early Hobby Boss kit and the Mid Prod. Dragon kit. The last post included a start on the interior with the gun cradle from the Dragon kit and the VLS engine bay and froward section.
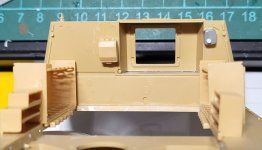
The Interior needed more work on the interior fighting compartment roof, which was not supplied by any of the kits.
Time for some scratch building - white plastic, wire and Meng Nuts and Bolts.

20231015_011615w.jpg
Then it was time for the ring around the gun cradle armoured ball....
20231017_100135w.jpg


This then had to be modified to allow the Dragon cradle shape to fit. I had to' ruff-up' and reduce the circle but the inner edges will be hidden by the gun.
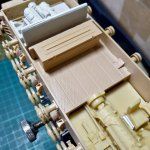
Ammo boxes etc at the sides..............these needed to be matched with all the added scratch details so there was no interfearance.
20231031_170037w.jpg20231031_170144w.jpg20231031_170148w.jpg
.........added the amunition box at the rear on the floor.
20231031_170158w.jpg
20231031_224952w.jpg

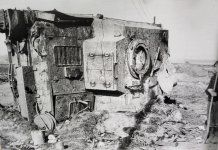
more details added including the chains for the pistol ports, which are fixed, hanging toward the centre, as they would be with the tank on its side. Keep in mind that a lot of this will be hard to see through the back doors and roof so this level of finish will be acceptable .
20231031_165914w.jpg

20231031_165933w.jpg

20231031_173242w.jpg

20231031_173303w.jpg
 
Last edited:
Man someone would knock a goose egg on their head in that thing if they are not careful.

Love it Ian.
Thanks MP, yeah I agree but the interior is really that full of bolts that size........go figure for no helmet. :doh:I don't think the Germans had a close fitting tank helmet like the Yanks and the Russians did.
 
Last edited:
Build 2 - [EARLY] late version CONTINUED...............
A little more progress and probably the last for the year, as my modelling has been brought to a stand still by [overdue] renovations on the house.

I applied the Tamiya Zimmerit (which is actually a sticker and not a decal) upgrade set, which is very fiddly and time consuming, so I think it may be just as easy [if not easier] to apply the Zimm with putty before attaching the detail parts. I am still happy with the result, though I need to add some more damaged sections plus some touch-ups with putty, once the upper and lower hulls are attached with glue.
Tamiya zimm sheet web.jpg

20231102_232144w.jpg

20231102_232257w.jpg

20231102_232242w.jpg20231102_232306w.jpg20231116_134522w.jpg20231116_134013w.jpg
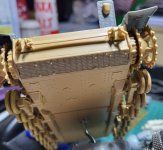
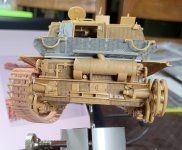
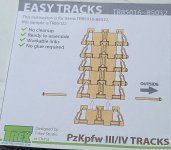
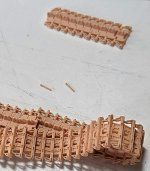
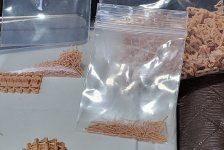
I also [finally] received the correct tracks for this model (in the mail), after ordering an incorrect earlier pattern and could commence construction to get the weighted look. I had not used any T-Rex 3D printed sets before so this was a new experience and a mini review of what I found out .:hmm:
20231106_103858w.jpg
20231106_103933w.jpg
They go together quite well but are very delicate, especially the pins. I know I snapped quite a few :bash:.
The box says ZERO clean-up, which is not quite true but very close. Some of the links require pieces of the support framing removed but this is only a few. The pins slot in quite well for the most part but require an exact hole match and snap very easily with too much pressure.
I found the best tool for threading the pins to be curved tweasers with a bit of width to them, not the pointy ones.
20231106_104200w.jpg

20231106_103917w.jpg20231106_103847w.jpg20231106_103854w.jpg20231106_103933w.jpg
20231116_134602w.jpg

20231116_133940w.jpg

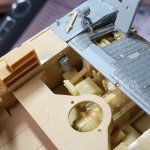
I am still going on the engine bay 'fitting' process but nearly there. I need to add the belts and wheels to the end of the engine block but fit them between that and the back, upper plate.
20231116_134452w.jpg

The rear fighting compartment door had to be modified from the mid-poduction (Dragon) pattern to the late version. A bit of white plastic and some left over resin from the interior stuff did the trick.
20231116_134251w.jpg

and a box for the inner compartment near the rear door made from a Draon Pzr4 ,closed cupola vision block
20231116_134732w.jpg

Back as soon as I can ........................
 
Last edited:
Back
Top