
-
Modelers Alliance has updated the forum software on our website. We have migrated all post, content and user accounts but we could not migrate the passwords.
This requires that you manually reset your password.
Please click here, http://modelersalliance.org/forums/login to go to logon page and use the "Forgot your Password" option.
You are using an out of date browser. It may not display this or other websites correctly.
You should upgrade or use an alternative browser.
You should upgrade or use an alternative browser.
1/200 Trumpeter Bismarck with Pontos 27001F1
- Thread starter Trogdor
- Start date


What was wrong with the airplane? 
We'll give a little leeway about non topic stuff, especially if you're having fun doing it!
That does look fun, for you. I enjoy flying but don't think I could ever willingly jump out.
Turret looks great btw.
We'll give a little leeway about non topic stuff, especially if you're having fun doing it!
That does look fun, for you. I enjoy flying but don't think I could ever willingly jump out.
Turret looks great btw.
Heavens Eagle
Well-known member
I look at it this way, your thread, go with it. 
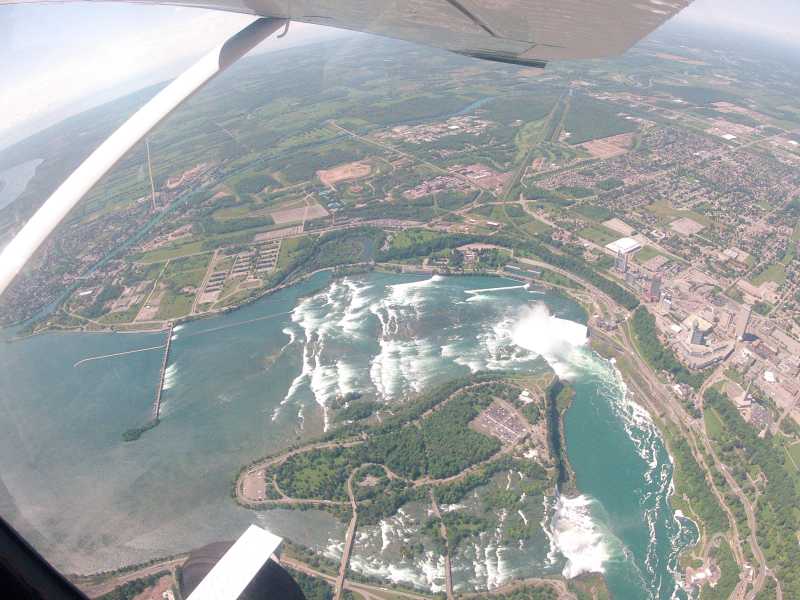
Nice view of Niagra Falls BTW. My brother was in airborne, but I won't skydive unless the plane is crashing.
Nice view of Niagra Falls BTW. My brother was in airborne, but I won't skydive unless the plane is crashing.

Good score, be careful with them!
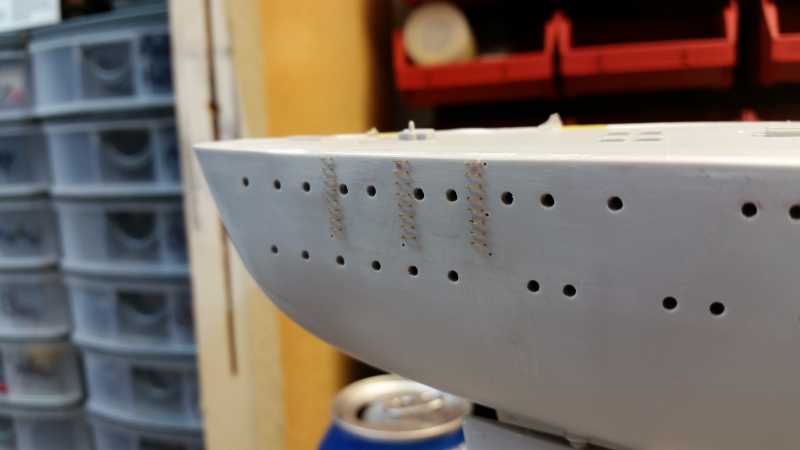
So got a little Work done on the Hull, Installed the Ladder Rungs a BIG PAIN in the Butt. The Carpet Monster Decided to Eat a Couple, Then worked on some Port Holes very Relaxing
On a Side Note i have to wait for more 0.3 Drill bits My Daughter Came down to Give me a Hug Good Night i put the Pin Vise on the Bench and rolls right off and Smashes the Bit on the Floor, I don't Think i was meant to have 0.3mm Drill bits for more than a couple days

On a Side Note i have to wait for more 0.3 Drill bits My Daughter Came down to Give me a Hug Good Night i put the Pin Vise on the Bench and rolls right off and Smashes the Bit on the Floor, I don't Think i was meant to have 0.3mm Drill bits for more than a couple days
Heavens Eagle
Well-known member
Yeah those carbide bits are sharp, but they are sper hard and VERY brittle. You might see if they will sell you a pack of 10 on the size you need.
Question, are your tweezers doing the PE launch to the carpet monster? I can help with that if it is the case.
Question, are your tweezers doing the PE launch to the carpet monster? I can help with that if it is the case.
LOOK WHAT SHOWED UP TODAY! :drool :yipee
My Gator Grip Glue and 1/200 Mask Set Thanks Gator! Very Excited 1st time trying Gator's Mask set and so far not disappointed

:drool :drool Dere goes da neighborhood!!! :geek
:drinksHeavens Eagle
Well-known member
Suspected. Tweezers need to have the tips redressed periodically. I really need to do a Tool Time on this but will try to explain.
Being a watchmaker I use tweezers all the time and they get abused. The insides of the tips get all chewed up and the tips can get bent slightly. This will tend to make parts launch out of them.
Take a look at the tips with good magnification. The inside surfaces should be perfectly smooth to the very tip. Look at them from the side with light behind to see how well the tips come together. If the very tip spreads apart slightly and they actually come together a little ways back, this is all easily fixable.
First off let's get the tips straightened. If they are spread slightly take each tip and press it against a HARD surface to flex it back. Take your time until you get a feel for how much it takes to line them up together. Once they are reasonably close, get two 3 inch square pieces of fresh flat 320 grit sandpaper. Place the sandpaper back to back grit side out, place the tweezers around it squeeze them slightly and draw the tips away to smooth the inside. Don't squeeze hard and don't pull them all the way off the paper. Do it repeatedly until you have a nice smooth finish on the inside surfaces.
Now check the very tips to see if they are rounded. If the very tips look like 2 balls sitting side by side you will need to flatten them. Squeeze the tip together and tap it point down on a HARD surface. Just a light tap. You want the very tip flat. If it flares a little this is a good thing. Do the bit with the sand paper between the tips again to get rid of the burr.
The last part is to dress the sides and top part of the tips down. An India stone or a good diamond hone works well for this though the 320 grit can work in a pinch. What you want to do now is squeeze the tips togetheer and work down the sides of the tips. Clean up and square up the edges of the holding surface and get them almost to a point. It is best to leave just the tinyest square tip. Don't forget to bring down the top surfaces also almost to a point. Double check how well the points com together now with light behind. There should be no gap at the tip at all.
Once you do this a few times it gets real easy and quick. It also makes your tweezers a wonderful tool instead of a problem. I know pictures would help a lot but it will be sometime late next week before I can do something to illustrate.
Oh and by HARD surface I mean either a thick piece of glass or a hard steel block. It can have absolutely no give to it.
Long explanation I know. Hope it helps!
Thanks! Heavens Eagle Ive Just added this to my Word Doc of Model tips Great Info Cause i rarely have a Problem with a fresh pair of Tweezers so this makes alot of sense and will save me some money buying new tweezers, Also do you have recommendation for a pair of tweezers these excel ones seem bit cheap feeling.
Heavens Eagle
Well-known member
Thanks! Heavens Eagle Ive Just added this to my Word Doc of Model tips Great Info Cause i rarely have a Problem with a fresh pair of Tweezers so this makes alot of sense and will save me some money buying new tweezers, Also do you have recommendation for a pair of tweezers these excel ones seem bit cheap feeling.
I am not familiar with those, but you might check out some of the jewelry supply places like Stuller or Rio Grande. (they also have jewelers saws and blades) They will have all kinds of tweezers. Note some are rather expensive and aimed at what I do for a living, But they have plenty in the $10 to $25 dollar range. If you realize that they can be resharpened some of the better and more expensive ones actually last and hold up better. I have several pair that get used daily and they are about 25 years old.
I will try to do a post next week to cover tweezers. Something that has been in the back of my mind for a while. Part of that will be doing the sharpening thing.
Glad that tidbit of info helped.
Suspected. Tweezers need to have the tips redressed periodically. I really need to do a Tool Time on this but will try to explain.
Being a watchmaker I use tweezers all the time and they get abused. The insides of the tips get all chewed up and the tips can get bent slightly. This will tend to make parts launch out of them.
Take a look at the tips with good magnification. The inside surfaces should be perfectly smooth to the very tip. Look at them from the side with light behind to see how well the tips come together. If the very tip spreads apart slightly and they actually come together a little ways back, this is all easily fixable.
First off let's get the tips straightened. If they are spread slightly take each tip and press it against a HARD surface to flex it back. Take your time until you get a feel for how much it takes to line them up together. Once they are reasonably close, get two 3 inch square pieces of fresh flat 320 grit sandpaper. Place the sandpaper back to back grit side out, place the tweezers around it squeeze them slightly and draw the tips away to smooth the inside. Don't squeeze hard and don't pull them all the way off the paper. Do it repeatedly until you have a nice smooth finish on the inside surfaces.
Now check the very tips to see if they are rounded. If the very tips look like 2 balls sitting side by side you will need to flatten them. Squeeze the tip together and tap it point down on a HARD surface. Just a light tap. You want the very tip flat. If it flares a little this is a good thing. Do the bit with the sand paper between the tips again to get rid of the burr.
The last part is to dress the sides and top part of the tips down. An India stone or a good diamond hone works well for this though the 320 grit can work in a pinch. What you want to do now is squeeze the tips togetheer and work down the sides of the tips. Clean up and square up the edges of the holding surface and get them almost to a point. It is best to leave just the tinyest square tip. Don't forget to bring down the top surfaces also almost to a point. Double check how well the points com together now with light behind. There should be no gap at the tip at all.
Once you do this a few times it gets real easy and quick. It also makes your tweezers a wonderful tool instead of a problem. I know pictures would help a lot but it will be sometime late next week before I can do something to illustrate.
Oh and by HARD surface I mean either a thick piece of glass or a hard steel block. It can have absolutely no give to it.
Long explanation I know. Hope it helps!
Fascinating... will have to give this a try sometime :drinks :drinks
Similar threads
- Replies
- 8
- Views
- 2K
- Replies
- 4
- Views
- 2K
- Replies
- 104
- Views
- 22K