-
Modelers Alliance has updated the forum software on our website. We have migrated all post, content and user accounts but we could not migrate the passwords.
This requires that you manually reset your password.
Please click here, http://modelersalliance.org/forums/login to go to logon page and use the "Forgot your Password" option.
You are using an out of date browser. It may not display this or other websites correctly.
You should upgrade or use an alternative browser.
You should upgrade or use an alternative browser.
THINGS ABOUT 3' s (July 26th Update)
- Thread starter Brokeneagle
- Start date
Heavens Eagle
Well-known member
Core K UPDATES applied during Production -
Another very interesting variant. I like this one.
- All changes applied to the L series by Dec '42 and updates to the M in Jan,Feb March '43.
- specially modified Panzer 4 F turret with a panzer 3 5cm/L60 gun.
- A drivers visor utilising the Panzer 3 drivers visor was mounted to the left of the main gun.
- The MG 42/34'S removed and an MP ball mount fitted to the hull front armor with a distinctive rectangular shape.
- M variant deep wading accessories added.
- Newly designed commanders cupola with a single piece hatch lid and thicker castings - later seen on the N model.
- Signal flare holder added to the rear of the cupola.
- S-Mine launchers (3 on each side) added to the turret sides.
- starting in May'43 they were backfitted with side and turret schuerzen (if they had survived).
Another very interesting variant. I like this one.

Brokeneagle
Master at Arms
Thanks Paul, all fixed. I was thinking right because I was looking at the turret and did not consciously transpose it.Core K UPDATES applied during Production -
I think you meant the Right of the main gun Ian.
- All changes applied to the L series by Dec '42 and updates to the M in Jan,Feb March '43.
- specially modified Panzer 4 F turret with a panzer 3 5cm/L60 gun.
- A drivers visor utilising the Panzer 3 drivers visor was mounted to the left of the main gun.
- The MG 42/34'S removed and an MP ball mount fitted to the hull front armor with a distinctive rectangular shape.
- M variant deep wading accessories added.
- Newly designed commanders cupola with a single piece hatch lid and thicker castings - later seen on the N model.
- Signal flare holder added to the rear of the cupola.
- S-Mine launchers (3 on each side) added to the turret sides.
- starting in May'43 they were backfitted with side and turret schuerzen (if they had survived).
Another very interesting variant. I like this one.
It's good though for 2 reasons, You helped me correct a detail that was wrong and now I know someone is actually reading all the details I am putting into this
 .
.Brokeneagle
Master at Arms
Hi Mike, it looks like that doesn't it.Do you have an army of elves building these for you at night? Awesome progress!
I have been building non-stop Mk3's since Dec 2021, basically building Mk3's every night.
I just got the bug to build and Mk3's caught my attention after looking through the Panzertracts books. I currently have a massive model boost at the moment, after building hardly anything since 2016 (1 kit a year). But as a consequence my art is on hold, which had front row until Oct last year. I seem to find it hard to be passionate about 2 things at once
 , which is really anoying for me personally because now I have a painting (pictures) drought.
mustang1989
Well-known member
Heya Bob, I'll get back to you on that. I couldn't believe it when I read it either. Just didn't make sense and I had the same question in my head. I've actually been a mechanic on the M109's and M88's but for the life of me can't remember what the tracks looked like in detail when it comes to the finish on them.Then what did that source say they looked like??
mustang1989
Well-known member
Thank you for that post. I just couldn't wrap my head around it either but was wondering the same thing that Bob asked. "Just what color were they supposed to be then?" lolDon't believe everything you read on the net,especially from a source that doesn't seem to be in touch with everyday reality.
Common sense will always win through even when you are unsure.
Just take the African conditions for example.
Bare metal tracks running over sand all day long , scrubbing them clean continually. They will never stay dull or even rusty. Just take a look at any of my reference photos in my MK3 thred here and you will see many pictures with shiny tracks. Panthers were no different. The tracks would dull off and go rusty if left stationary, especially in wet conditions, but once moving again they are scored and scrubbed by the soil and rock to be shiny on the high points again. You see this even in muddy conditions.
View attachment 149258
Brokeneagle
Master at Arms
Mmmmmm......
The M version.

Sept 1942 - Feb 1943. 8 series (made by 3 assembly plants in number bands 74100 - 75500, made by 5 ass. plants 76100 - 78000).
- 517 produced.
(approx 3 month overlap with the L prod./ overlap with the N official prod. from about Oct '42).
As a direct result of the cancellation of the K contract with DB, new contracts were placed for the M variant in Febuary 1942.
The M series was basically the LATE Pzr 3 L with the the deep wading characteristics of the K applied, with some small details added during production. These small details become the only way to tell an M from a late L if you can't see the deep wading exhaust/ outlet covers in the photo.
One aspect that I did not address in any detail with the L series was the simplified Hull, which became a standard feature of the M series. Only the later L variants were manufactured with this change.
The pic below from Panzertracts shows the hull used from the H - L Models with the scolloping at the Hull and chassis join.

The pic below from Panzertracts shows the hull used from the late L - M Models with the simplified bracing at the Hull and chassis join and the deletion of the hull escape hatch.

Core M UPDATES applied during Production -
As with the other versions, I will 'stick' to discussing the external modifications only.
Throughout the Pzr 3 production there have been a myriad of internal changes, as well as external but I have focused on the exterior to keep it a visual thing for building the model.

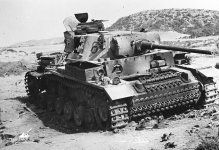
This M version shown in the photo above is a prime example of an early production with the only true M features recognisable being the deep wading exhaust extension (top left rear ), deep wading engine deck armoured hatch covers(recognisable by the holes in the tops) and the front engine access hatches with no external hinges (lower front plate either side of the barrel).
This particular tank seems to have had the side engine deck deep wading outlet covers removed from the vents. It even still has the vision ports in the turret sides and no S-Mine launches - very odd set of details.

As stated in my earlier posts, by 1943, the Panzer 3 had outlived it's design life and was falling behind in the arms race as a Main Battle Tank. The newer tanks like the Tiger 1, Panther were now coming on line. The upgraded Pzr 4 had also become a mainstay. As a result, the M production was cancelled and the remaining M chassis were completed as Stug 3's. The Stug 3 with the 75mm gun would prove to be a more successful design for the Pzr 3 platform for the remainder of the war.
There were a number of M chassis (100) that were converted to Flammpanzers and the remaining were completed as N models.
The Model
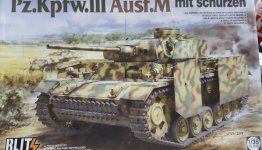
For this particular M version I moved away from using my Dragon M and went with the new TAKOM M.
I want to model the tank from this photo as I like the track guard damage and lack of armour hullskirts but with the hangars still there.

I had not built a Takom kit before and I wanted to see what they were like, with their 'BLITZ' kits supposedly being high in detail but quick to build.
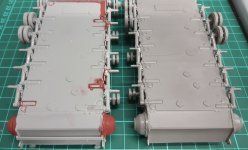
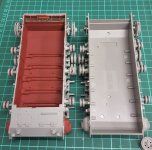
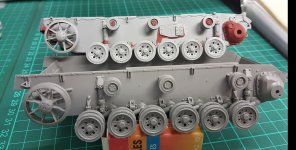
Overall a pretty good kit with less 'fiddly' parts than the Dragon kit, so it is easier and quicker to build, though you do pay the price of a certain amount of detail lost. Mainly in the onboard tools and lower hull. The tools are still good, just not as good and the hull looses the details in the areas of the bottom of the track guards and the machining behind the final drive housing. Now these would be unimportant to someone not modelling the M with the intention of a repair or damage scenario.
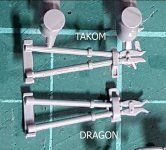
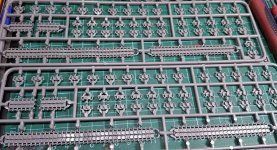
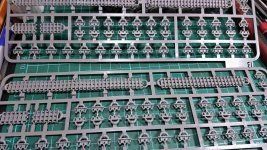
I found their tracks really nice with a length and link approach which, again, is more suited to building the model as standard. The guide horns are the hollow version as well - no flash.
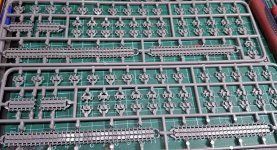
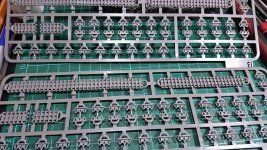
It's also cheaper - 1/2 the price, so I think it is just as good a buy if you don't want to modify the model.
A COMPARISON
Some comparison pics of the Dragon (light grey) chassis and the Takom chassis. Some of the takom details are more oversized than the Dragon counterpart.



BACK TO THE BUILD.....................
I won't show to much of the actual process here as the chassis and hull etc are the same as the last 4 builds - just the new bits.
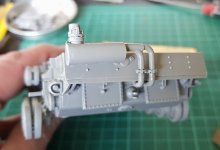
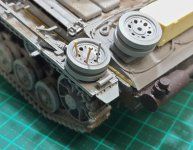
The deep wading exhaust system with the sealed flaps and extended exhaust.




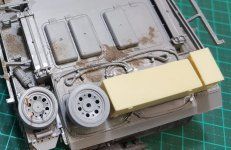
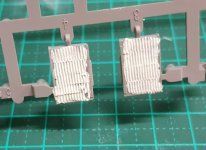
I utilised the remaing stowage boxes from my Pzr 3 MIG accessories for the rear deck to make it different again from the other builds.
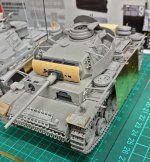
As with the other builds I still have some small details like the headlight wires and wingnuts to add. I also replaced the Takom Turret mantlet Vorpanzer with a spare Tamiya Vorpanzer part, as the bolt detail was slightly better.


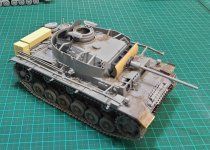
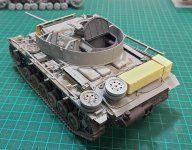
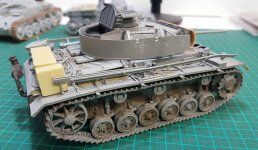



I have a second Pzr 3 M from Dragon
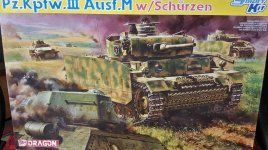
This one I will be modelling as the Pzr3 in the Russian cornfield using some cornstalks I purchased.


The M version.
Sept 1942 - Feb 1943. 8 series (made by 3 assembly plants in number bands 74100 - 75500, made by 5 ass. plants 76100 - 78000).
- 517 produced.
(approx 3 month overlap with the L prod./ overlap with the N official prod. from about Oct '42).
As a direct result of the cancellation of the K contract with DB, new contracts were placed for the M variant in Febuary 1942.
The M series was basically the LATE Pzr 3 L with the the deep wading characteristics of the K applied, with some small details added during production. These small details become the only way to tell an M from a late L if you can't see the deep wading exhaust/ outlet covers in the photo.
One aspect that I did not address in any detail with the L series was the simplified Hull, which became a standard feature of the M series. Only the later L variants were manufactured with this change.
The pic below from Panzertracts shows the hull used from the H - L Models with the scolloping at the Hull and chassis join.
The pic below from Panzertracts shows the hull used from the late L - M Models with the simplified bracing at the Hull and chassis join and the deletion of the hull escape hatch.
Core M UPDATES applied during Production -
As with the other versions, I will 'stick' to discussing the external modifications only.
Throughout the Pzr 3 production there have been a myriad of internal changes, as well as external but I have focused on the exterior to keep it a visual thing for building the model.
- All changes applied to the L series by Dec '42. - well mostly. Some of the manufacturers had not applied all changes to the L model at the start of the M production, so some early production variants will only have the deep wading modifications applied with a mix of the latest upgrades. This situation had sorted itself out mostly by Jan '43 though.
- Simplified hull applied as standard to the M version.
- All of the engine air intakes and exhausts were closed with lids & gaskets, which could be re-opened from the inside after fording was completed.
- 1 x 4 Lifting hooks were added to the upper hull sides at the front and rear of the turret platform. (These are sometimes the only way to distinguish an M from an L, depending on the photo).
- 2 Watertight Bosch headlights added to the front track fenders to replace the previous Notek light and horn.
- Watertight rear taillight on the left track guard and deletion of the right stop lamp on the right track guard.
- Deletion of hinges on the front deck access hatches to accommodate the deep wading requirement with gaskets.
- S-Mine launchers on the turret made a standard feature.
- S-Mines deleted from the rear lower engine deck mounting.
- This variant was more likely to be seen with the turret and chassis schurzen without it having to be back fitted.
This M version shown in the photo above is a prime example of an early production with the only true M features recognisable being the deep wading exhaust extension (top left rear ), deep wading engine deck armoured hatch covers(recognisable by the holes in the tops) and the front engine access hatches with no external hinges (lower front plate either side of the barrel).
This particular tank seems to have had the side engine deck deep wading outlet covers removed from the vents. It even still has the vision ports in the turret sides and no S-Mine launches - very odd set of details.


As stated in my earlier posts, by 1943, the Panzer 3 had outlived it's design life and was falling behind in the arms race as a Main Battle Tank. The newer tanks like the Tiger 1, Panther were now coming on line. The upgraded Pzr 4 had also become a mainstay. As a result, the M production was cancelled and the remaining M chassis were completed as Stug 3's. The Stug 3 with the 75mm gun would prove to be a more successful design for the Pzr 3 platform for the remainder of the war.
There were a number of M chassis (100) that were converted to Flammpanzers and the remaining were completed as N models.
The Model

For this particular M version I moved away from using my Dragon M and went with the new TAKOM M.
I want to model the tank from this photo as I like the track guard damage and lack of armour hullskirts but with the hangars still there.
I had not built a Takom kit before and I wanted to see what they were like, with their 'BLITZ' kits supposedly being high in detail but quick to build.
Overall a pretty good kit with less 'fiddly' parts than the Dragon kit, so it is easier and quicker to build, though you do pay the price of a certain amount of detail lost. Mainly in the onboard tools and lower hull. The tools are still good, just not as good and the hull looses the details in the areas of the bottom of the track guards and the machining behind the final drive housing. Now these would be unimportant to someone not modelling the M with the intention of a repair or damage scenario.
I found their tracks really nice with a length and link approach which, again, is more suited to building the model as standard. The guide horns are the hollow version as well - no flash.


It's also cheaper - 1/2 the price, so I think it is just as good a buy if you don't want to modify the model.
A COMPARISON
Some comparison pics of the Dragon (light grey) chassis and the Takom chassis. Some of the takom details are more oversized than the Dragon counterpart.


BACK TO THE BUILD.....................
I won't show to much of the actual process here as the chassis and hull etc are the same as the last 4 builds - just the new bits.
The deep wading exhaust system with the sealed flaps and extended exhaust.


I utilised the remaing stowage boxes from my Pzr 3 MIG accessories for the rear deck to make it different again from the other builds.
As with the other builds I still have some small details like the headlight wires and wingnuts to add. I also replaced the Takom Turret mantlet Vorpanzer with a spare Tamiya Vorpanzer part, as the bolt detail was slightly better.


I have a second Pzr 3 M from Dragon

This one I will be modelling as the Pzr3 in the Russian cornfield using some cornstalks I purchased.
Last edited:
you got a great eye for detail Ian. 

Heavens Eagle
Well-known member
Brokeneagle
Master at Arms
Thanks MP, Mike, James, Paul and Rhino. Appreciate the interest.
James, yeah, I know what you mean but I must say the Panzer 3 M builds up as a nice kit for half the price of the Dragon ones. I have now built the N version as well as that was pretty good also. The fit was 95% and the detail at a good level with no flash. Down here it equates to $55.00 versus $120 for Dragon and the Takom kits are better than the late 90's Tamiya that are still getting $70.00 down here.
James, yeah, I know what you mean but I must say the Panzer 3 M builds up as a nice kit for half the price of the Dragon ones. I have now built the N version as well as that was pretty good also. The fit was 95% and the detail at a good level with no flash. Down here it equates to $55.00 versus $120 for Dragon and the Takom kits are better than the late 90's Tamiya that are still getting $70.00 down here.
Brokeneagle
Master at Arms
N for no more versions left after this.
THE N MODEL

The N model was a result of the cancellation of the K model and the availablity of 450 75mm L/24 Guns left over from the Pzr 4 conversion to the 75mm 40 L/43. This required some conversion to the Gun carriage, the gun mantlet and turret of the Pzr 3. This would be a solitary series which would entail using the remaining M chassis in conjuction with rebuilt J & L chassis that came back for repair from the fronts.
The 75mm became a revitalised weapon due to advances in ammunition technologies, that enabled the 75mm Kw.K L/24 to be more effective firing HE and AP, than the 50mm K39 L/60.
The N model also got the up-armoured cupola with the one piece hatch, which was intended for the M but wasn't introduced until March' 43. The Schurzen was back fitted starting in May '43 after testing showed it to be effective to stop the Russian anti-tank rifle rounds at 100m. The wire mesh schurzen was also tested but the special hangers were not yet designed. Starting in January 1944, surviving N models could recieve a coating of Zimmerit [to armour plates reachable from the ground] by their units in the field.

Apart from the obvious choice of the North African versions the Pzr 3N was also used in Russia, being teamed up with Tiger 1 units to provide close defence. A number of them were transferred to Norway and formerly surrendered to the Allies in June 1945.
I have chosen one of these late model version to do as my first version of the N.

THE MODEL
Takom
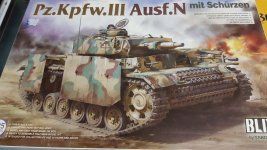
Again, as with the M model, I went for the Takom kit first as I was plesantly surprised with the balance between detail and ease of building, especially with the tracks and the slide molded barrel. So the build went the same way as with the M model , however this one would have the chassis shields mounted with the turret shield doors open and a zimmerit coating, as per the photo of the first tank on the left.
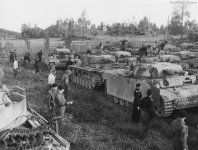
As with the other builds there are still small details to finish, such as headlight wires etc, stowage bin locks, that will be completed when I come back to paint it and put it on a base. The upper Hull and chassis are not attached with glue yet as I cannot do this until the tracks are painted.

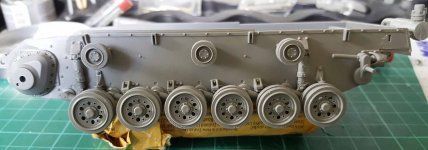

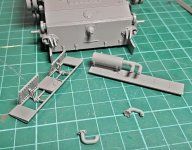

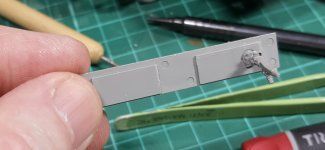
I added the wooden strip to the stowage box that Takom had left off the kit. The M didn't need it, as the model I was doing was manufactured with the turret schurzen, but the N was made as an earlier M chassis that was converted to an N as a returned rebuilt M and so would have been built with the wooden strip on the stowage bin. I figured that they would have just left it in place when the Schurzen was backfitted with the wooden strip.
I made the strip from plastic and pushed the screw holes in with a rivet maker tool.
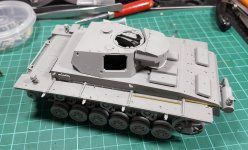
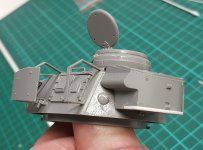
Another feature of the N models re-built with M chassis', were the deletion of the Drivers K.F.F.2 periscopes beginning in Feb 1943. The holes were plugged with conical bolts so I used some Model Kasten conical bolts.
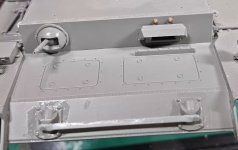
I started applying the Zimmerit with a Trumpeter zimmerit tool on the Gun mantlet and the front plate then proceeded to the upper back plate and the front guards. The last surfaces were the sides of the hull and the lower back plate.
I used Tamiya Epoxy Putty smooth, applying a thin film of water to the applicator before rolling the pattern. The Zimm was applied as a flat smear in small areas with a tooth pick.


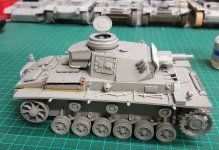


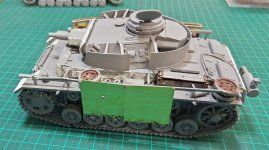
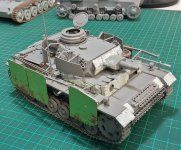

A lot of the small details still need doing - even giving it a good 'blow over' with the airbrush to get rid of the stray hairs. This one has been sitting on my bench now for a while. Also, I did notice the off centre engine deck hatch cover and will fix that one up too. The Zimm came Out just right I think as I left it slightly uneven and 'sloppy' as it would have been when applied by troops in the field.
So, from here there are no official models left but I will be 'back-tracking' to build the earlier models, plus a few anomolies such as the Su76i and the Flammpanzer. I will aslo be returning to this blog to paint and finish the built models and add them to bases as I get the urge, so if you have enjoyed this info dump it will continue but with more painting rather than stats.
Stay tuned - Ian.
THE N MODEL
The N model was a result of the cancellation of the K model and the availablity of 450 75mm L/24 Guns left over from the Pzr 4 conversion to the 75mm 40 L/43. This required some conversion to the Gun carriage, the gun mantlet and turret of the Pzr 3. This would be a solitary series which would entail using the remaining M chassis in conjuction with rebuilt J & L chassis that came back for repair from the fronts.
The 75mm became a revitalised weapon due to advances in ammunition technologies, that enabled the 75mm Kw.K L/24 to be more effective firing HE and AP, than the 50mm K39 L/60.
The N model also got the up-armoured cupola with the one piece hatch, which was intended for the M but wasn't introduced until March' 43. The Schurzen was back fitted starting in May '43 after testing showed it to be effective to stop the Russian anti-tank rifle rounds at 100m. The wire mesh schurzen was also tested but the special hangers were not yet designed. Starting in January 1944, surviving N models could recieve a coating of Zimmerit [to armour plates reachable from the ground] by their units in the field.
Apart from the obvious choice of the North African versions the Pzr 3N was also used in Russia, being teamed up with Tiger 1 units to provide close defence. A number of them were transferred to Norway and formerly surrendered to the Allies in June 1945.
I have chosen one of these late model version to do as my first version of the N.
THE MODEL
Takom

Again, as with the M model, I went for the Takom kit first as I was plesantly surprised with the balance between detail and ease of building, especially with the tracks and the slide molded barrel. So the build went the same way as with the M model , however this one would have the chassis shields mounted with the turret shield doors open and a zimmerit coating, as per the photo of the first tank on the left.

As with the other builds there are still small details to finish, such as headlight wires etc, stowage bin locks, that will be completed when I come back to paint it and put it on a base. The upper Hull and chassis are not attached with glue yet as I cannot do this until the tracks are painted.


I added the wooden strip to the stowage box that Takom had left off the kit. The M didn't need it, as the model I was doing was manufactured with the turret schurzen, but the N was made as an earlier M chassis that was converted to an N as a returned rebuilt M and so would have been built with the wooden strip on the stowage bin. I figured that they would have just left it in place when the Schurzen was backfitted with the wooden strip.
I made the strip from plastic and pushed the screw holes in with a rivet maker tool.


Another feature of the N models re-built with M chassis', were the deletion of the Drivers K.F.F.2 periscopes beginning in Feb 1943. The holes were plugged with conical bolts so I used some Model Kasten conical bolts.

I started applying the Zimmerit with a Trumpeter zimmerit tool on the Gun mantlet and the front plate then proceeded to the upper back plate and the front guards. The last surfaces were the sides of the hull and the lower back plate.
I used Tamiya Epoxy Putty smooth, applying a thin film of water to the applicator before rolling the pattern. The Zimm was applied as a flat smear in small areas with a tooth pick.


A lot of the small details still need doing - even giving it a good 'blow over' with the airbrush to get rid of the stray hairs. This one has been sitting on my bench now for a while. Also, I did notice the off centre engine deck hatch cover and will fix that one up too. The Zimm came Out just right I think as I left it slightly uneven and 'sloppy' as it would have been when applied by troops in the field.


So, from here there are no official models left but I will be 'back-tracking' to build the earlier models, plus a few anomolies such as the Su76i and the Flammpanzer. I will aslo be returning to this blog to paint and finish the built models and add them to bases as I get the urge, so if you have enjoyed this info dump it will continue but with more painting rather than stats.
Stay tuned - Ian.
Last edited:
That first photo has your name all over it! I can see your style in that photo.
Brokeneagle
Master at Arms
I was thinking the same. I will see how I go as I still want to do a desert version.That first photo has your name all over it! I can see your style in that photo.
3 color camo and you got a color photo for reference? Hard to pass by.I was thinking the same. I will see how I go as I still want to do a desert version.
Brokeneagle
Master at Arms
stop taunting me Man, I just can't take it!3 color camo and you got a color photo for reference? Hard to pass by.
 lol:
lol:I thought at this point
 I should add why I have been building and not posting during the builds - well, I have found that if I stop to post, then come back to build, then stop to post again etc. , it slows me to a standstill. I knew that with so many builds to do I just had to get them done first. This obviously only works when you can turnover a tank quiclkly and these Mk3's can be built in about a week with added details.
This approach wouldn't work if I was trying to complete them to the end of the paint and base stage everytime.
Last edited:
Similar threads
- Replies
- 53
- Views
- 7K
- Replies
- 9
- Views
- 1K
- Replies
- 1
- Views
- 222
- Replies
- 4
- Views
- 1K


