
Brokeneagle
Master at Arms
PANZER 3 - DEVELOPMENT HISTORY, INTERESTING ODDITIES AND MODEL STUFF
As the title suggests this will be a post on the German Panzer 3 and its myriad of development changes from the 'cradle to the grave'.
This all started for me during December and is the reason for my abscence of late. During my break from painting (after my long term Last Tiger project) but before getting serious about building my UBOATS, I suddenly got an urge to just build some tanks.
I had just picked up the Panzertracts issues on the Mk3 Panzer and started reading ......and off it went from there.
Panzertracts No 3-1 (A to D)
3-2 (E to H)
3-3 (J to N)
3-4 (Command vehicles in D,E,H,J,K series)
3-5 (Conversions and variations)
These are very detailed but also very interesting and 'tailor made' for the modeler.
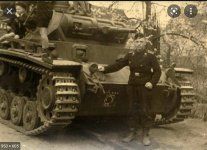
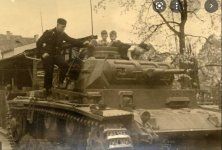
I also purchased 2 photo ref books from PEKO - Panzer 3 on the battlefield 1 & 2


These books are fantastic if you want to have a good broad set of large clear photos for Pzr 3 builds - highly recomended and I personally have found them a must for this project.
I had a large collection of Panzer 3's and new it was my mission for the end of 2021.
(I actually have more than shown here but you get the idea)
A B
B  D
D
 E F
E F G
G 
H
 J early J late
 K
K
 L
L  M N Africa
 N Late Sig33
 SU-76i
 1/16 large J
The A will be built standard (German Grey) and I am thinking of having it on concrete with a technician in a white coat standing marking a board
The B will be built as standard in German Grey for early war in France, 'sporting a German grey and Brown cammo scheme.
The D I am thinking of Finland in German Grey or 1945 in tri-color(I have a weird photo of one behind a wall in late '44 or '45 as defence.
The E will be a grey converted into a command vehicle (because it is very similar to the F) for Greece.
The F will be standard in Grey - not sure yet of the actual setting.
The G will be now be built as a Tauchpanzer version from the 18. Panzer Division in the East 1941 (German Grey).
The H will be in desert yellow over grey for North Afrika.
The J will be done over 3 models - early Funklenk version, early 50mm L60 (long barrel) version, late Befehlswagon(command) - all Russia
The L will be a mid version in dark yellow and red brown or a late grey - Russia.
The M will be a complete update in tricolor, with all shields, a second version with turret shields but no side shields from the 2nd Pzr Div in green and Dark yellow - probably Kursk and maybe Italy.
The N will have a desert version from Pz. Abt 501 in Dersert Yellow with sandbags etc, another will be from a unit in Italy and the last will be a late model from 1945 surrendered in Norway with Zimmerit and full shields.
A Sturm artillery Sig 33 howitzer mounted on a Panzer 3 chassis in an armoured box - developed initially for Stalingrad.
There will also be a Flammpanzer version(Flamethrower) mounted on a 'Frankenstien' assembly of parts at the end of the war. I have 2 references for these from 1945 that seem to be desperate measures to meet a requirement created from parts available. I will be doing the same and creating this one from all my spare parts collected from all of these builds combined with a touch of scratchbuilding.
Finally there will be an SU-76i which will be in Russian green peeling off German grey. These were a unique vehicle being a captured panzer 3J that was modified by the Russians then recaptured by the Germans who re-mounted a Panzer 3 cupola onto the replaced Russian superstructure. Yeah, crazy stuff but one of the most interesting builds.
So, I realise I have a lot of other models to build as well, so they will be built first without painting, then a scenario worked out and then painted etc at a later date, (in between a Uboat build), this way I can achieve both I hope. In fact I have already completed 6 of these tanks over Xmas and are curently working on number 7, so I will be posting up photos as I get to each build in the post.
This will be a fun ride of tanks facts and builds that will encompass the life of the Mk3 during WW2. Please stay tuned as the Panzer 3 is a fascinating story of changes and improvements so typical of the German approach to manufacturing war machines in the early 20th Century.
ABCD in a nutshell.
In the beginning there was an A......
The initial A series was only a run of 10 vehicles, B series 15 vehicles, C series 15 vehicles - Pretty low numbers and a reflection of still being in its 'teething' stages of development.
The A was light but to slow and underpowered but had the larger style roadwheels(10) that would influence from the E onward.
The B gained a little more speed but was still slow, however its chassis provided the basis for the Stug 3 prototype. An additional return roller was added (now 3) and the road wheels(16) were reduced in size as the suspension was changed to leaf springs. Smoke candles were introduced on the rear plate of the engine deck.
The C was produced at the same time as the B but a different leaf suspension setup was used. Other small changes were incurred but the main cosmetic changes were the grills on the engine deck, muffler change , a slight redesign of the Drive sprocket and the smoke candles at the rear were dropped.
During all of these changes there were still ongoing issues with the suspension, track design and speed.
Finally the D appeared late in 1938 with 30 vehicles produced, which addressed the armour thickness issue by increasing it to 30mm standard and improved the cupola. This increased the weight though to 19 tons, so an improved gearbox was added. All was not right still and the suspension, speed and wear on the wheels needed to be improved.
The D had become the final form for this early series and was as close to the familiar form of the Mk3 [that we know] as it was going to get without some re-design .
At this stage I only have the D from these early designs - Miniart Panzer 3 D....... but will do the B at a later date as I just bought one last night.
But I won't be starting with these - they will have to wait in line!
As the title suggests this will be a post on the German Panzer 3 and its myriad of development changes from the 'cradle to the grave'.
This all started for me during December and is the reason for my abscence of late. During my break from painting (after my long term Last Tiger project) but before getting serious about building my UBOATS, I suddenly got an urge to just build some tanks.
I had just picked up the Panzertracts issues on the Mk3 Panzer and started reading ......and off it went from there.
Panzertracts No 3-1 (A to D)
3-2 (E to H)
3-3 (J to N)
3-4 (Command vehicles in D,E,H,J,K series)
3-5 (Conversions and variations)
These are very detailed but also very interesting and 'tailor made' for the modeler.
I also purchased 2 photo ref books from PEKO - Panzer 3 on the battlefield 1 & 2
These books are fantastic if you want to have a good broad set of large clear photos for Pzr 3 builds - highly recomended and I personally have found them a must for this project.
I had a large collection of Panzer 3's and new it was my mission for the end of 2021.
(I actually have more than shown here but you get the idea)
A
B D E FG H
J early J late K L M N Africa N Late Sig33SU-76i 1/16 large JThe A will be built standard (German Grey) and I am thinking of having it on concrete with a technician in a white coat standing marking a board
The B will be built as standard in German Grey for early war in France, 'sporting a German grey and Brown cammo scheme.
The D I am thinking of Finland in German Grey or 1945 in tri-color(I have a weird photo of one behind a wall in late '44 or '45 as defence.
The E will be a grey converted into a command vehicle (because it is very similar to the F) for Greece.
The F will be standard in Grey - not sure yet of the actual setting.
The G will be now be built as a Tauchpanzer version from the 18. Panzer Division in the East 1941 (German Grey).
The H will be in desert yellow over grey for North Afrika.
The J will be done over 3 models - early Funklenk version, early 50mm L60 (long barrel) version, late Befehlswagon(command) - all Russia
The L will be a mid version in dark yellow and red brown or a late grey - Russia.
The M will be a complete update in tricolor, with all shields, a second version with turret shields but no side shields from the 2nd Pzr Div in green and Dark yellow - probably Kursk and maybe Italy.
The N will have a desert version from Pz. Abt 501 in Dersert Yellow with sandbags etc, another will be from a unit in Italy and the last will be a late model from 1945 surrendered in Norway with Zimmerit and full shields.
A Sturm artillery Sig 33 howitzer mounted on a Panzer 3 chassis in an armoured box - developed initially for Stalingrad.
There will also be a Flammpanzer version(Flamethrower) mounted on a 'Frankenstien' assembly of parts at the end of the war. I have 2 references for these from 1945 that seem to be desperate measures to meet a requirement created from parts available. I will be doing the same and creating this one from all my spare parts collected from all of these builds combined with a touch of scratchbuilding.
Finally there will be an SU-76i which will be in Russian green peeling off German grey. These were a unique vehicle being a captured panzer 3J that was modified by the Russians then recaptured by the Germans who re-mounted a Panzer 3 cupola onto the replaced Russian superstructure. Yeah, crazy stuff but one of the most interesting builds.
So, I realise I have a lot of other models to build as well, so they will be built first without painting, then a scenario worked out and then painted etc at a later date, (in between a Uboat build), this way I can achieve both I hope. In fact I have already completed 6 of these tanks over Xmas and are curently working on number 7, so I will be posting up photos as I get to each build in the post.
This will be a fun ride of tanks facts and builds that will encompass the life of the Mk3 during WW2. Please stay tuned as the Panzer 3 is a fascinating story of changes and improvements so typical of the German approach to manufacturing war machines in the early 20th Century.
ABCD in a nutshell.
In the beginning there was an A......
The initial A series was only a run of 10 vehicles, B series 15 vehicles, C series 15 vehicles - Pretty low numbers and a reflection of still being in its 'teething' stages of development.
The A was light but to slow and underpowered but had the larger style roadwheels(10) that would influence from the E onward.
The B gained a little more speed but was still slow, however its chassis provided the basis for the Stug 3 prototype. An additional return roller was added (now 3) and the road wheels(16) were reduced in size as the suspension was changed to leaf springs. Smoke candles were introduced on the rear plate of the engine deck.
The C was produced at the same time as the B but a different leaf suspension setup was used. Other small changes were incurred but the main cosmetic changes were the grills on the engine deck, muffler change , a slight redesign of the Drive sprocket and the smoke candles at the rear were dropped.
During all of these changes there were still ongoing issues with the suspension, track design and speed.
Finally the D appeared late in 1938 with 30 vehicles produced, which addressed the armour thickness issue by increasing it to 30mm standard and improved the cupola. This increased the weight though to 19 tons, so an improved gearbox was added. All was not right still and the suspension, speed and wear on the wheels needed to be improved.
The D had become the final form for this early series and was as close to the familiar form of the Mk3 [that we know] as it was going to get without some re-design .
At this stage I only have the D from these early designs - Miniart Panzer 3 D....... but will do the B at a later date as I just bought one last night.
But I won't be starting with these - they will have to wait in line!
Last edited:


")


 .
.


