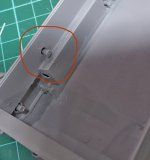
I could see a little puppy somewhere in there 
-
Modelers Alliance has updated the forum software on our website. We have migrated all post, content and user accounts but we could not migrate the passwords.
This requires that you manually reset your password.
Please click here, http://modelersalliance.org/forums/login to go to logon page and use the "Forgot your Password" option.
You are using an out of date browser. It may not display this or other websites correctly.
You should upgrade or use an alternative browser.
You should upgrade or use an alternative browser.
THINGS ABOUT 3' s (July 26th Update)
- Thread starter Brokeneagle
- Start date
Duke Maddog
Well-known member
I haven't commented on this before, but I have been following along. All this is incredibly interesting and I am looking forward to seeing all these painted and finished and lined up side-by-side!
No pressure... take your time.
No pressure... take your time.
Brokeneagle
Master at Arms
Thanks Duke - glad you are enjoying the ride.I haven't commented on this before, but I have been following along. All this is incredibly interesting and I am looking forward to seeing all these painted and finished and lined up side-by-side!
No pressure... take your time.

Brokeneagle
Master at Arms
The next installment before I go back to where it all beganis ......the FLAMPANZER 3.
THE FLAMMPANZER 3
Sd.Kfz.141/3

The Panzer 3 was equipped with a flamethrower that projected ignited flame oil through the barrel out to a range of 50 meters, by a 2 stroke gas driven pump. Initially the normal 50mm/L60 barrel was used but after a short period this was replaced with a wider sheet metal tube that mounted a new wide round collar at the mantlet base. there was a crew of 3. These versions also recieved the 20mm Vorpanzer on the turret front as well as the Zusatzpanzer on the front of the upper hull.
As mentioned in the Pzr 3 M section, a number of M chassis were utilised (100) after the cancellation of that series, however, other chassis were utilised later in the war. By mid 1944 the number of Pzr 3 Flammpanzers had been reduced to 4 and these were returned to the ordinance depot for repairs where they were converted back to Stug's.
In November 1944 Hitler ordered a large amount of flammpanzer units for a sprcial operation (at least 20-30). 15 of these were repaired/ converted Pzr 3's that were issued to the new company Panzer-Flamm-Kompanie 351*. The special action was the final offensive for defenss of Budapest in Hungary (of which my Panther G painting was set). By the 4the April 1945, there were still 4 of these in action and one in need of repair.
*It would have been interesting if they had named it 451 as this is the temperature (in Farenheit)that the author, Ray Bradbury, said paper auto ignites without a naked flame and named his famous sci-fi book after.

THE MODEL
This build will be part of the 'Götterdämmerung, the end, 1945' build group but I will post my progess here.


This build will be created from a couple of donor kits plus my Pzr3 spares box, which is pretty well stocked after all of these builds.
I was originally going to use an old spare hull from a late 90's Panzer 3 Stug B but realised my 'ongoing' donor kit, a Bronco Stug 3D had most of the chassis parts I needed and were better quality(a kit from the late 2000's).
So, with this massive bucket of parts I am confident that I can produce a Flammpanzer 3 to match my ref photo below. I only need to scratch build the barrel and collar. This will be the first 'live ' build of this Pzr 3 write -up so stay tuned for 'real time' progress.


Initial progess..........

I used the Bronco chassis and mated it with the Tamiya L hull escape hatch and the SiGG 33 front plate from the older Dragon Kit. The back plate will be a spare J engine deck and hatches from my 50mm/L60 J that used the earlier Bronco engine deck from this kit - everything that goes around comes around again.


The bolts on the SiGG 33 armour plate will be replaced with the excellent bolts from the much later Dragon Stug3 G kit. I have a number of these plates in my spares box as they come on an unused sprue with each Stug G KIT. The drive sprocket and rear idler were taken from the Bronco kit. The drive sprocket being the later version without the center cap.


I originally bought 2 of these Bronco Stug 3 kits when they were released as they were quite cheap. I was under the impression that they would be just a 'knock-off' of the old Gunze kits, reboxed by DML then reboxed by Bronco but I was pleasantly surprised. The Bronco kits are actually new kits that seem to be an improved version of the old Gunze/ DML molds combined with some late DRAGON kock-offs and some original parts of their own. The drive sprocket is one example where they offer you the option of capped and non-capped fot the sprocket centre. I went with the bolts exposed as was typical for this stage of the war for Pz3 drive sprockets. The other bonus is that you get a full set of late model track links with pins - Modelkasten esque. I will use these for my Pzr 3 Befehls J.
More to come soon.
THE FLAMMPANZER 3
Sd.Kfz.141/3
The Panzer 3 was equipped with a flamethrower that projected ignited flame oil through the barrel out to a range of 50 meters, by a 2 stroke gas driven pump. Initially the normal 50mm/L60 barrel was used but after a short period this was replaced with a wider sheet metal tube that mounted a new wide round collar at the mantlet base. there was a crew of 3. These versions also recieved the 20mm Vorpanzer on the turret front as well as the Zusatzpanzer on the front of the upper hull.
As mentioned in the Pzr 3 M section, a number of M chassis were utilised (100) after the cancellation of that series, however, other chassis were utilised later in the war. By mid 1944 the number of Pzr 3 Flammpanzers had been reduced to 4 and these were returned to the ordinance depot for repairs where they were converted back to Stug's.
In November 1944 Hitler ordered a large amount of flammpanzer units for a sprcial operation (at least 20-30). 15 of these were repaired/ converted Pzr 3's that were issued to the new company Panzer-Flamm-Kompanie 351*. The special action was the final offensive for defenss of Budapest in Hungary (of which my Panther G painting was set). By the 4the April 1945, there were still 4 of these in action and one in need of repair.
*It would have been interesting if they had named it 451 as this is the temperature (in Farenheit)that the author, Ray Bradbury, said paper auto ignites without a naked flame and named his famous sci-fi book after.
THE MODEL
This build will be part of the 'Götterdämmerung, the end, 1945' build group but I will post my progess here.
This build will be created from a couple of donor kits plus my Pzr3 spares box, which is pretty well stocked after all of these builds.
I was originally going to use an old spare hull from a late 90's Panzer 3 Stug B but realised my 'ongoing' donor kit, a Bronco Stug 3D had most of the chassis parts I needed and were better quality(a kit from the late 2000's).
So, with this massive bucket of parts I am confident that I can produce a Flammpanzer 3 to match my ref photo below. I only need to scratch build the barrel and collar. This will be the first 'live ' build of this Pzr 3 write -up so stay tuned for 'real time' progress.
Initial progess..........
I used the Bronco chassis and mated it with the Tamiya L hull escape hatch and the SiGG 33 front plate from the older Dragon Kit. The back plate will be a spare J engine deck and hatches from my 50mm/L60 J that used the earlier Bronco engine deck from this kit - everything that goes around comes around again.
The bolts on the SiGG 33 armour plate will be replaced with the excellent bolts from the much later Dragon Stug3 G kit. I have a number of these plates in my spares box as they come on an unused sprue with each Stug G KIT. The drive sprocket and rear idler were taken from the Bronco kit. The drive sprocket being the later version without the center cap.
I originally bought 2 of these Bronco Stug 3 kits when they were released as they were quite cheap. I was under the impression that they would be just a 'knock-off' of the old Gunze kits, reboxed by DML then reboxed by Bronco but I was pleasantly surprised. The Bronco kits are actually new kits that seem to be an improved version of the old Gunze/ DML molds combined with some late DRAGON kock-offs and some original parts of their own. The drive sprocket is one example where they offer you the option of capped and non-capped fot the sprocket centre. I went with the bolts exposed as was typical for this stage of the war for Pz3 drive sprockets. The other bonus is that you get a full set of late model track links with pins - Modelkasten esque. I will use these for my Pzr 3 Befehls J.
More to come soon.
mustang1989
Well-known member
Man that's crazy about the Stug 3 plates. One's got retaining nuts and the other one has retaining bolts. I'm guessing that these plates were indeed retained by bolts since that's what you're going to.
Brokeneagle
Master at Arms
Hey Mike, I sure will! 
Mustang, I think its just a case of less detail was added. I will transfer the bolts after Ihave attached the plate.
Mustang, I think its just a case of less detail was added. I will transfer the bolts after Ihave attached the plate.

Brokeneagle
Master at Arms
A little more progress on the flamm...................
I have pieced together a number of parts -


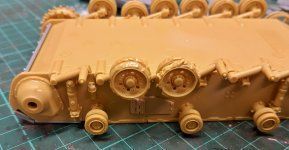
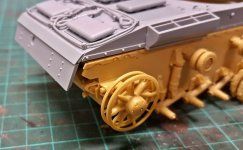
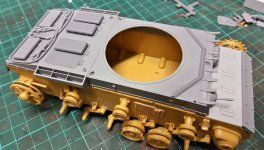
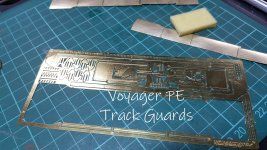
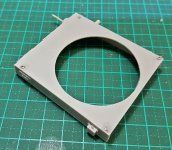
The upper J hull still needs plenty of work matching it to the earlier Stug 3D chassis. I also need to cut-out the spaces in the added armour for the earlier Stug 3D tow points at the front. The Voyager PE track guard set was perfect for the damage I need to apply that will be similar to the photo reference. For once the soldering went smoothly.
The wheels on one side will be undamaged with some different levels applied to the torsion bars while the other side will have the wheels with major damage.


After spending a whole afternoon working on scratching-up the flamethrower barrel and manlet I found a DML spare sprue from their old Pzr 3M that had the whole Flammpanzer barrel and mantlet assembly! I didin't even know it was in my spares box!

Back again soon........
I have pieced together a number of parts -
- Bronco Stug 3D hull and wheels
- Late Dragon Pzr 3 J engine deck
- Late Dragon Stug 3 G rear plate and upper front bolted on armor
- Early DML Stug 3 B upper front hull access hatch plate and front bolted armor plate
- Early DML Pzr 3 M front superstructure plate and Flampanzer spare sprue
- Late Dragon Pzr 3 J upper hull side plates and top plate with Vorpanzer
- Gunze Sangyo Pzr 3N turret
- Tamiya Pzr 3L turret stowage bin and hull escape hatches
- Voyager Pzr 3 brass track guards
- Trex front Drive sprocket
- Takom Pzr 3 N Cupola
- DML Stug 3 solid horn individual link track.

The upper J hull still needs plenty of work matching it to the earlier Stug 3D chassis. I also need to cut-out the spaces in the added armour for the earlier Stug 3D tow points at the front. The Voyager PE track guard set was perfect for the damage I need to apply that will be similar to the photo reference. For once the soldering went smoothly.
The wheels on one side will be undamaged with some different levels applied to the torsion bars while the other side will have the wheels with major damage.


After spending a whole afternoon working on scratching-up the flamethrower barrel and manlet I found a DML spare sprue from their old Pzr 3M that had the whole Flammpanzer barrel and mantlet assembly! I didin't even know it was in my spares box!
Back again soon........
Last edited:
Brokeneagle
Master at Arms
The Flammpanzer 3 is on hold at the moment so lets go back in time to the A version (that I did not build at the time) and see one I have prepared previously.
RECAP on the A model............
The initial A series was only a run of 10 vehicles - Pretty low numbers and a reflection of still being in its 'teething' stages of development.
The A was light but to slow and underpowered but had the larger style roadwheels(10) that would influence from the E onward.


THE MODEL
Overall the model is well detailed but some areas are not so well done......like the suspension springs and the wheel assemblies. The springs look like a good idea but don't fit properly into position, so you have to just wing it and do the best you can. The wheel construction is very similar and the 2 halves don't connect properly with the cap.
In the end the springs are mainly hidden by the large road wheels anyway.

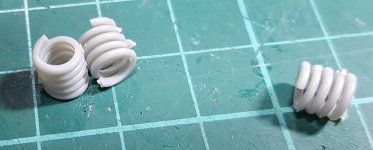
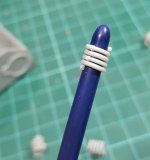


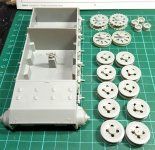
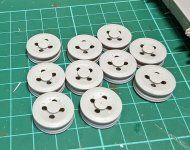
Next up was the drive wheels and idlers which were OK. Just make sure you pick the ones with the correct centre cap which is rounded ......i picked the squarish shaped one without taking enough attention. Must have been a prototype model maybe?
Also a bit of PE on the back plate.


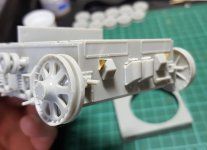
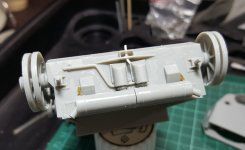
The track guards are very well detailed like the Dragon models which was nice.


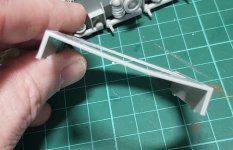
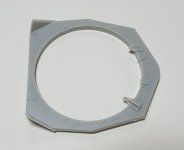
One issue was the warped front hull top. I fixed it by gluing it to the rear top half and bracing it with strip plastic.


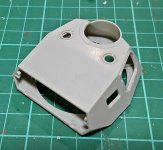
RECAP on the A model............
The initial A series was only a run of 10 vehicles - Pretty low numbers and a reflection of still being in its 'teething' stages of development.
The A was light but to slow and underpowered but had the larger style roadwheels(10) that would influence from the E onward.

THE MODEL
Overall the model is well detailed but some areas are not so well done......like the suspension springs and the wheel assemblies. The springs look like a good idea but don't fit properly into position, so you have to just wing it and do the best you can. The wheel construction is very similar and the 2 halves don't connect properly with the cap.
In the end the springs are mainly hidden by the large road wheels anyway.


Next up was the drive wheels and idlers which were OK. Just make sure you pick the ones with the correct centre cap which is rounded ......i picked the squarish shaped one without taking enough attention. Must have been a prototype model maybe?
Also a bit of PE on the back plate.


The track guards are very well detailed like the Dragon models which was nice.
One issue was the warped front hull top. I fixed it by gluing it to the rear top half and bracing it with strip plastic.


Last edited:
Nice fix. Love this work Ian 

Brokeneagle
Master at Arms
Thanks MP, glad you are enjoying it. Needed a small break from all the PE on the sub.  Don't congratulate me just yet as I 'stuffed-up' the top plate fix a little more before fixing it (the hard way - i should just 've got it right in the first place)
Further work on the A model......
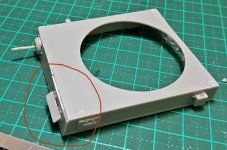
The hull top fix went ok once I fixed a few mistakes like gluing the top fix at the wrong end and putting the front plate on to match.
Both had to be removed which damaged the front plate and I had to add some plastic strip to fix.

I was really trying to build this one to fast and it goes to show that it doesn't matter how many years modelling you have under your belt you need to pay attention to the instructions on a new kit build. I made more mistakes on this kit than on any model I have built in 50 years!

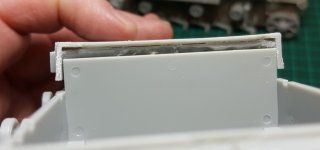
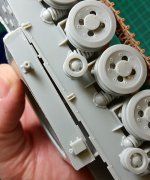
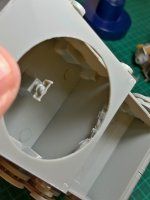
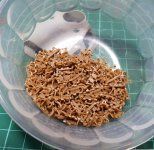
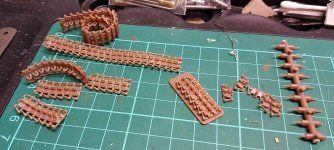
Time for the tracks once the roadwheels are on. These are individual links that look just like Modelkasten products.



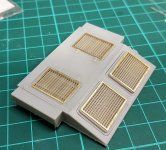
I next added the headlights from my spares using some dragon ones that were better than the Broncos. Attached the PE on the rear deck engine grills as well as adding some stuff to the track guards.


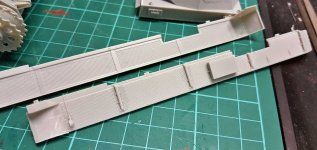
Turret


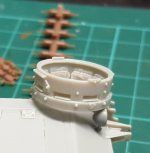

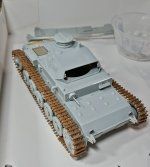
Tracks on!


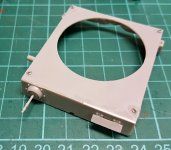
Front of the turret and cupola are now on and the track guards are done. I won't be attaching them yet though as I need to paint the hull sides and tracks first.

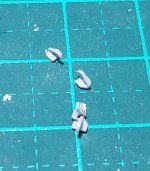
I added a Tamiya horn (orange plastic) and a DML jack block to the track guard, both from my spares box. The Tamiya horn was way more detailed and had its own mount - 20 years older too.


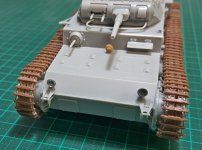
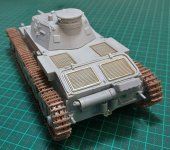
Time for the B model!


Further work on the A model......
The hull top fix went ok once I fixed a few mistakes like gluing the top fix at the wrong end and putting the front plate on to match.

Both had to be removed which damaged the front plate and I had to add some plastic strip to fix.


I was really trying to build this one to fast and it goes to show that it doesn't matter how many years modelling you have under your belt you need to pay attention to the instructions on a new kit build. I made more mistakes on this kit than on any model I have built in 50 years!


Time for the tracks once the roadwheels are on. These are individual links that look just like Modelkasten products.


I next added the headlights from my spares using some dragon ones that were better than the Broncos. Attached the PE on the rear deck engine grills as well as adding some stuff to the track guards.


Turret


Tracks on!
Front of the turret and cupola are now on and the track guards are done. I won't be attaching them yet though as I need to paint the hull sides and tracks first.
I added a Tamiya horn (orange plastic) and a DML jack block to the track guard, both from my spares box. The Tamiya horn was way more detailed and had its own mount - 20 years older too.


Time for the B model!


Last edited:
Brokeneagle
Master at Arms
The B model - 15 vehicles only.

The B gained a little more speed but was still slow, however its chassis provided the basis for the Stug 3 prototype. An additional return roller was added (now 3) and the road wheels(16) were reduced in size as the suspension was changed to leaf springs. Smoke candles were introduced on the rear plate of the engine deck.


The model.
The suspension setup changed dramatically with the B model. The coil-spring setup was completely upgraded to leaf-spring to try to deal with the better armour and faster speed. This made the suspension stage of the build a lot more complicated but a much better quality and fit than the Bronco A.

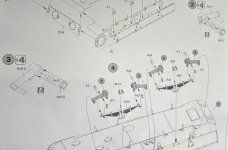
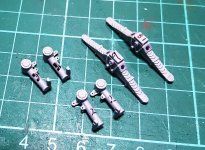

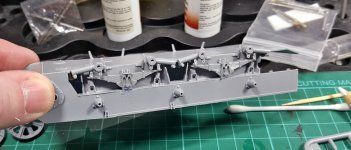

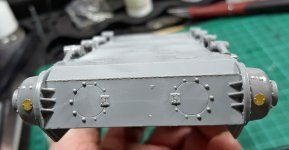

The wheels were a straight forward 'affair' and went on without a hitch except for the idler mounting pin which did not go all the way through. Easy mod to fix.
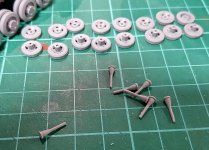

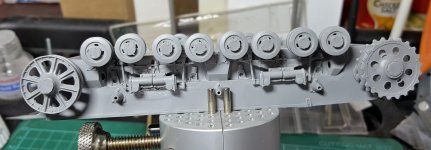

and a comparison of the A and B models to see the differences in historical development.

Upper body and turret up next.

The B gained a little more speed but was still slow, however its chassis provided the basis for the Stug 3 prototype. An additional return roller was added (now 3) and the road wheels(16) were reduced in size as the suspension was changed to leaf springs. Smoke candles were introduced on the rear plate of the engine deck.
The model.
The suspension setup changed dramatically with the B model. The coil-spring setup was completely upgraded to leaf-spring to try to deal with the better armour and faster speed. This made the suspension stage of the build a lot more complicated but a much better quality and fit than the Bronco A.


The wheels were a straight forward 'affair' and went on without a hitch except for the idler mounting pin which did not go all the way through. Easy mod to fix.


and a comparison of the A and B models to see the differences in historical development.
Upper body and turret up next.
Last edited:
Thanks Ian, that's a lot of difference in the suspension. Bet those coils gave a lot of problems when they kicked up mud and rocks.
I might be jumping forward but how do you intend on displaying all these?
I might be jumping forward but how do you intend on displaying all these?
Brokeneagle
Master at Arms
I'm thinking of having each one on a small simple base (only just bigger than the tank), sitting side by side attached to a long single mounting base. Each will have a name plate. That's the ruff idea anyway.Thanks Ian, that's a lot of difference in the suspension. Bet those coils gave a lot of problems when they kicked up mud and rocks.
I might be jumping forward but how do you intend on displaying all these?
Sounds like a plan man! 
Brokeneagle
Master at Arms
UPPER BODY AND TURRET
The upper body and turret have some really nice details but there are a few PE details that did not really work.
The upper body is nicely detailed and fits together well. If you remember the A, you can see another major change to the engine deck styling.
Also added the exhaust pipes and mufflers....again these have changed in style from round to rectangular.

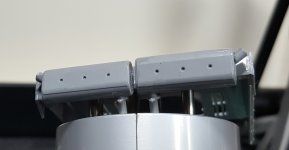

The engine deck grills have changed from 4 basic square/ rectangular slatted openings with mesh covers to a series of rectangular openings with very fine slats. The PE for these worked in some of the spacers but in others they were too thick or too short and needed

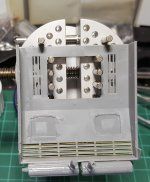

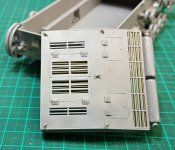
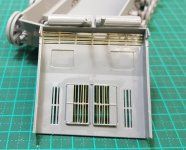
The horn has some nice details with a PE plate.


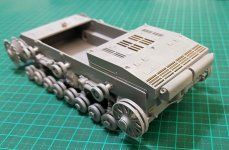
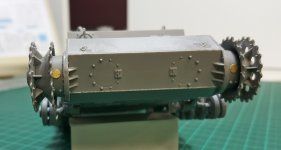
There's a bit of an interior which is probably enough to have through an open hatch door with a figure.

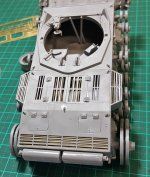
The sheet plastic replacements didn't go as well as I liked but the PE was too short so I will just live with it. Its not going in a comp. so its OK for my cabinet.

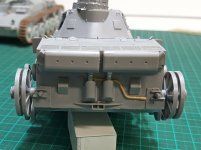
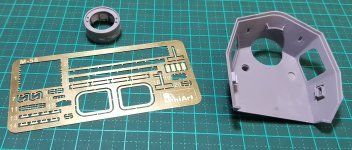
Still working on the turret though so I will come back to this after some more U-Boat love

The upper body and turret have some really nice details but there are a few PE details that did not really work.
The upper body is nicely detailed and fits together well. If you remember the A, you can see another major change to the engine deck styling.
Also added the exhaust pipes and mufflers....again these have changed in style from round to rectangular.

The engine deck grills have changed from 4 basic square/ rectangular slatted openings with mesh covers to a series of rectangular openings with very fine slats. The PE for these worked in some of the spacers but in others they were too thick or too short and needed


The horn has some nice details with a PE plate.


There's a bit of an interior which is probably enough to have through an open hatch door with a figure.

The sheet plastic replacements didn't go as well as I liked but the PE was too short so I will just live with it. Its not going in a comp. so its OK for my cabinet.


Still working on the turret though so I will come back to this after some more U-Boat love
Last edited:
Man that's one proud copula. Looking good Ian 

Similar threads
- Replies
- 53
- Views
- 7K
- Replies
- 9
- Views
- 1K
- Replies
- 1
- Views
- 261
- Replies
- 4
- Views
- 1K


