Steve Ski
Well-known member
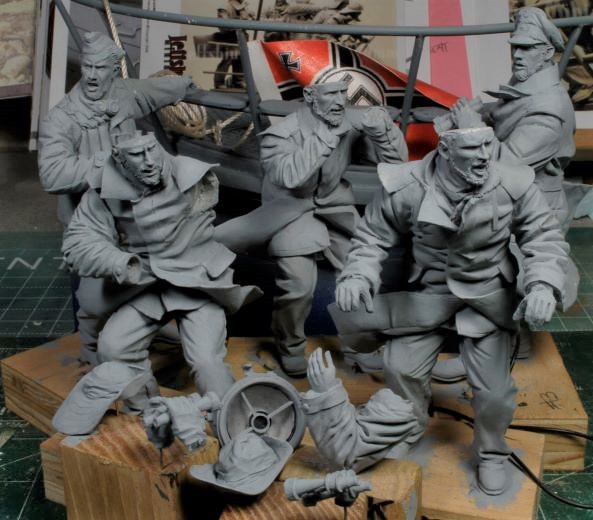
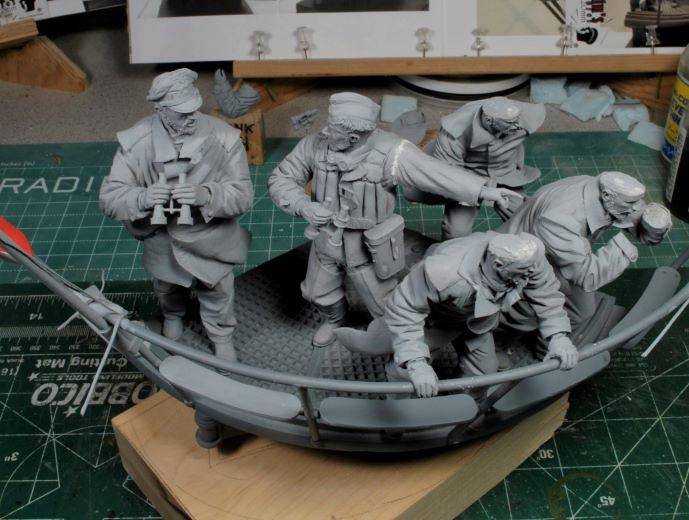
WWII German U-boat Crew on the Bridge
120mm Resin Scale Kit, Sculpted and Designed by Jeff Shiu
From the movie, Das Boot, Jeff Shiu has sculpted this set of figures which also includes the gun deck. After finishing my own Sub Gun Deck, I saw this as a natural progression into the submariner arena. I’m really just beginning to get my feet wet, pun intended, lol. Though this kit is older and is a limited production run, it may still be available, I’m not sure. As per Jeff’s notorious ability to sculpt figures with action and very usable poses, this set is no exception, and this is my first go at his work.
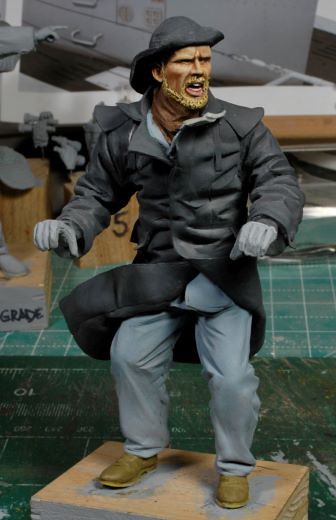
These figures have great action poses and several of the face’s bare close resemblance to the actors themselves. I like the chosen dynamic poses, all showing action and suspense, making for a great vignette. So, off we go, taking a “deep dive” into the submariner arena once again.
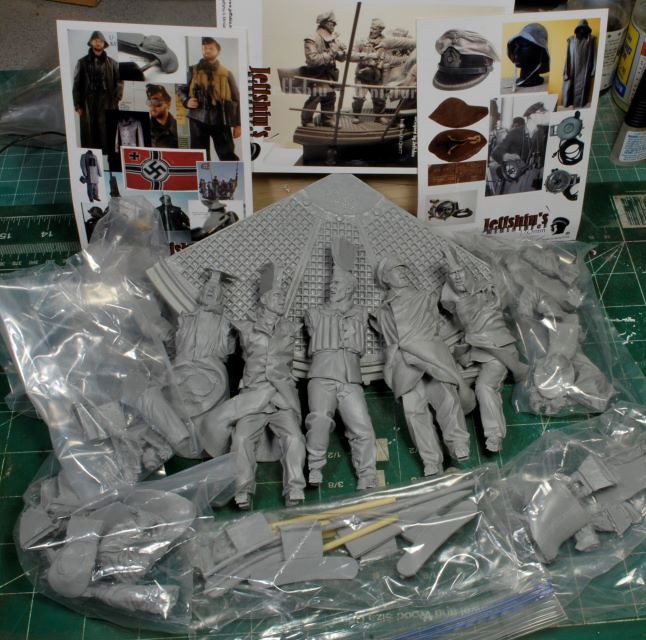
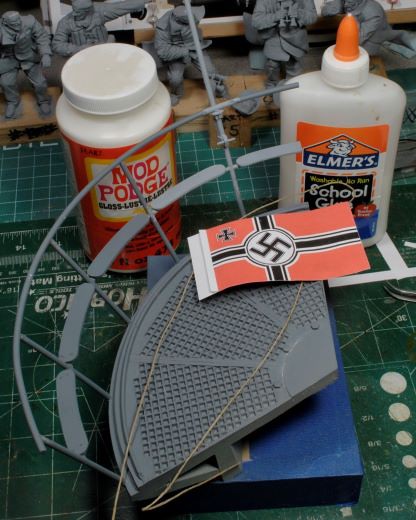
This set comes with instructions for constructing the deck railing along with a properly angled guide piece to obtain the correct support angle before attaching the top rail. Also included are photo cards with color references for uniforms and gear as well as a general guide for placement of the figures.
Working the Deck and Railing
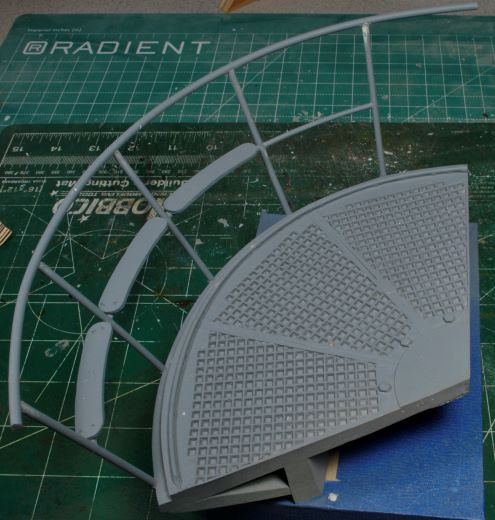
When opening this kit, you’ll find everything bagged separately including all the deck parts ready for clean-up. The amount of slag within the resin grid platform was minor and clean-up went rather quickly as with all the deck parts. Before I started working the railing, I drilled several holes on the underside of the deck now, to avoid damaging the railing later. I chose to go with a chunk of scrap wood from the shop as my base which will be painted flat black and I used large pins made from rebar tie wire to secure this deck temporarily. Keep in mind, there is a set angle that needs to be accounted for, so it may need to be adjusted as the figures are cleaned up and test fitted. The scene needs to show rocking and rolling at sea, so I did not secure the deck completely.
The railing may require a third hand, but you’ll manage if you take your time. I checked and verified all the uprights and the mid sections before I drilled each part for pinning. This rail system is just like my Sub Gun Deck, it won’t survive unless you pin every joint, IMHO. But my deck was soldered, not super glued. I left off the middle floater piece until final assembly. I did, however, use a round file for the tops of each vertical support to accept the top rail more easily.
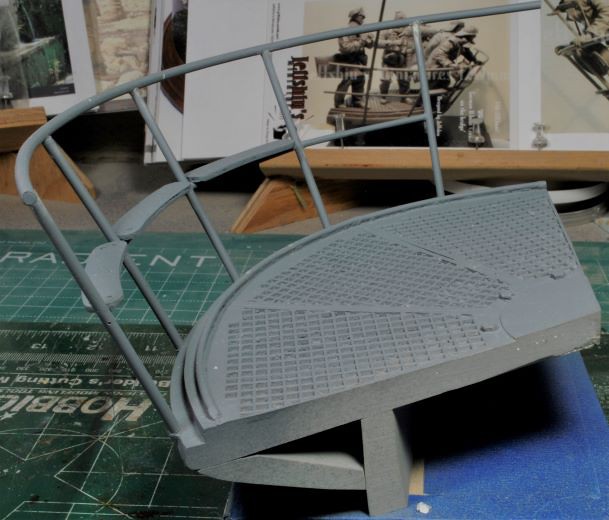
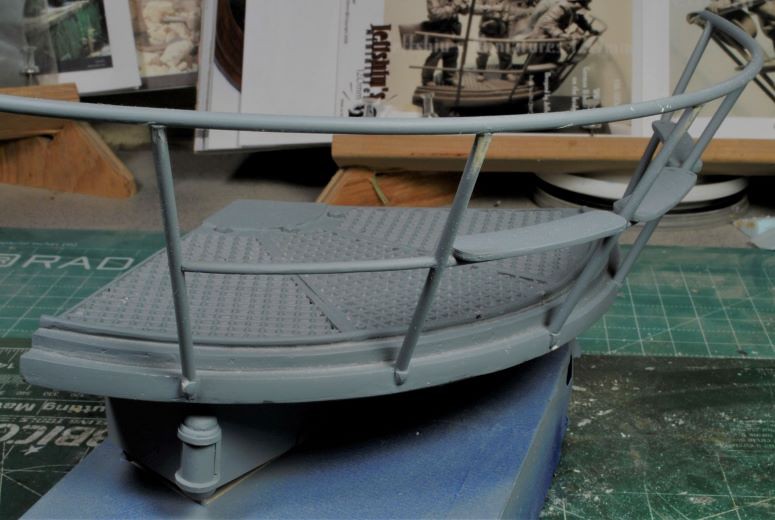
Once you have the base assembled and the rail system installed a good coat of primer makes this portion done for now.
Prepping the Figures for Paint
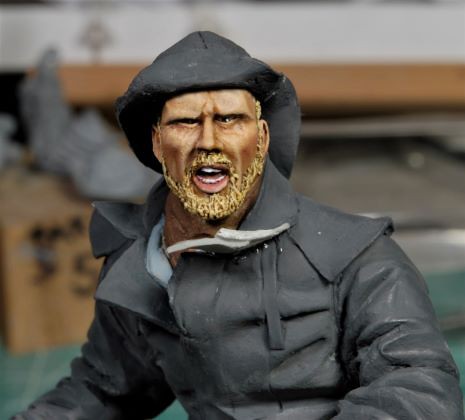
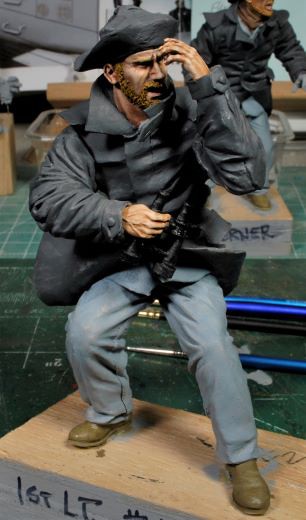
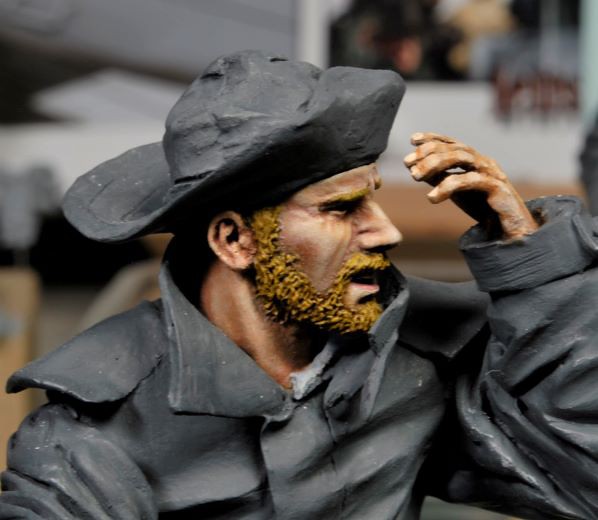
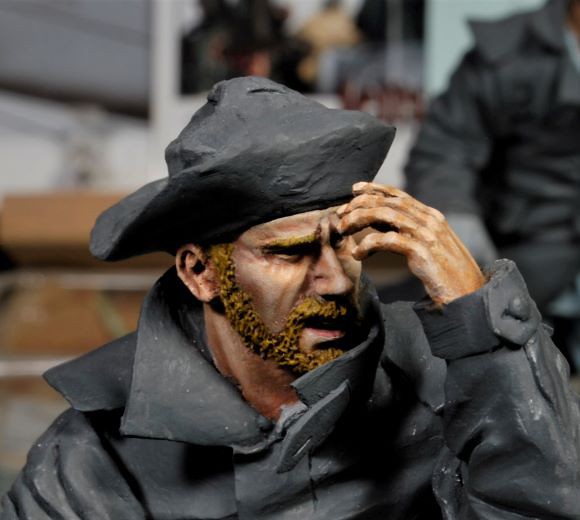
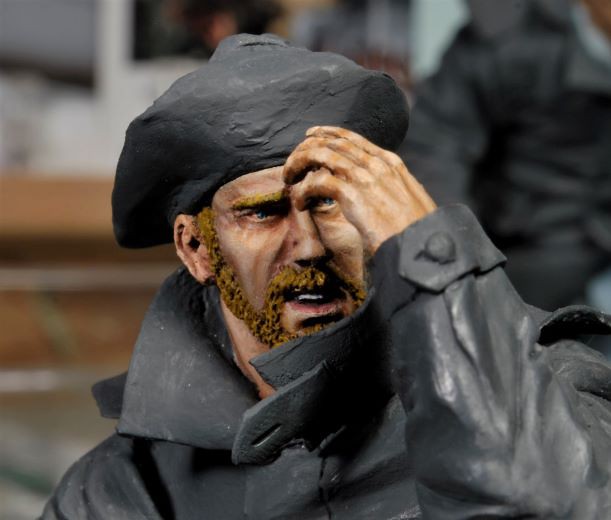
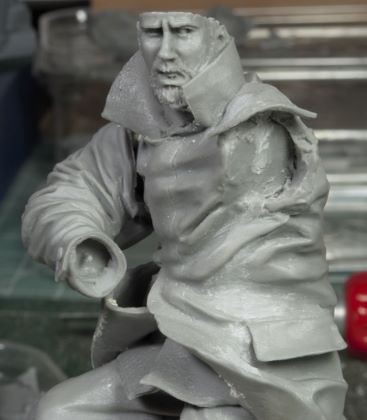
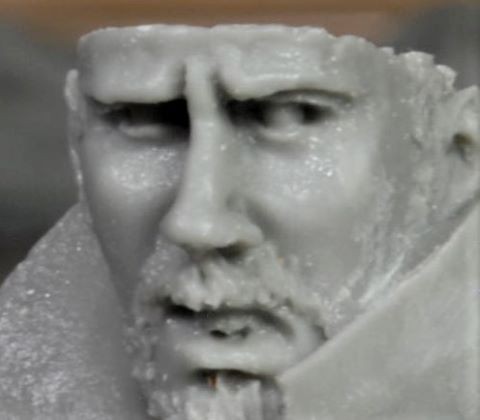
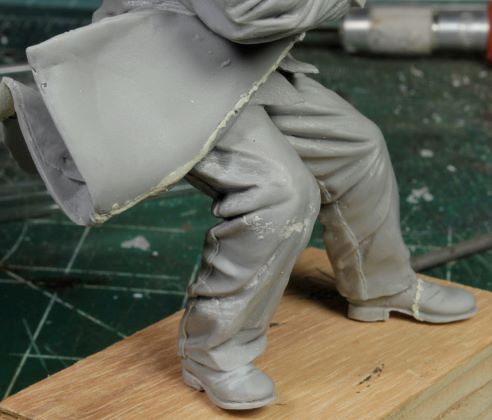
Time to make some resin dust and get this set going. Each figure has its own bag of pieces ready for clean-up and assembly. The first one out of the shoot is the reporter character, I’m assuming that’s who this is because he bares such close resemblance to the actor. Kudos to Jeff on this one! Clean-up went smoothly for the most part and by using a little bit of Tamiya putty I was able to align the arms and boots. The coat flaps are depicted as flopping in the wind, so if you attempt to secure them now you will have a difficult time painting the face later. I set the coat flaps aside for now and will do the same for the other figures as required.

Mike-the-Kiwi said, “Give em names.” Well, I haven’t come up with names for these characters just yet, but I’m working on it. I think once clean-up is completed and the painting starts to run smoothly these characters will begin to come alive, then they will have names.
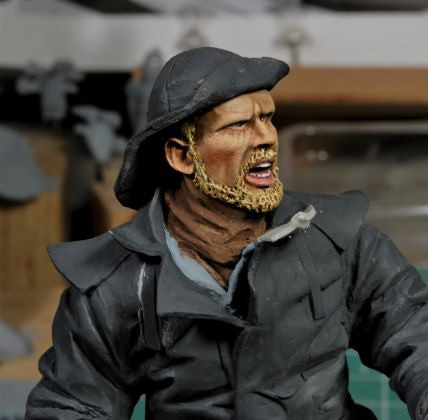
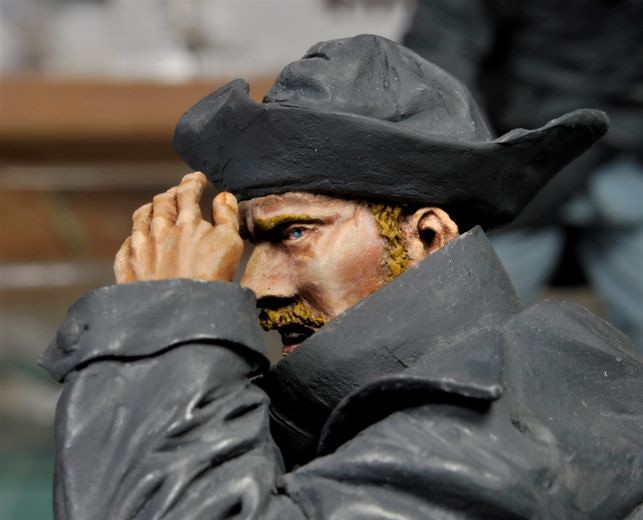
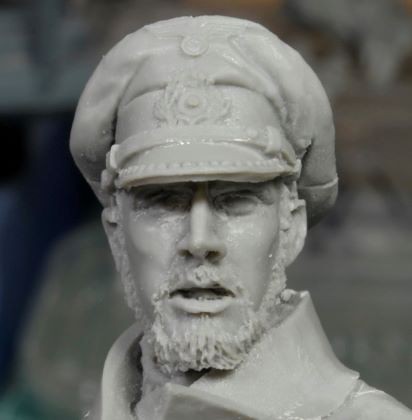
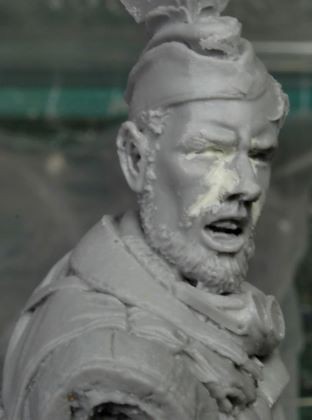
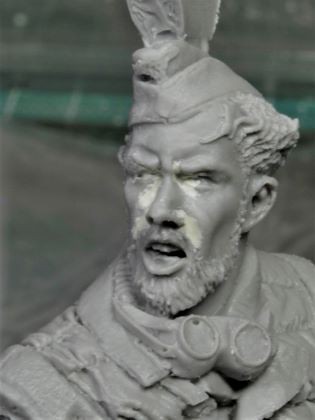
A word of caution, and this is not a gripe session, just factual issues I found when I examined the entire set and an honest assessment of the quality of this kit; this set I received had several issues with heavy seam areas (more than I would have expected), arm assemblies were not accurate for a smooth fit, and two of the figures had serious fascial discrepancies, and a third face was only minor. Now, I know we’ve all seen this before, but the depth of some of the eye sockets and a partial nose missing leads me to believe quality control was overlooked. This is not a cheap kit, it’s expensive, so I would have expected a more careful examination of the items included before shipping. My set may have been an anomaly, and I will leave it at that.
Ok, let’s get these issues fixed and back on track. Using tiny dabs of Tamiya Putty, I was able to reshape the eyes and reconstruct the nose and fill in the deep caverns alongside that nose. One eye was just a small BB like globe in the middle of the socket which I will fill in and reshaped. After working these discrepancies everything should begin to fall in to place leaving only a primer coat to reveal anything I may have missed.
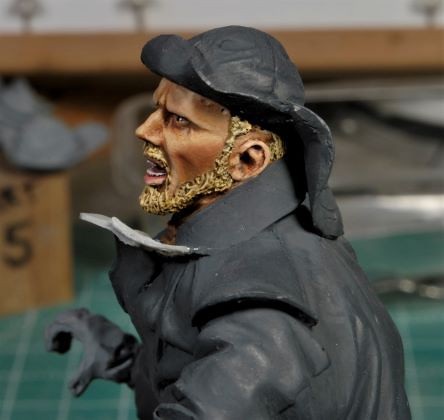
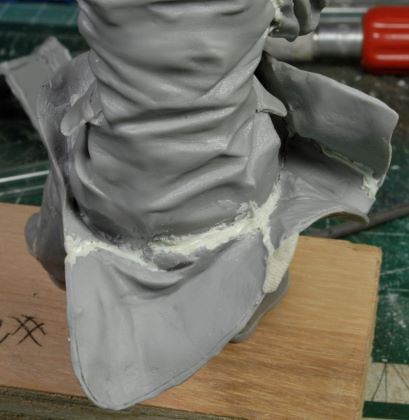
An assembly issue to be aware of is having to do with how the coats and flaps that are to be attached to the figures. I’m not a sculptor, nor do I work with resin casting, but I can understand after close examination that this was the only way to cast and produce these intricate designs. This process will take some patience and persistence, but after clean-up it should be fine. Just keep going, cause it ain’t gonna get done looking at it.
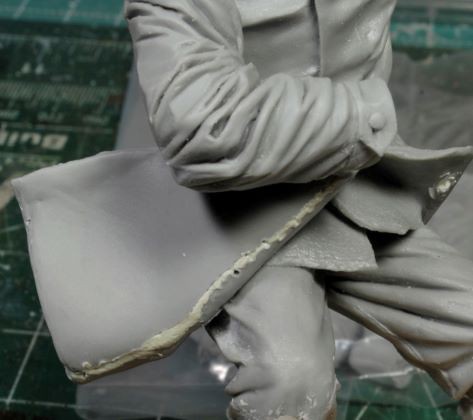
Something I found a bit odd was some of the boot tips were molded separately and one leg portion was also molded separately. That seemed to me to be an unnecessary step adding more time and work to get this set cleaned, primed, and ready for paint. So, having never run into these types of mold issues before, duly noted, move on.
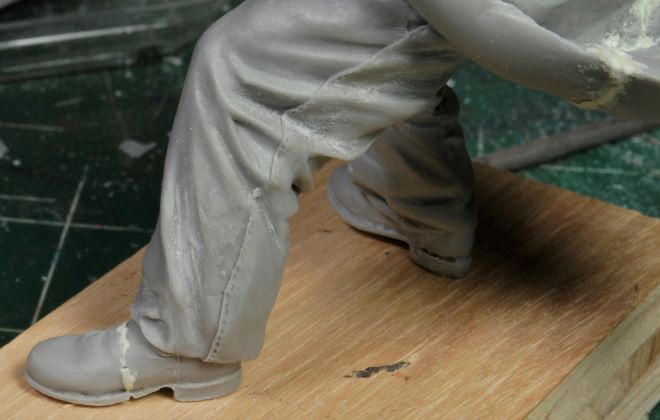
There is still a bit more clean-up work for each of the figures shown and one more figure to work over before I prime them all and examine for any issues I might have missed. Regardless of the mold issues, this is an awesome action filled set and all credit to Jeff for his imagination, sculpting skills, and willingness to keep producing. Ruck On!
Thanks for watching and more to follow soon. Cheers, Ski.
120mm Resin Scale Kit, Sculpted and Designed by Jeff Shiu
From the movie, Das Boot, Jeff Shiu has sculpted this set of figures which also includes the gun deck. After finishing my own Sub Gun Deck, I saw this as a natural progression into the submariner arena. I’m really just beginning to get my feet wet, pun intended, lol. Though this kit is older and is a limited production run, it may still be available, I’m not sure. As per Jeff’s notorious ability to sculpt figures with action and very usable poses, this set is no exception, and this is my first go at his work.
These figures have great action poses and several of the face’s bare close resemblance to the actors themselves. I like the chosen dynamic poses, all showing action and suspense, making for a great vignette. So, off we go, taking a “deep dive” into the submariner arena once again.
This set comes with instructions for constructing the deck railing along with a properly angled guide piece to obtain the correct support angle before attaching the top rail. Also included are photo cards with color references for uniforms and gear as well as a general guide for placement of the figures.
Working the Deck and Railing
When opening this kit, you’ll find everything bagged separately including all the deck parts ready for clean-up. The amount of slag within the resin grid platform was minor and clean-up went rather quickly as with all the deck parts. Before I started working the railing, I drilled several holes on the underside of the deck now, to avoid damaging the railing later. I chose to go with a chunk of scrap wood from the shop as my base which will be painted flat black and I used large pins made from rebar tie wire to secure this deck temporarily. Keep in mind, there is a set angle that needs to be accounted for, so it may need to be adjusted as the figures are cleaned up and test fitted. The scene needs to show rocking and rolling at sea, so I did not secure the deck completely.
The railing may require a third hand, but you’ll manage if you take your time. I checked and verified all the uprights and the mid sections before I drilled each part for pinning. This rail system is just like my Sub Gun Deck, it won’t survive unless you pin every joint, IMHO. But my deck was soldered, not super glued. I left off the middle floater piece until final assembly. I did, however, use a round file for the tops of each vertical support to accept the top rail more easily.
Once you have the base assembled and the rail system installed a good coat of primer makes this portion done for now.
Prepping the Figures for Paint
Time to make some resin dust and get this set going. Each figure has its own bag of pieces ready for clean-up and assembly. The first one out of the shoot is the reporter character, I’m assuming that’s who this is because he bares such close resemblance to the actor. Kudos to Jeff on this one! Clean-up went smoothly for the most part and by using a little bit of Tamiya putty I was able to align the arms and boots. The coat flaps are depicted as flopping in the wind, so if you attempt to secure them now you will have a difficult time painting the face later. I set the coat flaps aside for now and will do the same for the other figures as required.
Mike-the-Kiwi said, “Give em names.” Well, I haven’t come up with names for these characters just yet, but I’m working on it. I think once clean-up is completed and the painting starts to run smoothly these characters will begin to come alive, then they will have names.
A word of caution, and this is not a gripe session, just factual issues I found when I examined the entire set and an honest assessment of the quality of this kit; this set I received had several issues with heavy seam areas (more than I would have expected), arm assemblies were not accurate for a smooth fit, and two of the figures had serious fascial discrepancies, and a third face was only minor. Now, I know we’ve all seen this before, but the depth of some of the eye sockets and a partial nose missing leads me to believe quality control was overlooked. This is not a cheap kit, it’s expensive, so I would have expected a more careful examination of the items included before shipping. My set may have been an anomaly, and I will leave it at that.
Ok, let’s get these issues fixed and back on track. Using tiny dabs of Tamiya Putty, I was able to reshape the eyes and reconstruct the nose and fill in the deep caverns alongside that nose. One eye was just a small BB like globe in the middle of the socket which I will fill in and reshaped. After working these discrepancies everything should begin to fall in to place leaving only a primer coat to reveal anything I may have missed.
An assembly issue to be aware of is having to do with how the coats and flaps that are to be attached to the figures. I’m not a sculptor, nor do I work with resin casting, but I can understand after close examination that this was the only way to cast and produce these intricate designs. This process will take some patience and persistence, but after clean-up it should be fine. Just keep going, cause it ain’t gonna get done looking at it.
Something I found a bit odd was some of the boot tips were molded separately and one leg portion was also molded separately. That seemed to me to be an unnecessary step adding more time and work to get this set cleaned, primed, and ready for paint. So, having never run into these types of mold issues before, duly noted, move on.
There is still a bit more clean-up work for each of the figures shown and one more figure to work over before I prime them all and examine for any issues I might have missed. Regardless of the mold issues, this is an awesome action filled set and all credit to Jeff for his imagination, sculpting skills, and willingness to keep producing. Ruck On!
Thanks for watching and more to follow soon. Cheers, Ski.
")


 ...no question !
.gif")