The J 50mm/L60 'Long Barrel(RENAMED TO L in April 1942).
So the next J model up for building was the first version to be fitted with the 50mm/ L60 (Long Barrel).
- Dec '42 the J began to be fitted with the longer 50mm/ L60 gun, which was being made ready for the L version. However in April '42 it was decided to rename these as L models to keep the long gun variant exclusive to the L model. About 50 had been produced by this time.
So technically its an L but it has factory designated J production plates. The shorter 50mm/L42 was produced together with the L60 during this transition period in late '41- early '42.
At the same time the armoured cooling louvers on the engine deck became standard.
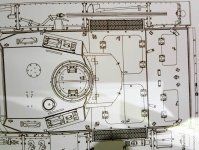
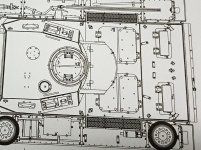
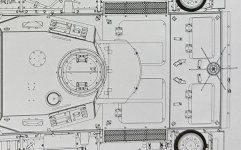
The first version of armoured cooling louvers on the engine deck [in the initial horizontal configuration] had been fitted for vehicles being sent to hot climates, like North Africa, since Feb 1941. It was also back fitted to earlier models being sent or already in that theatre of operations.
By December '41 the larger engine hatches and fan covers with vertical louvres became standard (Version 2), however, some factories needed to use the already manufactured parts and some J model 50mm/L60 Tanks were still made with the earlier horizontal armoured louvers and smaller hatches. (Ignore the star ariel at the back of the engine deck as these were only on command vehicles.
So, the version that I wanted to build to keep variation amongst my models[for my Pzr 3 collection] was one of the first 50mm/L60 tanks.
The early production vehicles still retained the version 1 tropical pattern engine deck, so that was a nice variation to model. Some of these were built for distribution to North Africa but at the last minute were redirected to the Eastern Front to 'top-up losses there with the 'harder hitting' long barrel. A mix of these vehicles were sent to Russia painted in the North African desert brown base color or grey. I am still deciding on the color but most probably I will do a dirty German grey.
I found 2 interesting photos in my panzer 3 books from Peko, showing the same tank from different angles, the first, just as it was being camouflaged with straw and the second as it was completed. I will only do a light straw version as in the photo below, so that I don't hide most of the tank. This is also a tank produced before the track bar across the front lower plate was fitted at the factory (this was ordered as a standard fitting at the factory in November 41), probably due to an already completed chassis but waiting for a turret.
The spare wheel at the front of the left track guard has been moved to fit the toolbox due to the large 'field fitted' box in the centre.
The Model
I used the earlier 2 in 1 kit from Dragon 6394 - an excellent kit, though a little on the 'pricey' side at present. You can get the RFM version with all the same options plus a full interior for $20 less.
I used my 'donor kit', the Bronco Stug 3D, for the early tropical engine deck and grafted this onto the back of the Dragon upper front hull. I then cut another piece from the late Dragon engine deck for the extended deck and grafted this to the back end. This was fairly easy as the Bronco kit is basically a mixed copy of the very early and late Dragon Panzer 3 kits. I also added the missing rear braces(WHITE PLASTIC) between the upper and lower as the Dragon versions had been cut -off
Next up were the tracks, which were done in the usual way and assembled with the wheels before attaching the guards. I then painted the base soil color adding soil to the lower hull and track in a patchy pattern, mainly for texture but it serves as a base color as well.
I then attached the front and rear mud flaps and small locking hooks. Dragon give you plenty of track pins, which I utilised in the spare wheels. I used a spare Tamiya jack and fire extinguisher, only because the assembly was simpler and detail just as good and I couldn't be bothered at the time with a small fiddly job.
Next was the turret, which I actually completed before doing the mud and attaching the guards.
I also added the spare track bar between the armoured brake covers at the front and built a brass strip holder [accross the front upper hull plate] for more spare track and pins. I then filed the gaps between the joins in the track guards to make them appear more used and worn.
I then added some model kasten conical bolt heads to the white plastic brace at the rear, between the hull and the mud guard. Tyres were also suitably damaged with wear and tear, as I like to do. These are more damaged than the picture but its all about preferance.
Def Model spare box attached to the front of the left track guard - rear tow pins, headlight and horn wires still to be added.
The picture below shows another mix which could also happen - an early J L60 model that managed to get a full fitting of Vorpanzer on the upper hull and turret front. It has the cut-out for the right hand vision port in the gun manlet and the side vision ports, which were ordered for deletion from production in January 1942 but were delayed due to already manufactured parts. The turret armour was usually unavailable for many early to mid L models, which were issued with only the frame until armour became available . Alkett and Miag produced some vehicles with full Vorpanzer in the early stages but the turret sheet armour was not widely available until after August/September '42.


