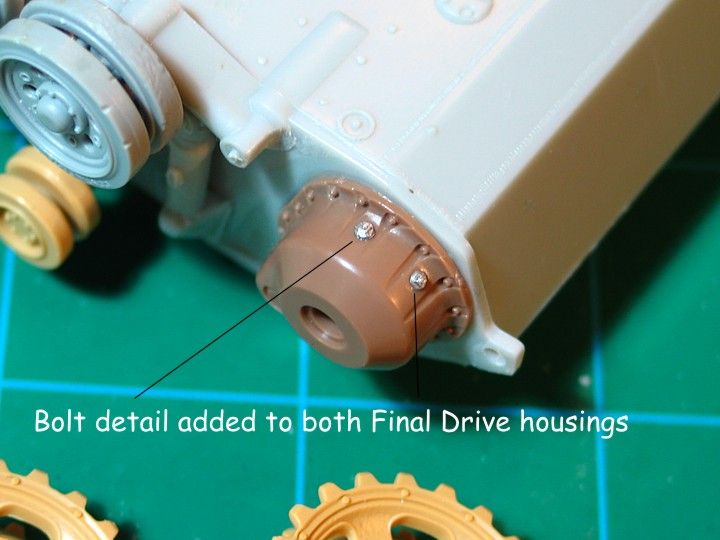
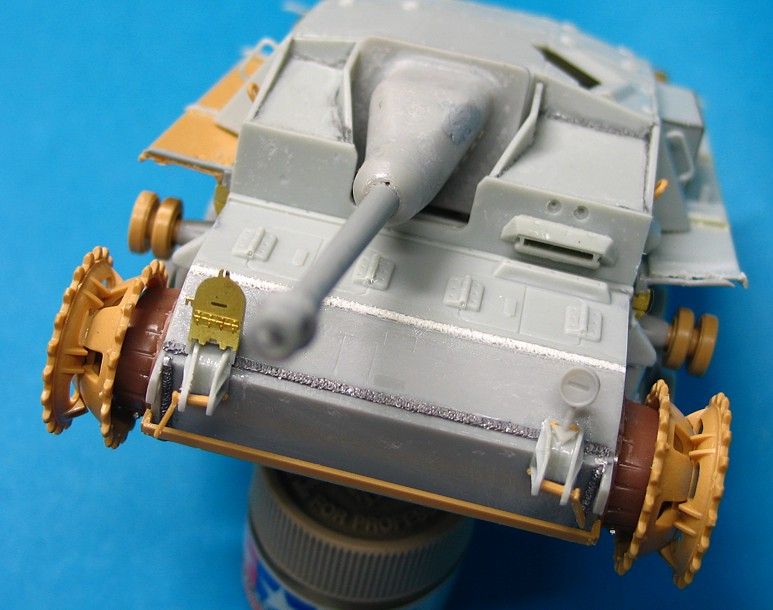
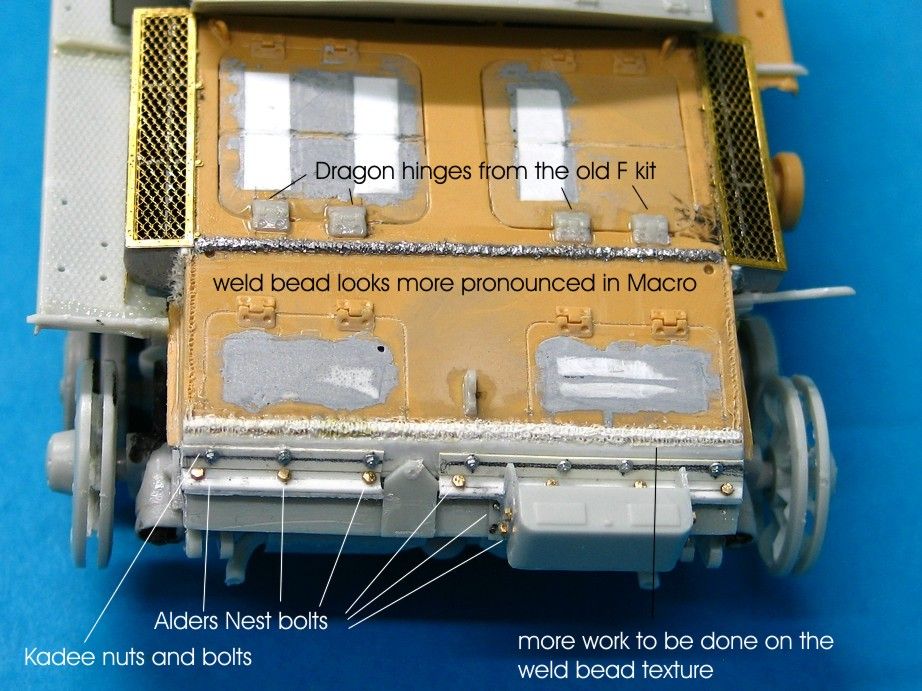
Are you using 'The Nutter' (don't giggle, that really is the name of a tool) to create these bolts?
Regards,

Modelers Alliance has updated the forum software on our website. We have migrated all post, content and user accounts but we could not migrate the passwords.
This requires that you manually reset your password.
Please click here, http://modelersalliance.org/forums/login to go to logon page and use the "Forgot your Password" option.
") Thanks for following Sherman 18, The Zod and James.
Thanks for following Sherman 18, The Zod and James.Hello Ian,
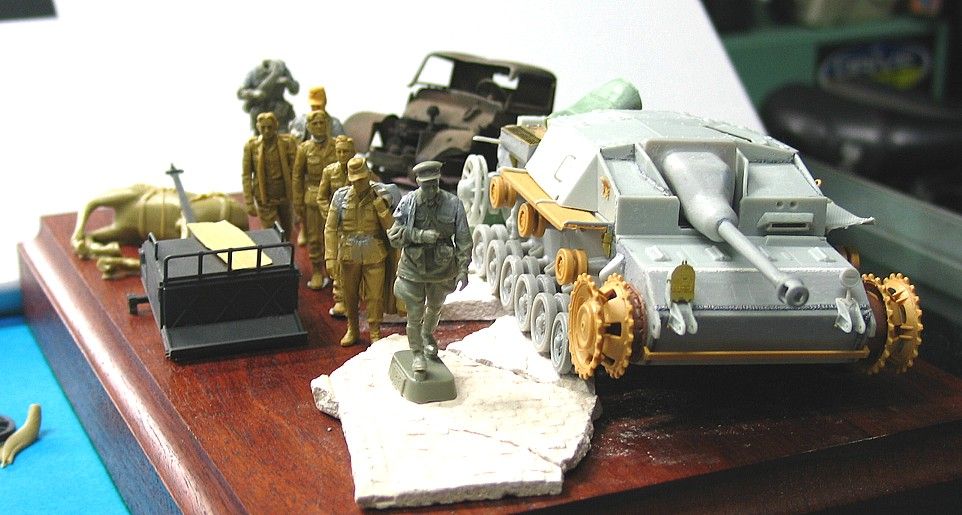
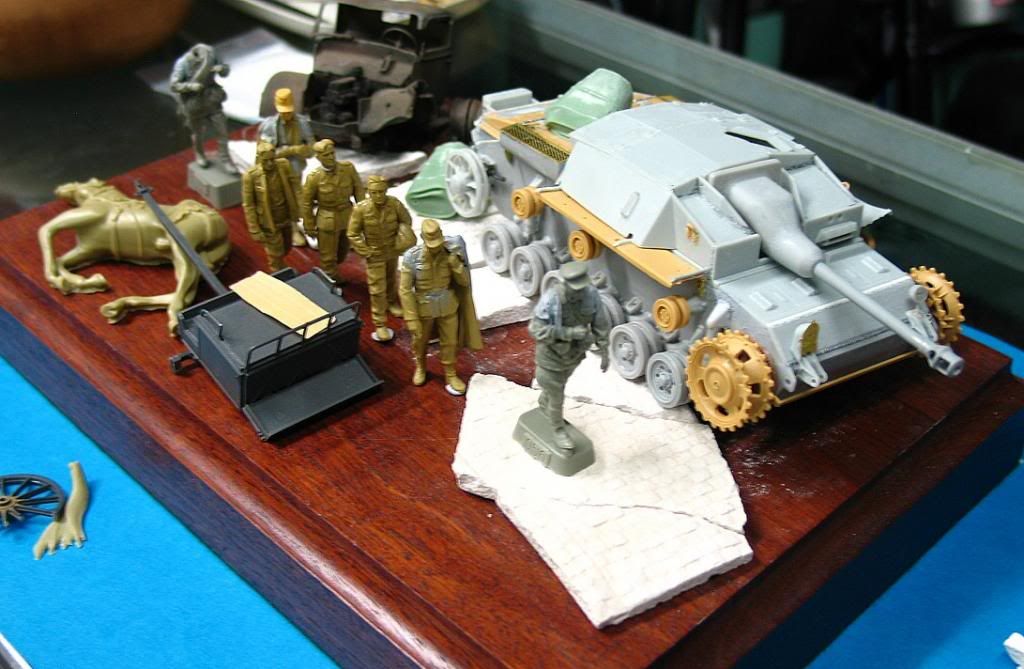
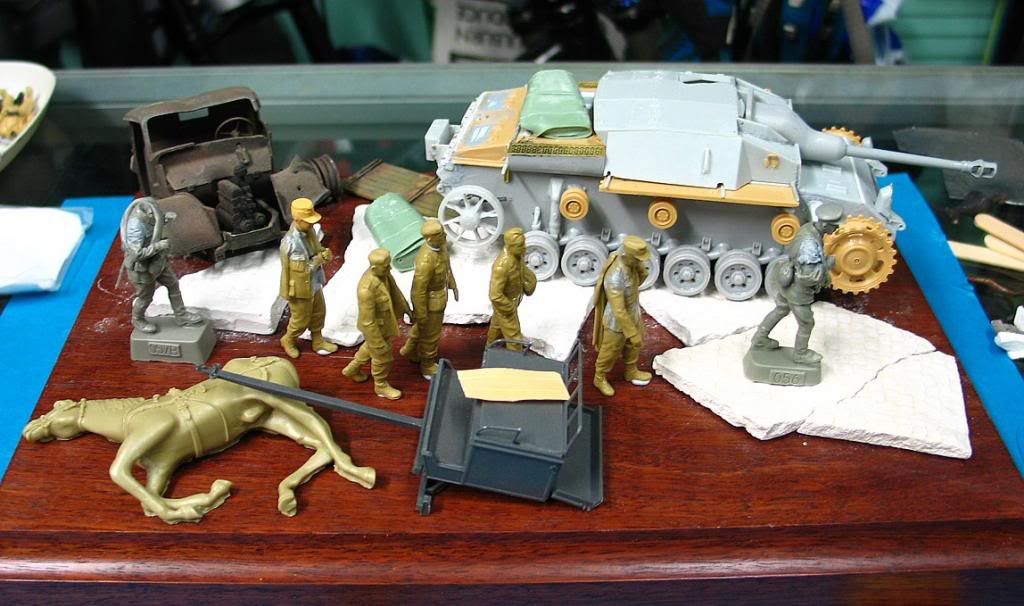
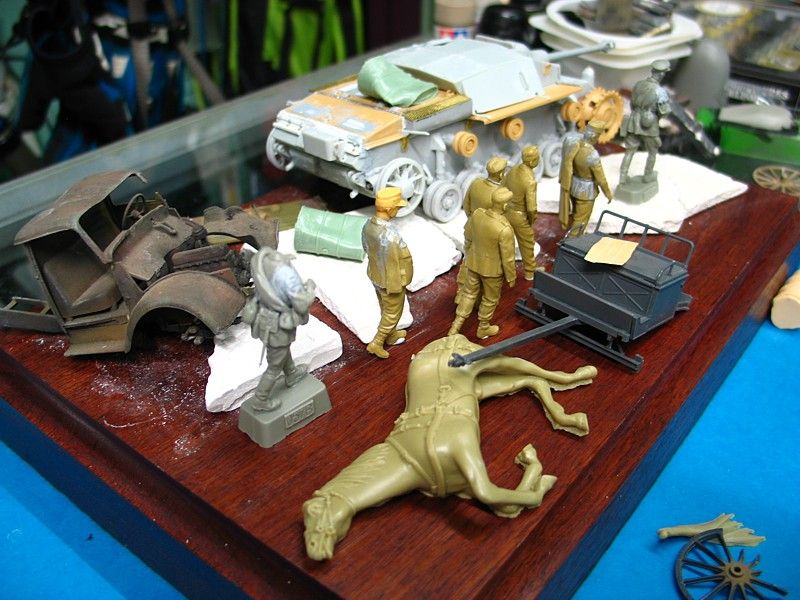
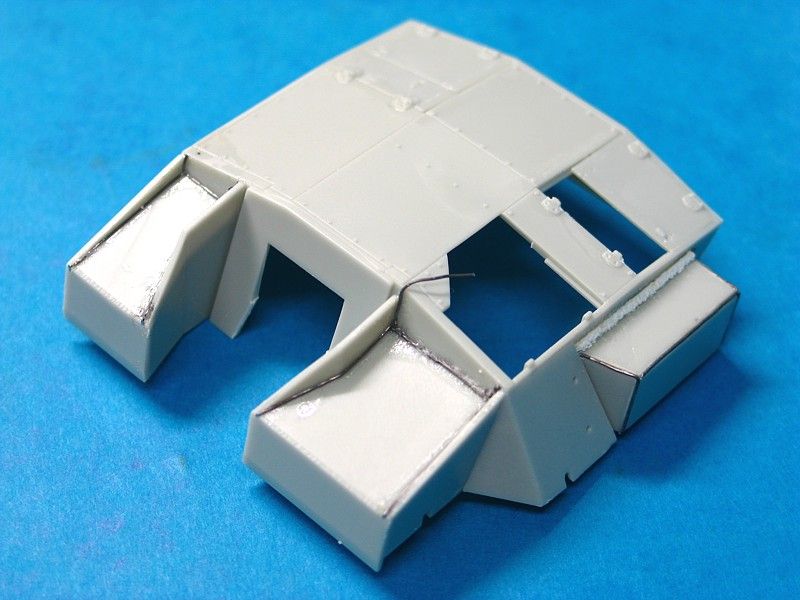
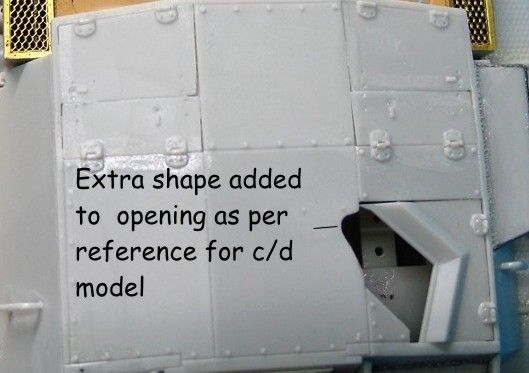
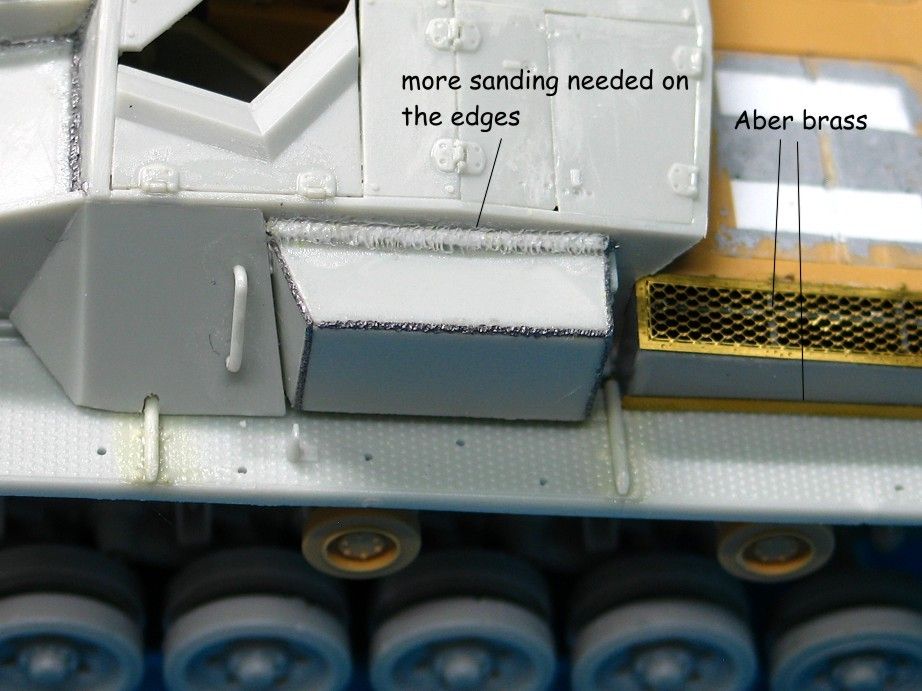
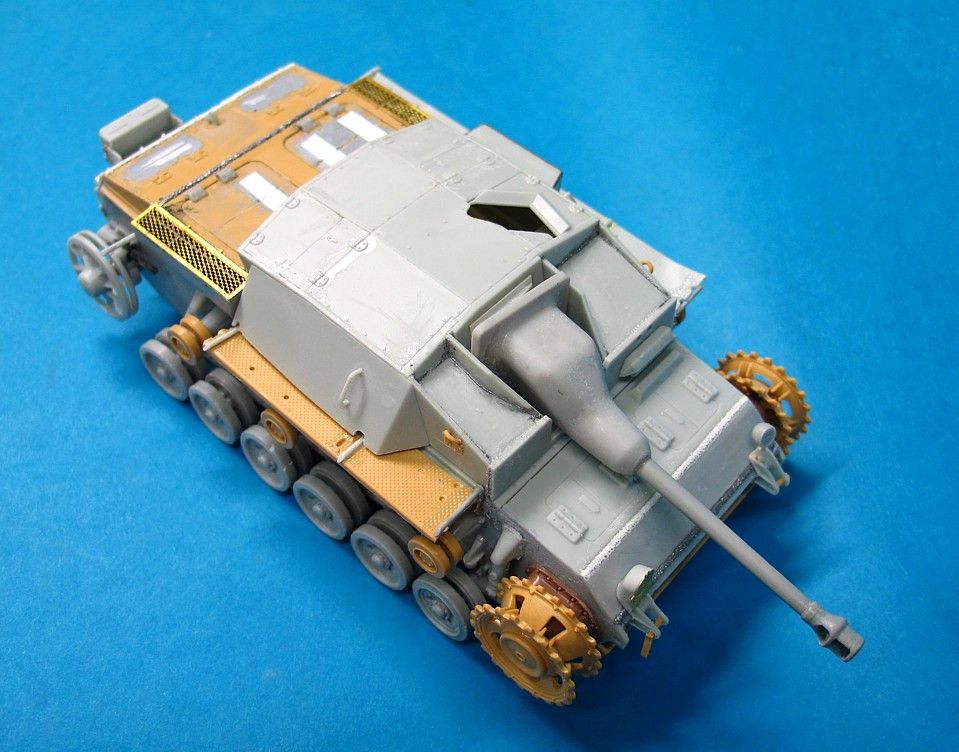
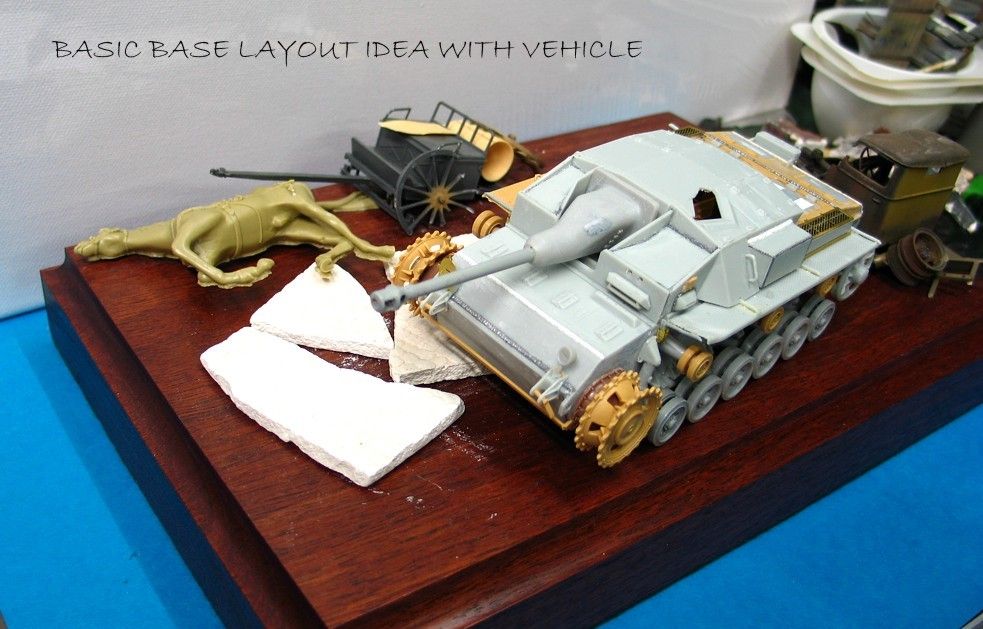
Nothing I love more than a parts box build John will attest to that . Can't wait for time to start my Stug. Ian I just wanted to remind you that in your pics of your drive housing you have not put the back plate spacer between it and the hull.
Brian
:smack 


Even your simple quick builds are out of sight man
Tony lee