• Modelers Alliance has updated the forum software on our website. We have migrated all post, content and user accounts but we could not migrate the passwords.
    This requires that you manually reset your password.
    Please click here, http://modelersalliance.org/forums/login to go to logon page and use the "Forgot your Password" option.

Coanda-1910 - scratch built

Some more stuff done :blink

The wheels driving the tail section (outside the cockpit)


h3080d1a.JPG


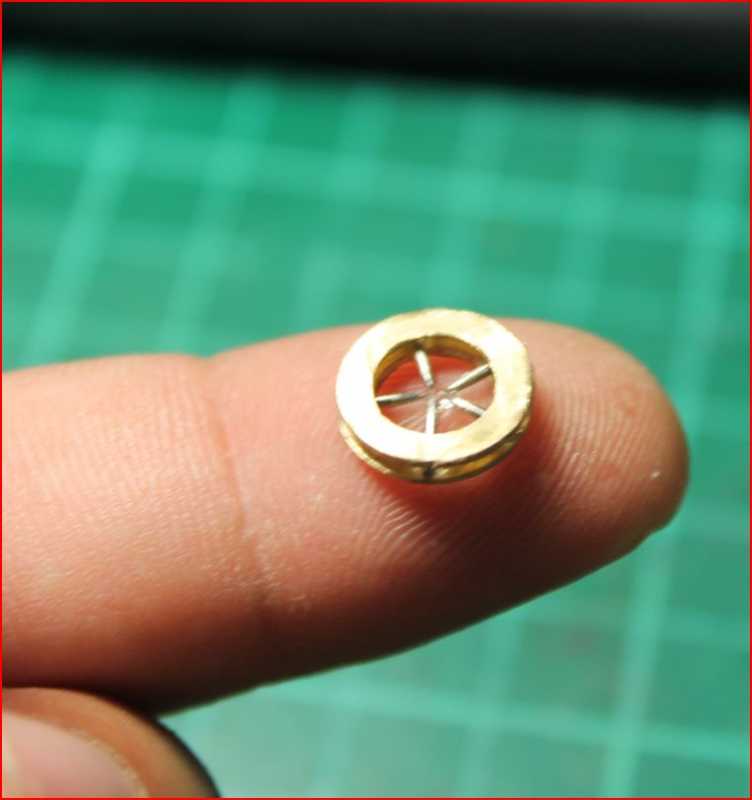
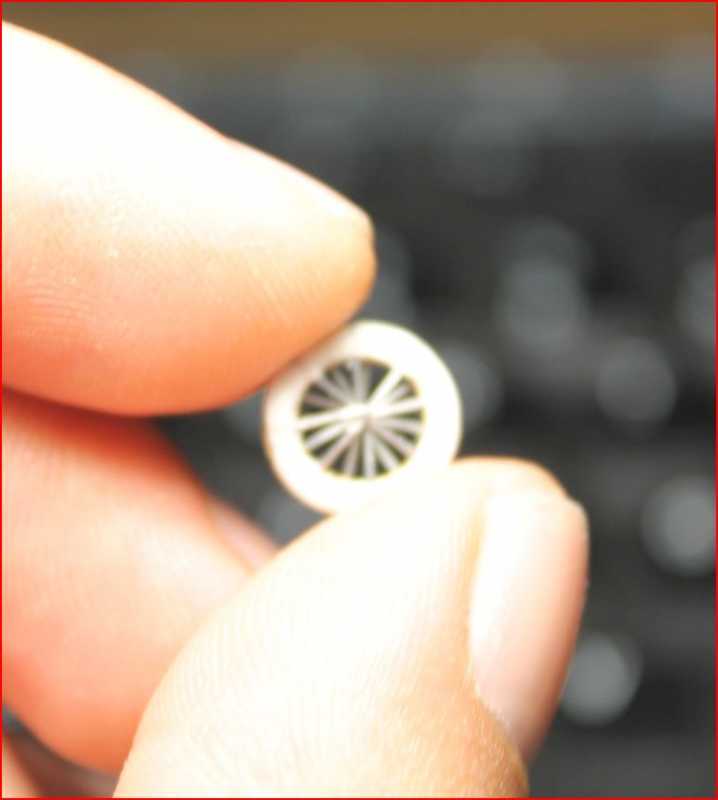
The spoked wheels - bit blurry apologies


h11df3ab.JPG


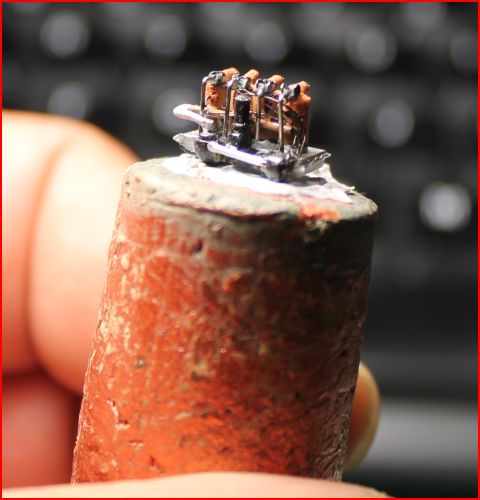
Found out this thing had two radiators on each side of the cockpit - hardly visible in the pics I had but they were there. PE leftovers came in handy, the verticals are copper wire from a sacrificed CAT5 network cable
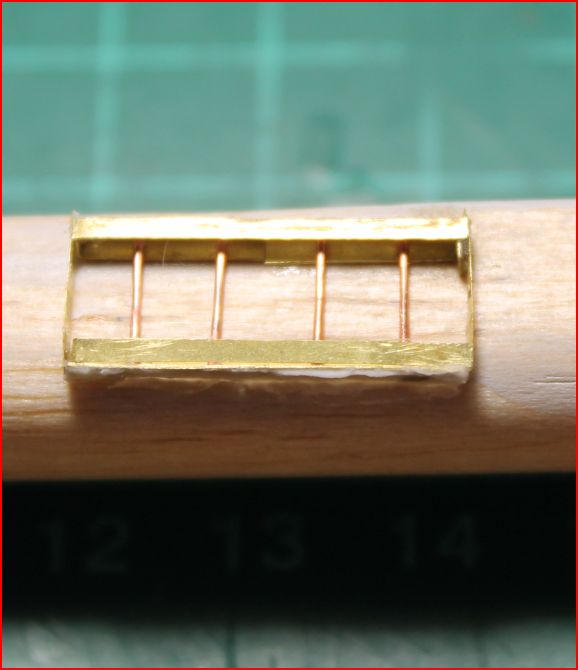
 :lol:


h4b3367d.JPG
 
Thanks James :notworthy

Currently the fuselage is of a shade that I am not happy with so will have to correct it :sick:
There are no color photos of the plane - records indicate it was plywood in mahogany color, pretty much like a piece of expensive furniture :blink
Photos coming soon
 
Try painting it Tamiya sail colour. Then used Burnt Sienna artist oil paint and dab some on. Then keep drawing back with a wider brush until most of the oil paint is gone. You will have to clean the brush periodically to unload the excess oil paint. After a while you get a nice redish brown look of wood. Raw Sienna is redder and you can add brown to it as well. Hope that helps
Thats how I got this look.

DSC03910.JPG


James
 
Thanks James,

Initially I painted the wings (fuselage wasn't ready then) with a mixture of raw umber and burnt sienna and I got it very close to how the seat looks in your photo (very nicely done there)but apparently it wasn't the right color.
Something closer to what apparently the original was in the pic below


hf620029.JPG


I tried adding a bit of carmine red to the original mix when doing the fuselage but I think it ended up being a bit too dark. On the small stabilizer wing at the rear initially done without the red, I used the same mix but more like a wash and I am a lot happier with that shade.

Cheers,
Laurence
 
I used black as primer, Vallejo Flesh as undercoat then the raw umber/burnt sienna that gave it a look very close to yours. It might be possible to use red as undercoat and then the raw umber / sienna mix. I'll give it a go see how it turns out.

Thanks for the suggestion :good:
 
Cant wait to see. I've used Sail colour, buff, German Dark Yellow as bases to change the final shade. On props I've used German yellow and red brown. That is quite a vibrant colour for an aircraft. Am watching with interest.
James
 
Thank you Sir, appreciate it. It did give me a bit of grief I must admit, but reasonably happy with the result. It's 2 centimetres long almost 1 cm wide, tried to capture as much as possible in there. The sparkplugs' wires do not really come visible in that photo as they are black.
One thing that surprised me was to find out that there was no exhaust :blink so I had to remove the one I put in to preserve the realism. That taught me a lesson ... :smack
 
Back
Top