• Modelers Alliance has updated the forum software on our website. We have migrated all post, content and user accounts but we could not migrate the passwords.
    This requires that you manually reset your password.
    Please click here, http://modelersalliance.org/forums/login to go to logon page and use the "Forgot your Password" option.

1/48 Scale Bf-109G-6

Skinny_Mike

Well-known member
Hello everyone!

I am going to jump into this group build with another Bf-109G-6! This is one of those builds where you find a set of markings that you just have to build, and why not get a campaign ribbon out of it!

Between this build, my prototype FW-190, the MIG-21 I started and the F-15 I’ll be starting in a couple of days, my bench is getting busy! And then there a two more campaigns starting at the end of January! Geez – I better get moving!

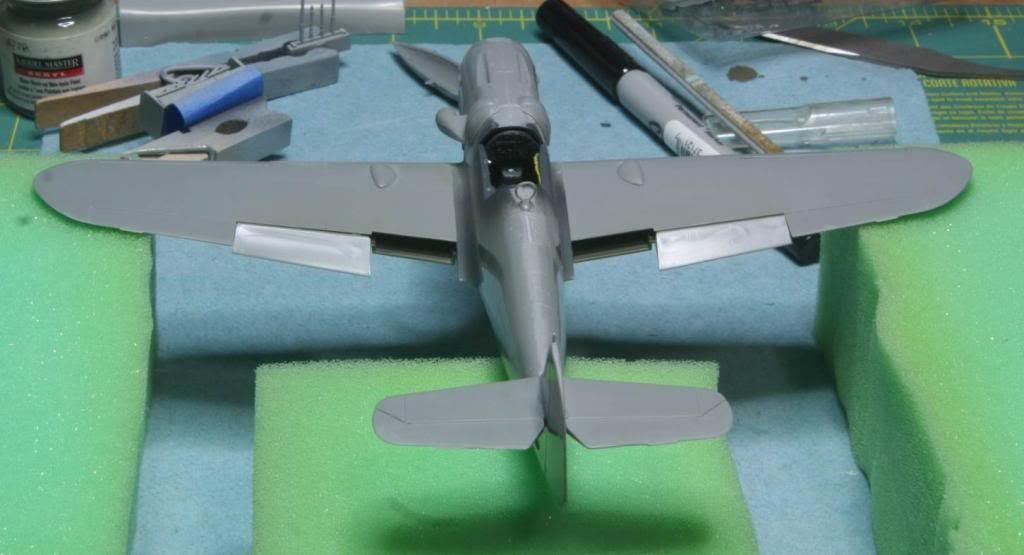
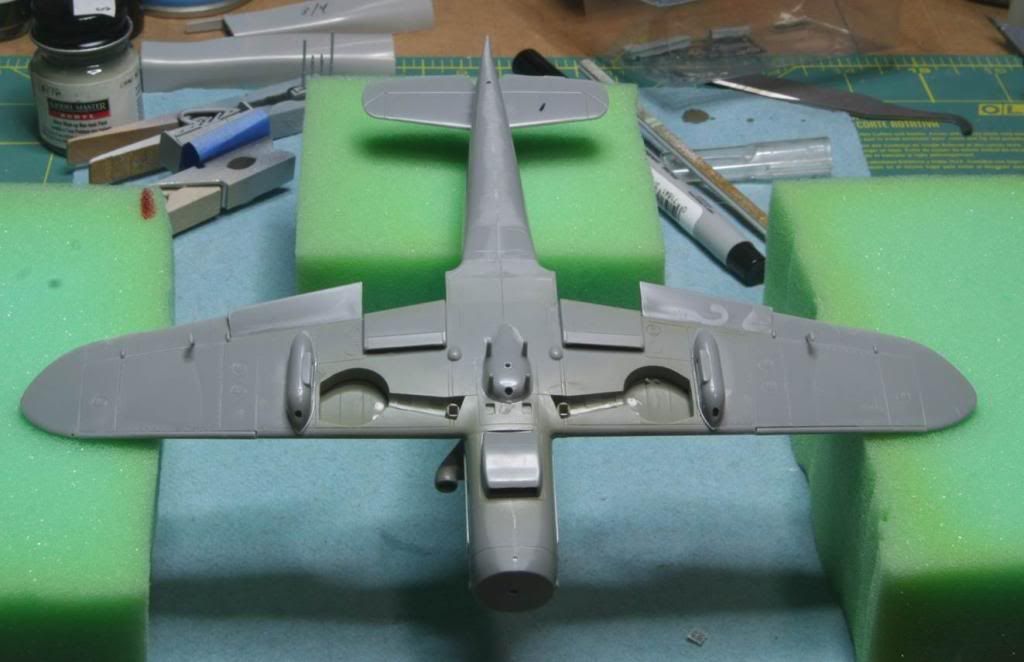
Here is the requisite entry photo:

Photo11_zpsa393da80.png


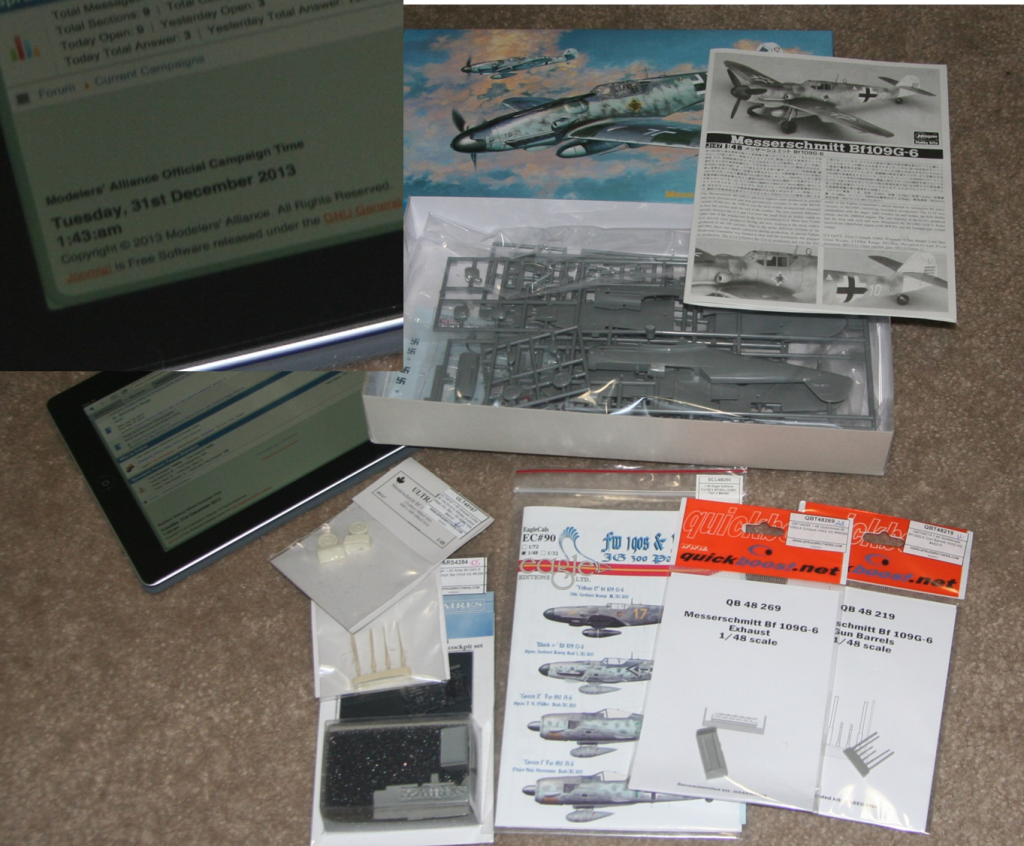
And the vital stats:

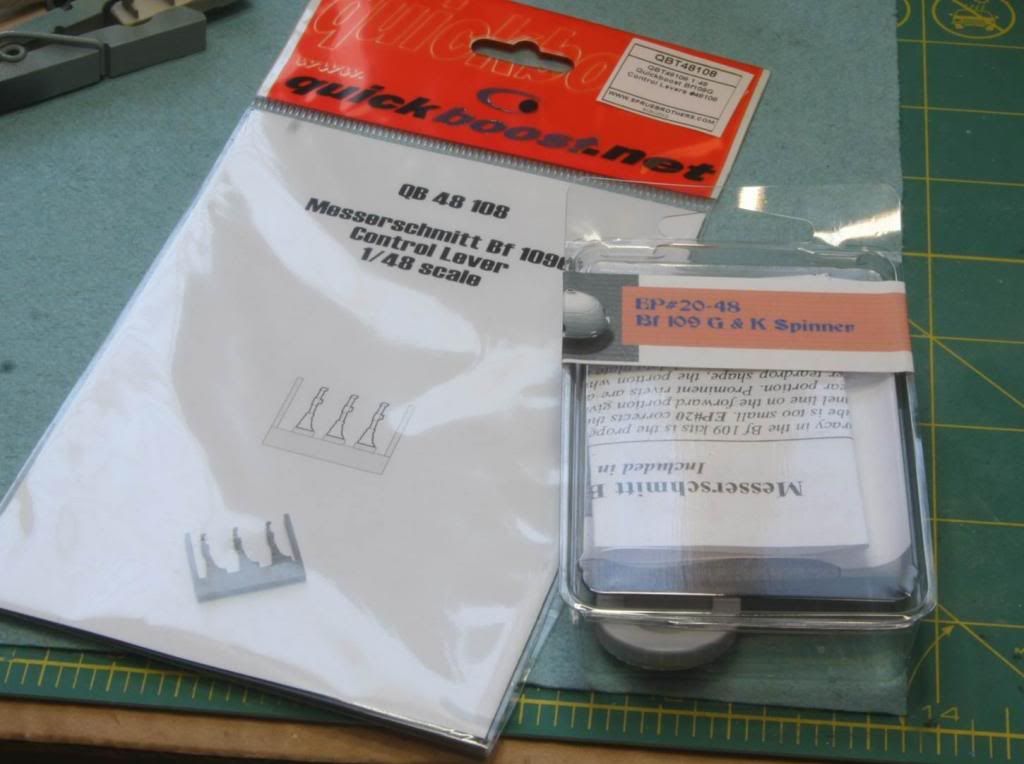
Hasegawa 1/48 scale Bf109G-6
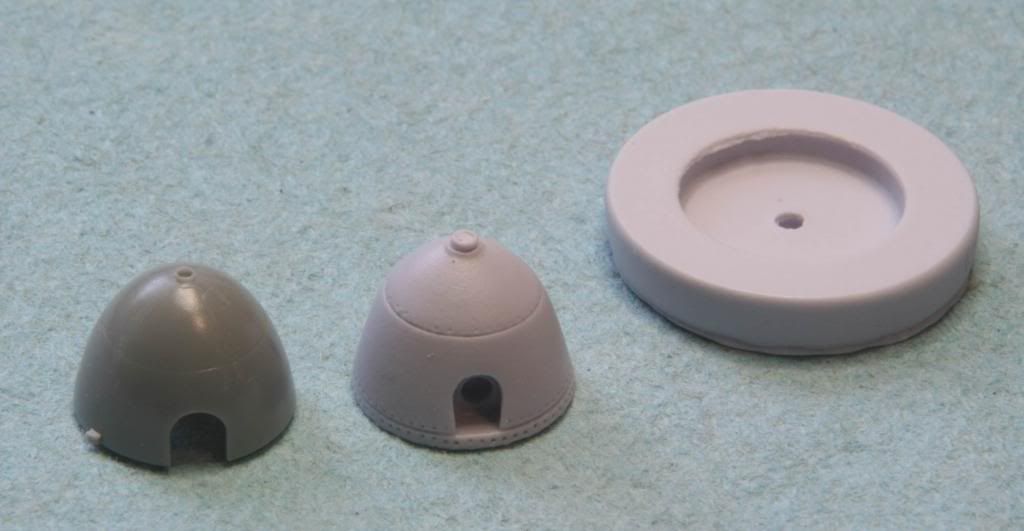
Aires Bf109G-6 Early Cockpit
Ultracast Bf109G-6 wheels
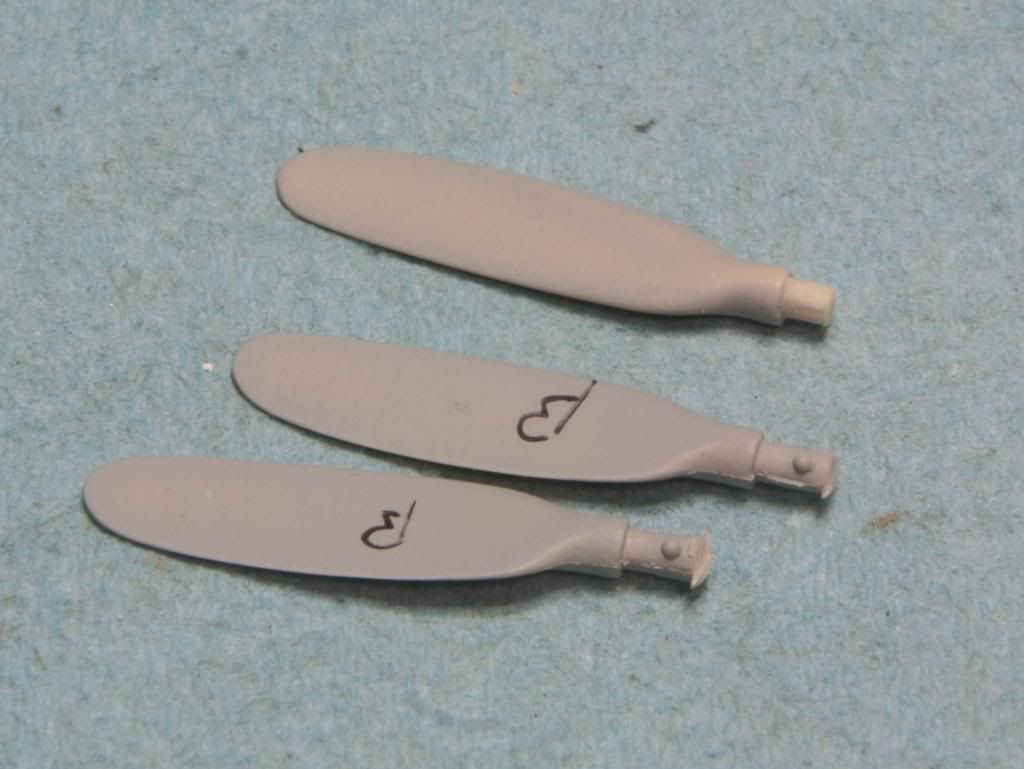
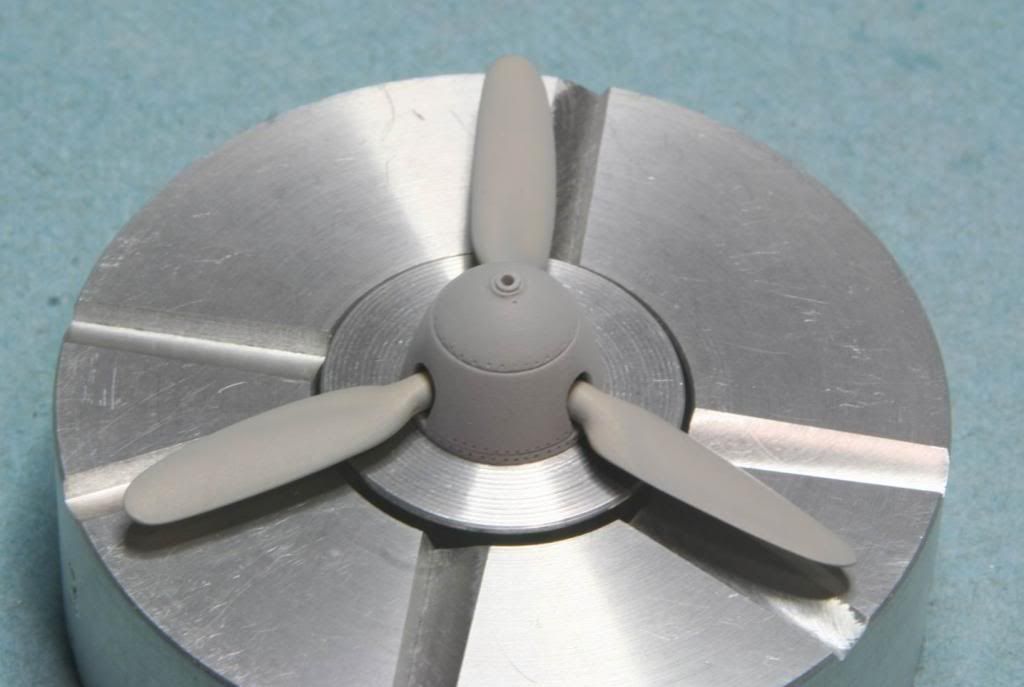
Ultracast Wide Blade Props
Quickboost Bf109G-6 Exhaust
Quickboost Bf109G-6 Gun Barrels
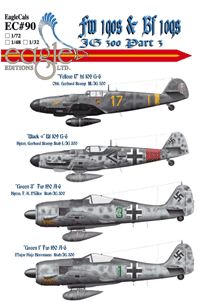
EagleCal Decals for JG300

Work hasen’t started yet, but I still have another week off from work, so there should be a flurry of activity in the near future!

See you all soon!
Mike
 
All good stuff. Which JG300 machine are you planning to build ?? - I know Jerry covered a few.

Ian
 
I’m back with a little bit of progress on the G-6.

First off all the resin got a bath and was laid out to dry.

Post21_zpsecb5c76f.jpg


Then the Aires cockpit was assembled. I had a little trouble with the wheels, but in the end I got it to all assemble nicely. I’ll add the seat belts after detail painting. I’m still not sure if I am going to use the etched ones from the Aires set or if I am going to use some Eduard colored photo etched ones.

Post22_zps42a5e308.jpg


After assembly, everything was primed and painted. I primed with Alclad gray primer so I could use the airbrush instead of my usual Tamiya primer from the rattle can. Then I painted everything Tamiya XF-63 German Gray, my RLM 66 or choice right now.

Post23_zps68c238a6.jpg


I also added assembled the fuselage haves and added the rear bulkhead from the Aires cockpit. Looks pretty good so far.

Post24_zpsd7d69f38.jpg


Next step is the detail painting and the assembly of the cockpit. I’m moving right along, although the work bench sure is getting crowded these days!

Hey Ian – the plan is to do yellow 17…

post25_zps9ef270f0.gif


Thanks for following along!
Mike
 
Hello everyone! Here is some progress I’ve made in the last week.

I finished painting the cockpit. Took some pictures too – unfortunately I had the incorrect settings on the camera and all I got was a black screen! Oops! :blush: 
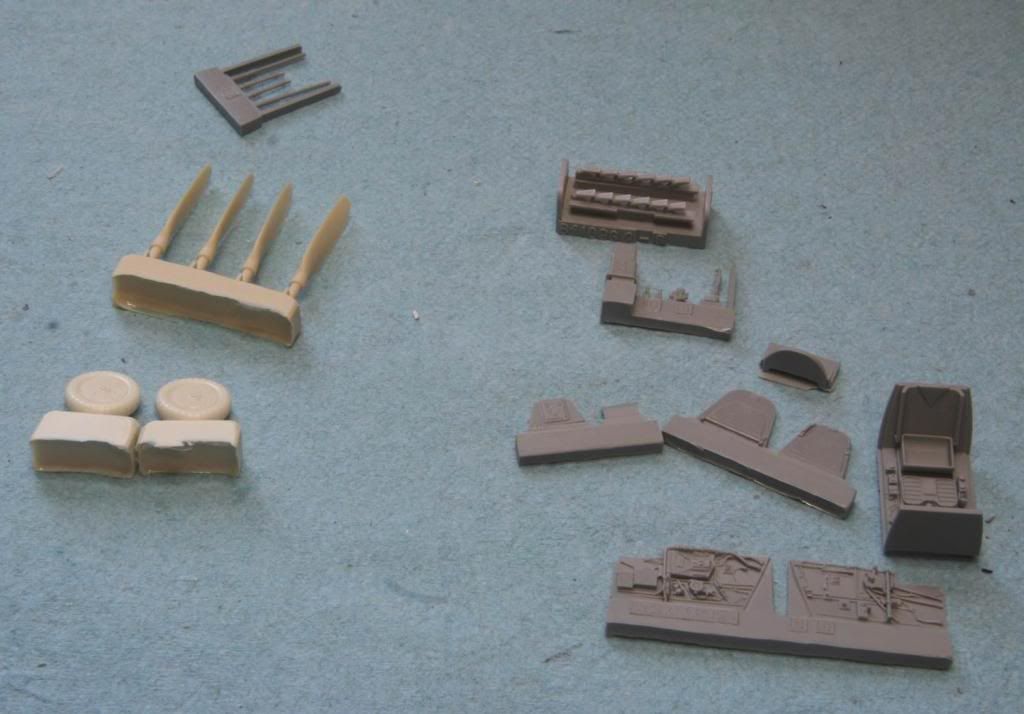
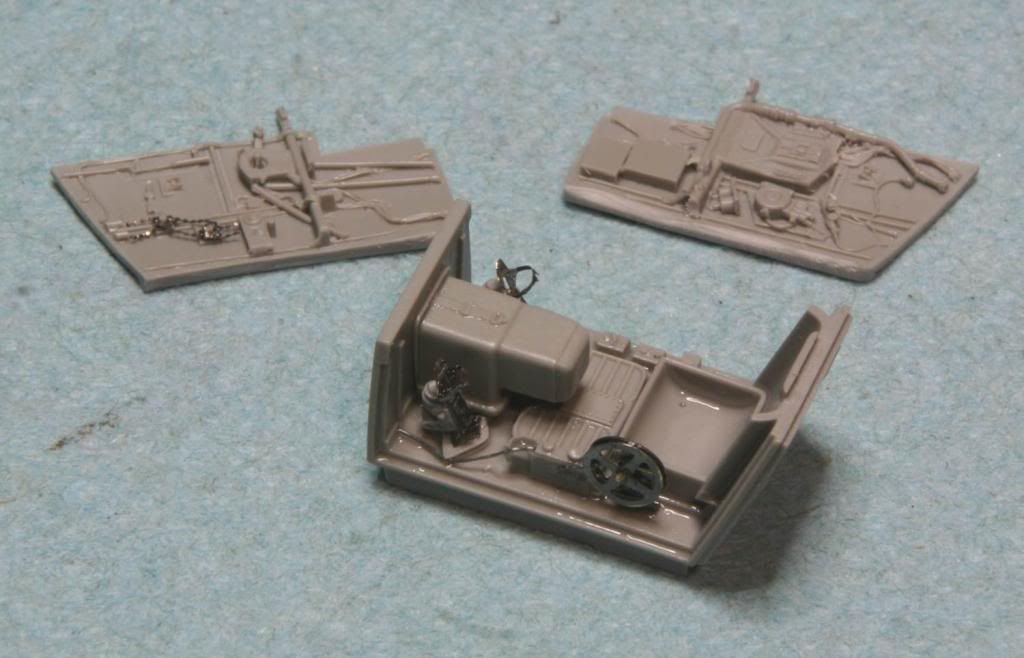
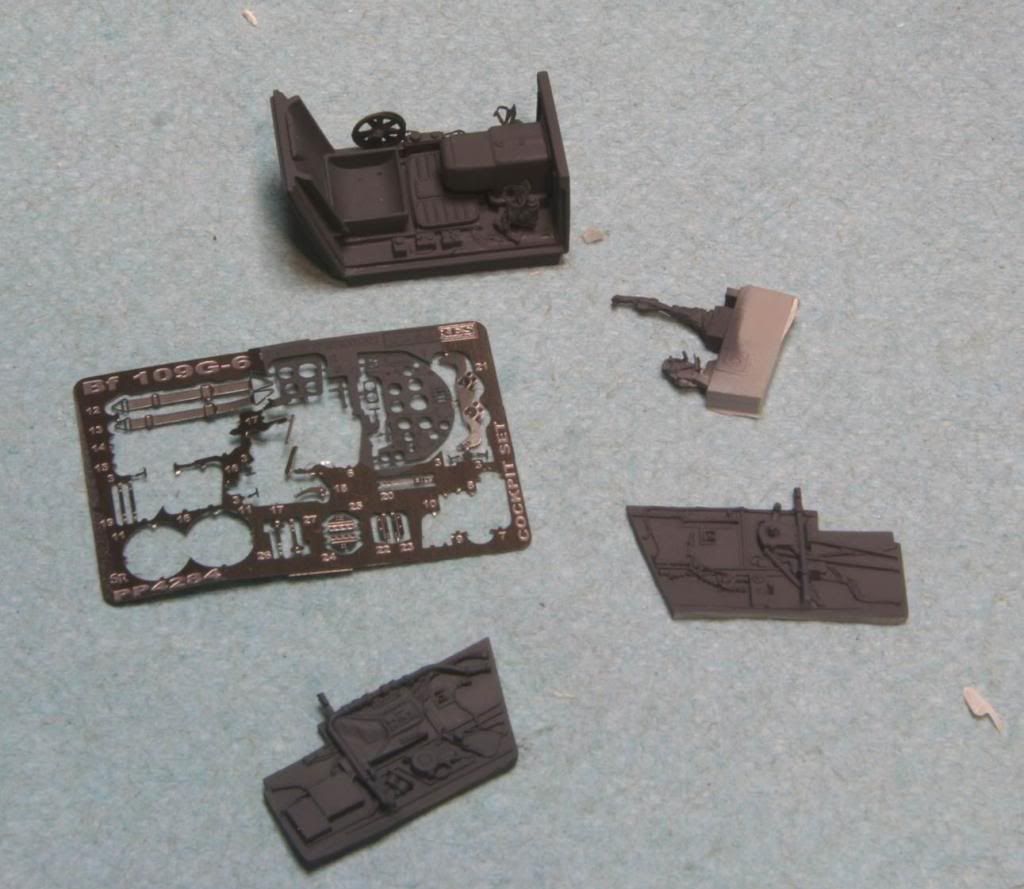
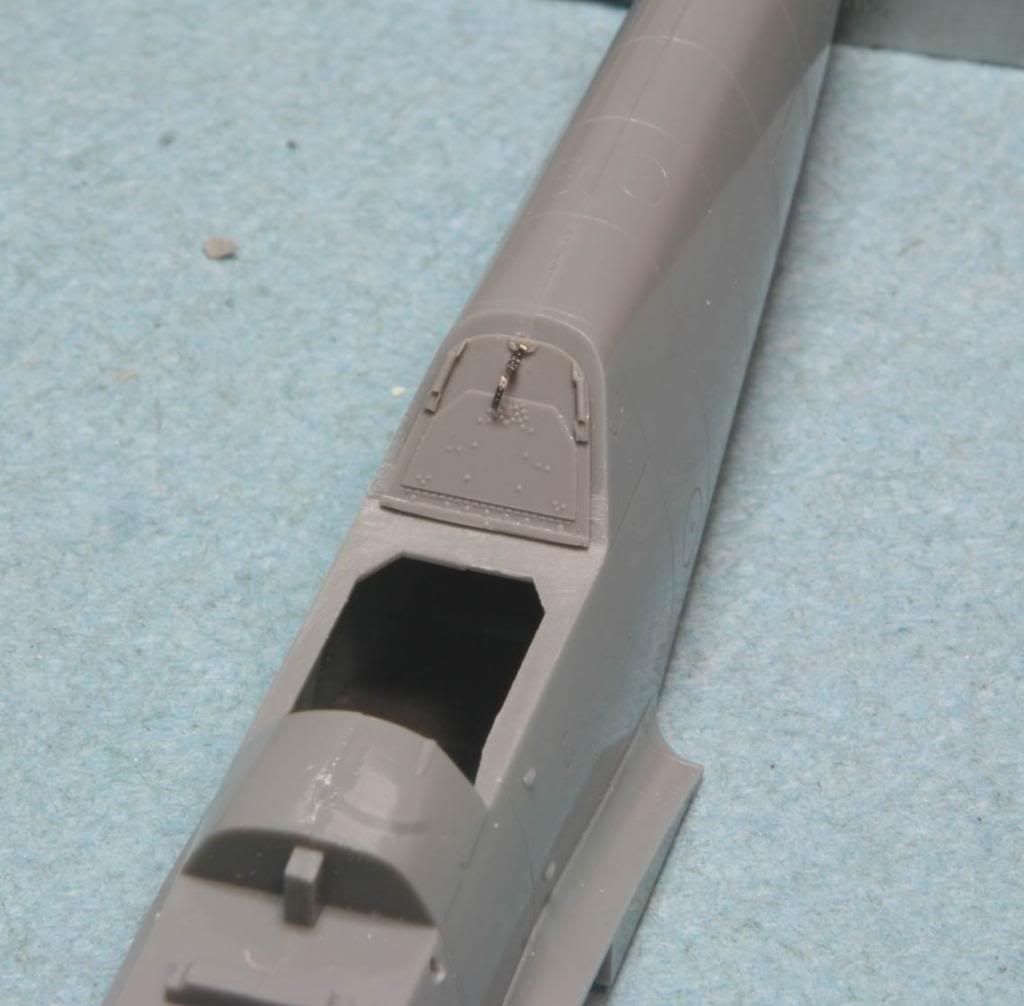
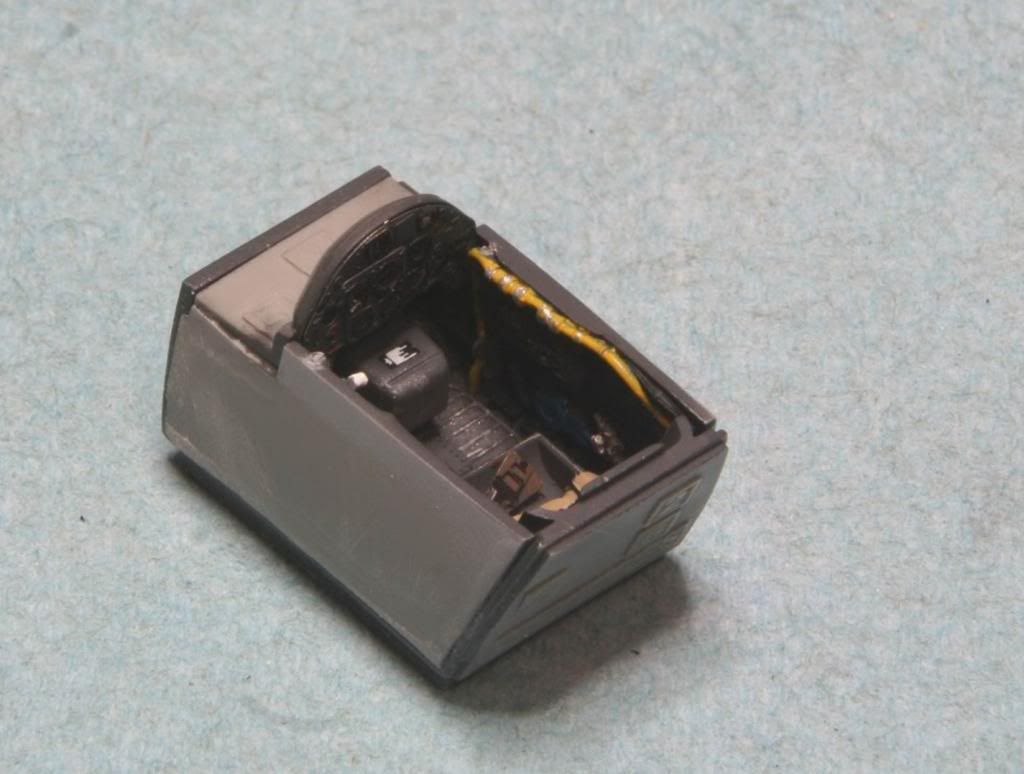
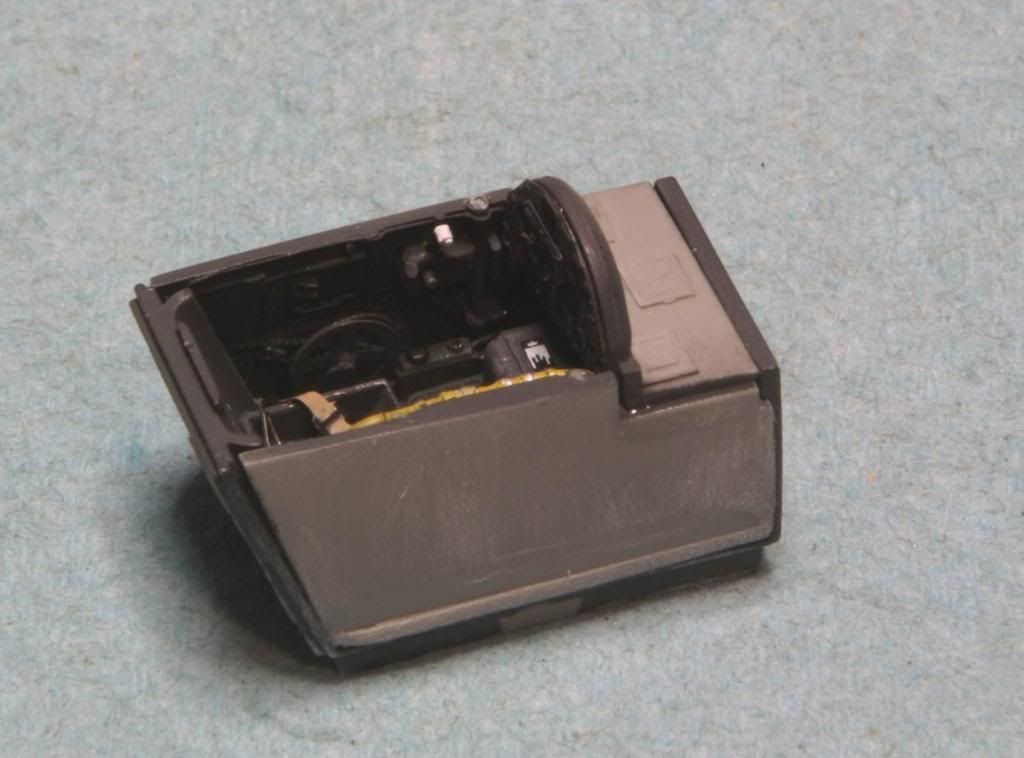
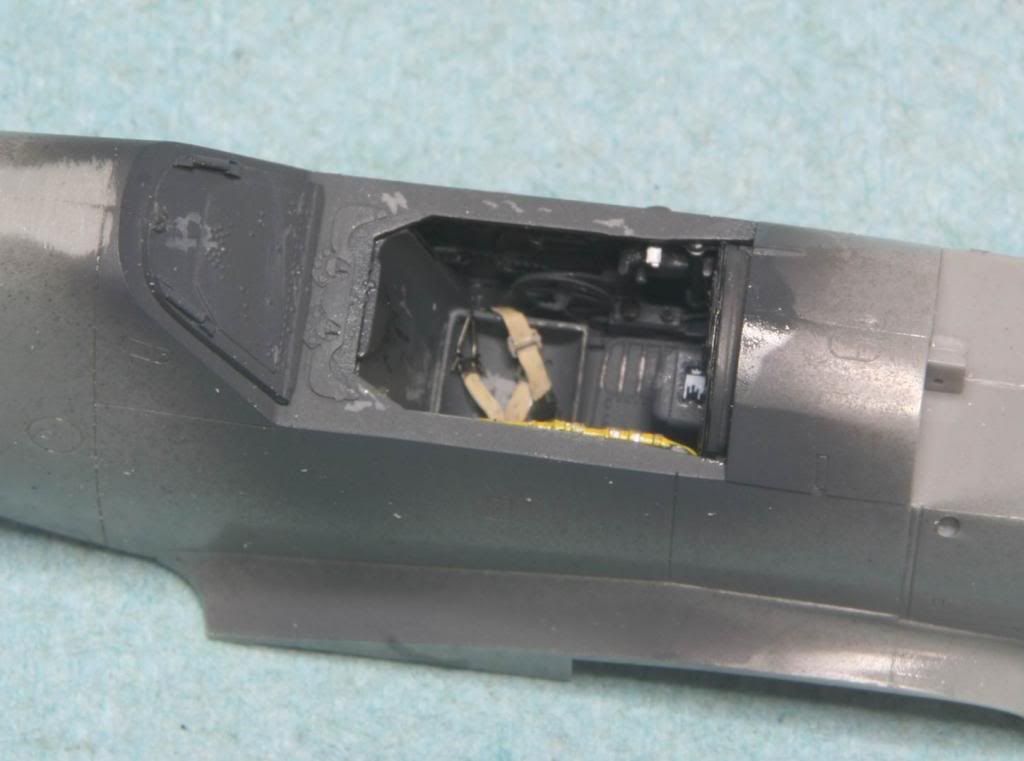
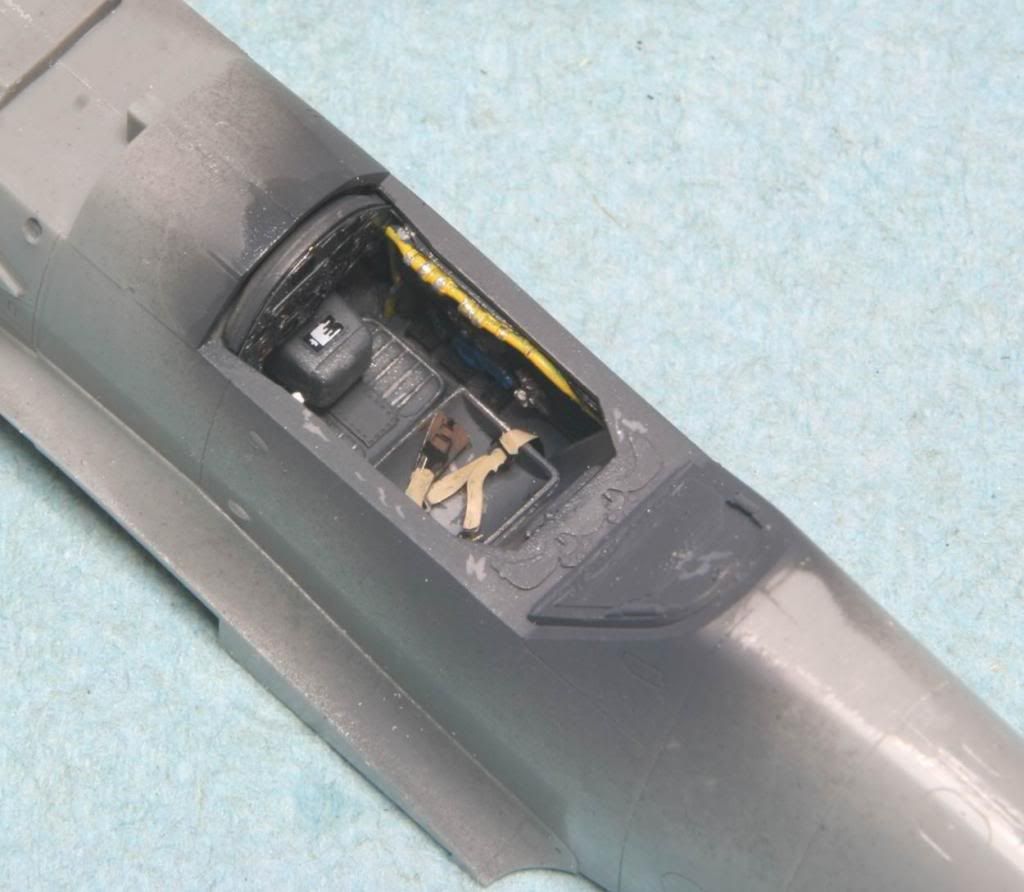
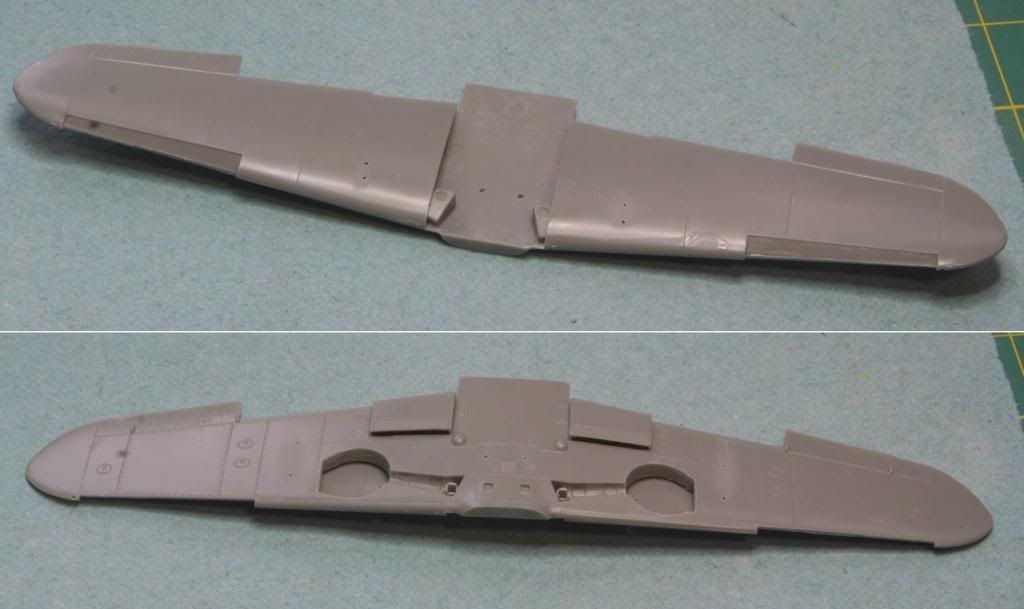
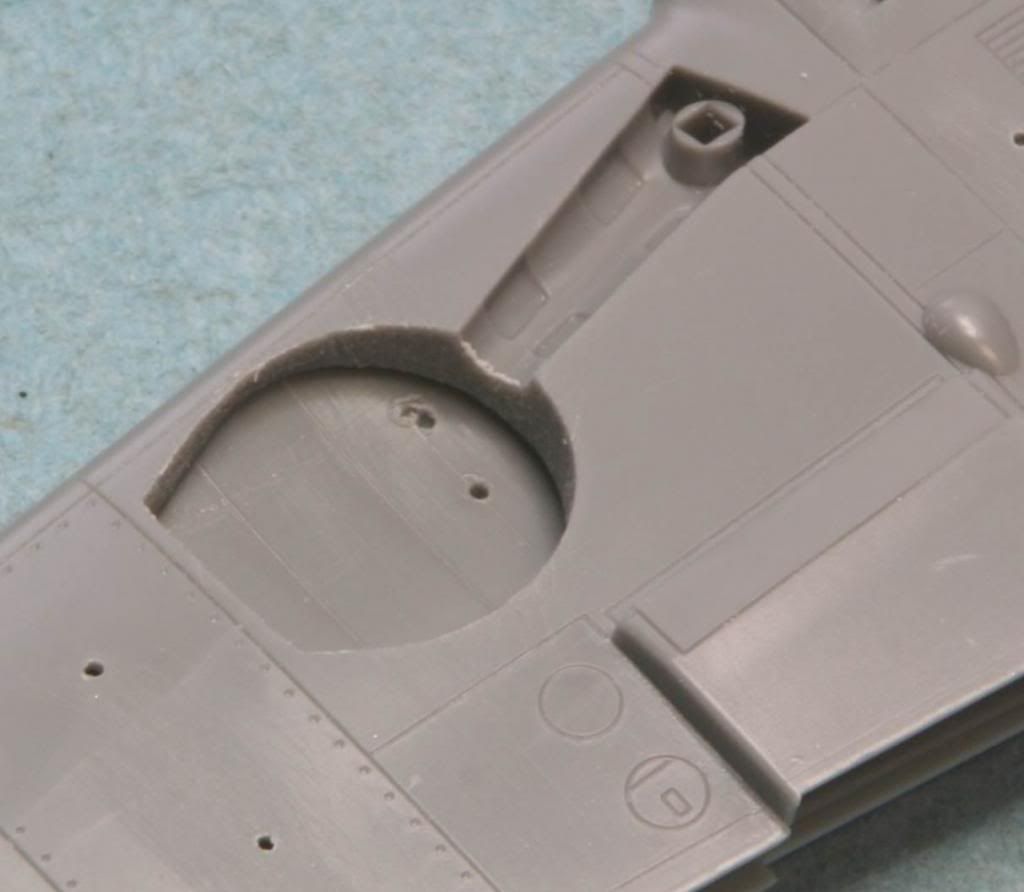
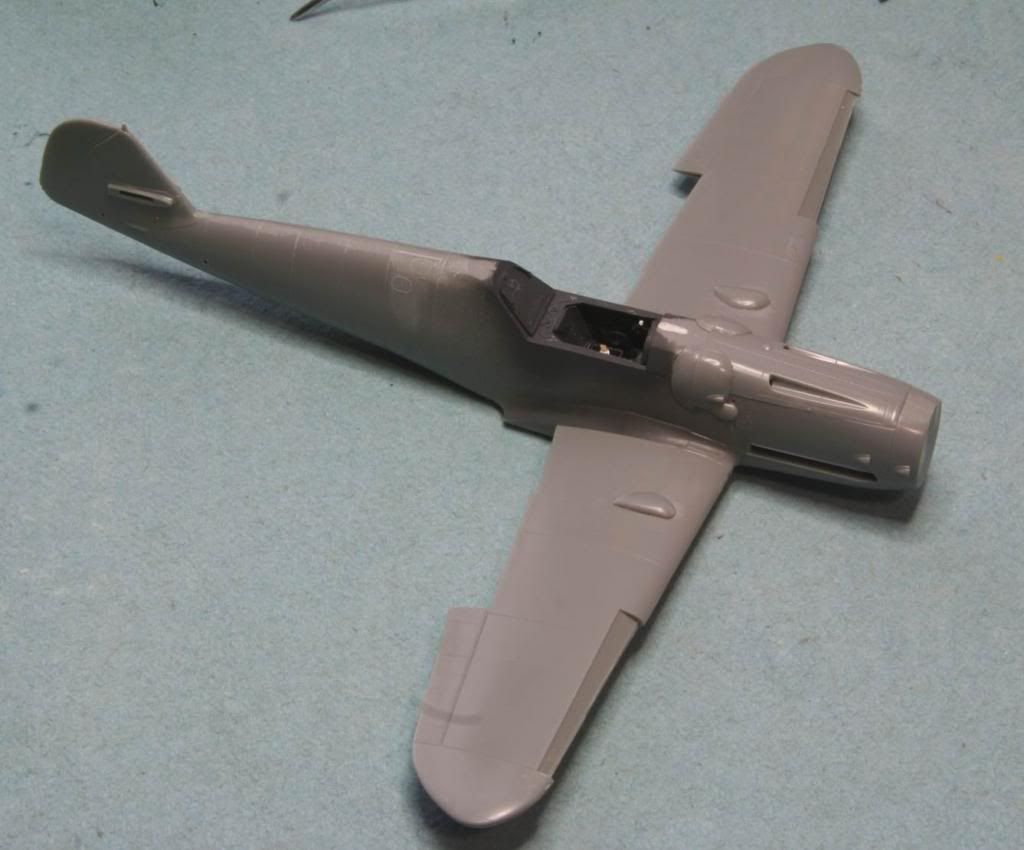
Well trust me – it looks great! Here are some of the pictures of the assembled cockpit though…

Post31_zps7c25bc5d.jpg


Post32_zpscdaa4d04.jpg


I used Tamiya XF-63 for the base coat, dry brushed with Vallejo German Gray. Details were painted with a variety of acrylics and I used a light gray and a soft pencil for some chipping and scuffing in the pit. I also added some Airscale German Cockpit Placards. I think they added that little missing touch. All kidding aside, it turned out to be one of the better cockpits I’ve finished in a while. Sorry I screwed up the photos. Here is the cockpit installed…

Post33_zps00ca4338.jpg


Post34_zps92c0778e.jpg


You might have noticed that the control stick is missing. So I had it all painted up and while I was removing the stick from the resin carrier block…. well, I heard a crack and then what sounded like the part hitting the wall! After an extensive search, filled with much cursing, I gave up and ordered a set of the Quickboost Bf-109G control sticks. They’ll be here on Wednesday. Ugh. :facepalm

Next I moved onto the wings. First step was to paint the radiators in Tamiya Flat Aluminum and I brush painted the front on the housing/intakes in RLM 02, and installed the radiators. Next I opened all the holes up for the extra lumps and bumps that are missing. Once that was done, I assemble the wing halves.

Post35_zpsbe8beb3e.jpg


Then I noticed something. The holes I drilled for the upper wing blisters, are right in the gear wells! Oops. This would have been much easier to fix before the wing was together. :bang head

Post36_zpsee2c0c30.jpg


So I added the blisters to the top of the wing and then filled the holes with some putty and smoothed it out with a cotton bud dipped in some rubbing alcohol. We’ll see how it turned out once I get some paint in the wells. I feel like that was a bit of a boneheaded mistake. Sometimes I just move too quickly. Oh well, I’ll get it fixed and keep moving.

Next step was to attach the wings to the fuselage and then I added the gun cowl and the blisters to the nose. I also cleaned up all the seams and filled in some extra panels for a different version -109. I didn’t need to use any putty on the wing root, which was nice. I’ve use a little bit of filler here and there, but nothing too bad.

Post37_zpsa32a96a0.jpg


Post38_zps3de79801.jpg


I’ve started putting together the rest of the little bits. I hope to get all the RLM 02 down tomorrow and the remaining pieces all assembled. If things go well, I’ll have this guy in the new and improved painting station next weekend. I am still trying to decide which paints to use for this one. I have the RLM 74/75 combo in a few different brands; Model Master, Gunze Mr. Color, White Ensign Colorcoats and Xtracolor. Anyone have any thoughts on that dilemma? :hmmm

Thanks for watching guys! See you all soon!
Mike
 
I'm one of those luddites who still cling to (and love) enamel paints so my first choice will always be Xtracolour and/or White Ensign. Big plus for Xtra's is the high gloss finish which takes a time to dry thoroughly (you have been warned), but is essentially bulletproof when it's cured. Usually highly accurate and well researched colours aswell. White ensign also very accurate and dry to a silky smooth 'eggshell' finish so will need a coat of Future/Klear.

HTH

Ian
 
I"m kinda partial to the MM and Vallejo brands mainly because they are easy for me to get.

Looking good. :popcorn
 
That's really some nice work on the cockpit! Looking forward to the rest of this build...you can never have enough Messerschmitts. :ro:


Matrixone
 
Hello all! Back with a little bit of progress.

Thanks everyone for the encouragement and the advice. I think I am going to use the Xtracolor paints for this build. I used them once before and got some orange peel effect in my finish that I wasn’t pleased with, but I’m going to try again and we’ll see how they do.

And now – on to the build!

First off, some new toys arrived in the mail. My replacement control stick and an Eagle Editions corrected spinner. :yipee More on that in a minute.

Post41_zps78442f72.jpg


I finished putting the remaining parts on the airframe, including the flaps, the tail, counter weights, etc. I decided to leave the split radiator flaps off until after painting, just for the ease of keeping the insides RLM02. I need to finish up the cockpit by adding the control stick and the gun sight and then I’ll add the canopy parts and mask up everything for paint.

Post42_zpsacdb76c7.jpg


Post43_zps50447792.jpg


Next I moved onto the propeller. The eagle editions spinner comes with the spinner and a jig for drilling out the spinner. The instructions include the correct drill sizes to use so that you can mount the propeller on the Hasegawa propeller shaft. This is the shaft that you are supposed to have installed when you put the fuselage halves together. Yo may have noticed that it is missing on my plane - I have forgot to install that part..........again. :facepalm Here is a comparison between the kit spinner and the Eagle Editions one. Hmmmm, which one shall I use?

Post44_zps4b5a547b.jpg


The drill that the instructions tell you to use, fit rather loosely in the jig and my first attempt ended up with a hole that was off center. I decided to use a drill slightly larger then the guide hole on the jig which helped center everything. I ended up with a 2mm hole. Then I inserted a small piece of 2mm plastic rod to serve as a prop shaft and give a positive location point for installing the propeller. Once that was done I drilled out the blast tube as directed and sanded it down to a length I was happy with. The instructions tell you that the blast tube is intentionally too long and that you should shorten it using reference photos as I guide. Overall I really like this piece, the detail is amazing, and correct, plus the instructions are very complete. Something I cannot say for most aftermarket stuff. I also picket up one of these in 1/32 scale for my Revell Bf-109G-6, but that kit is still in the "collecting aftermarket" stage.

The spinner is designed to work with either the kit propeller blades or aftermarket ones designed to fit the kit spinner, with some modification. The mounting shaft for each propeller needs to be shortened slightly, and the instructions tell you the length you are shooting for. I used the Quickboost corrected propeller blades, designed as a direct replacement of the kit parts. And modified them as directed. The top blade is modified and the two bottom ones are not.

Post45_zpse2d22ac4.jpg


Then I used my UMM propeller tool to assemble the propeller. In the end I felt like there was too much pitch on the propeller blades so I twisted them back closer to what Hasegawa intended. Here is the end result.

Post46_zps353f1632.jpg


After that it was given a shot of MM RLM70. I'll get some weathering on it as I move along.

Post47_zps387dace7.jpg


That’s where I am as of this weekend. I ordered a metal pitot tube (always braking off the plastic ones! :bang head ) and once it arrives I’ll get that on and the canopy, and we'll hit the paint booth.

Thanks for following along! See you all soon.
Mike
:snoopy
 
Great work Mike - and my 'learning point' for today... Quickboost do replacement blades for the 109G... I didn't know that, so off to Hannants I go to order some for m'self !!

Ian
 
I like that prop tool, should have grabbed one when we saw UMM at Amps last year. :bang head

Looking good so far :popcorn
 
Back
Top