• Modelers Alliance has updated the forum software on our website. We have migrated all post, content and user accounts but we could not migrate the passwords.
    This requires that you manually reset your password.
    Please click here, http://modelersalliance.org/forums/login to go to logon page and use the "Forgot your Password" option.

Messerschmitts X 3

No, I have not started this little Revell Me 262 yet but I went ahead and opened the bag to examine the parts.
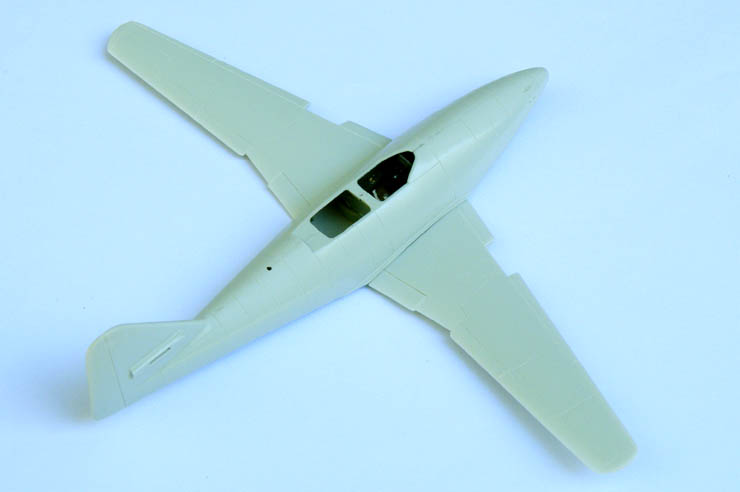
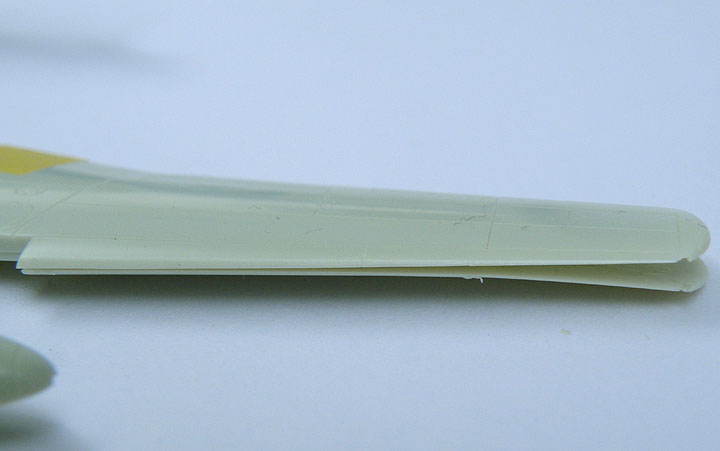
What I found was not good, lots of flash on various parts and the lower wing was warped. I have had this kit for a long time and kept it at room temperature so I can't explain why the wing was as warped as it was.

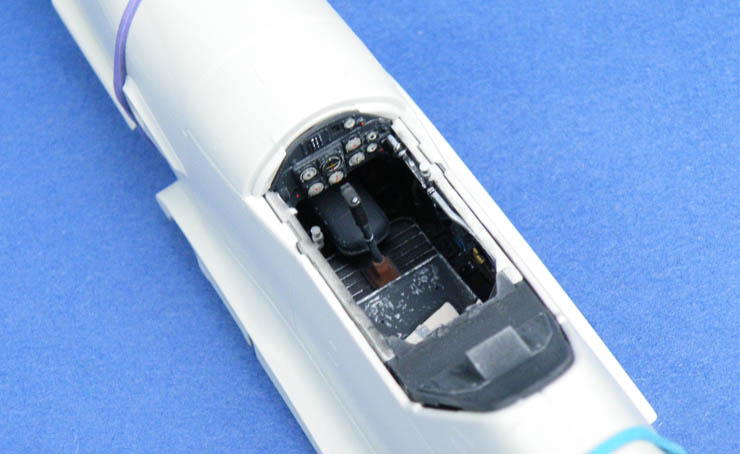
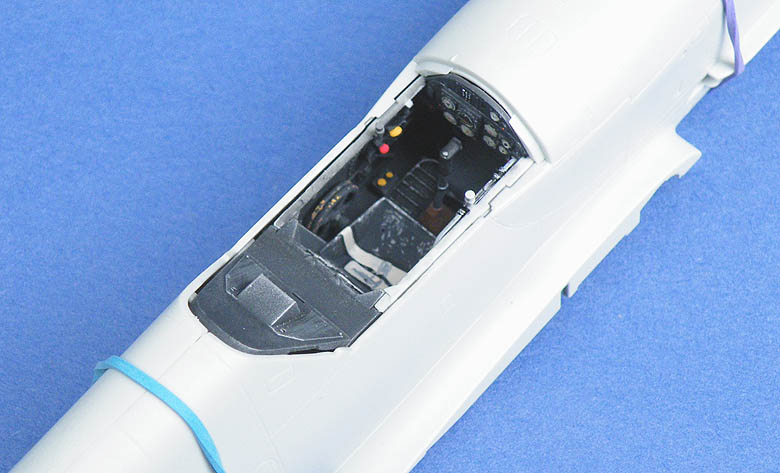
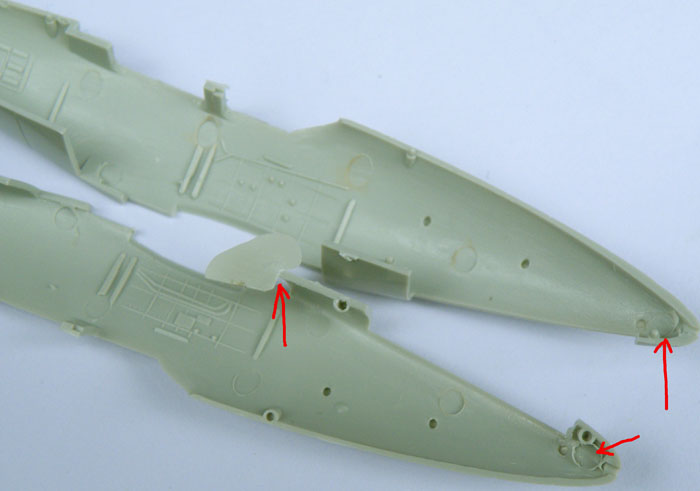
Below are some pictures to show some of the problems with this kit.


he899ecf.JPG


h0ade27c.JPG


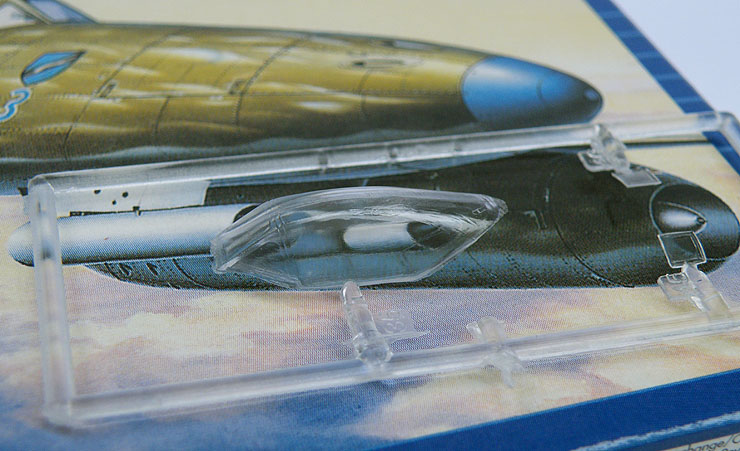
The canopy is not very clear and is slightly milky looking.
h38a3227.JPG


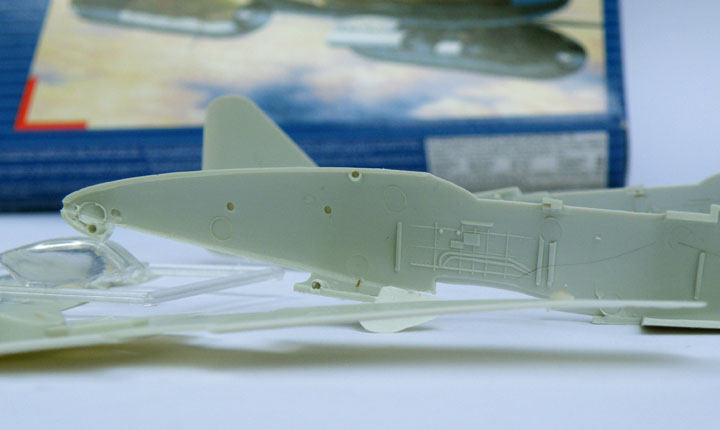
The arrows point to where some of the flash was (or still is), some of it had already been removed before these pictures were taken.
hdba748d.JPG


I had wanted to have this kit be a quick build and something to work on while parts or paint dries on the Erla Bf 109G-10...this will not be a quick build. :facepalm

Matrixone
 
Yeah Les those underwing panels can take a warp set just from setting in the box with some pressure on them. When you go to take the warp out use a thermometer in the hot water and only heat it to 180-185 F. I wouldn't go much hotter as then it can go toast in a hurry. The 180 temp is good as you start out with a short dip of a few seconds (say 5) and then dip and hold it for slightly longer amounts of time until it takes a new set. A clock with a second hand is helpful. The 180 temps are such that you can handle the part by hand. The water will be hot and you won't want to put your hands in it, but the part will not be too hot to handle.

I have also had some of the warp come back, so it is a good idea to get it slightly the "other" way as it will tend to "spring" back over a few days. I had a lot of practice with my Me323 kit. :bang head :bang head :facepalm :facepalm
 
Thanks for looking in Luiz and Paul!

Paul,
The wing warp is not too big of a problem since the plastic is so thin it should be easy to mend.
A little over a year ago I built the Revell what-if version of the Me 262 (the Me P1109 Heavy Armor kit) and it uses the same sprues for the wings as with the Me 262A-1a kit and they were near perfect with no signs of flash or warps on them, I expected this Me 262A-1a kit to be the same since it was produced not too long after the kit was introduced to the market and the molds should have still been fresh and in good condition. Who knows, maybe my kit was produced late on a Friday afternoon when everybody was thinking about the weekend. :idonno

Matrixone
 
Okay, I have started on a couple of the Messerschmitts, the Bf 109G-10 Erla and the little 1/72 scale Me 262.


The Bf 109G-10 'Erla' looks to be a really nice kit with some nice detail of the cockpit. The only bad point here is the decals for the IP have white instrument faces and they should be black. It would appear the same person who designed the Meng Me 163 IP decal found work with Revell and made the same mistake on the G-10. With all the hundreds of photographs and surviving examples of instruments used in Luftwaffe aircraft I have yet to see one with light colored instrument faces so where did Revell of Germany get this idea from? :idonno

I went with some over the top paint chipping and wear marks on the paint inside the cockpit since I plan on building my model with the canopy closed, experience has taught me that little of the weathering will be seen through the canopy on the finished model.

h39e7105.JPG

The fuel line is painted in a custom mixed color that I call 'metall'. Most instructions in model kits would have you paint the fuel line yellow but I have seen some photographs of an unrestored Bf 109 cockpit with the fuel line in unpainted silver plus there is a black and white photograph of a late war Bf 109G in a scrap yard in Germany that clearly shows the fuel line in a metallic finish so I decided my model will have this same feature just to make this 109 different than all the others I have built.

hf00e101.JPG


And below is the Me 262 cockpit, since the kits canopy is not that clear not that much of what I painted will be seen later on. :( 
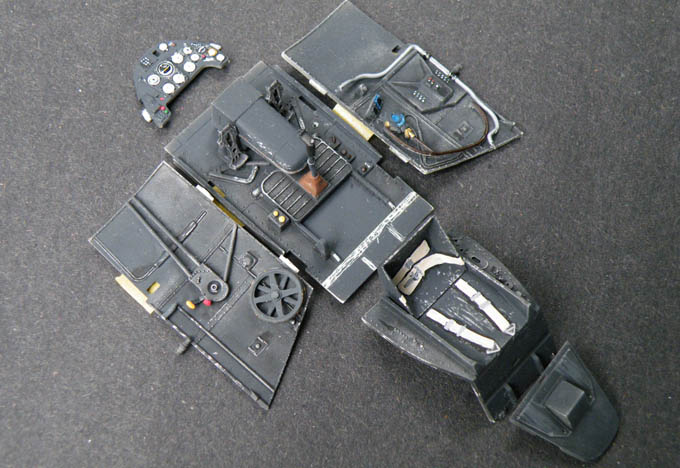
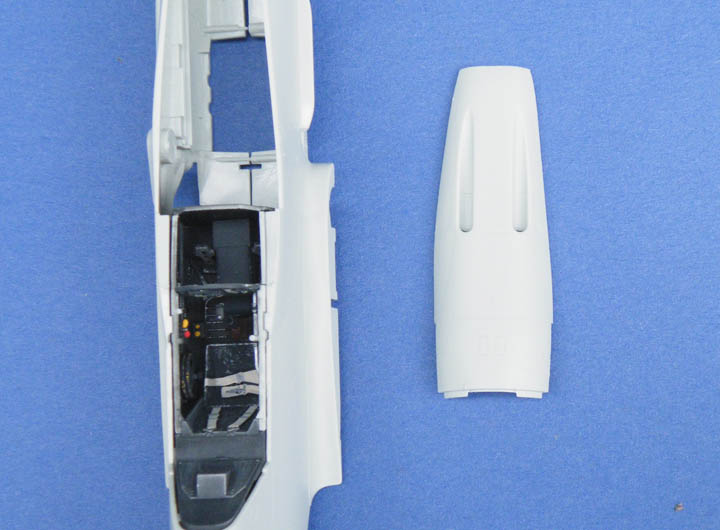
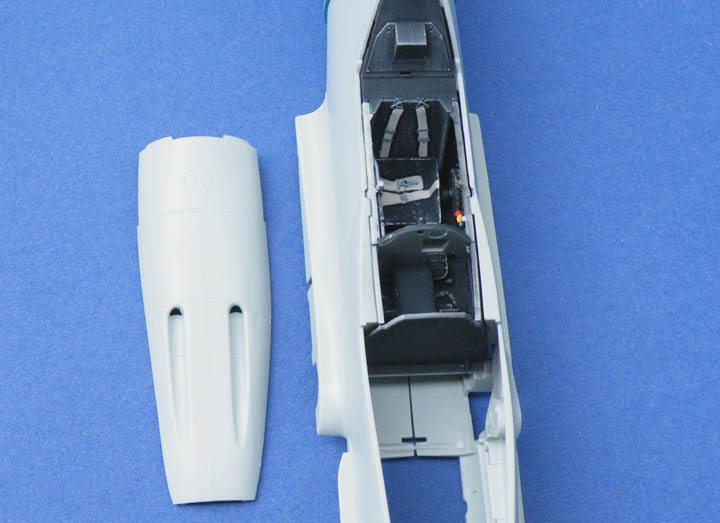
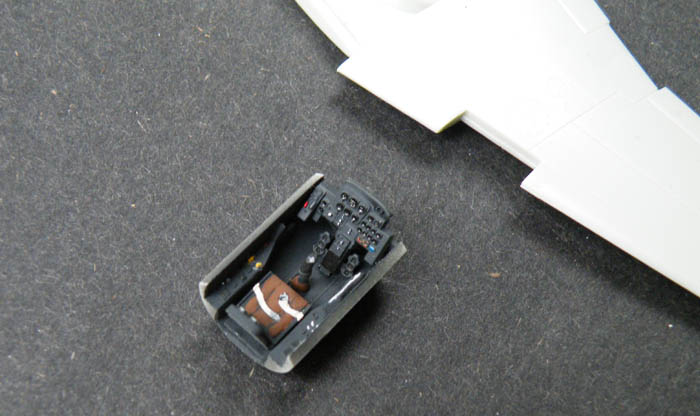
It would be madness to add anymore detail than this.
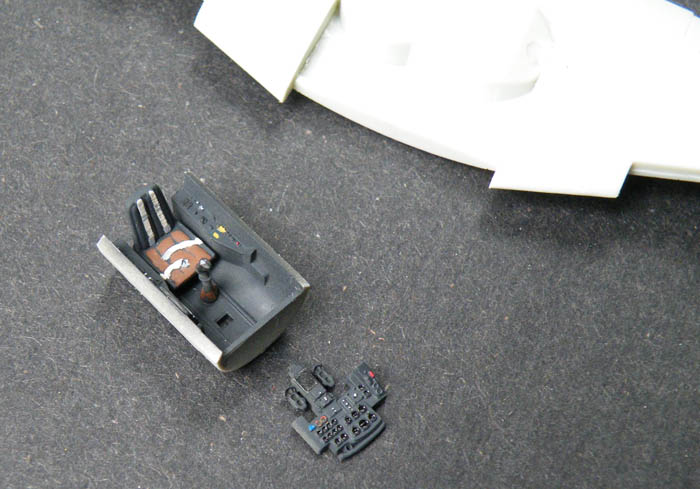
h09b7e2d.JPG


The IP is not yet glued in.
h17a3167.JPG


Matrixone
 
Great job Les, I agree with the fuel line color, I also saw some non-standard colors.

:popcorn

All the best!
Dusan.
 
Thanks for looking in Dusan!

I believe that most 109 fuel lines were painted yellow but towards the backend of the war some shortcuts in construction were unavoidable because of material shortages plus the reduction in the number of aircraft inspectors let minor things pass in order to get the machines to the front ASAP.
If the fuel line was not painted yellow as per the directives it would not prevent the aircraft from performing in combat so it was the type of thing that could be overlooked.
I remember reading about some of the difficulties Luftwaffe mechanics had when they received new aircraft from the factories late in the war, a lot of important things like the cockpit instruments and fuel pumps were not always installed correctly and the entire aircraft had to be checked and repairs made if needed before handing the aircraft over for operations...not exactly a way to win a war! :blink

Matrixone
 
Thanks for the info Les. Recently I saw some inspirational pictures of a non-standard color finish on 109 airframe near the production line at Regensburg, so I can't wait to resume my work on 109s.... (...and to start some new projects :eek:hyeah )

All the best!
Dusan.
 
Thanks guys!

I hope to have more in-progress pictures Thursday, I just finished gluing the cockpit parts together and they will have to dry for a few hours.

I did dry fit the fuselage halves on the Bf 109G-10 and found some problems, the locating pins are a C hair too thick to fit into holes so I ended up drilling out all of the holes and tried the dry fitting again and it now fits together as it should...I hope the rest of the model is not like this. :S
On nearly all the finished builds of the Bf 109G-10'Erla' that I have seen it looks like there might be too much dihedral on the wings so I will sand down the top of the wing spar to hopefully reduce the dihedral a tiny amount.
Earlier today I had a wickedly stupid thought...why not build the Hasegawa Bf 109G-10 along side the Revell kit! :drool I already have a lot of my Bf 109 reference books out and nearby. :hmmm


Matrixone
 
Earlier today I had a wickedly stupid thought...why not build the Hasegawa Bf 109G-10 along side the Revell kit! :drool I already have a lot of my Bf 109 reference books out and nearby. :hmmm


Matrixone

Do you need a double dog dare?
 
Thanks for looking guys!

Bob, no dare needed here. Any excuse to build another 109 is good enough for me. :silly: I have had a couple Hasegawa G-10's in my stash for years and now is as good a time as any to build one. It will be a nice companion to the Revell kit.

The basic cockpit parts have been assembled and is seen here dry fitted to the fuselage.

h88b7b4a.JPG


h38e95a5.JPG


Below are a couple pictures of the gun cowl, I am impressed by the way Revell got the shape of this part correct...I know it looks like its deformed but that's how they were, IIRC some have said Hasegawa got this all wrong on their kit so its nice to see that Revell has done some research.

hd8f7e35.JPG


h8f807bb.JPG


Matrixone
 
Not much has been done on the G-10 the past few days but just this morning I used super glue to fill and smooth over any and all seam lines on the fuselage and leading and trailing edges of the wings of the Me 262.

h0685f34.JPG


h3052215.JPG


The wing is just dry fitted in the above pictures, the wing roots will get some Mr. Surfacer to fill the slight gaps there.
Before I join the wing to the fuselage I will be adding the engine pods to make it easier to fill and smooth any seam lines that might be present.

I was going to put the Me 262 in JG 7 markings but I found some little known KG(j)6 markings that look pretty cool and probably not already done in model form very much, I like to be original when I can. :cheer:

Matrixone
 
Back
Top