• Modelers Alliance has updated the forum software on our website. We have migrated all post, content and user accounts but we could not migrate the passwords.
    This requires that you manually reset your password.
    Please click here, http://modelersalliance.org/forums/login to go to logon page and use the "Forgot your Password" option.

Advance to Arnhem 1/16 scale

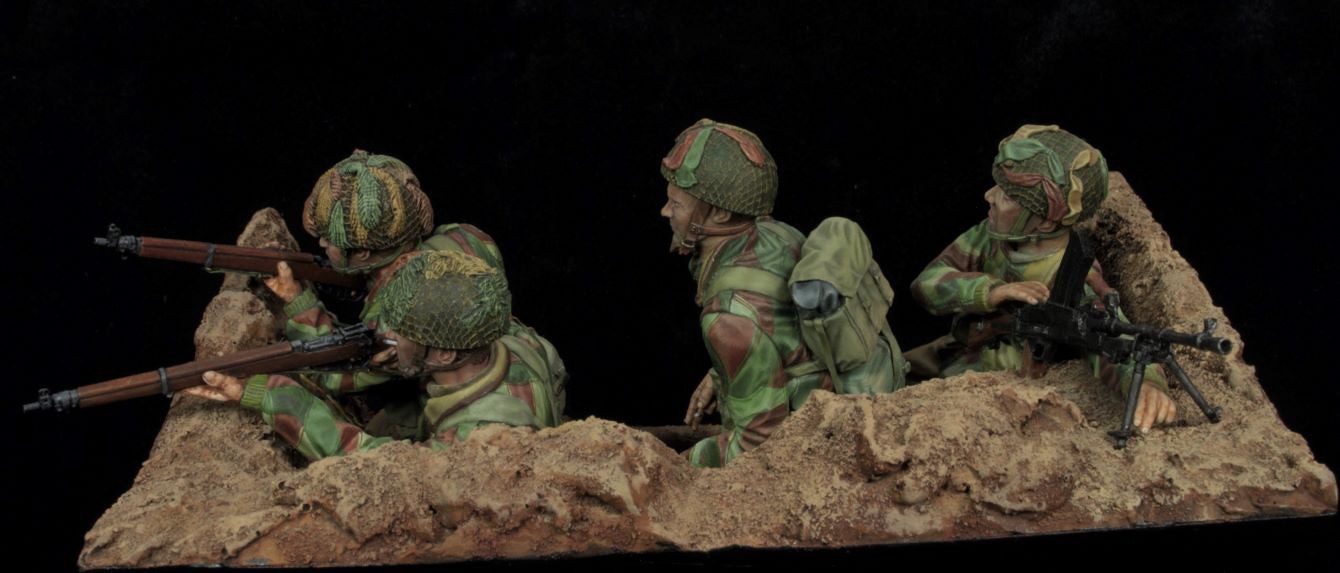
Major Update; Figure #2 and The Last Smock

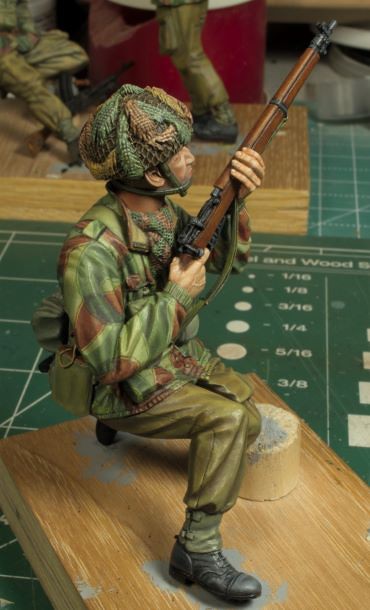
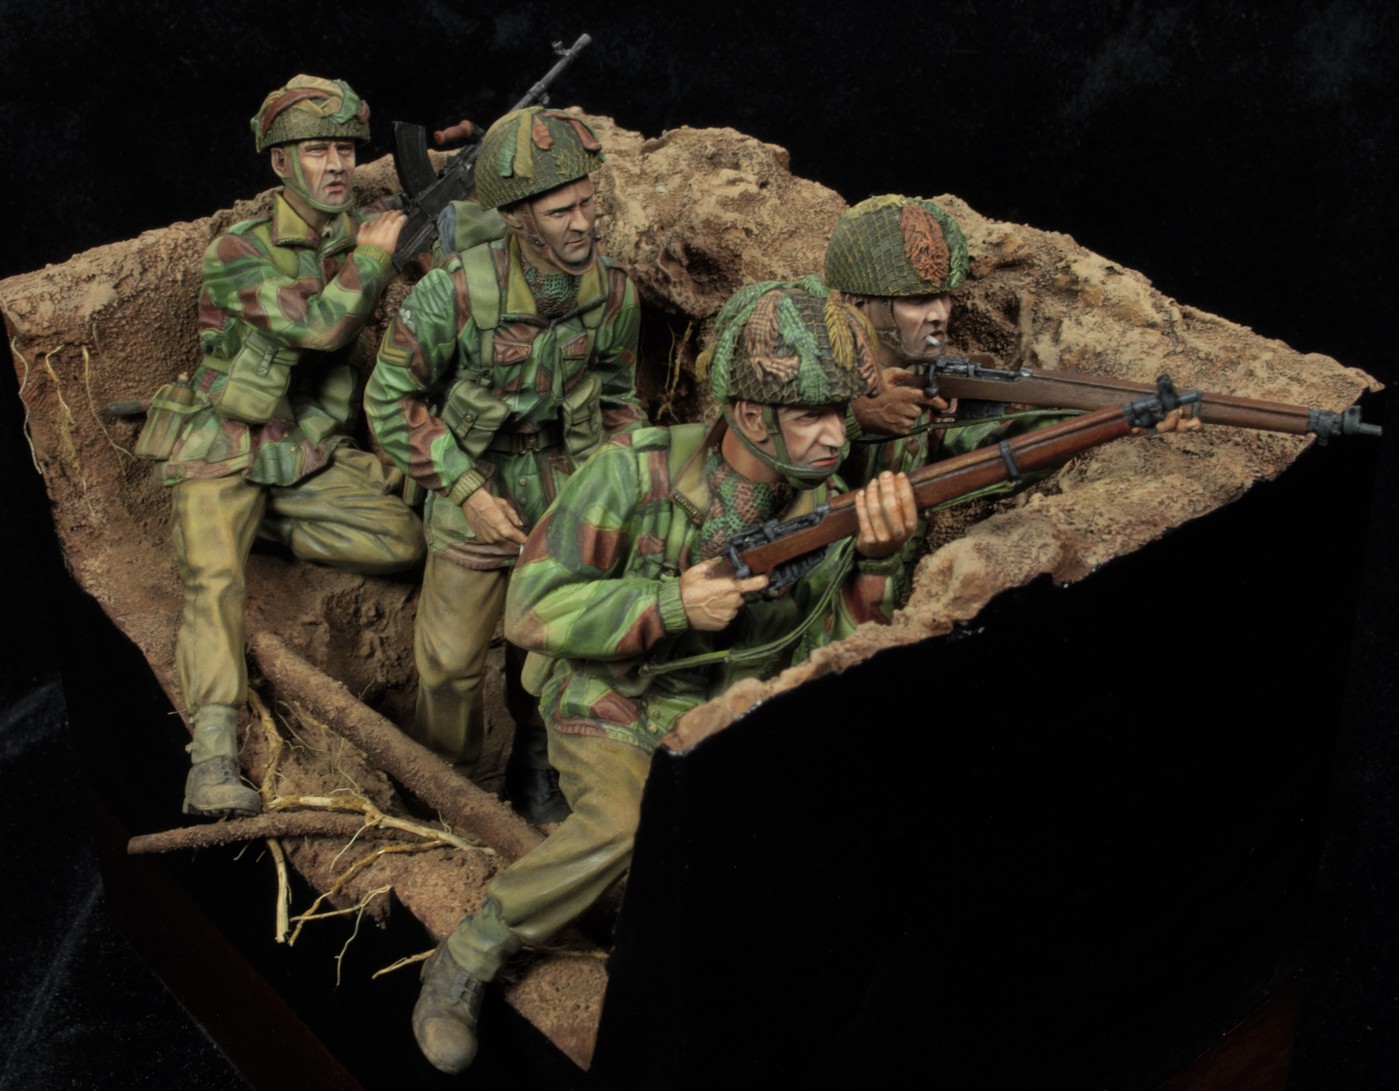
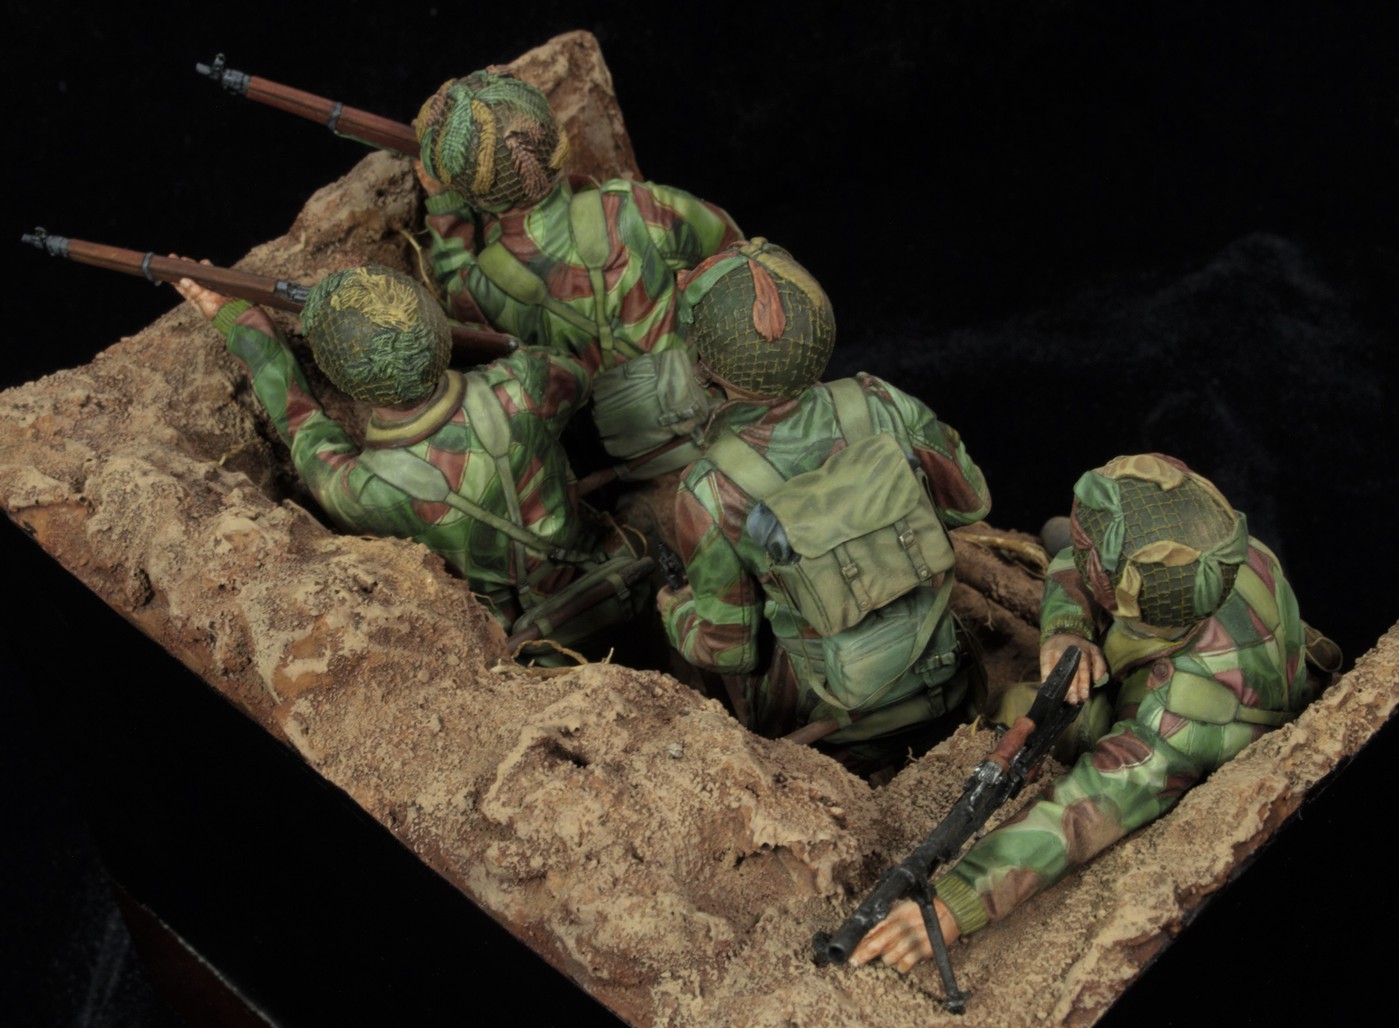
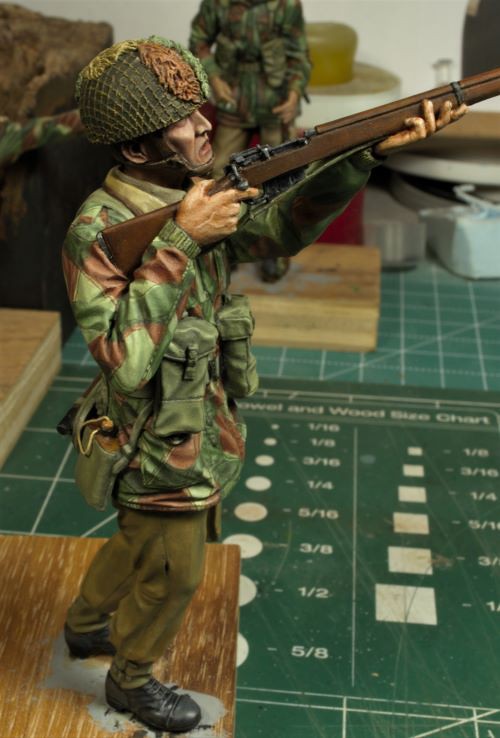
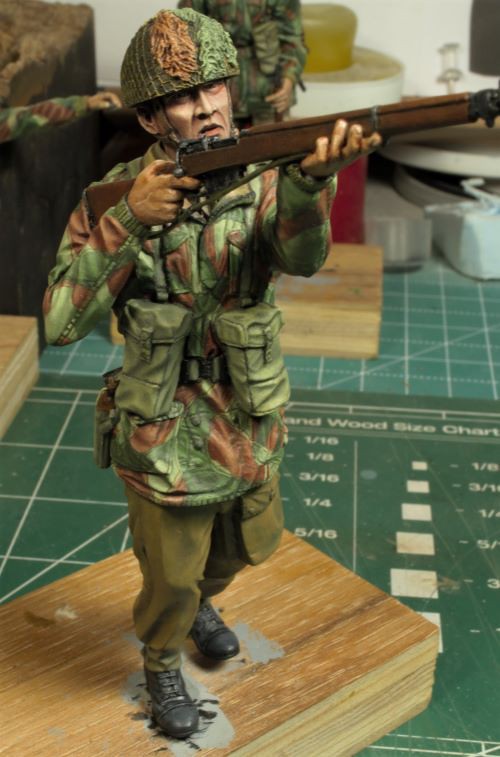
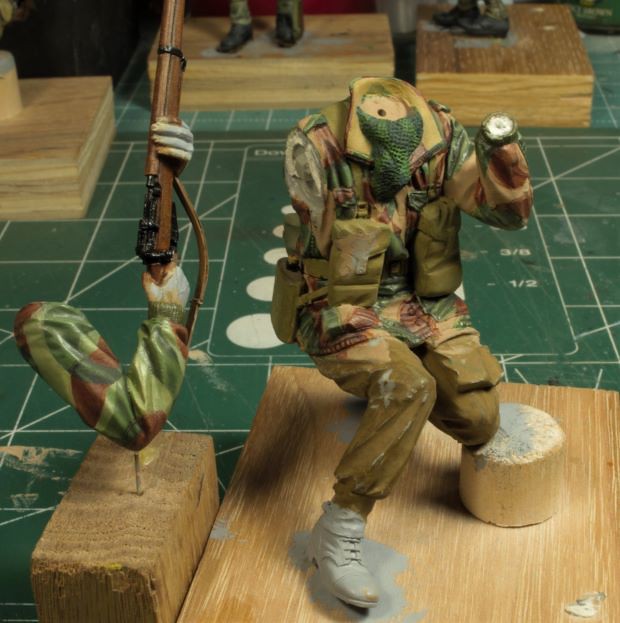
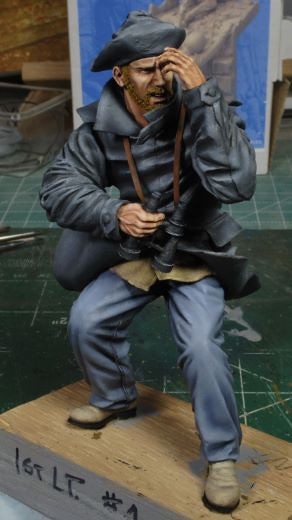
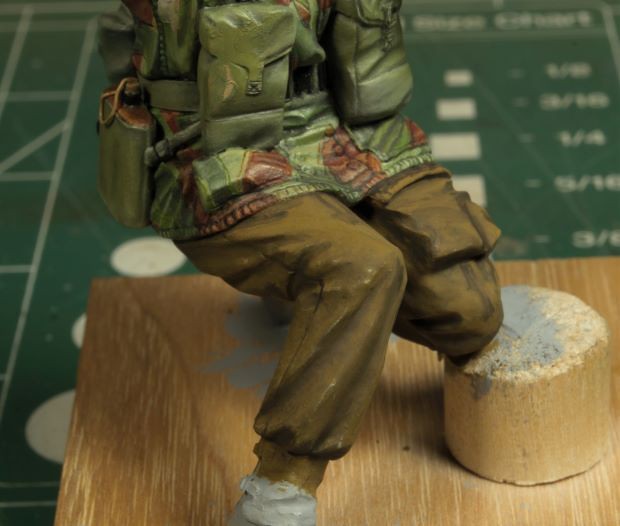
I’ve been so busy trying to stay consistent at the bench I forgot to post progress photos, so here we go. The trousers, boots, and anklets for figure #2 have been completed. I also finished off the rifle and hands. Figure #2 is now set aside to dry completely and await the punch list, and that 5’o clock shadow, like the other two.

_DSC0281b-vi.jpg

_DSC0283b-vi.jpg

_DSC0285b-vi.jpg

_DSC0287b-vi.jpg

_DSC0288b-vi.jpg


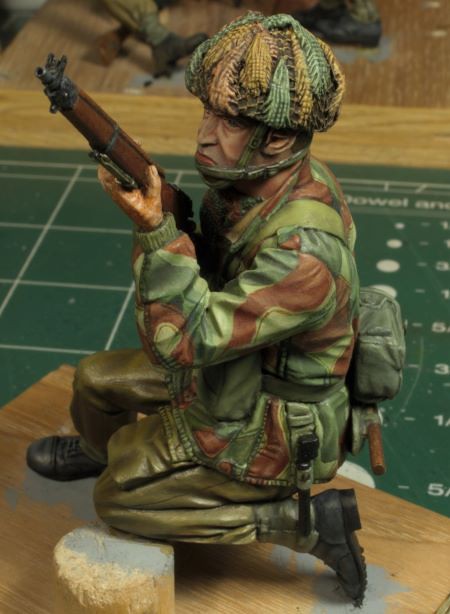
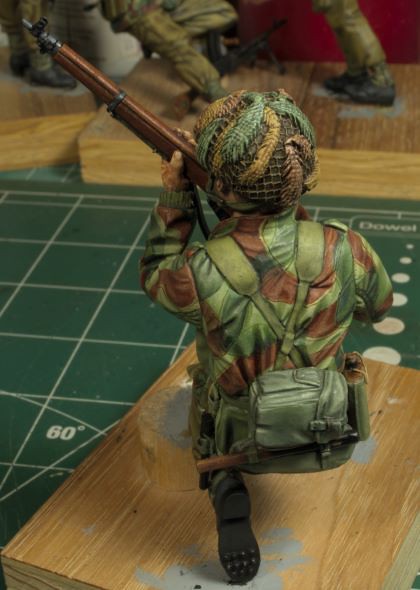
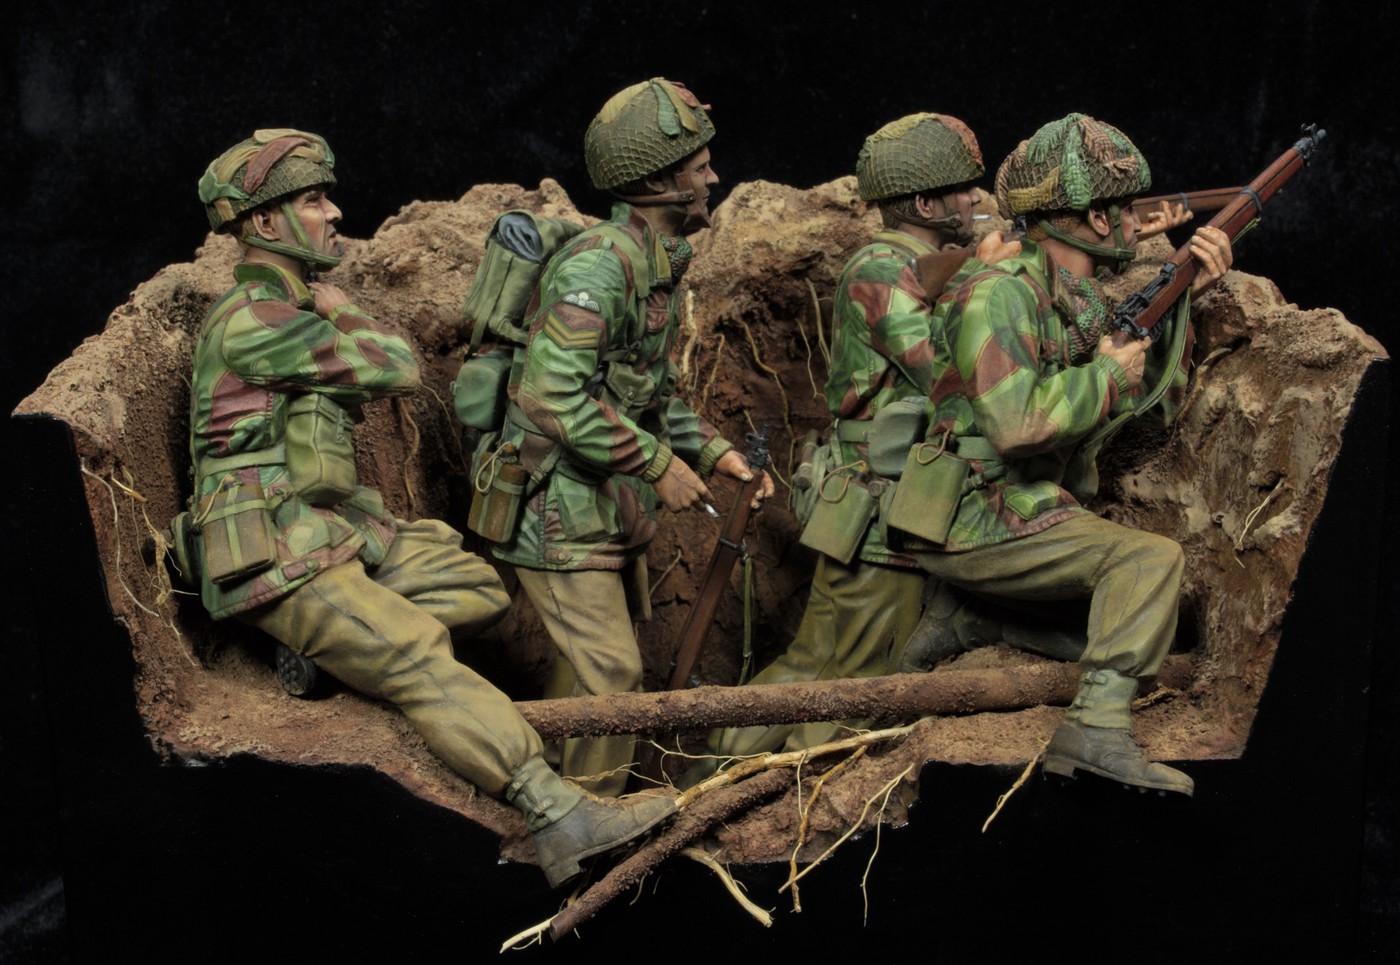
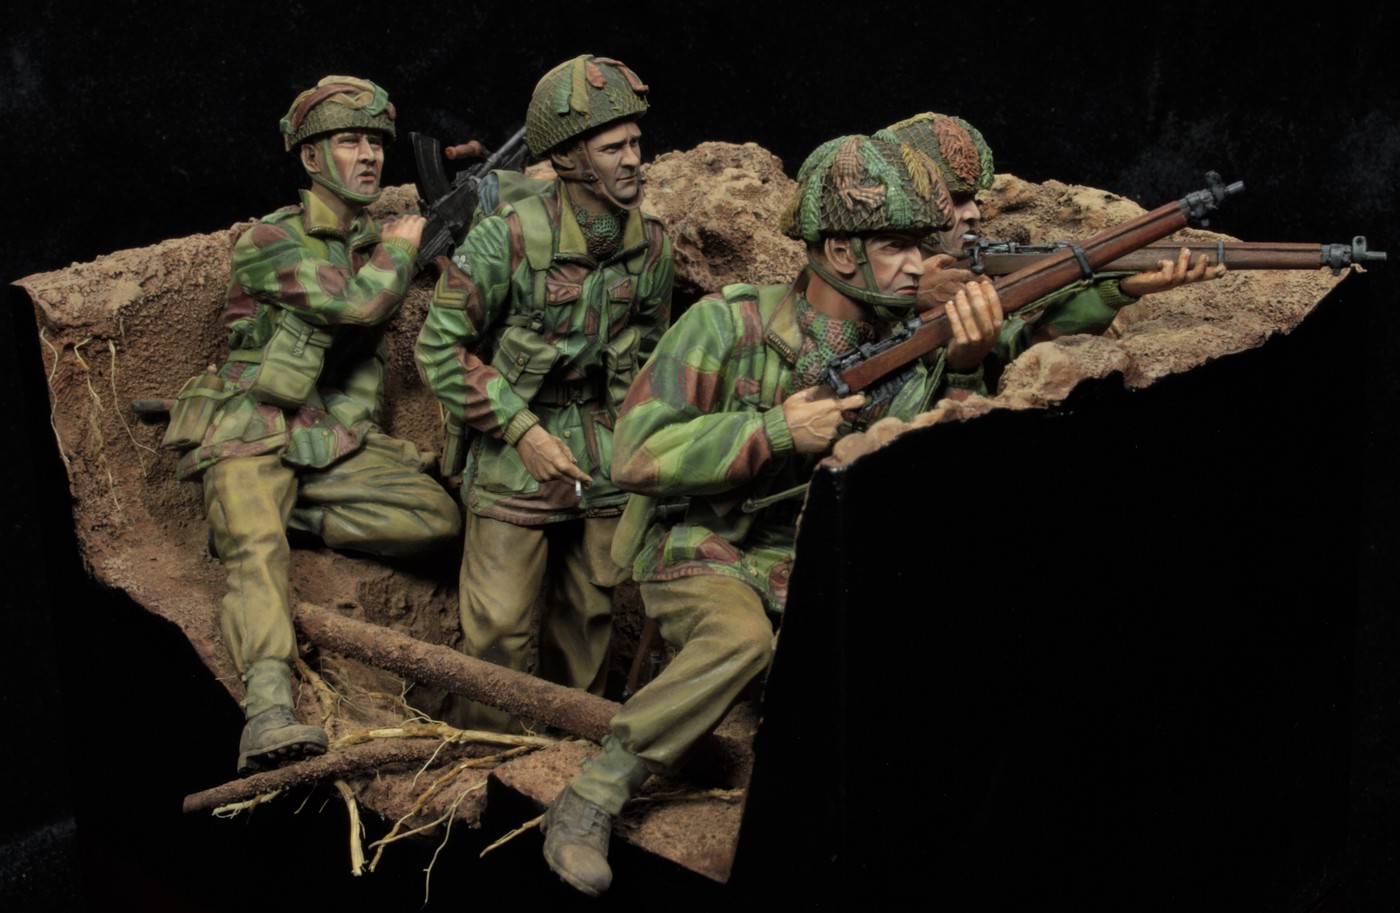
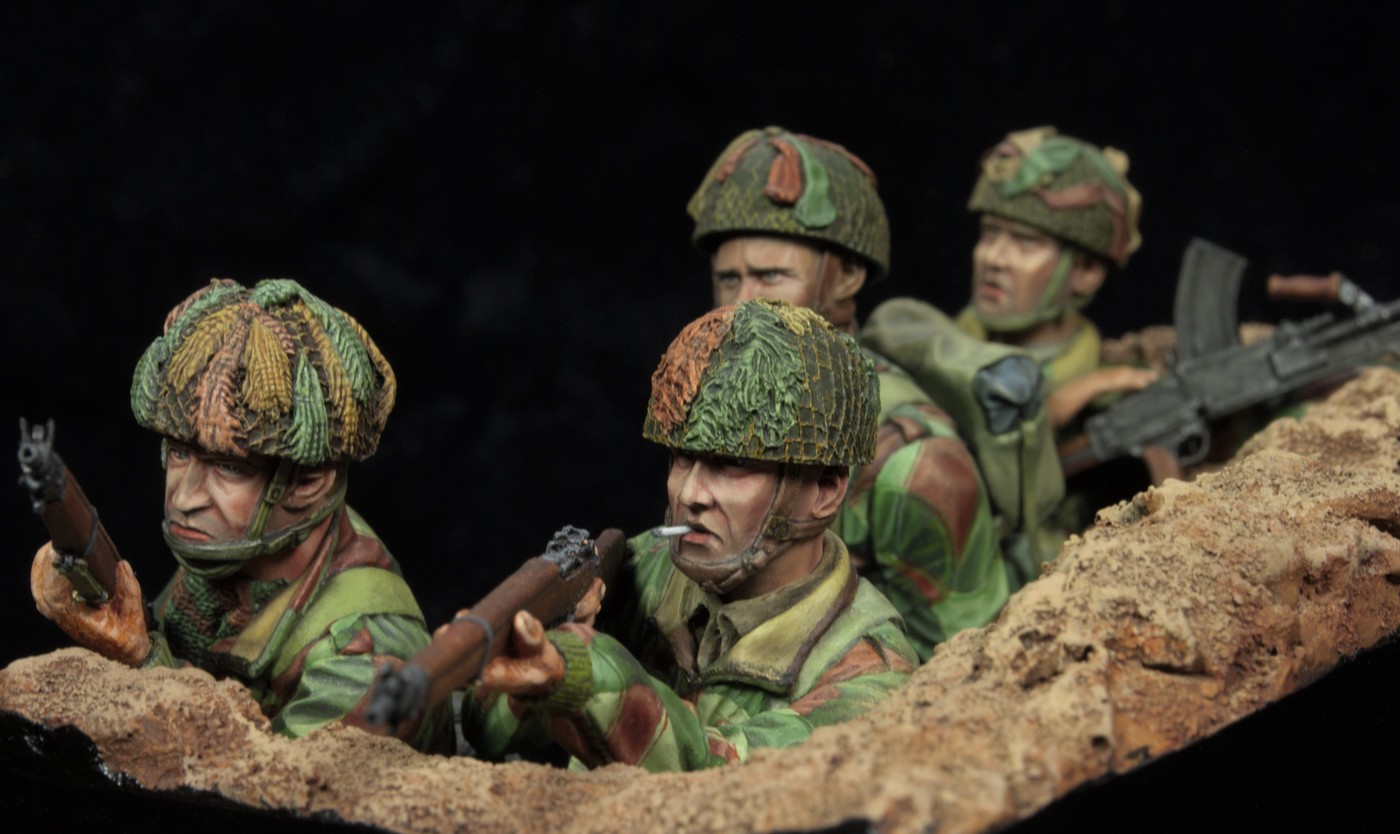
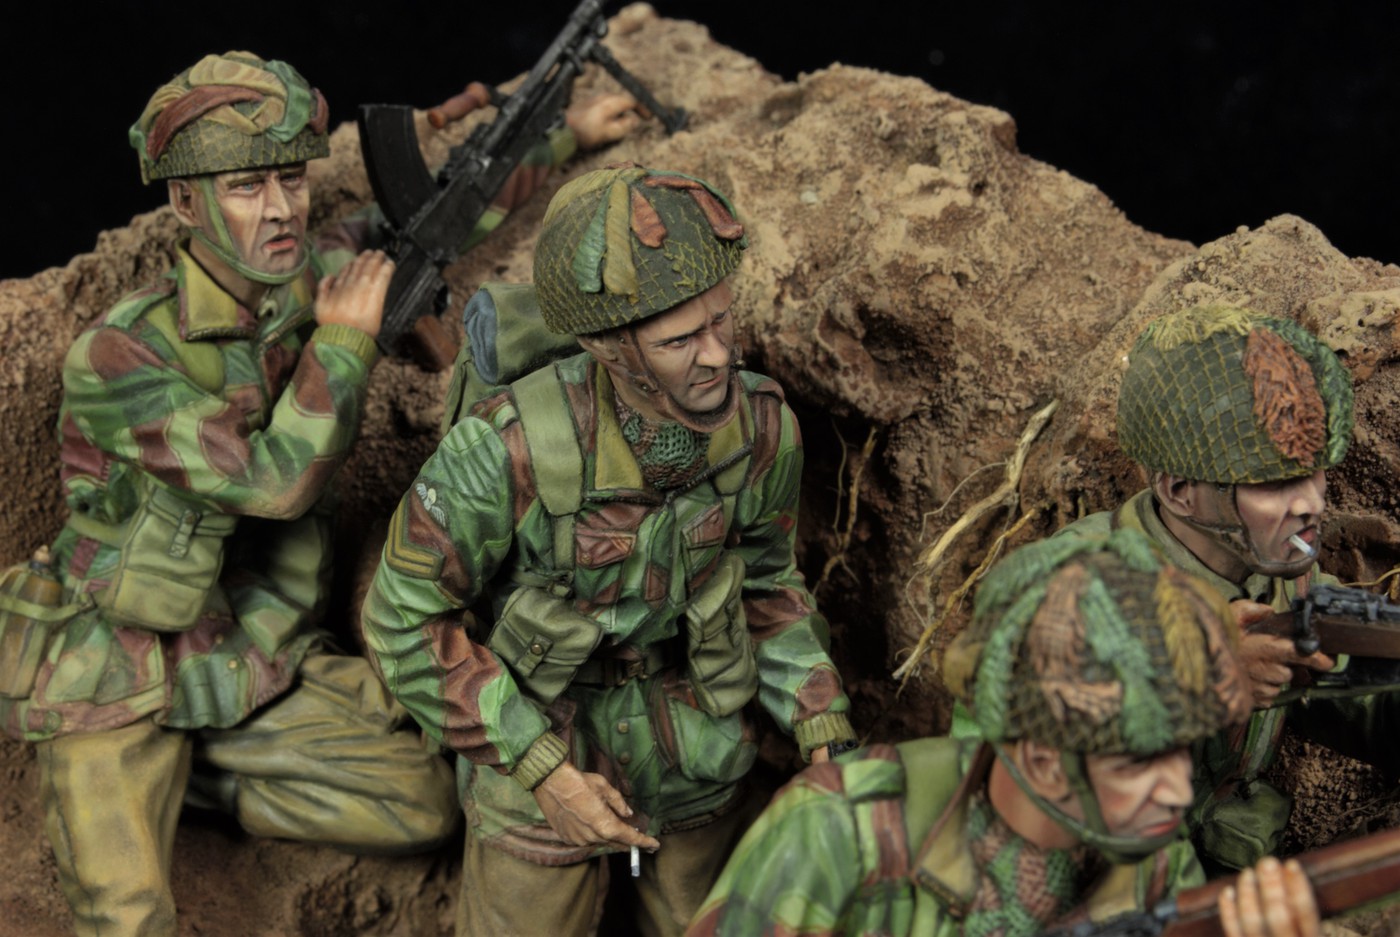
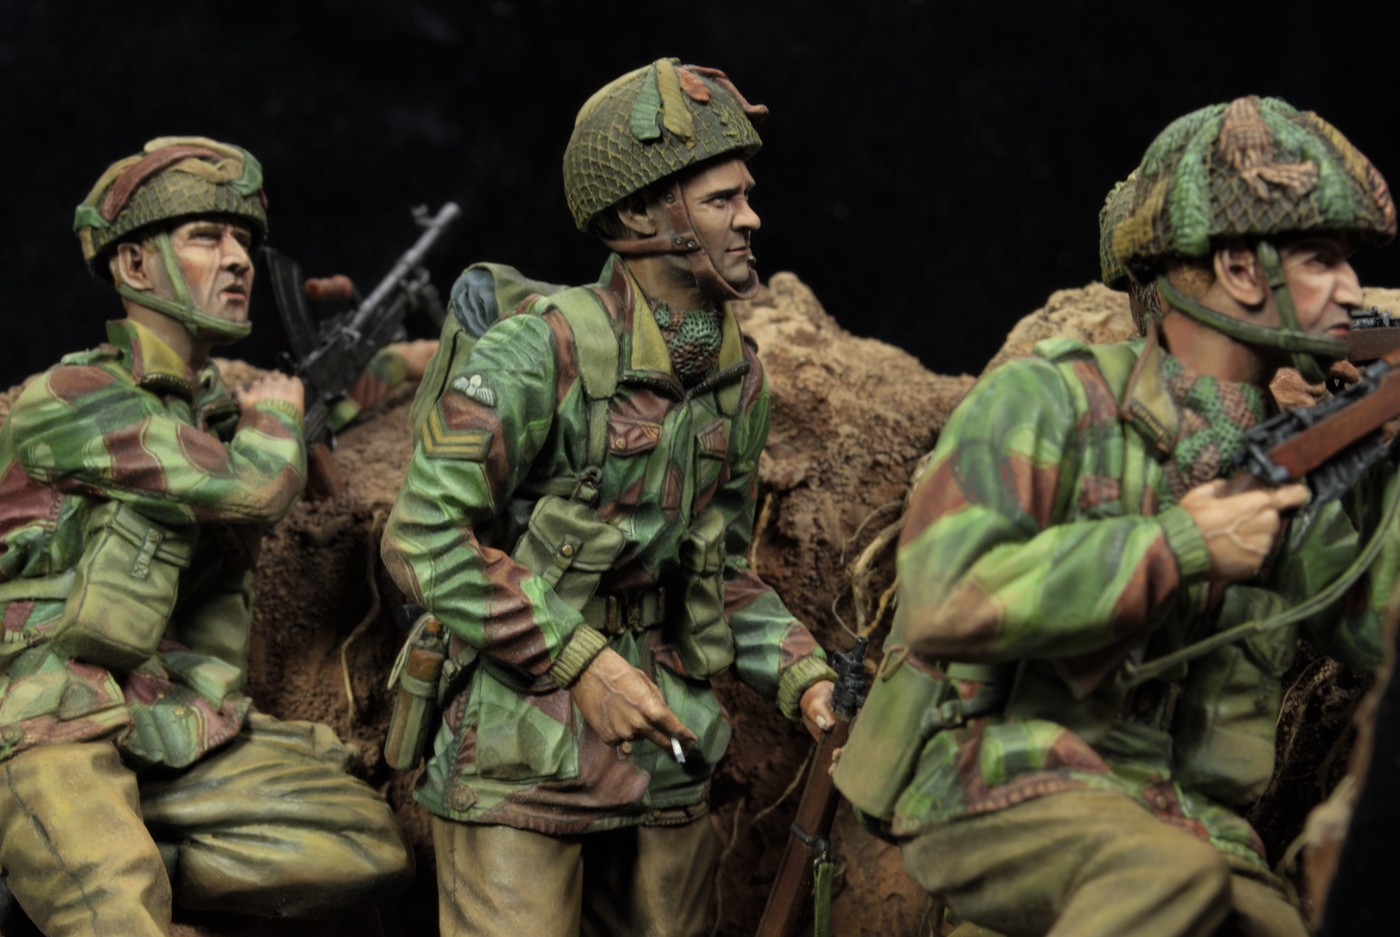
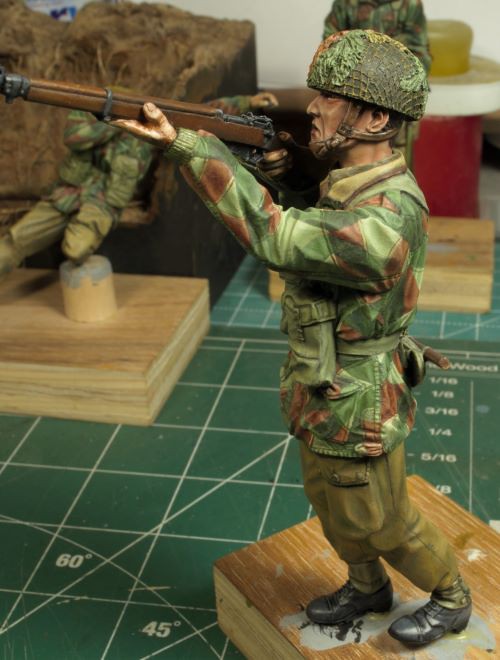
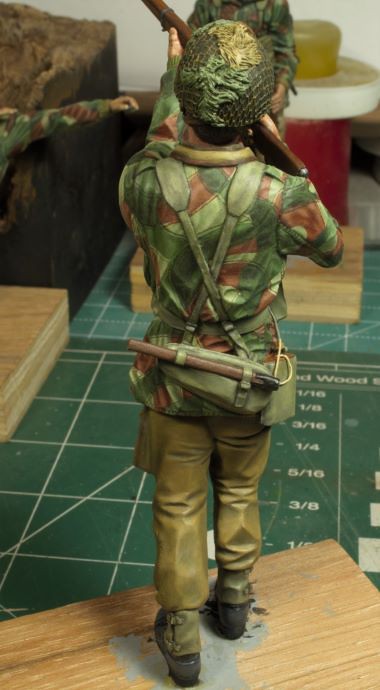
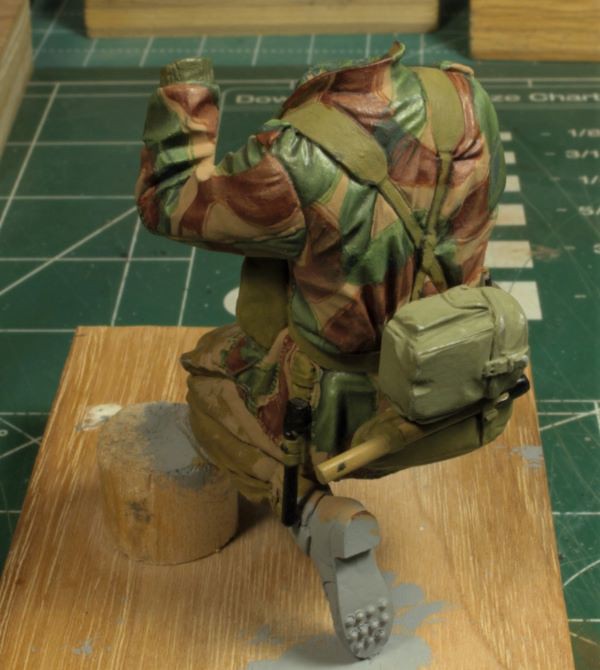
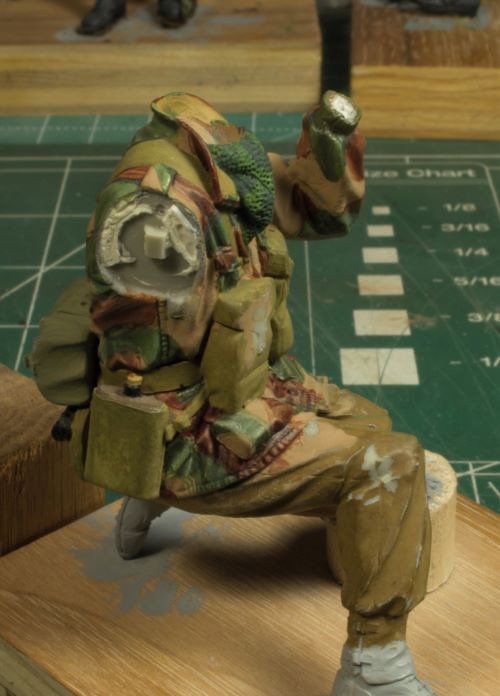
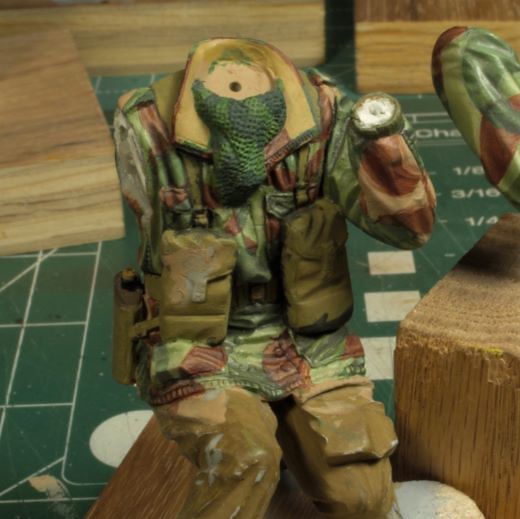
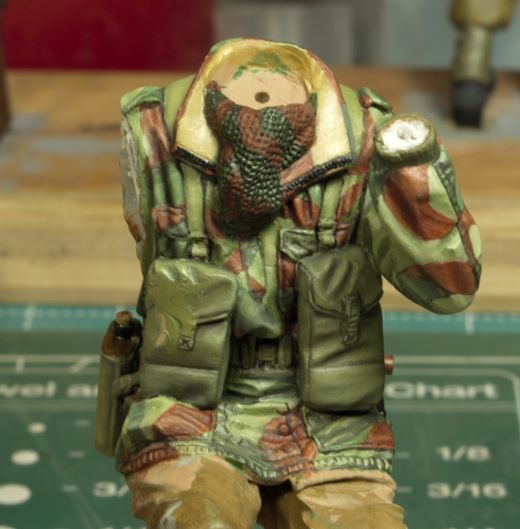
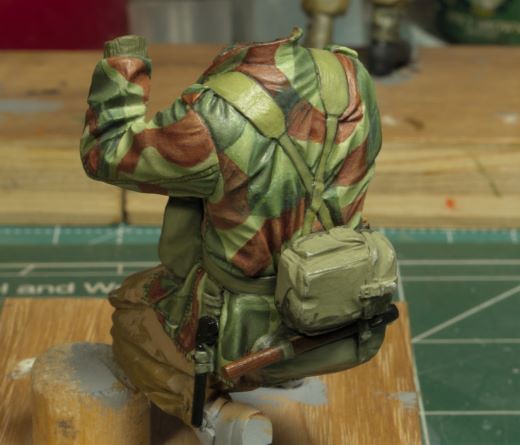
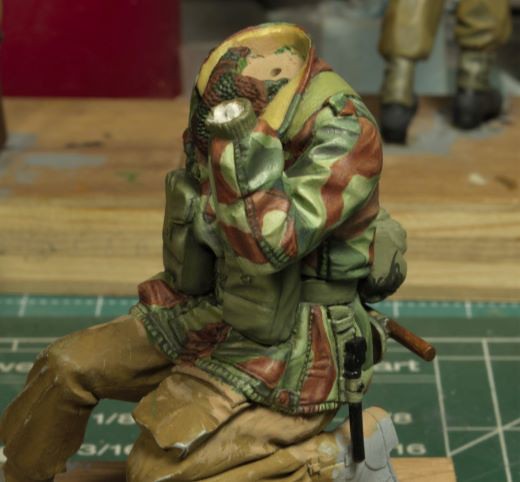
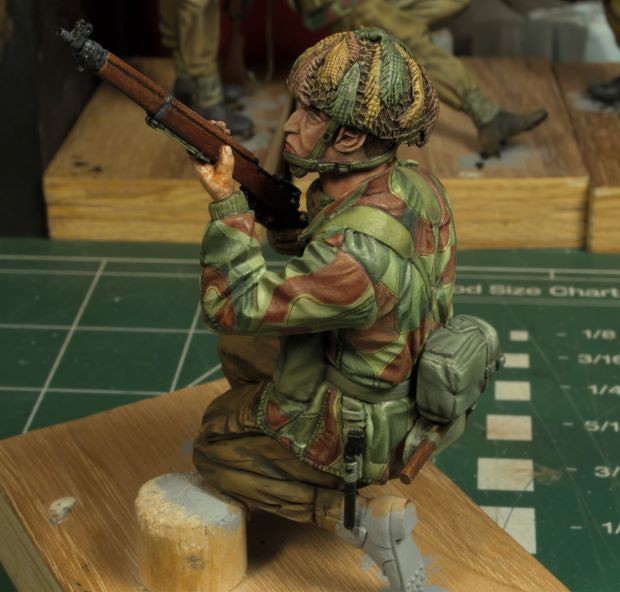
Ah, the last smock, yehaaaaaaaaa! This last smock was not nearly as difficult as I had expected. After working out a basic system of painting each color tone separately, the whole process sped up quite nicely. I worked the red tones first, then moved on to the green tones, saving the light tone for last.

This has been a challenging camo pattern to keep consistent and what I’ve learned is that you have to remember each color tone has to carry the shadows and highlights from one tone to the next. Sometimes you can get a little bug eyed during the process. It’s not like painting a regular uniform that has only one color tone. As you work your way around the figure you have to project the shadows and highlights within each small section. I found myself constantly pulling back to make sure the shadows and highlights were falling correctly and accurately.

This camo pattern may not be exactly accurate, but it has definitely been a learning process for me. Looking back there are a few things I would have done differently, but I’m happy with the results, so Ruck On we will.

_DSC0290b-vi.jpg

_DSC0291b-vi.jpg

_DSC0292b-vi.jpg

_DSC0293b-vi.jpg


Once I was satisfied with the initial pass for each tone, I immediately began to work the web gear. The smock still has plenty of detail to tend to, but the bulk of the work has been done. I still need to add the brush strokes and adjust some of the details, toning some down, highlighting others. Once the details are worked, I will go back to the arm and paint the hands, rifle, attach the arm to the figure, then clean up any details missed before working the trousers. So far, so good.

_DSC0294b-vi.jpg

_DSC0295b-vi.jpg

_DSC0296b-vi.jpg

_DSC0297b-vi.jpg


More to follow real soon. Thanks for watchin. Cheers, Ski.
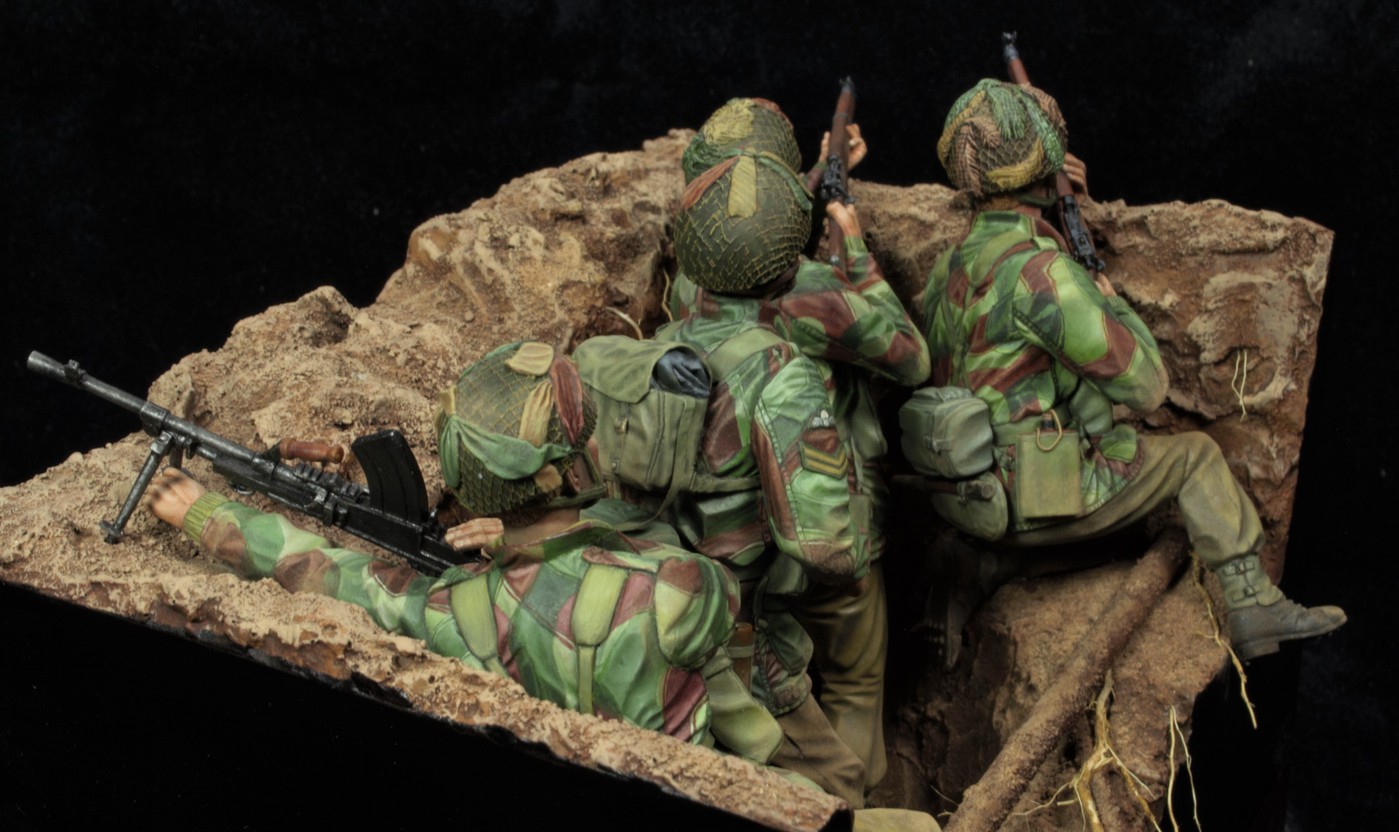
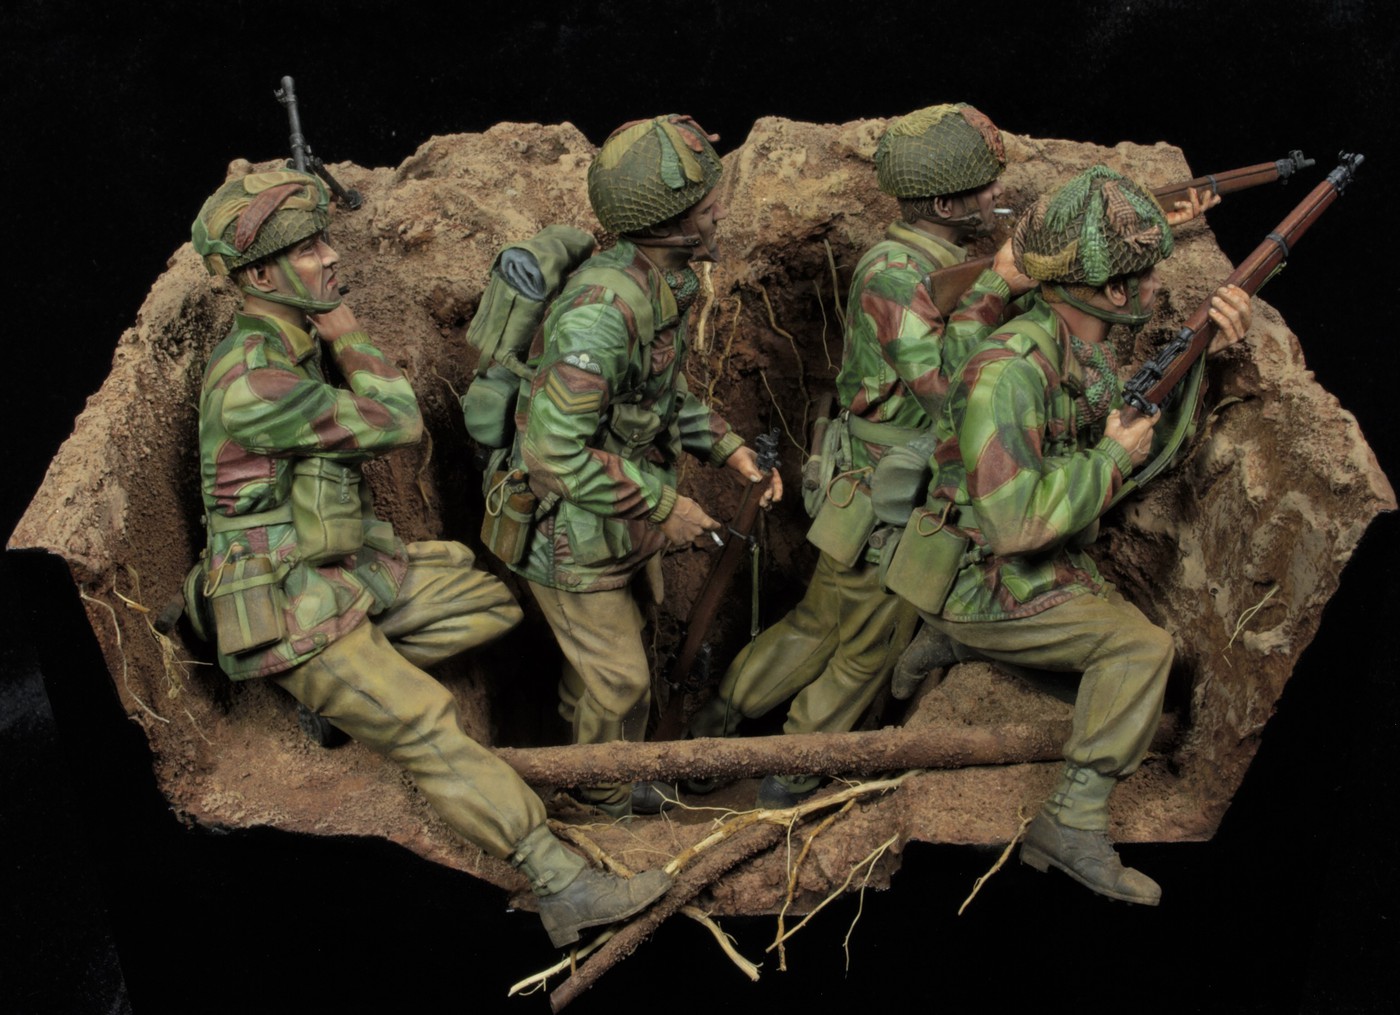
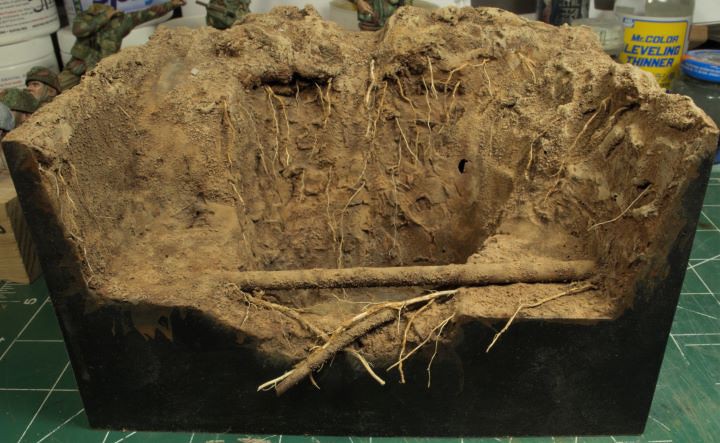
 
Jug, MP, thanks Guys!


The Base

To break things up a bit and keep the motivation going between figures I jumped ahead and worked the base. Once again, I was so involved in the process, I forgot to take progress pics.

There isn’t anything special about how I worked the resin base. Using a few pieces of styrene tubing I added the sewer pipe and water line seen in the original photo. Steve said it was certainly a consideration to add those, but the casting process would have been a bugger, so they were installed before I got too far along. I used the Dremel tool to prep the locations for each pipe, installed them, then covered the areas with glue and cat litter for a more natural appearance.

_DSC0276b-vi.jpg


I gave the entire base a primer coat of Krylon Gray and dried it completely with a hair dryer. Using slightly diluted Elmer’s wood glue I carefully placed crushed cat litter in areas that needed a dustier loose dirt affect. At first, I couldn’t find my jar of cat litter and was in a bit of a panic. We don’t have cats anymore, haven’t for years, and I wasn’t in the mood to make a trip just for cat litter. Then that jar caught my eye as I scavenged the material shelf. Shewwww, wiping the sweat from me brow, I carried on, HA!

After an initial coat of flat black, I used Vallejo’s Flat Earth and AK’s Tan and Light Sand to achieve the desired dirt tones. Then the process of weathering was pretty straight forward using oils washes for definition and dry brush with acrylics for some of the highlights. Mig’s Europe Dust P028 was used in all the appropriate areas. Once everything was dried overnight, I added the roots as seen in the original photo.

_DSC0278b-vi.jpg


Now, I know someone is going to say, “Those roots near the pipes are a bit too large and there’s too many.” Oh contraire, observe the stump in the foreground of that original photo, there’s plenty of roots to be had everywhere. If you’ve ever dug up a sewer or water line, especially an older line near any old growth trees, you will normally find roots looking to tap into that water source somewhere along that line. I did temper my approach, not wanting to make the roots the main focus but a compliment to the scene.


Now it’s back to work on those trousers of the last figure and see if I can finish this scene. Thanks for watching.


Cheers, Ski.
 
Figure #3 on Final Approach; Gear Down, Flaps Down, Cleared to Land!

So, as we crank a bit of Outlaws, “Green Grass and High Tides”, and maybe a little bit a Tom Petty, “Here comes My girl”, or maybe some Joe Cocker, “Feeling Alright”, we Ruck On! And when was the last time any of you have listened to Jeff Beck “Live” with Jan Hammer, “Earth in Search of a Sun”? Sometimes it pays to relax when you’re “sniffin paint and gluin them fingers together.” Just a bit of nostalgia for my paint sniffin Amigos! So, let’s get this pig on the roll, right quick!

Been more than long enough, but there has been some decent progress. I must admit, there is a bit more work to be done on the hands, not there yet, but we are now ready to paint the trousers, mue pronto. So, just a pre-shading is set in preparation for closing out this last figure.

_DSC0298b-vi.jpg

_DSC0299b-vi.jpg


With the arm and head in place, it’s coming together nicely. Still, there’s plenty on the punch list to deal with later, but it’s coming together as expected when one deals with incredibly well sculpted figures. Kudos to Stevo, once again!

_DSC0303b-vi.jpg
_DSC0302b-vi.jpg

_DSC0301b-vi.jpg


The sweet part about finishing this last figure is the punch list, then the placement within the base. I might add, we do have an incredibly beautiful chunk of Black Walnut left over from the fireplace mantel, so I will do my best to expose the sap ribbon, or as some say, “that beautiful blond strip before the meat of the trunk”. Either way, I’ll get a nice lookin piece after I mill this 4” thick chunky block of beautiful black walnut.


Thanks for watchin. Cheers, Ski.
 
Tanks, you Guys! I'm already messing with the base wood, not sure how thick it is, but it's a beauty of a chunk!
 
Smooth Landing


Figure #3 is finally completed. The trousers may have a more greenish tint than the rest of the crew, but I did go back and correct this with some filters and blending. Also, each figure had all the brass work completed and sealed with Dull Coat. All that is left to do is dust up each figure to blend each of them into the base.

Taxi clear of the runway 35 left at Bravo 4, contact ground.

Just the base is left to finalize and we can park this beauty on the ramp, or curio cabinet, as they say.

_DSC0308b-vi.jpg
_DSC0309b-vi.jpg


_DSC0310b-vi.jpg
_DSC0311b-vi.jpg


I had my mind all set on a really beautiful chunk of black walnut only to find there would have been some considerable waste just to get this small chunk. Instead, I settle on a nice piece of oak that was already milled to an acceptable thickness. Just some minor milling and a bit of work on the belt sander to match the resin base and we’re good to go. I might add that I really wasn’t in the mood to spend several hours milling that walnut at 28*F in the shop, so the oak was a wonderful choice, HA!

You can see the cleats I added to keep the resin base in the exact location desired. Once the oak was sanded smooth, I gave it a generous coat of Minwax Red Mahogany stain. This will give the base some character without attracting too much attention and it will also get a few coats of Minwax Tung oil. I prefer to use Tung Oil on most of my wood projects even though it is not the easiest sealer to work with. I can control the sheen, whereas most polyurethane finishes are not easy to adjust, either shinny or dull, nothing in betwixt.

_DSC0305b-vi.jpg
_DSC0307b-vi.jpg


Once the base has dried completely and I’m satisfied with the finish I’ll install the figures and mate the resin base to this block of oak and call it a wrap!


Final pics coming soon and thanks for watching. Cheers, Ski.
 
Advance to Arnehm
RM1601 Resin, 4 figures plus groundwork.
A requote from the beginning of this build log:

Using Steve's own words to describe the scene: " The first release is RM1601 which is taken from a photo taken 17 September 1944 during Operation Market Garden at Wolfheze Village. It shows a Bren gun section of R Company 1 Para taking cover in a Bomb crater during their advance along Amsterdamseweg (Leopard Route)."

"Corporal Alfred Reynolds, second from left, who commanded the Bren gun section was seriously wounded a few hours after the photo was taken, he fell into German hands a died from his injuries a day or two later."

The fate of the other three is unknown.


This has been a wonderful adventure into the historic reality of WWII and the Advance on Arnhem. As a painter I’m always looking for the historical aspect of every subject I consider, and Steve has made this part of the process easy. I would consider this sculpting a perfect rendition of the actual event from the historical photograph taken in September, 1944. I hope I have done my part to honor these men and their sacrifices in the battle to end the war by Christmas.

Painting: Oils over an acrylic base throughout for each figure. Pipes and roots were added to the base and then the entire base was treated with a primer coat and a bit of cat litter for fine rubble, then a basic tonal coat. Oil washes were used for depth and highlights were dry brushed to complete the appearance.

_DSC0300-vi.jpg

_DSC0301-vi.jpg

_DSC0301b-vi.jpg

_DSC0302-vi.jpg

_DSC0303-vi.jpg

_DSC305-vi.jpg

_DSC0304a1-vi.jpg

_DSC0304b-vi.jpg

_DSC0304d-vi.jpg

_DSC0305-vi.jpg

_DSC307-vi.jpg

_DSC0307-vi.jpg

_DSC0308-vi.jpg

_DSC0309-vi.jpg

_DSC0310-vi.jpg


This has been an enjoyable piece of sculptured art to work with! Kudos, Stevo!


Cheers, Ski.
 
Last edited:
Back
Top