
-
Modelers Alliance has updated the forum software on our website. We have migrated all post, content and user accounts but we could not migrate the passwords.
This requires that you manually reset your password.
Please click here, http://modelersalliance.org/forums/login to go to logon page and use the "Forgot your Password" option.
- Home
- Forums
- Current Campaigns
- Past Campaigns
- Finished Campaigns
- 2015 Campaigns
- MIGHTY MESSERSCHMITTS
You are using an out of date browser. It may not display this or other websites correctly.
You should upgrade or use an alternative browser.
You should upgrade or use an alternative browser.
Messerschmitts X 3
- Thread starter matrixone
- Start date
Skinny_Mike
Well-known member
A treat to watch as always!
Thanks guys, I was not too happy before with the 262 because I thought the fit should be MUCH better than it has been so far, but after cleaning up the seam lines its looking better and my mojo is back. :dance
Mike, did you read my answer to your questions? If you have more specific questions on the exhaust and wheel painting feel free to ask.
Matrixone
Mike, did you read my answer to your questions? If you have more specific questions on the exhaust and wheel painting feel free to ask.
Matrixone
Skinny_Mike
Well-known member
I did Les, thanks for taking the time. The exhaust was pretty straight forward and I took some good notes. I'll probably ask some more questions on the wheels when I get back into full on building mode. Really missing having the full bench right now.. 
Thanks for looking guys!
I have stopped work on the G-10 'Erla' so I can get the Hasegawa G-10 to the same stage of assembly as the Revell kit, this way when I get to the painting stage I can paint both models at once so I can hopefully save both time and paint.
The little Revell Me 262 is a nice kit but the canopy is pure rubbish, its poorly rendered and the canopy frames are missing on the rear of the canopy. Plus the fit of the canopy to the fuselage is terrible and requires a lot of fiddly work, after spending much effort trying to get it to fit I still have not been successful...I may have trimmed off too much of the canopy. :facepalm This is not all my fault since the lower edges of the canopy were so thin I thought some of it was flash and some of it crumbled while handling the canopy during dry fitting.
Now to the good part...the camo scheme and markings. Below is the decal sheet I am using...

...here is the marking option I chose, 'white 1', so far I have not seen anybody else build a Me 262 with these markings so my model will be original.

Matrixone
I have stopped work on the G-10 'Erla' so I can get the Hasegawa G-10 to the same stage of assembly as the Revell kit, this way when I get to the painting stage I can paint both models at once so I can hopefully save both time and paint.
The little Revell Me 262 is a nice kit but the canopy is pure rubbish, its poorly rendered and the canopy frames are missing on the rear of the canopy. Plus the fit of the canopy to the fuselage is terrible and requires a lot of fiddly work, after spending much effort trying to get it to fit I still have not been successful...I may have trimmed off too much of the canopy. :facepalm This is not all my fault since the lower edges of the canopy were so thin I thought some of it was flash and some of it crumbled while handling the canopy during dry fitting.
Now to the good part...the camo scheme and markings. Below is the decal sheet I am using...
...here is the marking option I chose, 'white 1', so far I have not seen anybody else build a Me 262 with these markings so my model will be original.
Matrixone
Thanks Luiz!
The airframe of the 262 is nearly done and I just finished masking the canopy.
Revell's 109 'Erla' kit is coming along too but the further I get into this build the more I find wrong with it. :frantic
Some things are easily correctable and others are just a P.I.T.A. The instructions are rather poorly done and if modelers new to 109's were to build this kit they might not have an enjoyable time with it mostly due to the build instructions.
One would think Revell of Germany would be able to produce a more accurate model kit of the 109 since their country built many thousands of the full size machine, where is their national pride? :idonno I am just baffled. :facepalm
I expect to have pictures posted soon.
Matrixone
Thanks Luiz!
The airframe of the 262 is nearly done and I just finished masking the canopy.
Revell's 109 'Erla' kit is coming along too but the further I get into this build the more I find wrong with it. :frantic
Some things are easily correctable and others are just a P.I.T.A. The instructions are rather poorly done and if modelers new to 109's were to build this kit they might not have an enjoyable time with it mostly due to the build instructions.
One would think Revell of Germany would be able to produce a more accurate model kit of the 109 since their country built many thousands of the full size machine, where is their national pride? :idonno I am just baffled. :facepalm
I expect to have pictures posted soon.
Matrixone
Roger that!
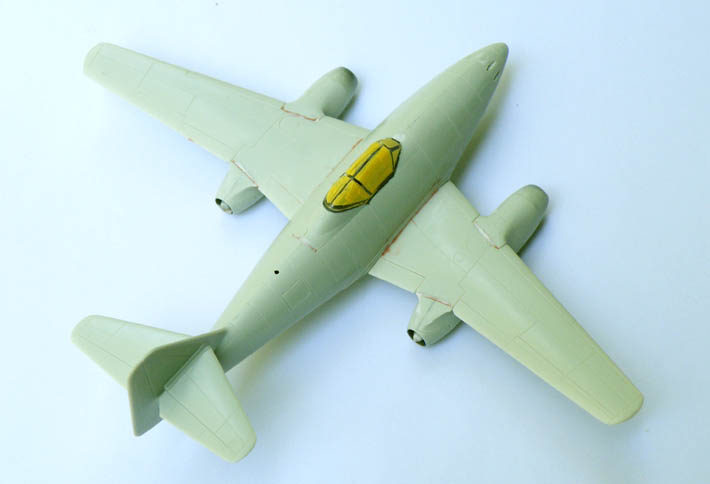
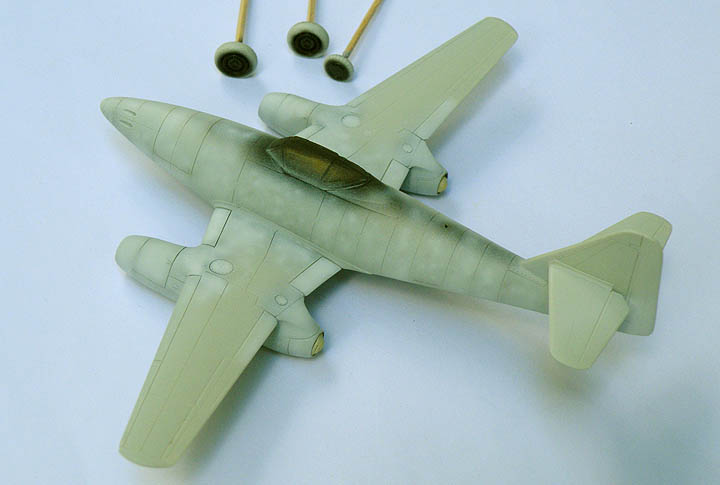
Not the most exciting, but here are some pictures anyway.
The 1/72 scale Revell Me 262 is nearly ready for paint, the canopy was just glued on and the glue needs to be 100% dry before I can actually start painting.

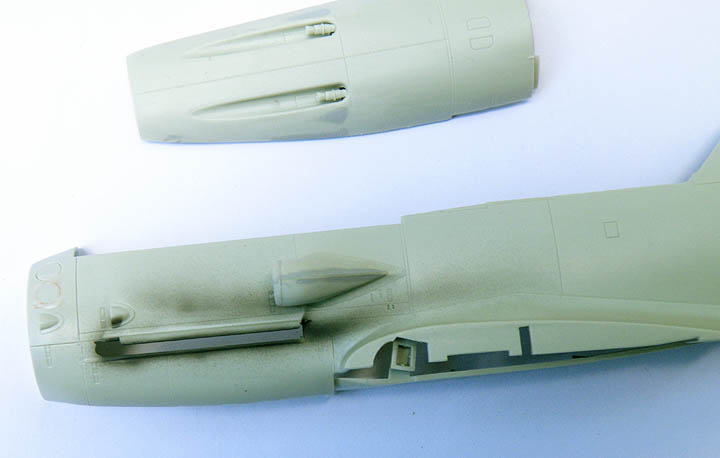
And here is the Erla Bf 109G-10, in this shot you can see the places where I needed to fill the unwanted access panels...the instructions point out the one for the oil filler hatch that needs filled in but don't mention anything about the one on the right side of the fuselage.
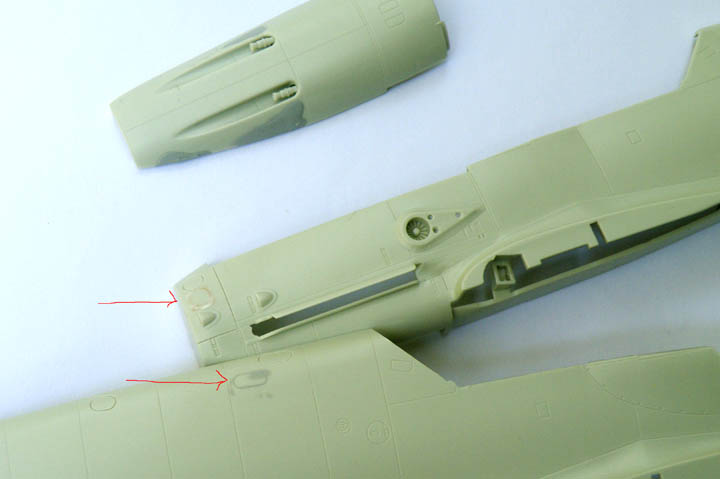
I drilled out the ends of the cowl mounted MG's and also used some stretched sprue to add a ridge to the rear of the supercharger air scoop. Yes I realize not all late 109's had the ridge on the air scoop but I want it on this one just to be different.

Matrixone
The 1/72 scale Revell Me 262 is nearly ready for paint, the canopy was just glued on and the glue needs to be 100% dry before I can actually start painting.
And here is the Erla Bf 109G-10, in this shot you can see the places where I needed to fill the unwanted access panels...the instructions point out the one for the oil filler hatch that needs filled in but don't mention anything about the one on the right side of the fuselage.
I drilled out the ends of the cowl mounted MG's and also used some stretched sprue to add a ridge to the rear of the supercharger air scoop. Yes I realize not all late 109's had the ridge on the air scoop but I want it on this one just to be different.
Matrixone
Skinny_Mike
Well-known member
-262 is looking good Les. Enjoying your build of the G-10 as well. Can't wait to see more.
A lot going on there Les, 
-262 is looking good Les. Enjoying your build of the G-10 as well. Can't wait to see more.
I CORncur!!
Thanks very much guys!
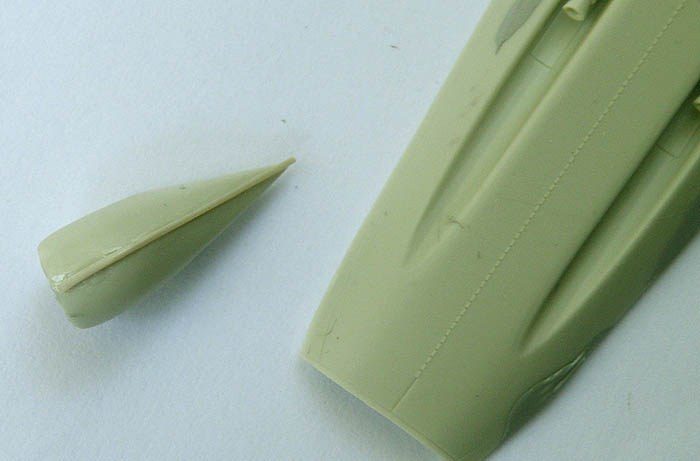
I have done more work on the subtle conversion work on the supercharger air intake for the 109G-10, its nearly done and will soon get a test spray to check my work.
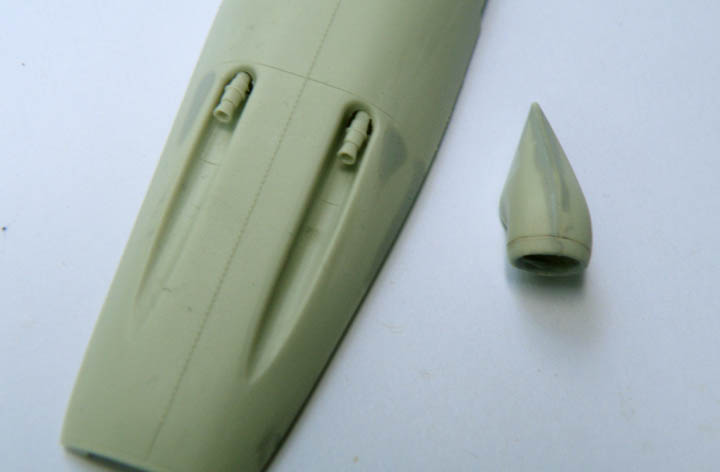
Below is a photograph of an an Erla built Bf 109G-10 and it shows the sharp edge to the rear of the supercharger air intake that some of them had.
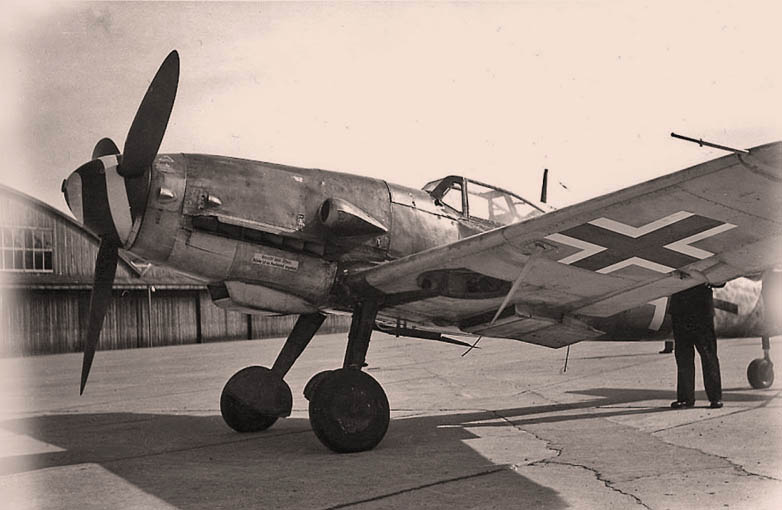
This picture shows the air scoop dry fitted on the fuselage and the painting I did on the inside of the exhaust shields, I needed to do this painting before I could mount the exhaust stacks.
The Me 262 has been given its pre-shading. It will have to sit overnight before I can mist on a thin coat of RLM 76.
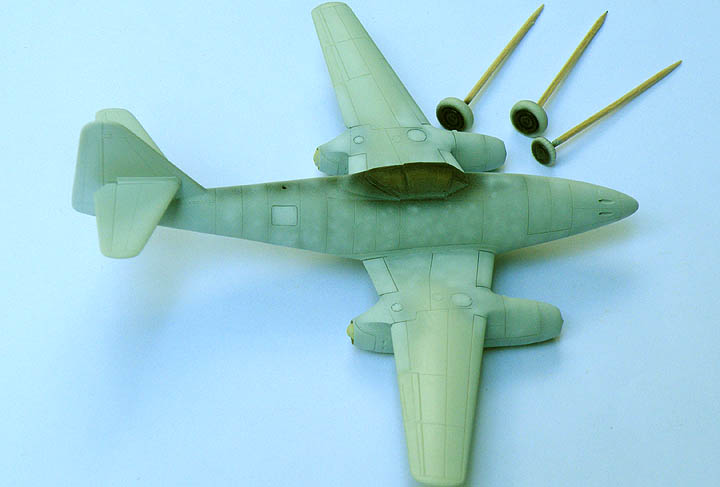
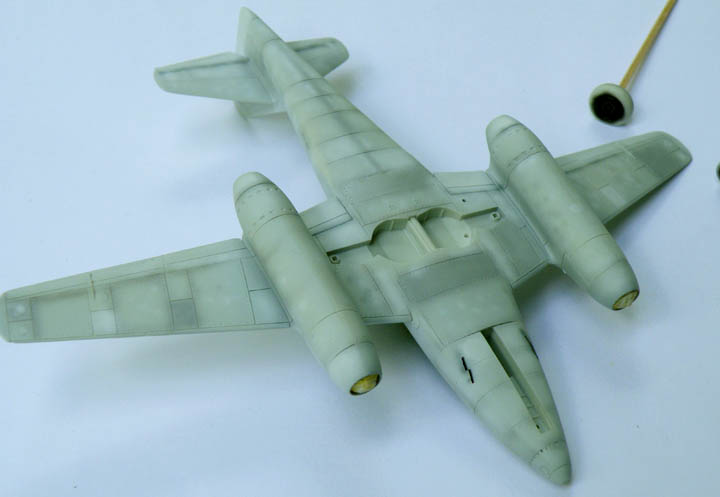
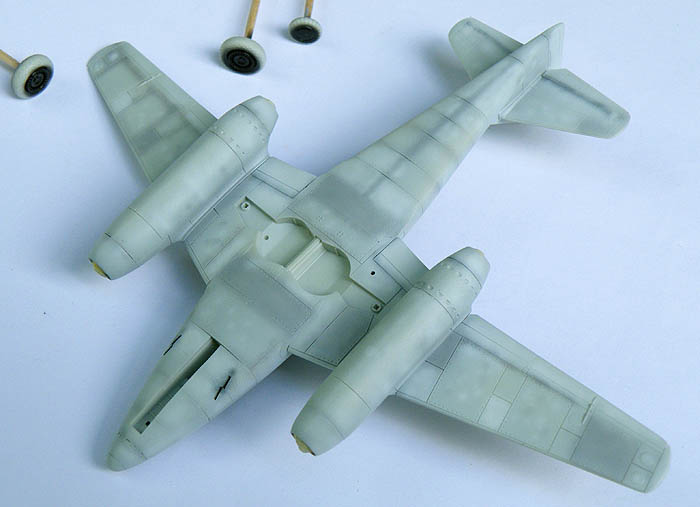

The wheel hubs have also been painted gloss black which is the first step in painting the wheels, when the paint is dry I will hand brush my custom mix of tire 'rubber' on the tires.
Matrixone
I have done more work on the subtle conversion work on the supercharger air intake for the 109G-10, its nearly done and will soon get a test spray to check my work.
Below is a photograph of an an Erla built Bf 109G-10 and it shows the sharp edge to the rear of the supercharger air intake that some of them had.
This picture shows the air scoop dry fitted on the fuselage and the painting I did on the inside of the exhaust shields, I needed to do this painting before I could mount the exhaust stacks.
The Me 262 has been given its pre-shading. It will have to sit overnight before I can mist on a thin coat of RLM 76.
The wheel hubs have also been painted gloss black which is the first step in painting the wheels, when the paint is dry I will hand brush my custom mix of tire 'rubber' on the tires.
Matrixone
Similar threads
- Replies
- 4
- Views
- 2K
- Replies
- 39
- Views
- 13K
- Replies
- 146
- Views
- 25K