
-
Modelers Alliance has updated the forum software on our website. We have migrated all post, content and user accounts but we could not migrate the passwords.
This requires that you manually reset your password.
Please click here, http://modelersalliance.org/forums/login to go to logon page and use the "Forgot your Password" option.
You are using an out of date browser. It may not display this or other websites correctly.
You should upgrade or use an alternative browser.
You should upgrade or use an alternative browser.
Maddog Manufacturing Open in 2021
- Thread starter Duke Maddog
- Start date
Duke Maddog
Well-known member
this is not a hobby, thats a factorylooking great
Hence the name: "Maddog Manufacturing!"


Thanks for joining the factory floor tour and looking in Martin! Stay tuned, there's more coming....
Flyingbabydoc
Well-known member
Goodness gracious Mark that is one hell of a factory. You must own a house just for your models.
If I ever attempted to buy and assemble that An-124 I would be looking at a very expensive divorce.
Good luck I will keep watching.
Cheers
Alex
If I ever attempted to buy and assemble that An-124 I would be looking at a very expensive divorce.
Good luck I will keep watching.
Cheers
Alex
iambrb
Well-known member
neat stuff! When BMW was building it's factory in SC, GSP airport extended the runway for 'special equipment and aircraft' and one of these was the AN-124. I worked for a French company here in SC that hired one of those planes to fly in a special injection mold press that could only JUST fit inside that plane. I did not see the plane on the ground, but it overflew the area just south-east of the airport on it's approach, and I remember even though it was still up quite high, it made you want to duck!
Duke Maddog
Well-known member
Thanks Alex! No, I don't have a second house just for my models. I wish I did! They are all inside one 10x10 room of a two-bedroom condo. As for the An-124; my wife doesn't care as I have bought it using my own money. She's seen it and hasn't even commented.
Thanks Bruce! What a great story. I can imagine the urge to duck when something like this Antonov flies over.
I finally (knock on wood!) got this white and clear-coated. I think I can now start applying decals to this bird.
Stay tuned, more to come.
Thanks Bruce! What a great story. I can imagine the urge to duck when something like this Antonov flies over.
I finally (knock on wood!) got this white and clear-coated. I think I can now start applying decals to this bird.
Stay tuned, more to come.
Duke Maddog
Well-known member
Today I have a rather large update showing all the work I did from my birthday on Monday until now.
I've got quite a few pics to post so this will be in two parts.
So, everyone climb aboard the tram and we'll get on our way. Just remember to keep hands and feet inside the tram at all times.
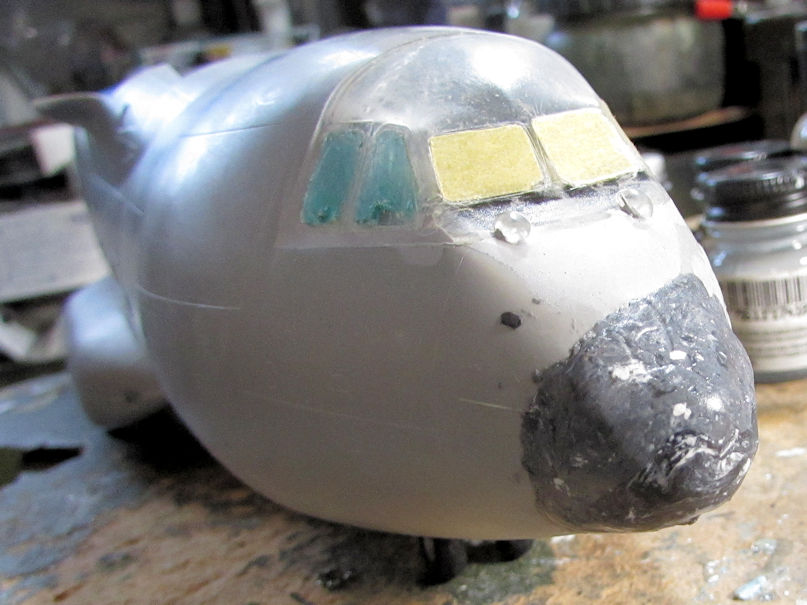
Let's start with my aircraft in the hangar. I'm still slowly working on my A-400; this time I have the nose all puttied up:
While I was doing that, somehow one of my main landing gear wheels broke off..... again! This particular wheel had already come off three previous times and this time I was nowhere near it so I have no idea how or why it broke again! Instead of trying to cement it back in place like I did before, I tore out the mounting arm that it is supposed to stick to first. I then clamped it into place and filled the joint with CA glue and kicker:
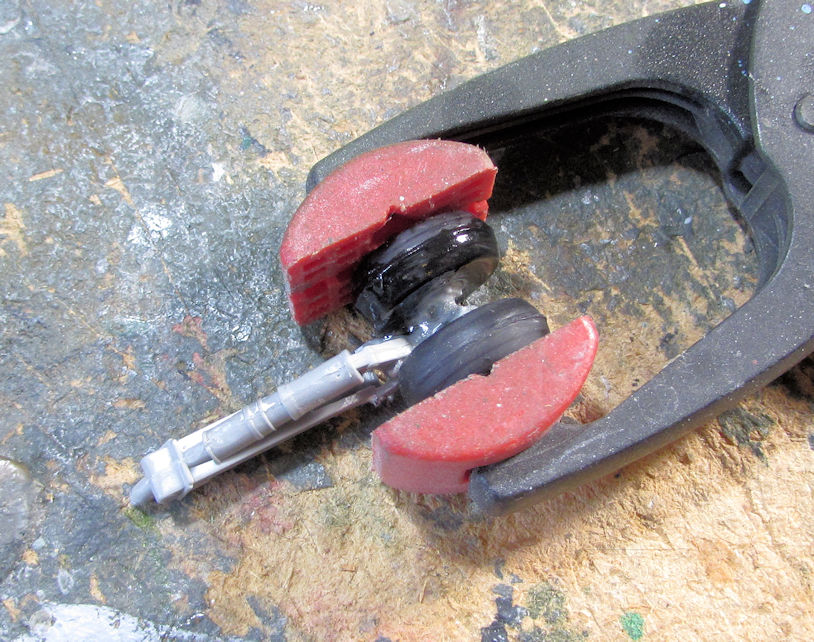
That thing is now back on the main strut it's supposed to sit on and should hopefully stay this time!
Okay, next is the work I did on my An-124. That's the An-124; everyone keeps calling it the -225 which I have NOT gotten yet!
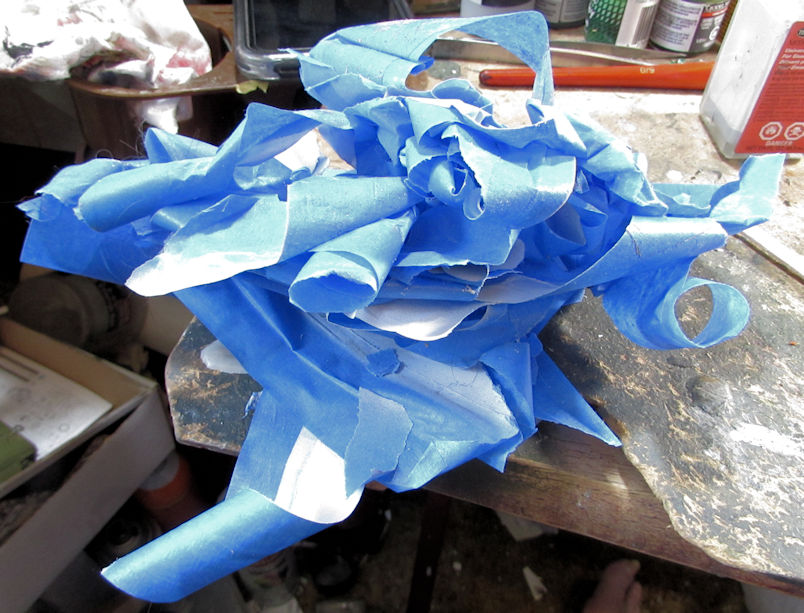
First off, thanks to a friend and fellow AMPS member, I finally managed to get the fuselage of this monster painted clean and smooth enough. So, I took all the tape off the bottom of the plane, except for the tape still protecting the main landing gear bays:
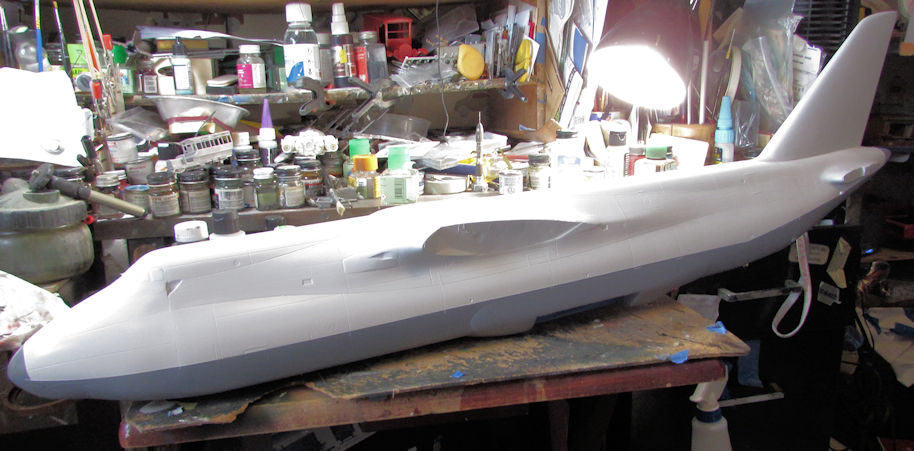
That was a lot of tape!
Next, I taped off and painted the aluminum leading edge on the vertical stabilizer:
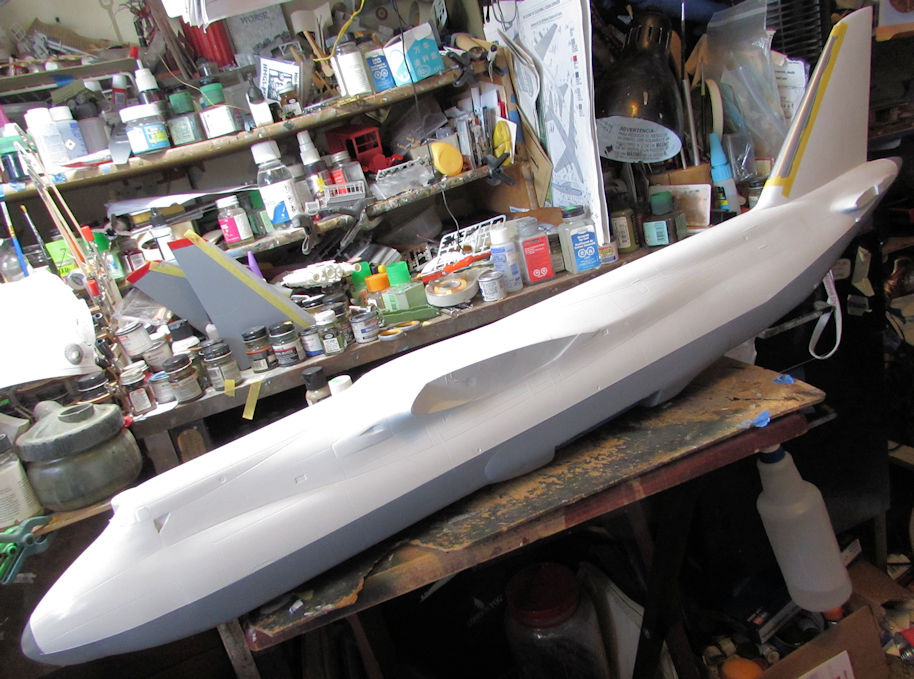
After that, I painted the nose and tail with the "steel grey" (Humbrol) called for in the paint call out sheet. Here's the nose, the tail has the same color:
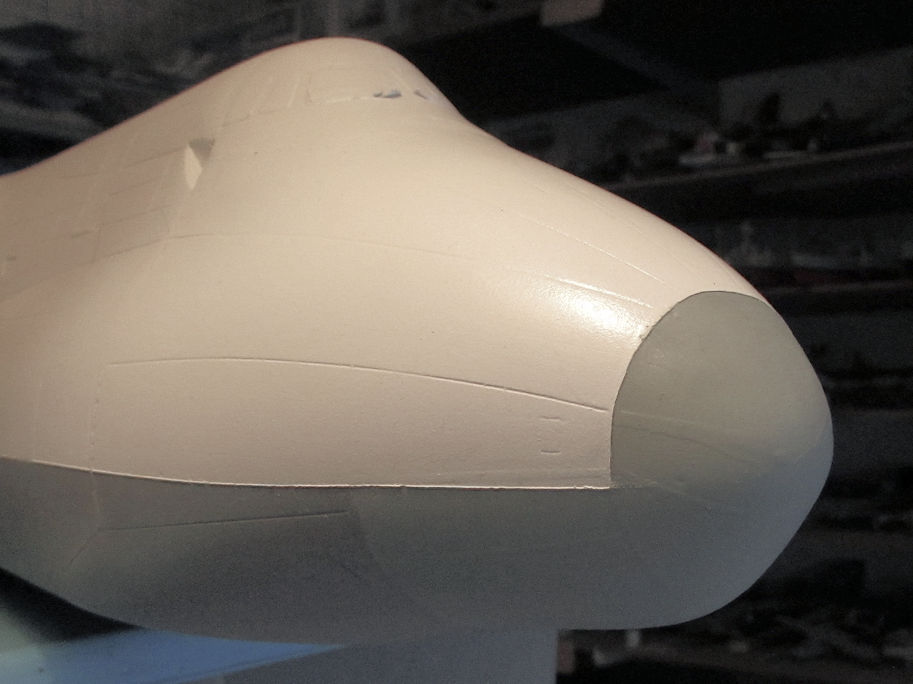
After that, I removed the tape from the vertical stabilizer. Now this bird's fuselage is ready for another clearcoat to tie everything together and then I can decal it:
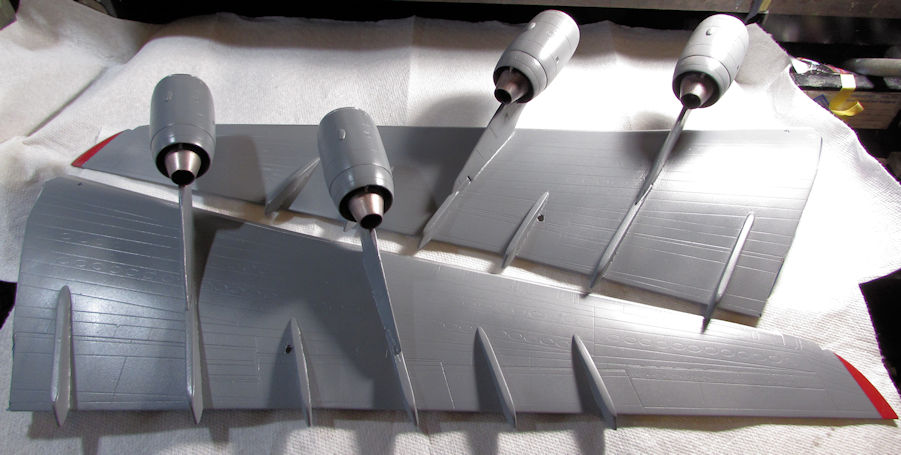
Next I turned my attention to the wings. to start with, I tried an experiment on the exhaust cones of the engines. First came the dark metallic color, then I drybrushed a light aluminum color over that, followed by another drybrush of copper over it. This is the result:
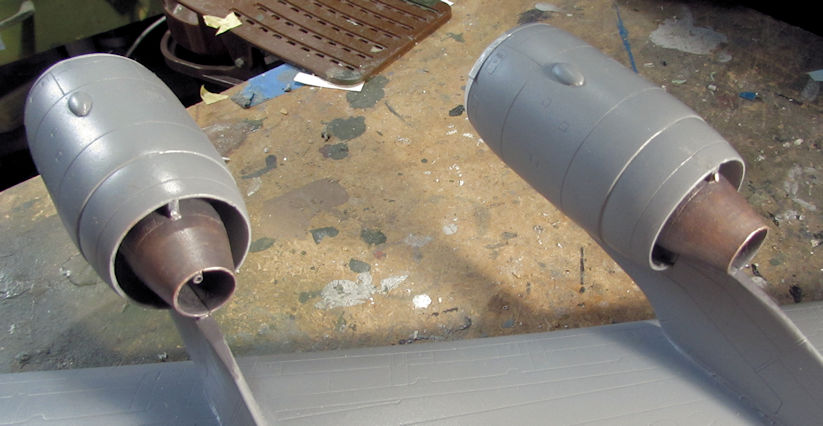
I like it.
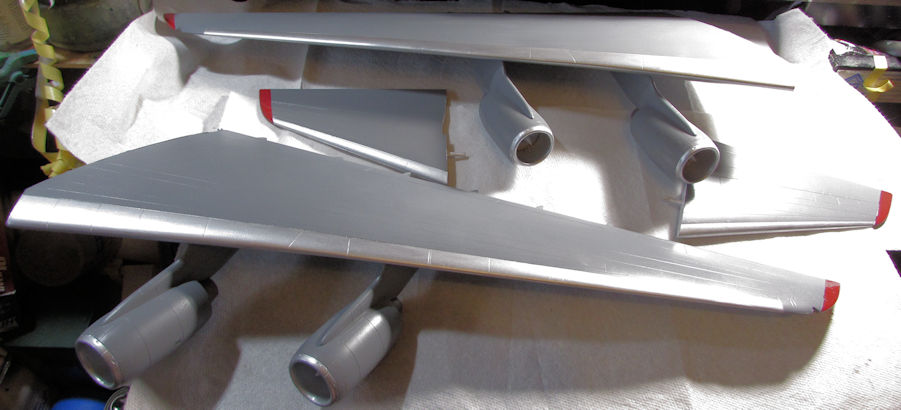
Then I masked and painted the leading edges of the wings and tail and painted the aluminum on those:
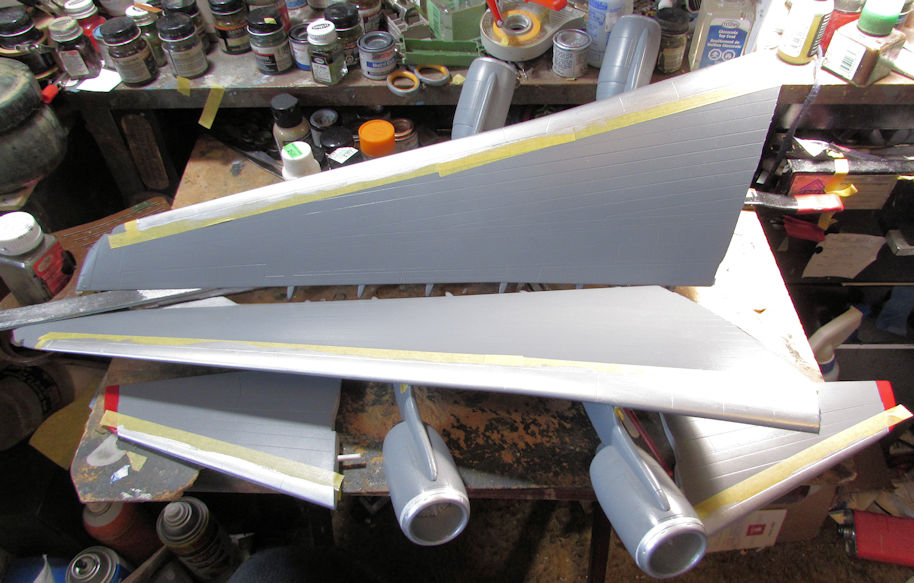
After awhile, I removed all the tape after finishing the other two exhaust cones on the other wing. Now these wings and tails are ready for decals after another clearcoat:
That's as far as I got with this An-124.
Time for something different...
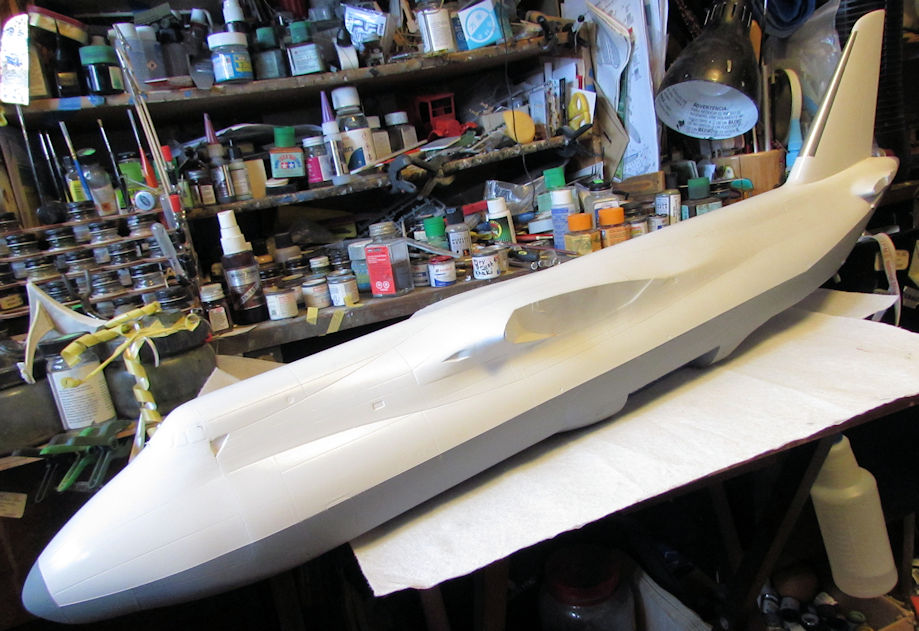
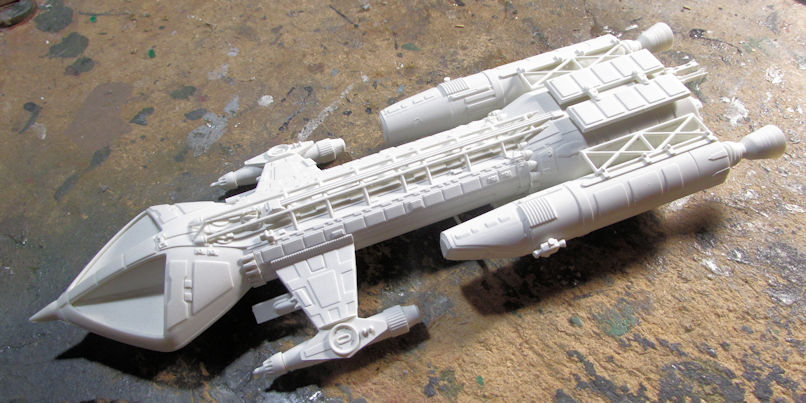
I shot a white coat on the Space 1999 Mk.IX Hawk. Next I'll have to mask off certain places to shoot the orange on it. It doesn't look like it since this was molded in white, but it is sprayed:
Moving on to the vehicle assembly line, we have a lot going on here.
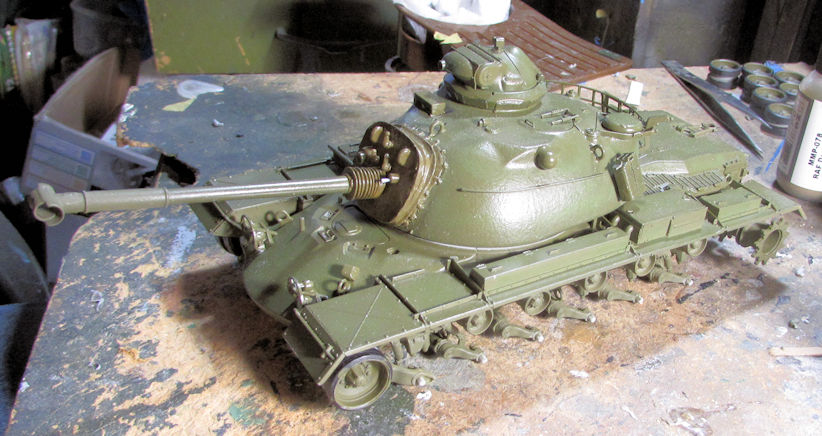
I shot a clear coat on the 1/35th scale Patton I'm doing. Decals will be next before I add the wheels and tracks:
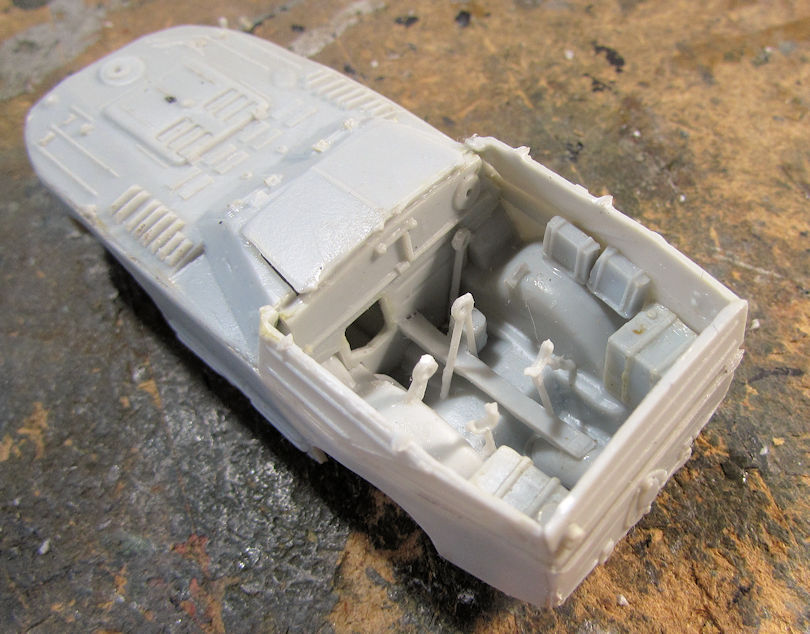
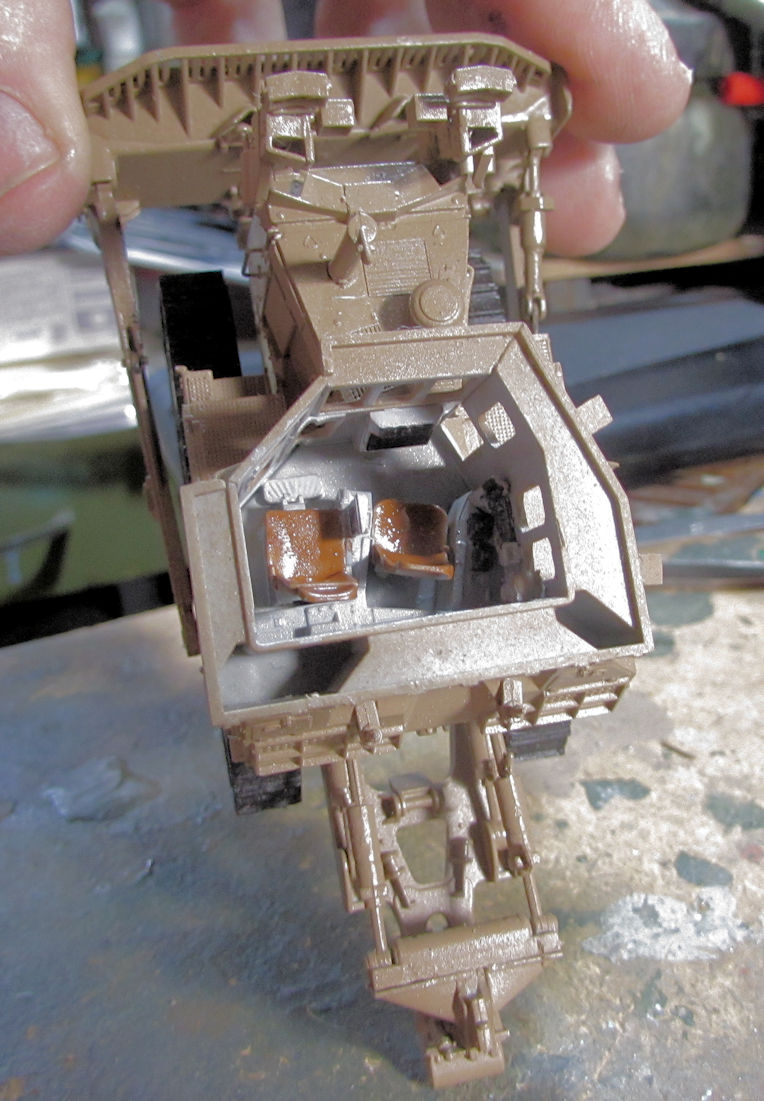
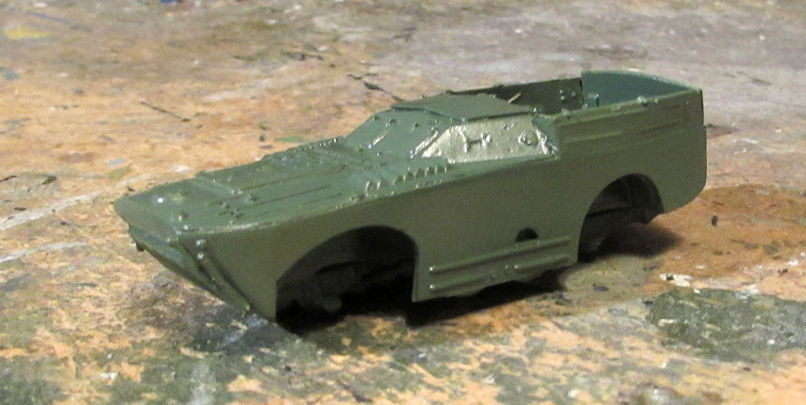
Moving on to my smaller stuff; I'm doing another Group Build on another forums so it was time to do more on that project. This is a Russian anti-tank vehicle that I basically had to add an interior to. This is what it looks like:
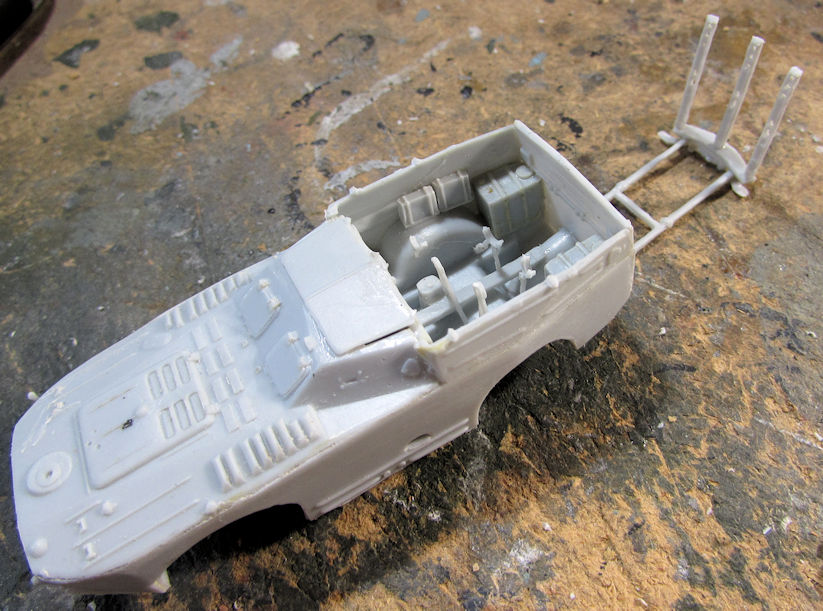
Later I built the launching arm assembly for the three missiles in firing position. You can see that sitting behind the vehicle here:
Gotta do some painting before I can move on this further.
This completes part I. Part II resumes in the following post. Please disembark from the tram for a brief intermission.
I've got quite a few pics to post so this will be in two parts.
So, everyone climb aboard the tram and we'll get on our way. Just remember to keep hands and feet inside the tram at all times.
Let's start with my aircraft in the hangar. I'm still slowly working on my A-400; this time I have the nose all puttied up:
While I was doing that, somehow one of my main landing gear wheels broke off..... again! This particular wheel had already come off three previous times and this time I was nowhere near it so I have no idea how or why it broke again! Instead of trying to cement it back in place like I did before, I tore out the mounting arm that it is supposed to stick to first. I then clamped it into place and filled the joint with CA glue and kicker:
That thing is now back on the main strut it's supposed to sit on and should hopefully stay this time!
Okay, next is the work I did on my An-124. That's the An-124; everyone keeps calling it the -225 which I have NOT gotten yet!
First off, thanks to a friend and fellow AMPS member, I finally managed to get the fuselage of this monster painted clean and smooth enough. So, I took all the tape off the bottom of the plane, except for the tape still protecting the main landing gear bays:
That was a lot of tape!
Next, I taped off and painted the aluminum leading edge on the vertical stabilizer:
After that, I painted the nose and tail with the "steel grey" (Humbrol) called for in the paint call out sheet. Here's the nose, the tail has the same color:
After that, I removed the tape from the vertical stabilizer. Now this bird's fuselage is ready for another clearcoat to tie everything together and then I can decal it:
Next I turned my attention to the wings. to start with, I tried an experiment on the exhaust cones of the engines. First came the dark metallic color, then I drybrushed a light aluminum color over that, followed by another drybrush of copper over it. This is the result:
I like it.
Then I masked and painted the leading edges of the wings and tail and painted the aluminum on those:
After awhile, I removed all the tape after finishing the other two exhaust cones on the other wing. Now these wings and tails are ready for decals after another clearcoat:
That's as far as I got with this An-124.
Time for something different...
I shot a white coat on the Space 1999 Mk.IX Hawk. Next I'll have to mask off certain places to shoot the orange on it. It doesn't look like it since this was molded in white, but it is sprayed:
Moving on to the vehicle assembly line, we have a lot going on here.
I shot a clear coat on the 1/35th scale Patton I'm doing. Decals will be next before I add the wheels and tracks:
Moving on to my smaller stuff; I'm doing another Group Build on another forums so it was time to do more on that project. This is a Russian anti-tank vehicle that I basically had to add an interior to. This is what it looks like:
Later I built the launching arm assembly for the three missiles in firing position. You can see that sitting behind the vehicle here:
Gotta do some painting before I can move on this further.
This completes part I. Part II resumes in the following post. Please disembark from the tram for a brief intermission.
Duke Maddog
Well-known member
And now for Part II. All aboard to complete this tour!
This next one is my campaign model for the Micro Modeling Month campaign here on the Alliance.
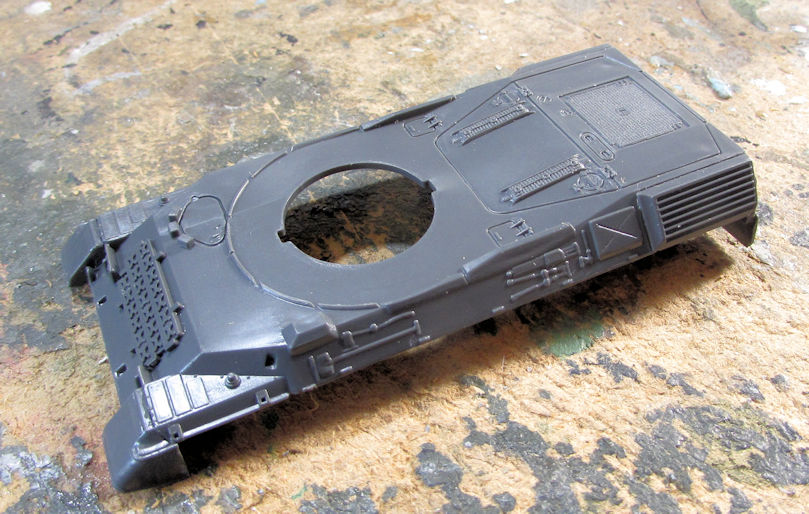
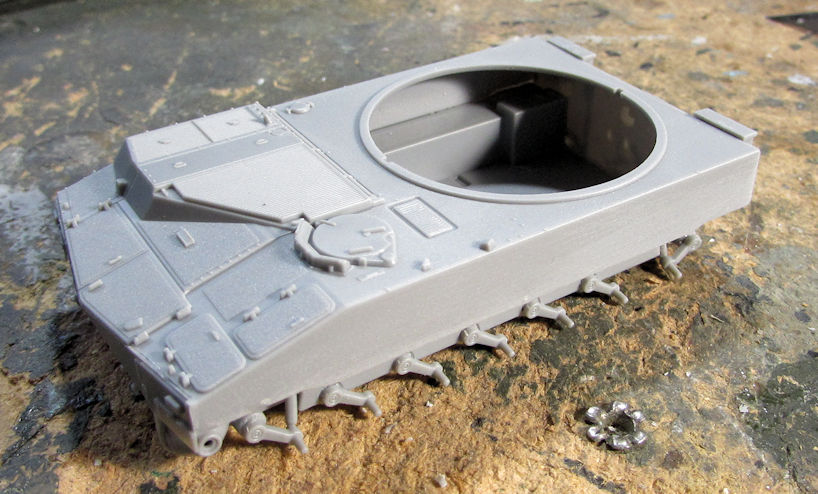
I started by assembling the lower hull as it was in three pieces:
I then built the turret, only doing the basics while leaving off delicate parts until later:
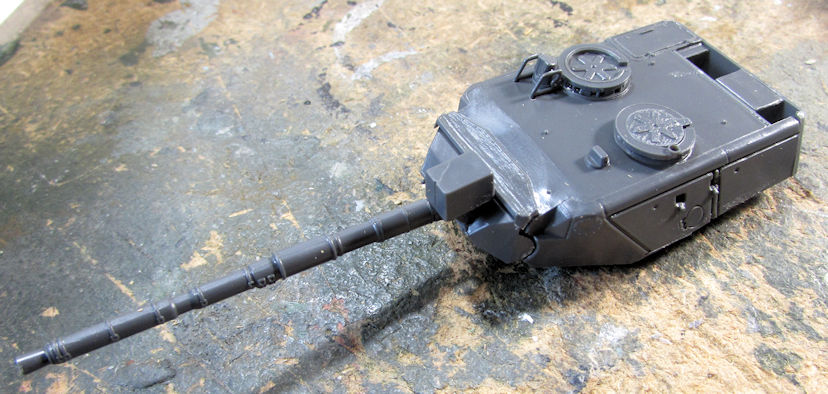
Next was adding the additional parts to the upper hull. There weren't too many:
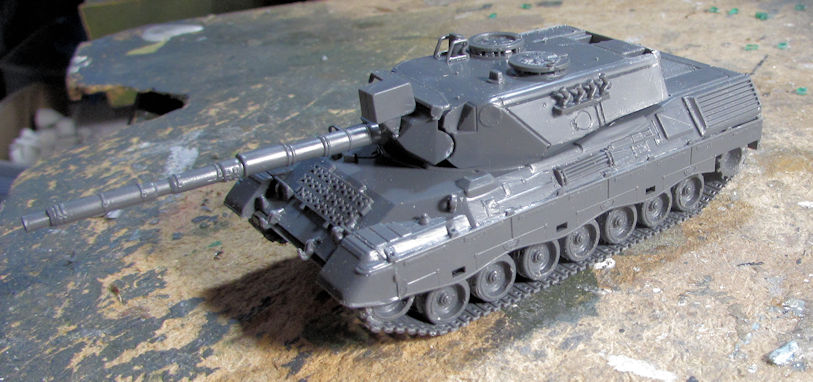
Finally, I assembled the running gear and tracks and added additional parts and sub-assemblies to the turret. This tank is now ready for paint. Here it is all mocked up:
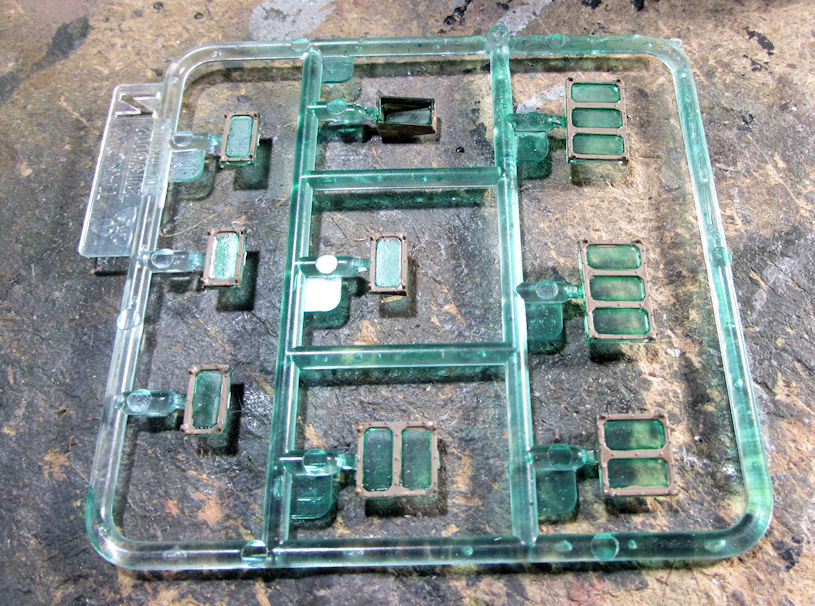
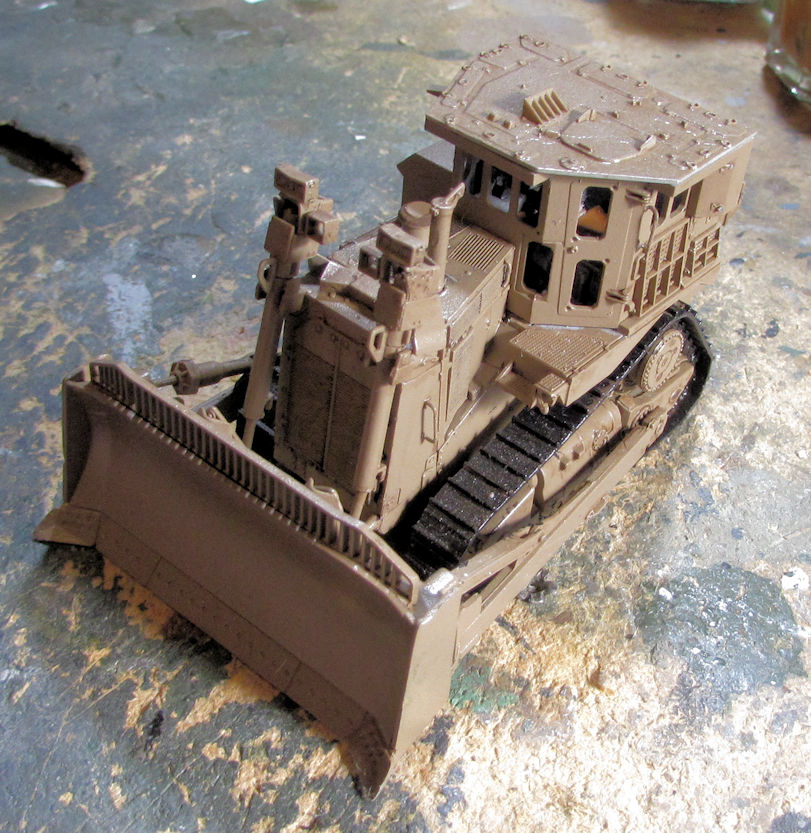
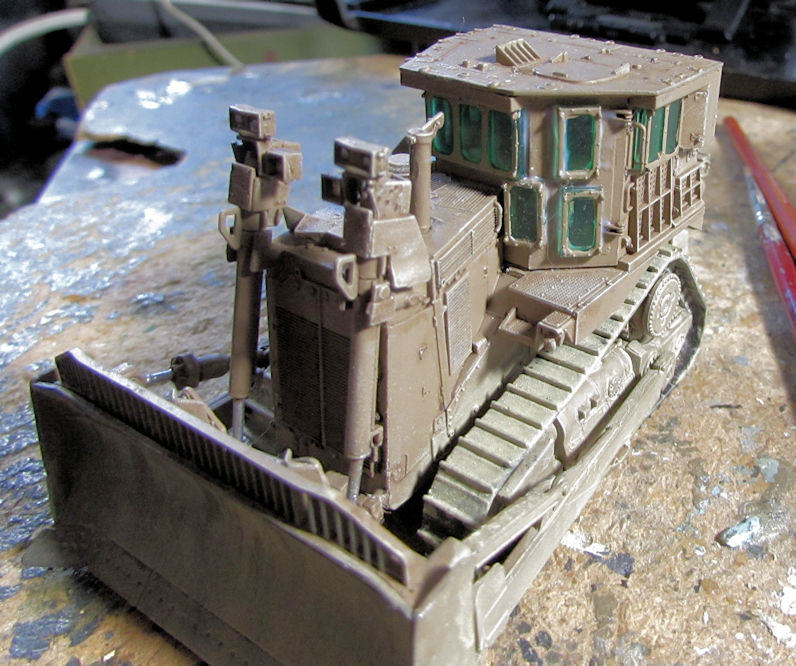
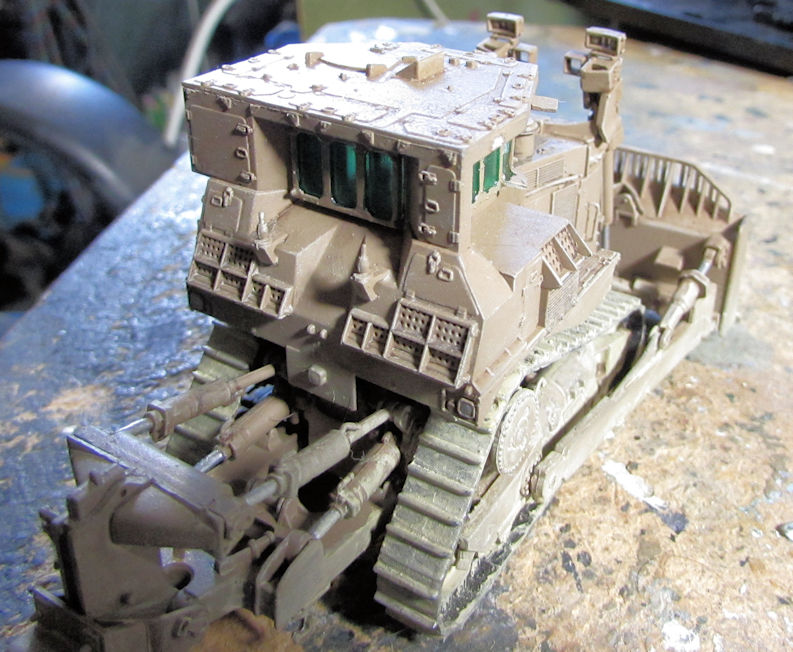
Moving on from here, I painted the interior of the D-9 dozer cab so I can close it up and move on. It is a bit crude in there, but once this cab is closed and the windows on it; you won't be able to tell:
As for the windows, I had painted them a clear green before to represent the bulletproof glass on them. This time, I painted the frames the same tan color as the rest of the model:
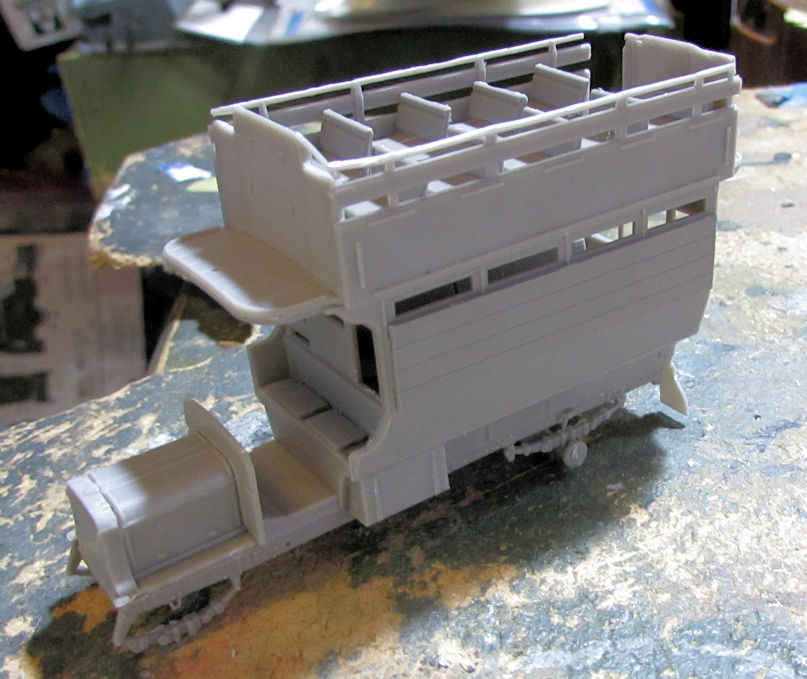
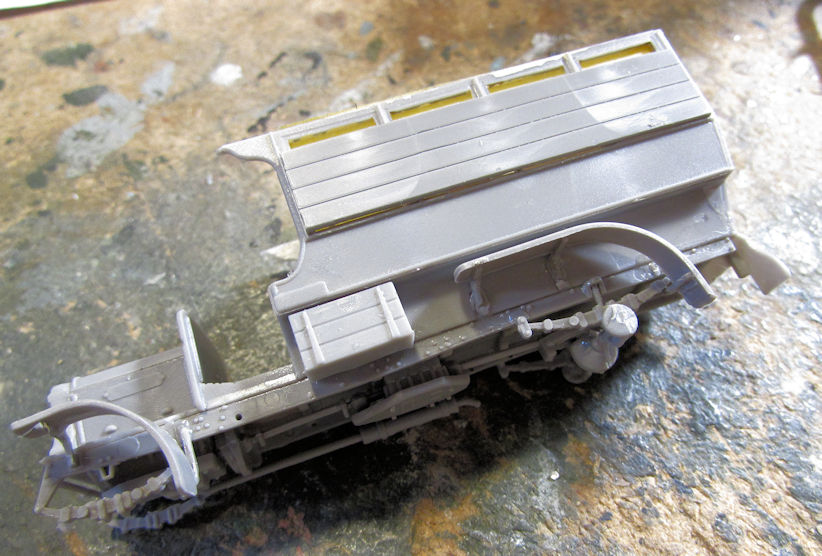
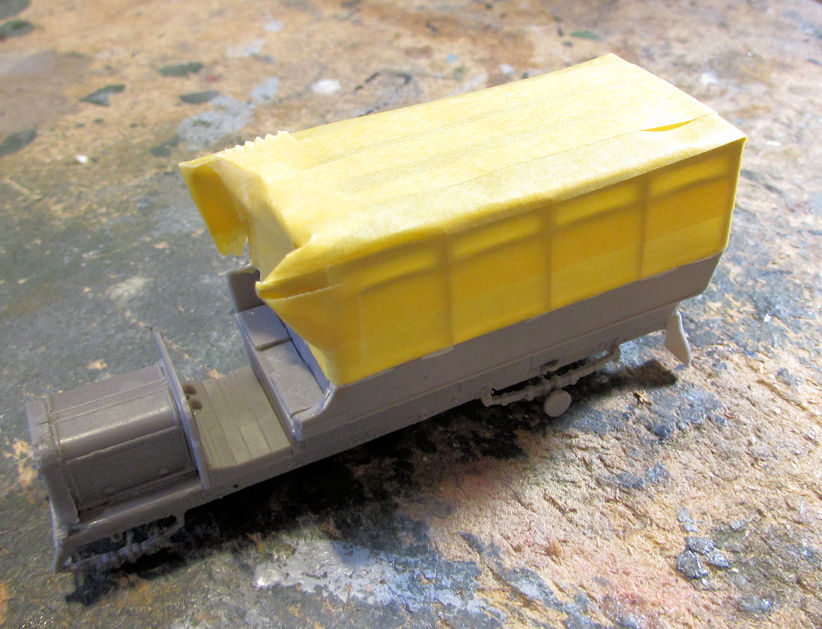
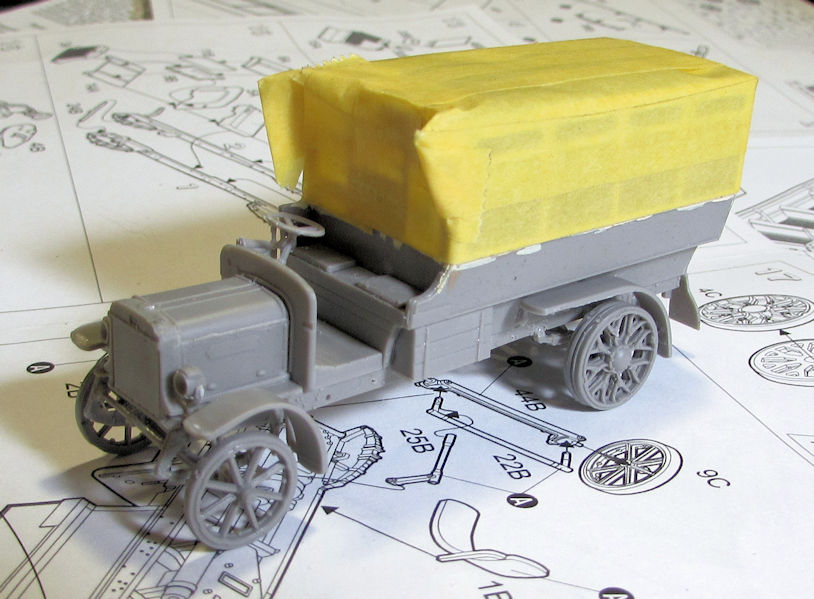
Next I started a second Type B bus; this time it was the one in military service known as "Ole Bill". All the assembly was basically the same; the one exception was that "Ole Bill" had boards covering the lower cabin windows for protection of the troops inside. So, I waited until I had it built to the same level as the previous bus before shooting pics:
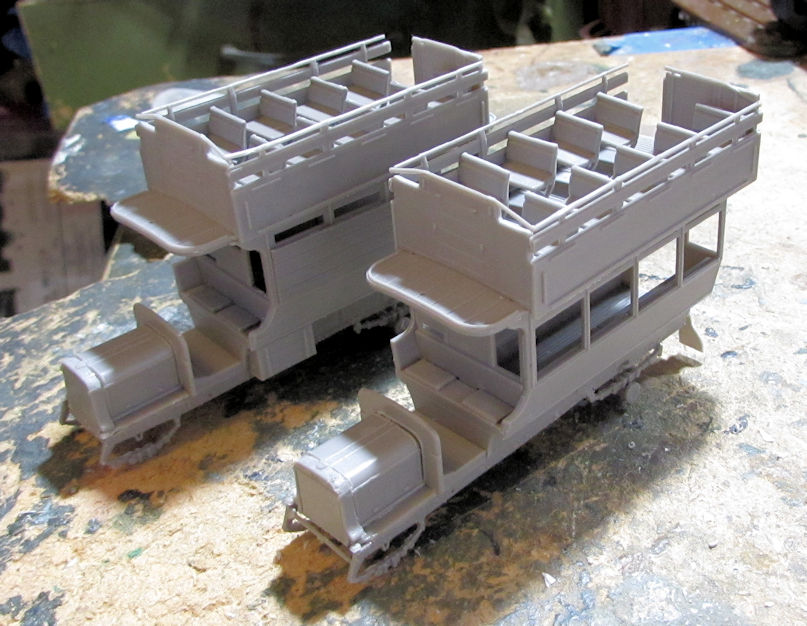
Here you can see the difference between the two in this shot of them sitting side by side:
Afterward, I decided it was time to get all the photo etch out of the way on all these models that need it. I started with the baskets on the rear of the M-109A6 turret. All the side pieces needed photo etch before assembly:
Later I built them and installed them on the turret but I didn't get pics of that. Next update I'll show them.
More photo etch fun happened with the British FV-432. This vehicle has a rather large basket that sits on top. Takom gave me a rather ingenious little jig in the kit that simplified assembly of it tremendously. It looks like a giant tub (at least giant from the perspective of 1/72 scale!) that you prop the pieces up on. Then you add glue where they touch on the ends:
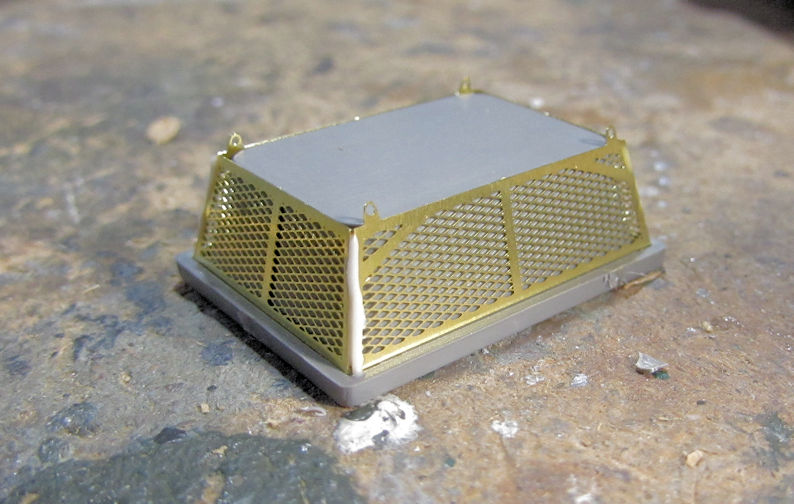
The glue was still wet when I took that pic. After it dried, I added the photo etch screen to the base grid piece that this sits on and then glued this assembly on top of it. And there you have a basket:
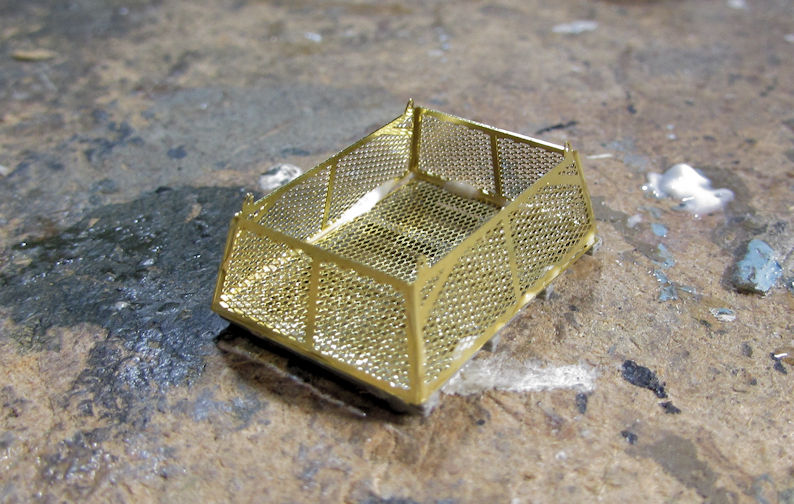
Again, the glue was till wet in that pic. That was amazingly simple and fun!
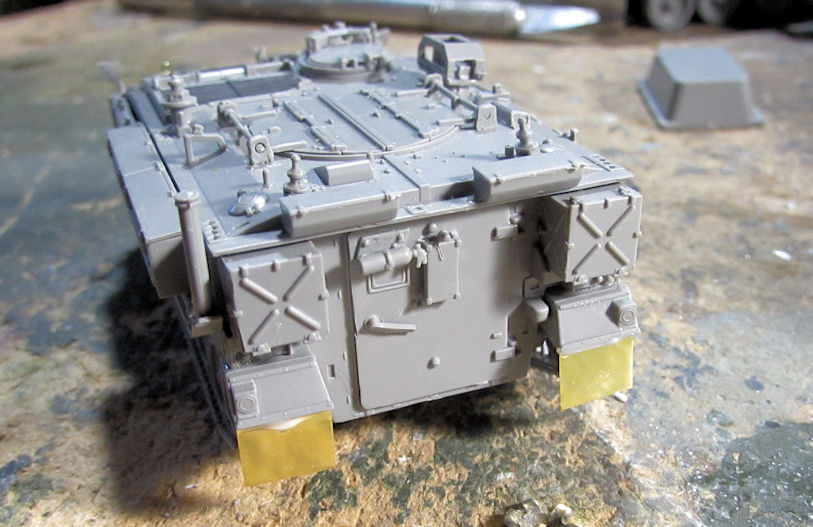
Moving on, I added the remaining photo etch parts to the model itself; starting with the headlight screens and lift rings in front:
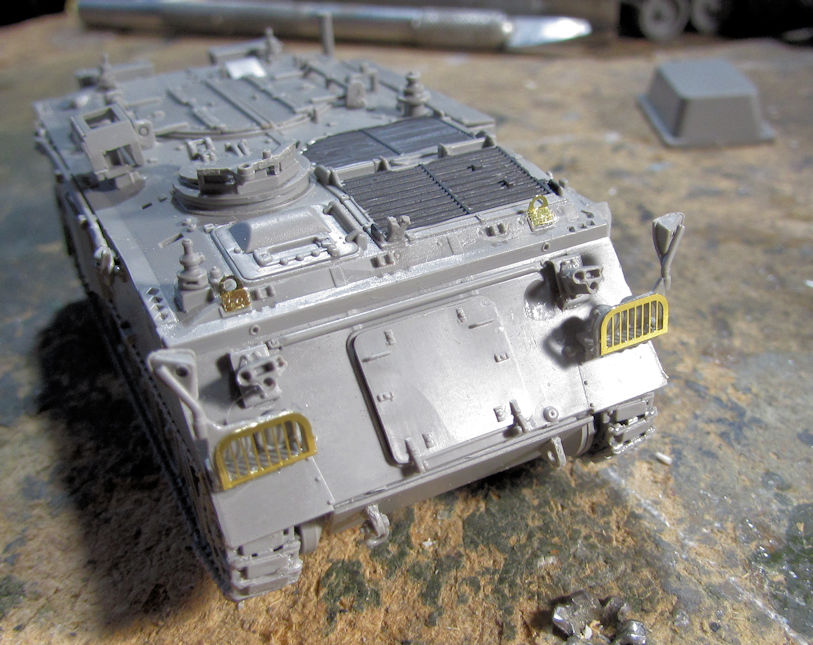
On the back I added the photo etch mud flaps:
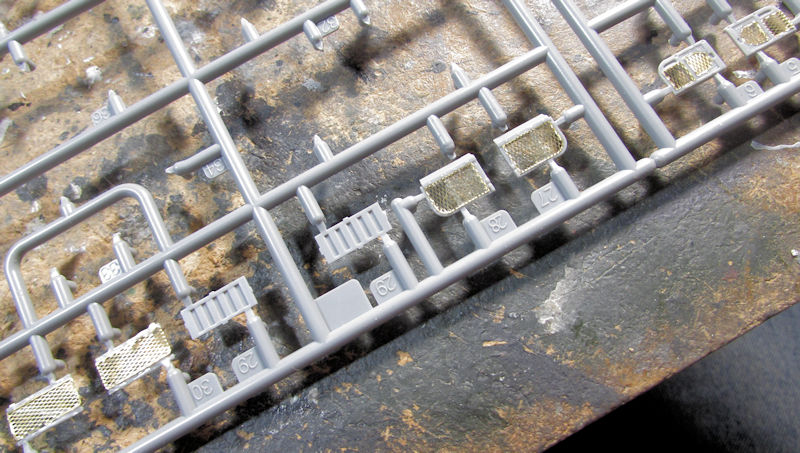
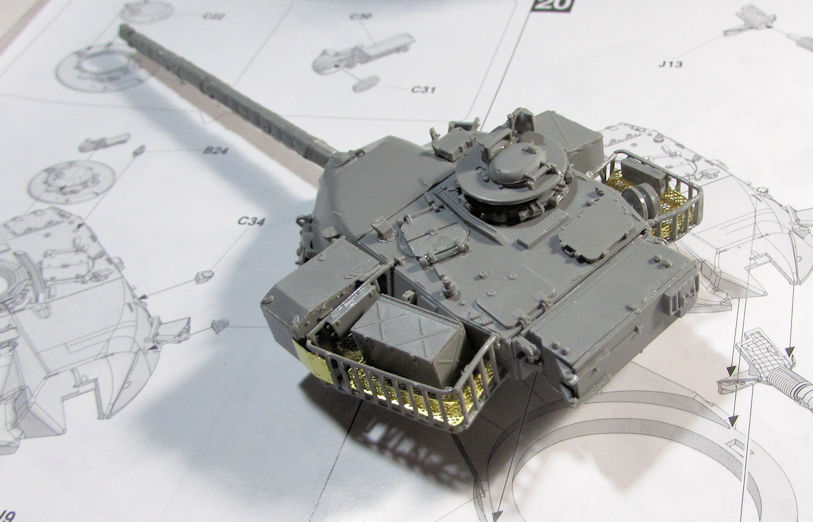
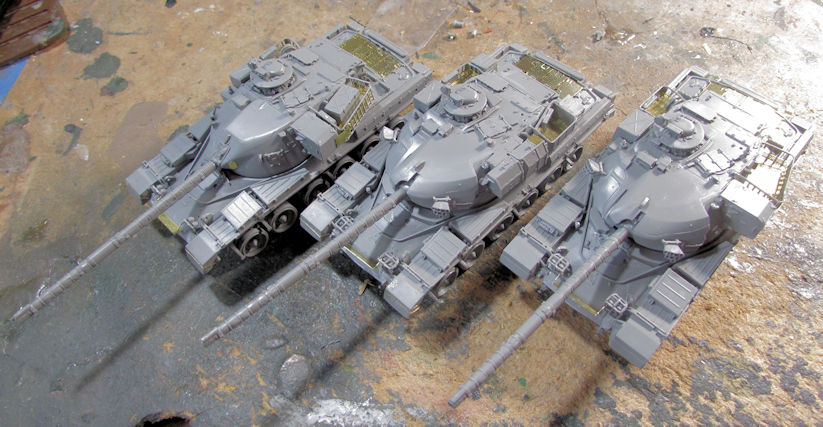
Next it was time to add the photo etch to the Chieftains, starting with the Mk.5. I started on the hull, adding the engine deck screens and other parts:

Those parts on the front fenders were very difficult to add. I then added all the photo etch to the baskets on the turret:
I did the same thing with the Mk.10, first doing the hull followed by the turret baskets:
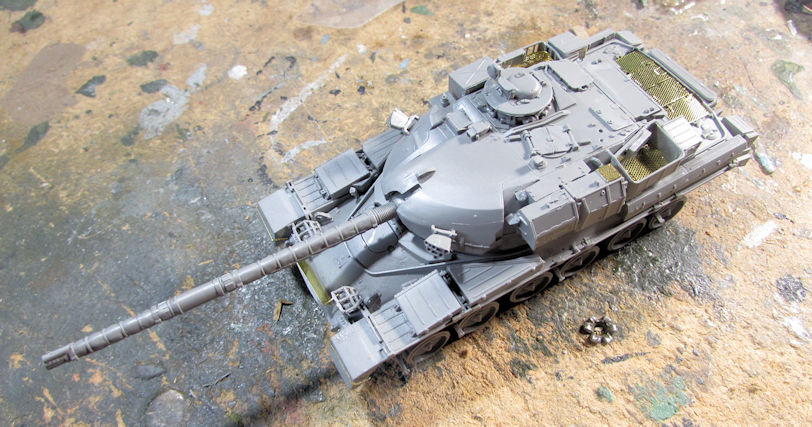
Here it is all mocked up:
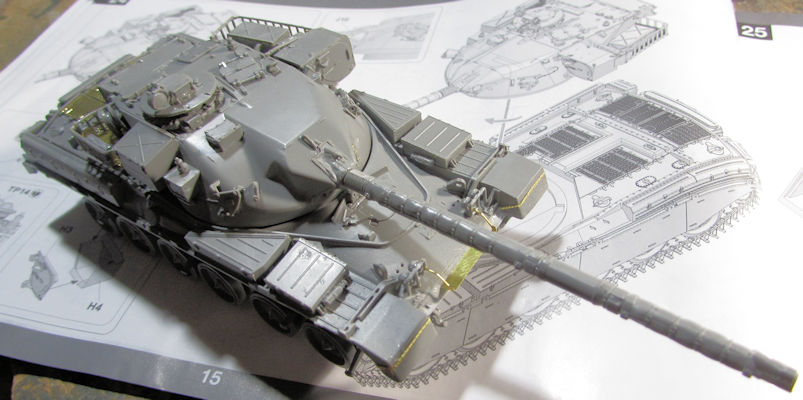
...and then the Mk. 11 was completed the same way:
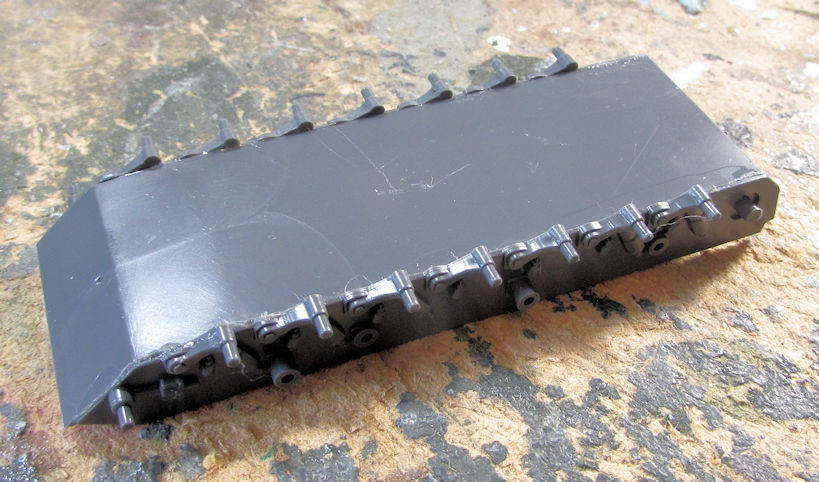
Afterward while the photo etch was drying, I completed the track runs for all three tanks. Here they are still on the track jigs:
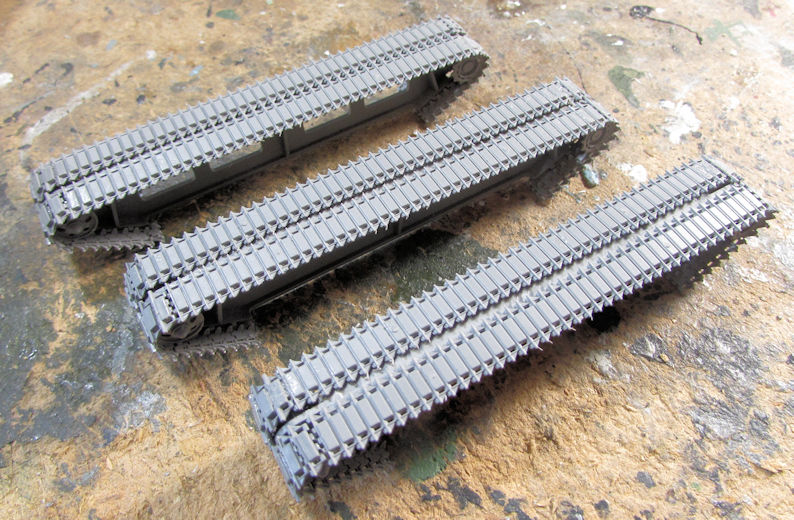
Now all three of these are ready for paint now, then I can complete the track installations and go from there:
Because of all this progress, I had a great birthday!
That completes the tour for this week. Please disembark in an orderly fashion. Extra birthday cake and ice cream will be served in the snack bar.
Thank you all for looking in, comments are welcome.
This next one is my campaign model for the Micro Modeling Month campaign here on the Alliance.
I started by assembling the lower hull as it was in three pieces:
I then built the turret, only doing the basics while leaving off delicate parts until later:
Next was adding the additional parts to the upper hull. There weren't too many:
Finally, I assembled the running gear and tracks and added additional parts and sub-assemblies to the turret. This tank is now ready for paint. Here it is all mocked up:
Moving on from here, I painted the interior of the D-9 dozer cab so I can close it up and move on. It is a bit crude in there, but once this cab is closed and the windows on it; you won't be able to tell:
As for the windows, I had painted them a clear green before to represent the bulletproof glass on them. This time, I painted the frames the same tan color as the rest of the model:
Next I started a second Type B bus; this time it was the one in military service known as "Ole Bill". All the assembly was basically the same; the one exception was that "Ole Bill" had boards covering the lower cabin windows for protection of the troops inside. So, I waited until I had it built to the same level as the previous bus before shooting pics:
Here you can see the difference between the two in this shot of them sitting side by side:
Afterward, I decided it was time to get all the photo etch out of the way on all these models that need it. I started with the baskets on the rear of the M-109A6 turret. All the side pieces needed photo etch before assembly:
Later I built them and installed them on the turret but I didn't get pics of that. Next update I'll show them.
More photo etch fun happened with the British FV-432. This vehicle has a rather large basket that sits on top. Takom gave me a rather ingenious little jig in the kit that simplified assembly of it tremendously. It looks like a giant tub (at least giant from the perspective of 1/72 scale!) that you prop the pieces up on. Then you add glue where they touch on the ends:
The glue was still wet when I took that pic. After it dried, I added the photo etch screen to the base grid piece that this sits on and then glued this assembly on top of it. And there you have a basket:
Again, the glue was till wet in that pic. That was amazingly simple and fun!
Moving on, I added the remaining photo etch parts to the model itself; starting with the headlight screens and lift rings in front:
On the back I added the photo etch mud flaps:
Next it was time to add the photo etch to the Chieftains, starting with the Mk.5. I started on the hull, adding the engine deck screens and other parts:
Those parts on the front fenders were very difficult to add. I then added all the photo etch to the baskets on the turret:
I did the same thing with the Mk.10, first doing the hull followed by the turret baskets:
Here it is all mocked up:
...and then the Mk. 11 was completed the same way:
Afterward while the photo etch was drying, I completed the track runs for all three tanks. Here they are still on the track jigs:
Now all three of these are ready for paint now, then I can complete the track installations and go from there:
Because of all this progress, I had a great birthday!
That completes the tour for this week. Please disembark in an orderly fashion. Extra birthday cake and ice cream will be served in the snack bar.
Thank you all for looking in, comments are welcome.
Flyingbabydoc
Well-known member
Happy belated birthday Mark! I am happy you had a good time. Certainly you have made a lot of progress in you models.
Are you really going for an An-225 kit? Probably 1/32 I guess...
Good luck with your other biggies. I guess I could do an An-124 too. If it were 1:700!
Cheers
Alex
Are you really going for an An-225 kit? Probably 1/32 I guess...
Good luck with your other biggies. I guess I could do an An-124 too. If it were 1:700!
Cheers
Alex
Duke Maddog
Well-known member
Thank you Alex! It was a great birthday, especially since I did get so much progress done. And yes, I want to get an An-225 someday to go with this An-124. And no, it would not be 1/32 scale, that would be big enough to climb in and fly off in. There is one released in 1/72 scale like the An-124. a 1/700 scale An-124? Yeah, that might be about four inches long! Eminently doable!
Duke Maddog
Well-known member
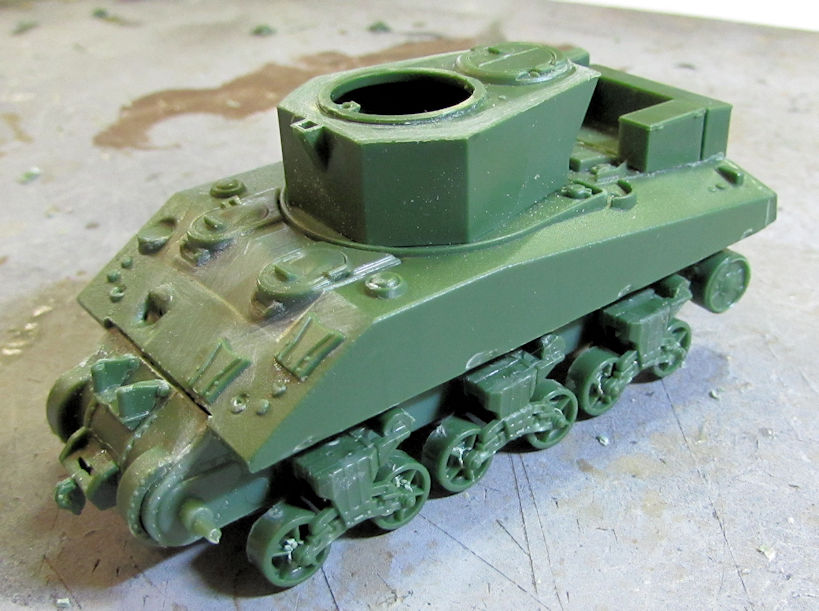
This has been a pretty great week, especially since I got to spend so much time building at Hobby Day. Almost all the model acquisitions I posted were also gotten at Hobby Day. This is all armor too this time.
First up is my 1/35th scale Patton that I'm building for the SoCal AMPS Group Build. All I did was to apply the decals, starting with the front of the hull:
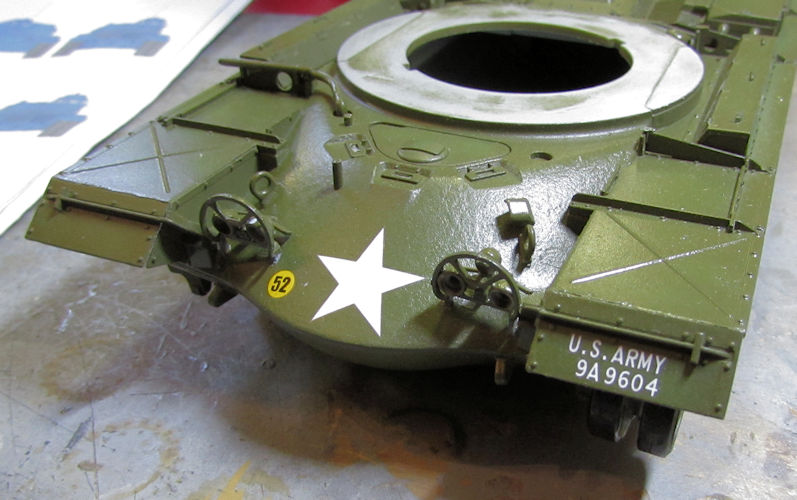
After that I did the turret decals:
Next were the decals on the side. This is where I nearly lost it. With the exception of the word "Army" every single letter and number was individually printed... even the stinkin' dots that go behind the 'U' and the 'S'!! WHAT?!!!


 Seriously, why was it so hard to print them as one big decal? Well, because of that, these are not that that straight and I don't care:
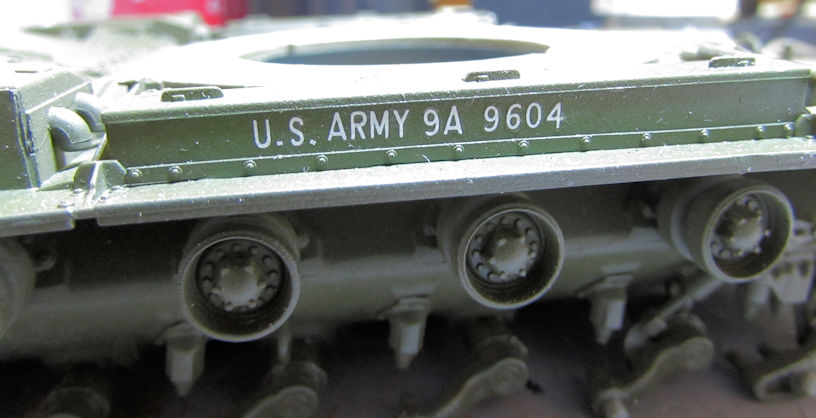
Here is this big beastie all decaled up and ready for the dullcoat, weathering, wheels and tracks:
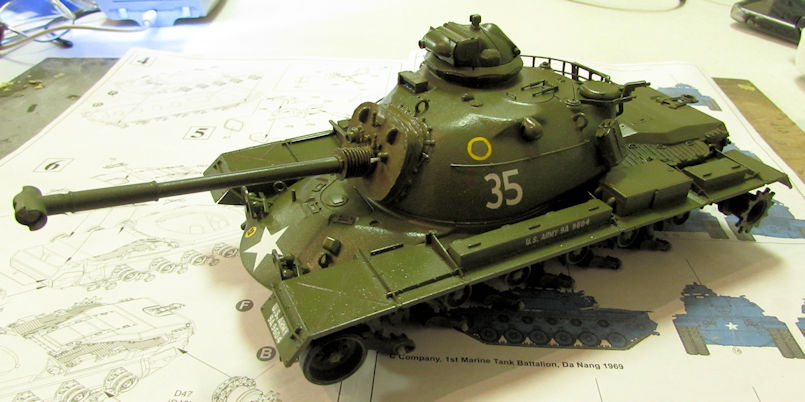
I did this up as a tank from the 1st of the 69th Armor in honor of a friend of mine who served in that unit and fought at the battle of Ben Het.
Oh man, enough of that! After that I was ready for something simple.
The next thing I did was to finally cement down the cab roof. After that I added a dark brown wash to the D-9 Dozer, and then a black wash to the grilles on it:
It doesn't show well in that pic, but it is there. Yes, I have a bit of touch up painting to do. I'll do that after I dullcoat it.
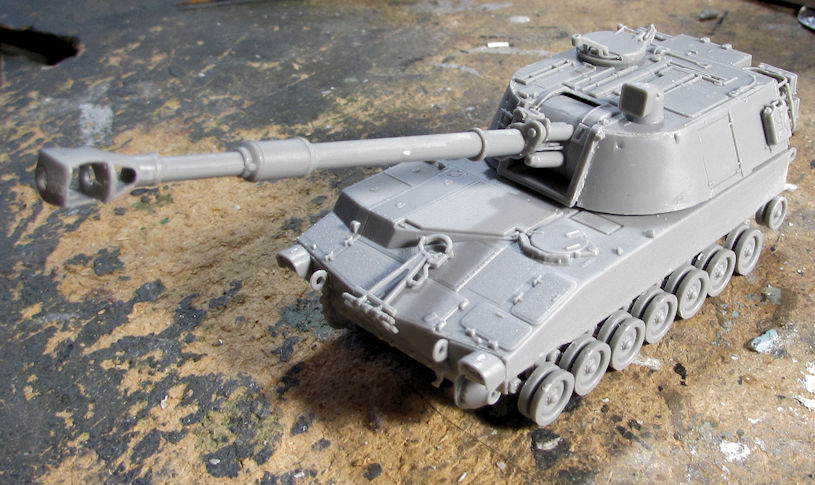
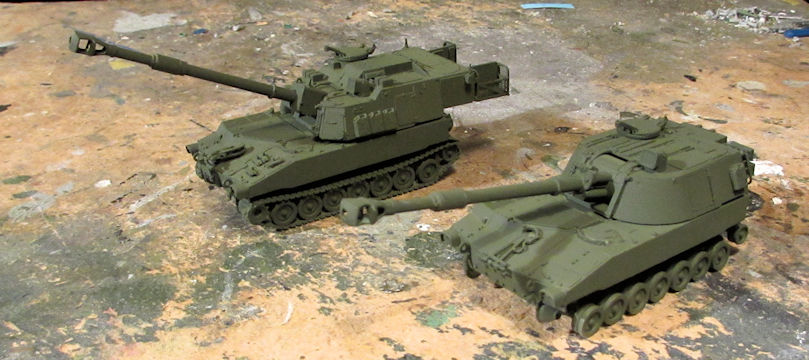
Next up, I figured if I was going to paint my M-109A6; then I might as well build my M-109A2 and paint it at the same time. I pulled it out and started on it by building the basic hull:
Next I added all the detail parts and the wheels and sprockets:
The turret was next. After I built it and added the gun I placed it on the hull:
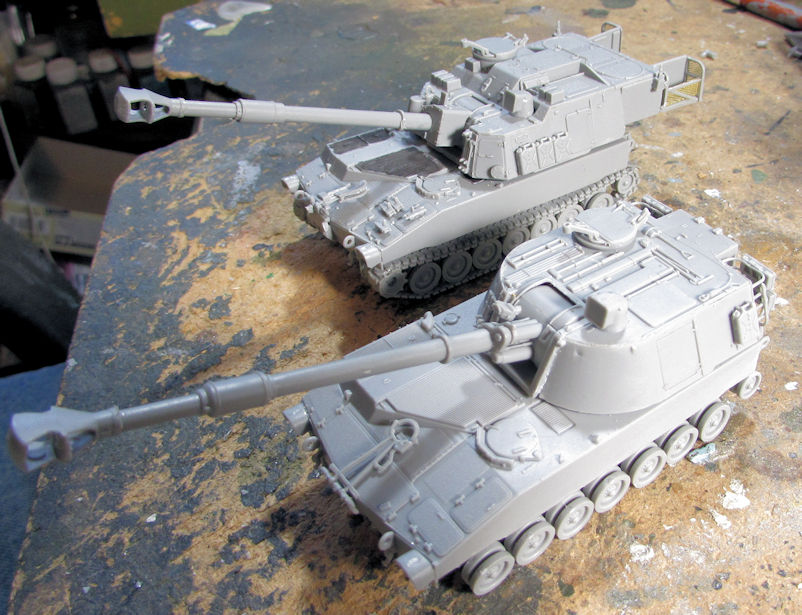
Once I get the tracks on that, I'll be able to paint it with my M-109A6. Speaking of the -A6, here they are together:
Next I decided to move forward on my M-32. It was time to do the running gear. For a UM kit, this went better than I expected:
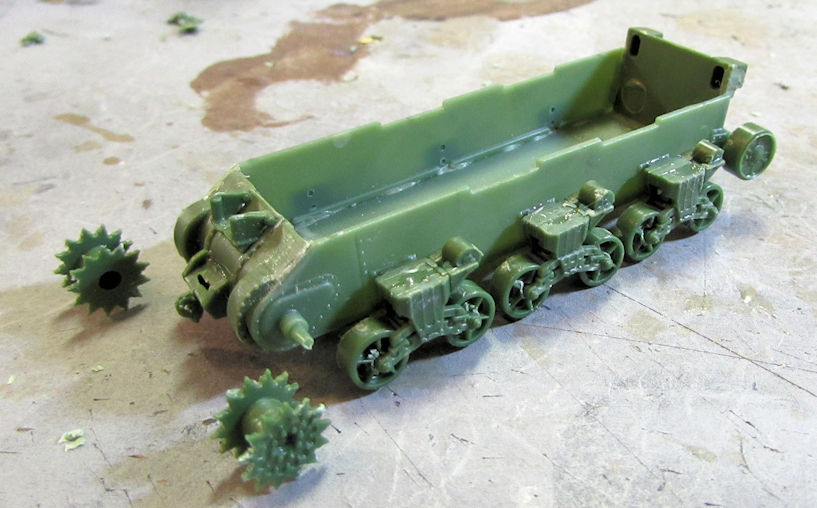
Then I added a photo-etch strip of rivets to the front of the upper hull and dry-fit it to the lower hull to see what adjustments I would need to make. Naturally, it disappeared never to be found again:
Oh well, I then checked the positioning of the mine roller attachment now that I had this up on wheels:
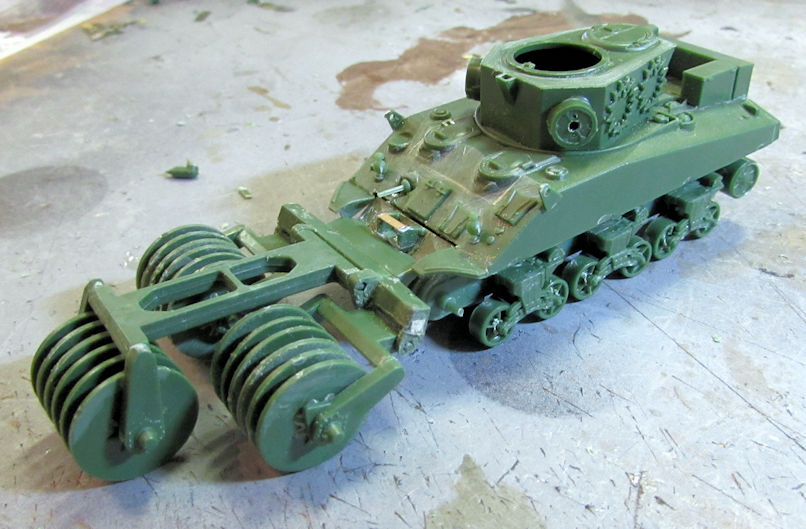
Looking pretty good. Time to set that aside until I can anneal the P/E and add it to the running gear...
That completes what I had going on before Hobby Day, some of that work above was done there too. By that time my Birthday order was in and I took thirty minutes trying to decide what to start first.....
The Master Box Mk I Female tank looked the easiest and since I'd never built a Master Box kit before, I started on that. Despite a slight bit of warpage on the bottom hull floor; this went together very fast and very well. I stopped here before doing the sponsons:
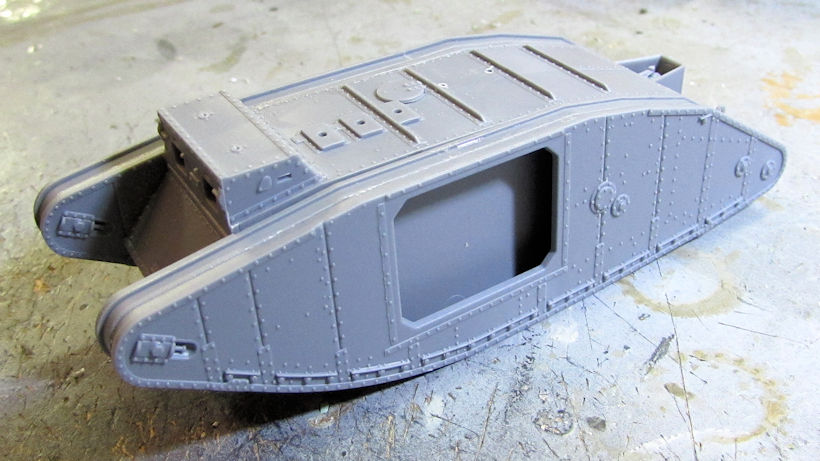
Yeah, that was about five minutes of work....
I love it!
The French APC looked the next simplest to at least start, so I built up the basic hull:
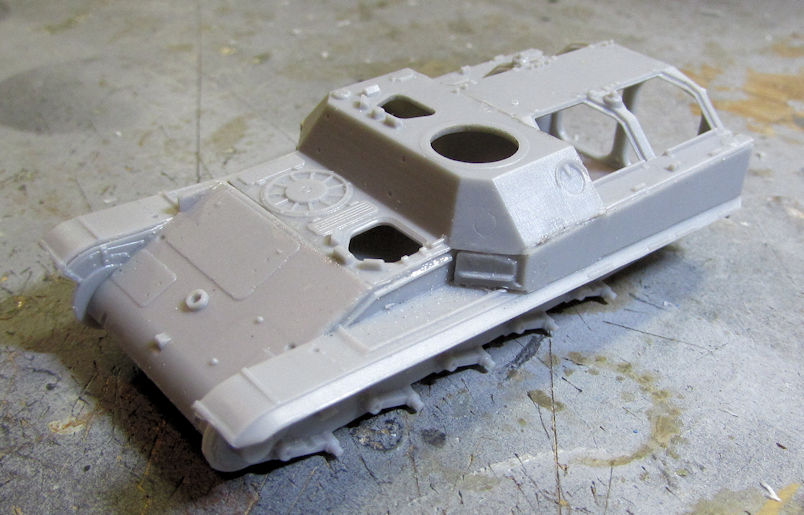
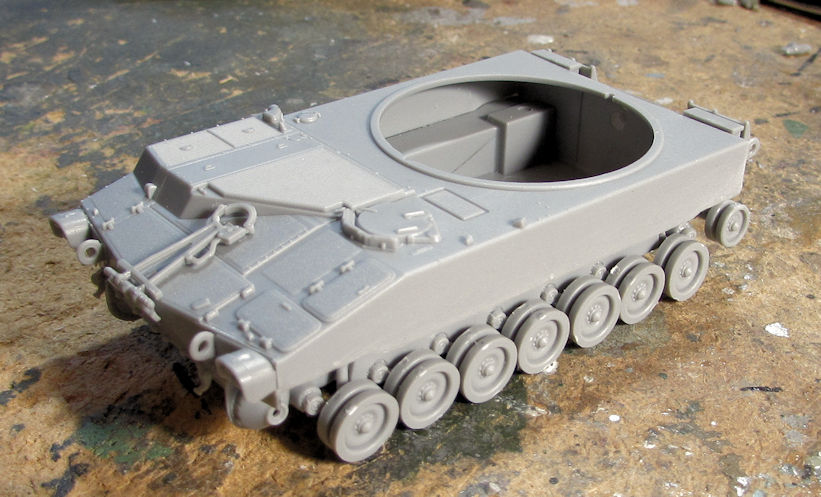
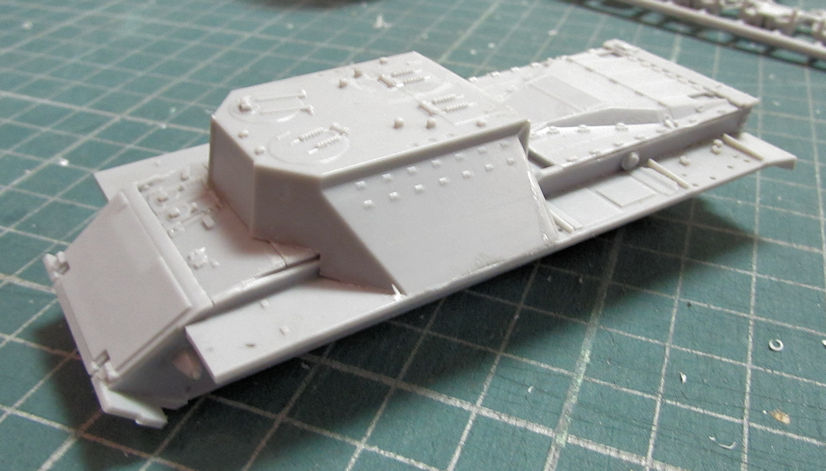
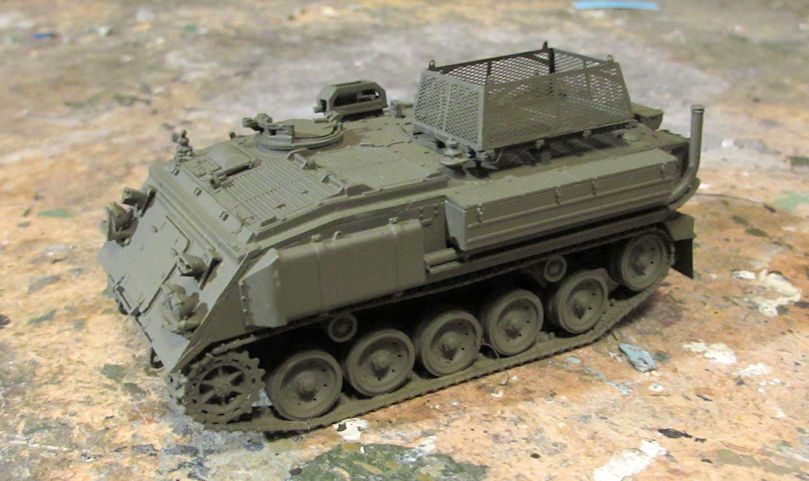
After that, I set that aside to dry and moved on to start the Israeli Nagmashot APC:
I built up the basic hull and added the top pyramid to it to test the fit:
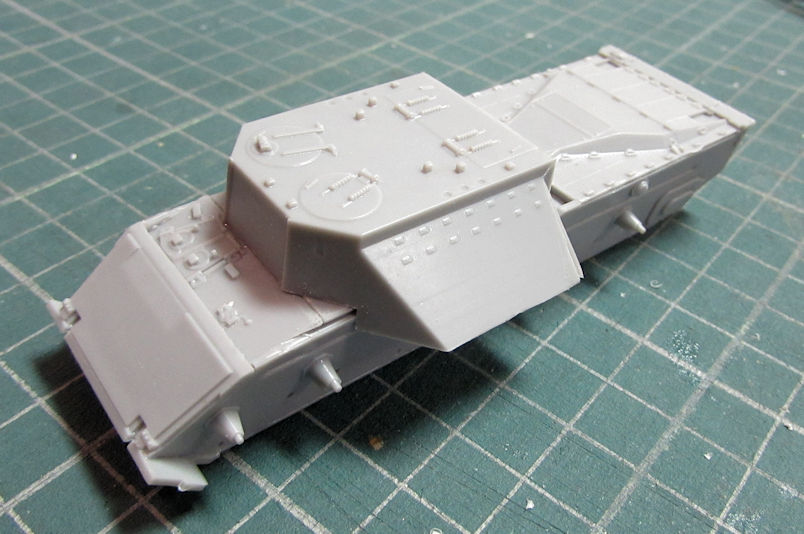
Looked okay, but I needed to do some sanding to make it fit better. Once that was done, I fit that into place. Then I felt it looked too funny so I added the fenders to the sides:
That looks better now. The final model I started was the Armory M-41 Walker Bulldog. Again, the basic hull was assembled first:
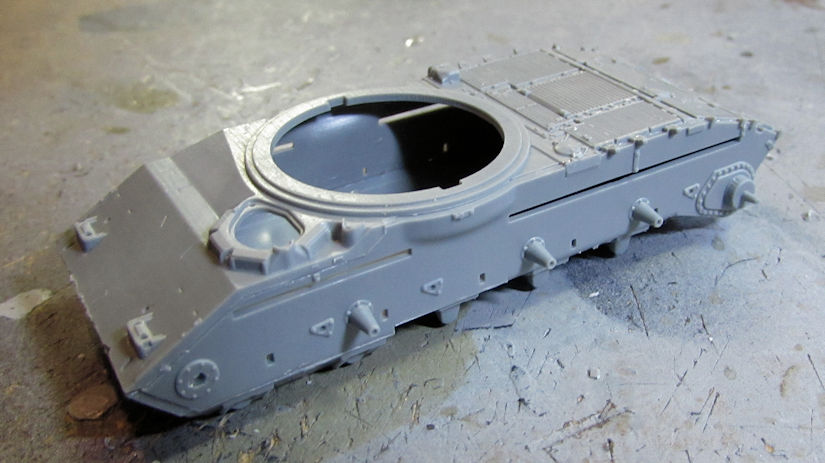
Then I did the turret. That was more fiddly than I thought it would be:
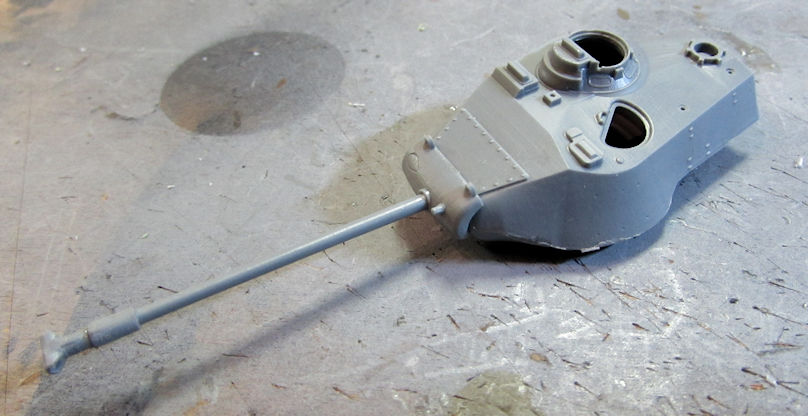
Gonna take a bit of cleanup on that turret. After that, I tried to add it to the hull and found that the turret ring was either too thick, or the bar along the bottom was not positioned well to allow the turret to turn because it wouldn't go on. After some careful shaving and finagling, I got it to go on like it's supposed to.
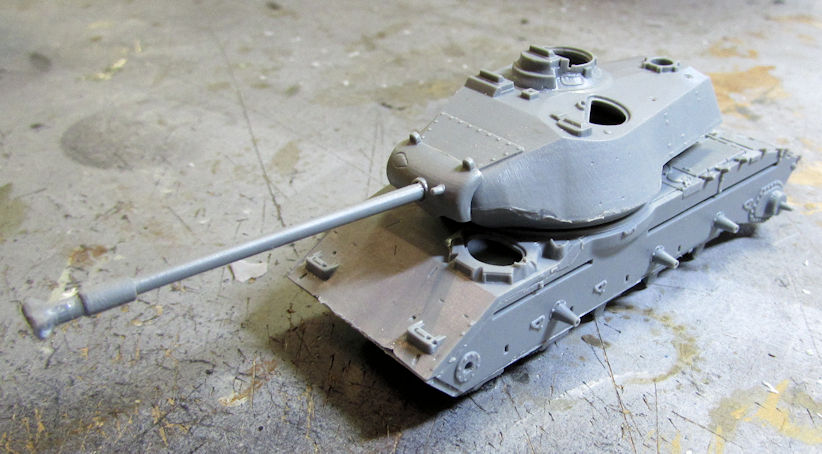
Wow, that turret looks big on that. It'll fall into proportion once I get everything else on.
And that is where I finished for the week. Thanks all for looking in, comments are welcome.
First up is my 1/35th scale Patton that I'm building for the SoCal AMPS Group Build. All I did was to apply the decals, starting with the front of the hull:
After that I did the turret decals:
Next were the decals on the side. This is where I nearly lost it. With the exception of the word "Army" every single letter and number was individually printed... even the stinkin' dots that go behind the 'U' and the 'S'!! WHAT?!!!
Seriously, why was it so hard to print them as one big decal? Well, because of that, these are not that that straight and I don't care:Here is this big beastie all decaled up and ready for the dullcoat, weathering, wheels and tracks:
I did this up as a tank from the 1st of the 69th Armor in honor of a friend of mine who served in that unit and fought at the battle of Ben Het.
Oh man, enough of that! After that I was ready for something simple.
The next thing I did was to finally cement down the cab roof. After that I added a dark brown wash to the D-9 Dozer, and then a black wash to the grilles on it:
It doesn't show well in that pic, but it is there. Yes, I have a bit of touch up painting to do. I'll do that after I dullcoat it.
Next up, I figured if I was going to paint my M-109A6; then I might as well build my M-109A2 and paint it at the same time. I pulled it out and started on it by building the basic hull:
Next I added all the detail parts and the wheels and sprockets:
The turret was next. After I built it and added the gun I placed it on the hull:
Once I get the tracks on that, I'll be able to paint it with my M-109A6. Speaking of the -A6, here they are together:
Next I decided to move forward on my M-32. It was time to do the running gear. For a UM kit, this went better than I expected:
Then I added a photo-etch strip of rivets to the front of the upper hull and dry-fit it to the lower hull to see what adjustments I would need to make. Naturally, it disappeared never to be found again:
Oh well, I then checked the positioning of the mine roller attachment now that I had this up on wheels:
Looking pretty good. Time to set that aside until I can anneal the P/E and add it to the running gear...
That completes what I had going on before Hobby Day, some of that work above was done there too. By that time my Birthday order was in and I took thirty minutes trying to decide what to start first.....
The Master Box Mk I Female tank looked the easiest and since I'd never built a Master Box kit before, I started on that. Despite a slight bit of warpage on the bottom hull floor; this went together very fast and very well. I stopped here before doing the sponsons:
Yeah, that was about five minutes of work....
I love it!
The French APC looked the next simplest to at least start, so I built up the basic hull:
After that, I set that aside to dry and moved on to start the Israeli Nagmashot APC:
I built up the basic hull and added the top pyramid to it to test the fit:
Looked okay, but I needed to do some sanding to make it fit better. Once that was done, I fit that into place. Then I felt it looked too funny so I added the fenders to the sides:
That looks better now. The final model I started was the Armory M-41 Walker Bulldog. Again, the basic hull was assembled first:
Then I did the turret. That was more fiddly than I thought it would be:
Gonna take a bit of cleanup on that turret. After that, I tried to add it to the hull and found that the turret ring was either too thick, or the bar along the bottom was not positioned well to allow the turret to turn because it wouldn't go on. After some careful shaving and finagling, I got it to go on like it's supposed to.
Wow, that turret looks big on that. It'll fall into proportion once I get everything else on.
And that is where I finished for the week. Thanks all for looking in, comments are welcome.
Sherman 18
Master at Arms
Looking good
Flyingbabydoc
Well-known member
Excellent work Mark. Just need to concentrate on what really matters now (airplanes of course).
Cheers
Alex
Cheers
Alex
Duke Maddog
Well-known member
Thank you Sherman!
Thank you Martin! That sounds like a pretty good idea for that tape. I might even try that.
Thank you Alex! I'd love to do more planes but right now, the An-124 is keeping me very occupied, along with the A-400 which still needs the nose job, and the C-54 which needs further progress. The armor sure helps keep them fresh and makes me feel like I'm actually making progress since the aircraft seem to be taking their sweet time!
Heavens Eagle
Well-known member
Aircraft do seem to take some time Mark. So far so good, keep up the good work!

Duke Maddog
Well-known member
Thanks Paul! Doing my best.
Duke Maddog
Well-known member
Well, it's been another rather productive week so here's another update. This is all armor again as I'm trying to get more of these done and off the workbench. So, climb aboard the tram for the next tour of Maddog Manufacturing...
I'll start with all the stalled projects that have been waiting for paint. I had some time earlier this week to shoot some paint and such so I shot a base coat of green on my US Paladins first:
You can see I also added the tracks to the one.
Next was the British FV-432:
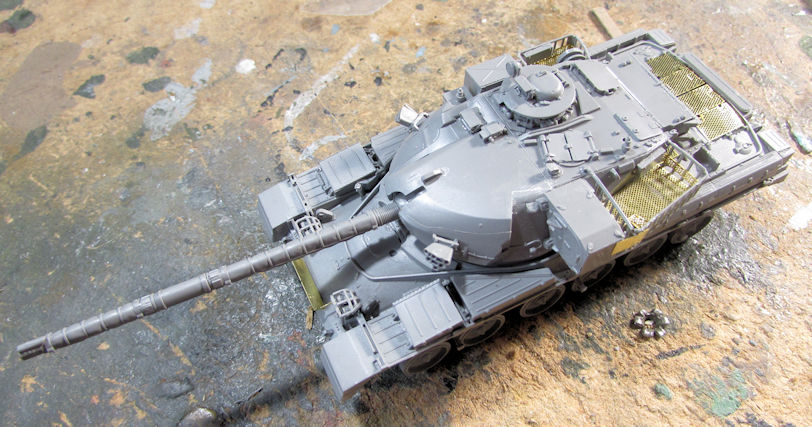
Followed by the three Chieftains:
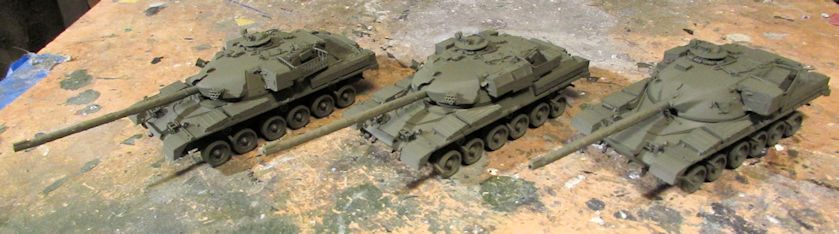
These will all get the Silly Putty masking later on.
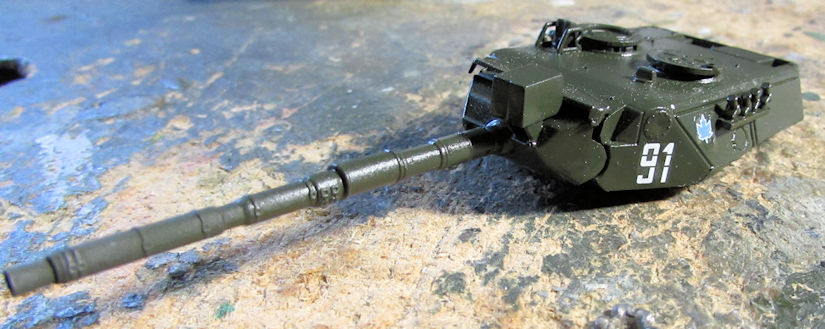
I also shot a base coat on the Canadian Leopard that I needed to finish this month:

Later I glossed this and added the decals to it. They were all on the turret:
After that came a dull coat and then a coating of dust as I took it out on the range for a test drive:
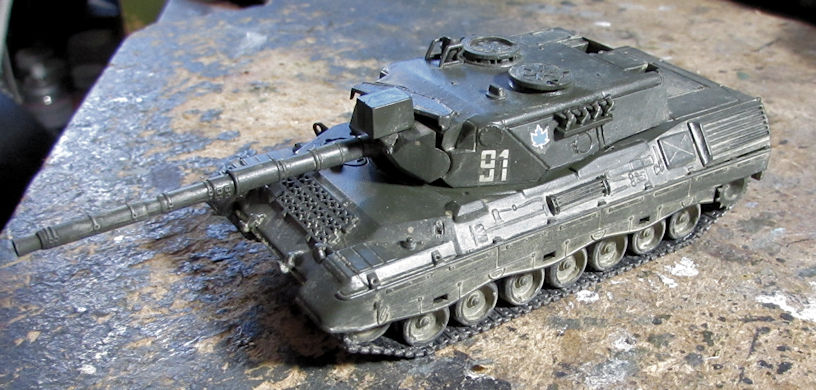
After that came the final bits of detail parts and she was finished! You can see the finished pics in the Completed Models Campaign Thread; and later on in the Finished Armor post I'll post later.
Next I also put paint on three other small models that had been sitting for a bit. First was the Japanese Isuzu fuel truck:
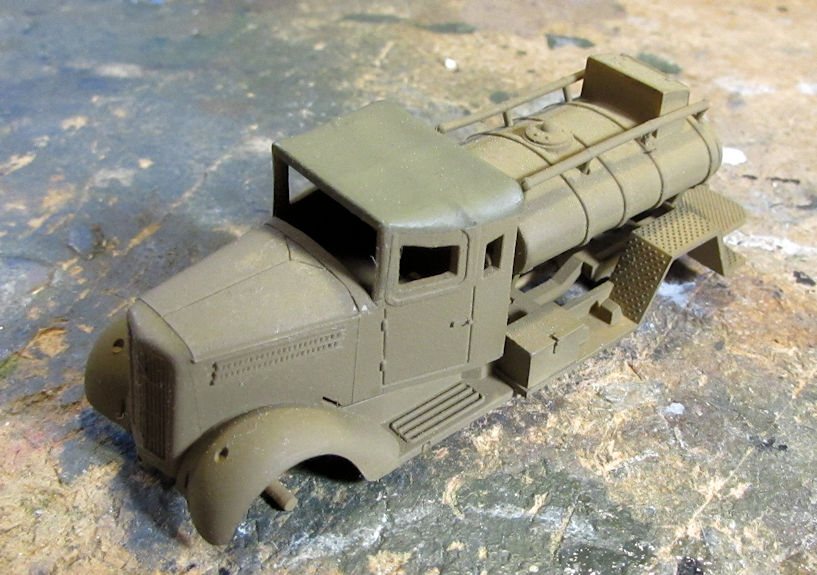
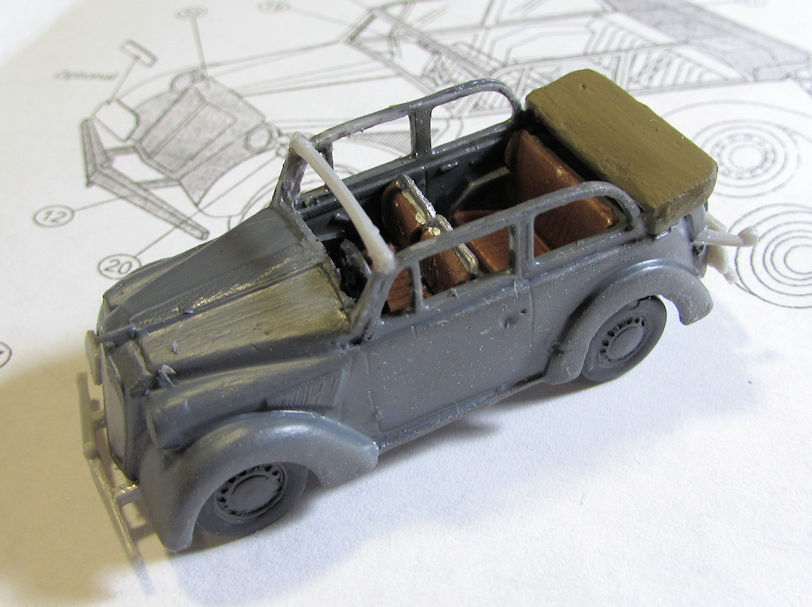
It's hard to tell but the canvas top is a different khaki color. Next was the little German Olympia staff car that I will be making a captured US staff car. I did the interior first, and then after painting the exterior; I added all the extra detail parts. Once I touch this up I'll be able to gloss this and add decals:
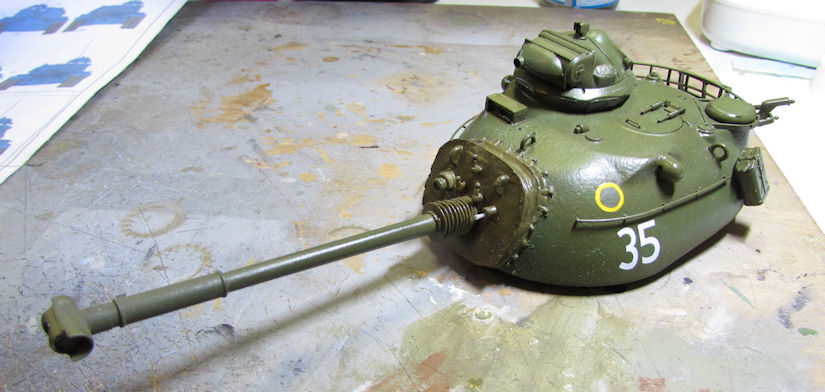
Next up was my Russian AT-1 Snapper which got a base coat of green:
Afterward, since I was decaling the Leopard, I added the decals to this. I also exercised a little artistic license on this too. The instructions say to use either the red banner markings or the '479'; but since I saw there was room for both, I added both:
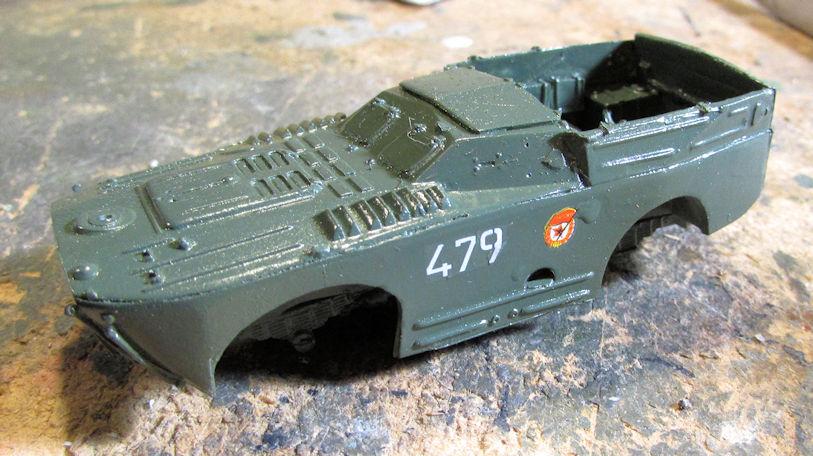
Next I can add the wheels, cabin doors, and rocket launcher assembly with rockets and I'll be able to finish this up.
The after all this, I shot a dullcoat over my Russian 2S19 self propelled gun and added the outer roadwheels:
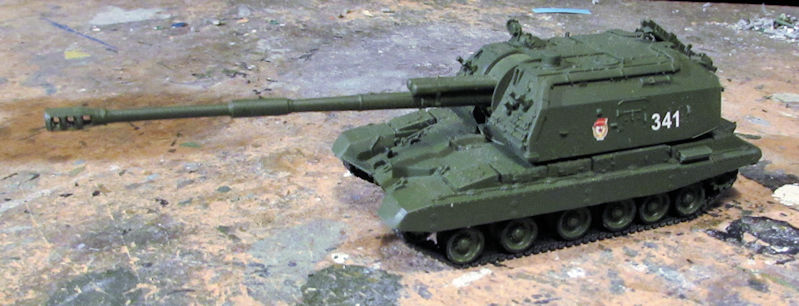
After dusting this one up and adding the final parts, I called this one done.
After that, I decided it was time to move forward on the D-9 Dozer. I added the windows to the cab:
Later on I touched up the paint; repaired some broken parts, did some more weathering, repaired some broken parts, dusted this up, repaired some broken parts, added the metallic dry brush to their respective places, repaired some broken parts... and finally called this one done.
Once I did that, it was time to move forward on the two Omnibuses. Starting with Ole Bill, I masked off the interior to prepare this for painting. It's gonna be an all-over olive drab so not much needed masking:

Then I figured I should add the fenders and other parts to this to make sure they got painted too:
I broke at least five brackets in my attempt to put those fenders on, not bad when you consider there are eight brackets that hold all four fenders!
Later I even added all the driver's controls and steering wheel to the inside. Next was to bring the other Type B bus up to this level. It took a bit more masking as this little bus will be red:
After that I added the fenders, driver's controls and steering wheel and went a bit farther by installing the wheels:
There's a few other detail parts that go on, but because of the risk of breakage, I left them off. Hopefully paint will be shot soon.
And that's all I have for this latest tour. Thanks for looking in, comments are welcome.
I'll start with all the stalled projects that have been waiting for paint. I had some time earlier this week to shoot some paint and such so I shot a base coat of green on my US Paladins first:
You can see I also added the tracks to the one.
Next was the British FV-432:
Followed by the three Chieftains:
These will all get the Silly Putty masking later on.
I also shot a base coat on the Canadian Leopard that I needed to finish this month:
Later I glossed this and added the decals to it. They were all on the turret:
After that came a dull coat and then a coating of dust as I took it out on the range for a test drive:
After that came the final bits of detail parts and she was finished! You can see the finished pics in the Completed Models Campaign Thread; and later on in the Finished Armor post I'll post later.
Next I also put paint on three other small models that had been sitting for a bit. First was the Japanese Isuzu fuel truck:
It's hard to tell but the canvas top is a different khaki color. Next was the little German Olympia staff car that I will be making a captured US staff car. I did the interior first, and then after painting the exterior; I added all the extra detail parts. Once I touch this up I'll be able to gloss this and add decals:
Next up was my Russian AT-1 Snapper which got a base coat of green:
Afterward, since I was decaling the Leopard, I added the decals to this. I also exercised a little artistic license on this too. The instructions say to use either the red banner markings or the '479'; but since I saw there was room for both, I added both:
Next I can add the wheels, cabin doors, and rocket launcher assembly with rockets and I'll be able to finish this up.
The after all this, I shot a dullcoat over my Russian 2S19 self propelled gun and added the outer roadwheels:
After dusting this one up and adding the final parts, I called this one done.
After that, I decided it was time to move forward on the D-9 Dozer. I added the windows to the cab:
Later on I touched up the paint; repaired some broken parts, did some more weathering, repaired some broken parts, dusted this up, repaired some broken parts, added the metallic dry brush to their respective places, repaired some broken parts... and finally called this one done.
Once I did that, it was time to move forward on the two Omnibuses. Starting with Ole Bill, I masked off the interior to prepare this for painting. It's gonna be an all-over olive drab so not much needed masking:
Then I figured I should add the fenders and other parts to this to make sure they got painted too:
I broke at least five brackets in my attempt to put those fenders on, not bad when you consider there are eight brackets that hold all four fenders!
Later I even added all the driver's controls and steering wheel to the inside. Next was to bring the other Type B bus up to this level. It took a bit more masking as this little bus will be red:
After that I added the fenders, driver's controls and steering wheel and went a bit farther by installing the wheels:
There's a few other detail parts that go on, but because of the risk of breakage, I left them off. Hopefully paint will be shot soon.
And that's all I have for this latest tour. Thanks for looking in, comments are welcome.

Thought you were making a custom tilt over the truck for a minute.
Duke Maddog
Well-known member
Thanks Bob! If you are referring to the tape masking, those are buses and doubledecker ones at that. Thanks again for looking in and commenting.
Similar threads
- Replies
- 20
- Views
- 2K
- Replies
- 2
- Views
- 556
- Replies
- 41
- Views
- 8K