• Modelers Alliance has updated the forum software on our website. We have migrated all post, content and user accounts but we could not migrate the passwords.
    This requires that you manually reset your password.
    Please click here, http://modelersalliance.org/forums/login to go to logon page and use the "Forgot your Password" option.

Maddog Manufacturing Open for 2024!

Duke Maddog

Well-known member
It's been awhile and real life has gotten in the way a bit, but now I have a chance to re-open Maddog Manufacturing to show our 2024 production. There's quiet a bit to show doe this tour, so it might have to be broken up into two posts. The trams have been maintained and updated and so they are ready for the next tour. All aboard whenever you're ready!


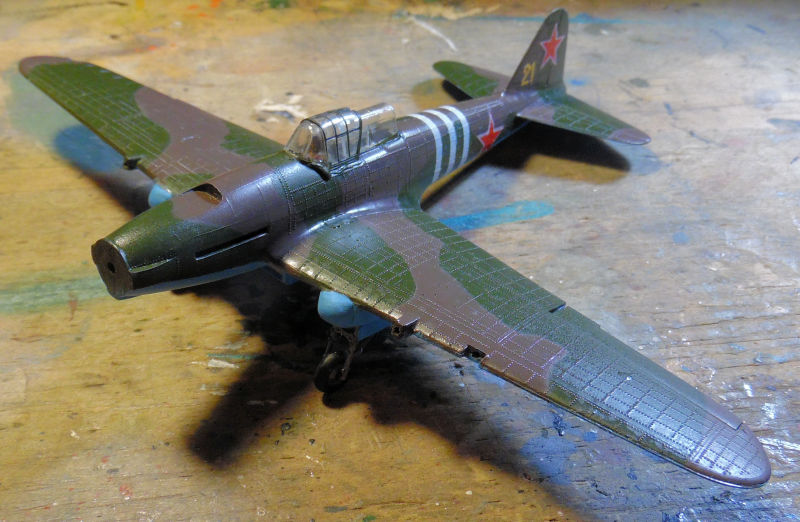
Our first stop as always is the Hangar. There's a lot of wonderful activity happening here. In this first bay, we still have the Russian Schtormovic waiting for the propeller replacement as well as a few other parts that need to be found:

full


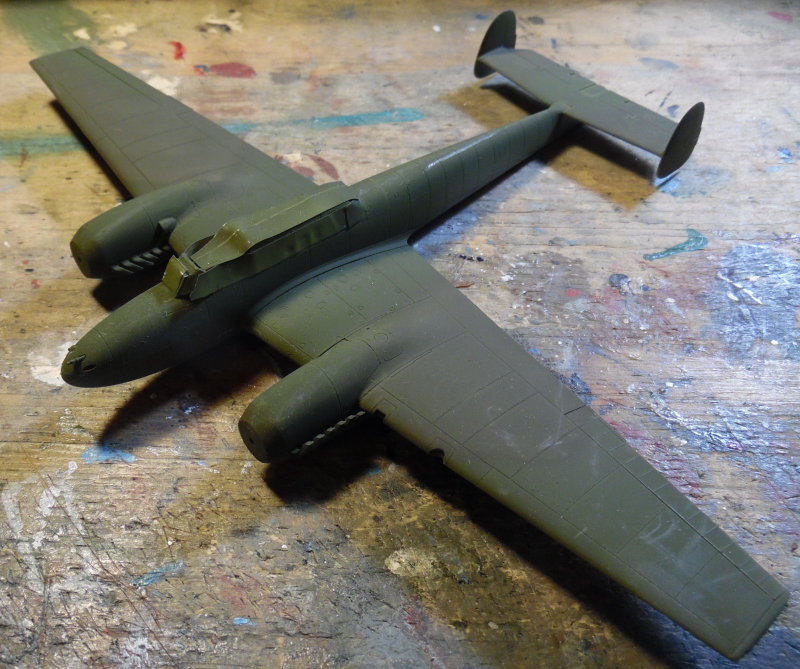
In the next bay, we have the German Me-110 all painted with a base coat, waiting for more camouflage:

full


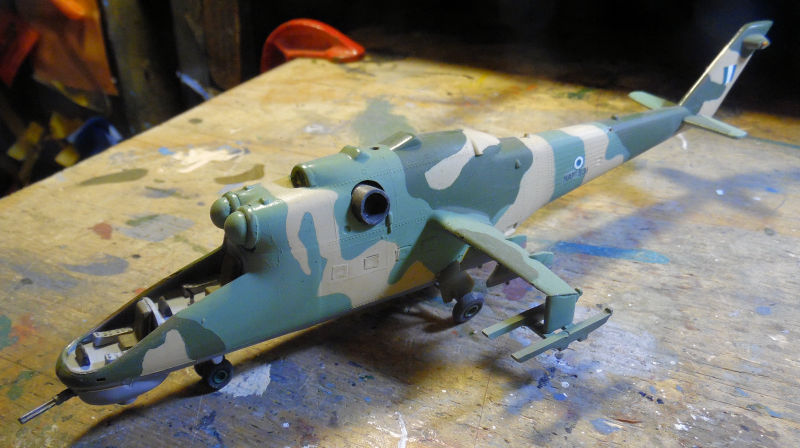
Next we have a Nigerian Mi-24 Hind that needs some modifications to fit the new canopy we got. Then additional parts can be added to finish this off:

full


Speaking of helicopters, we have this Russian Ka-26 Helix waiting for the rest of the camouflage before more work can be done on it:

full


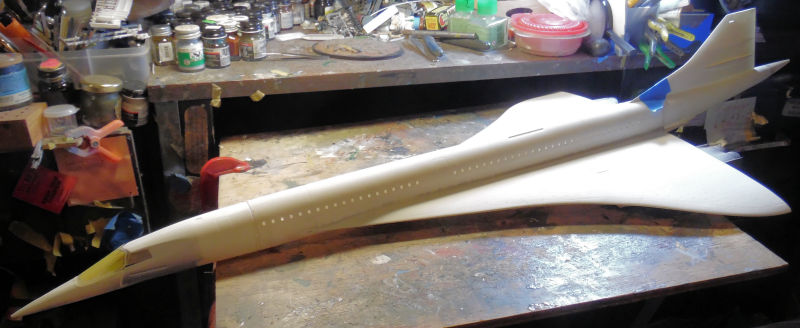
Now we start getting into the bigger planes. In this bay we have the British Airways Concorde SST that needs more filling and sanding work before any further work can be done:

full


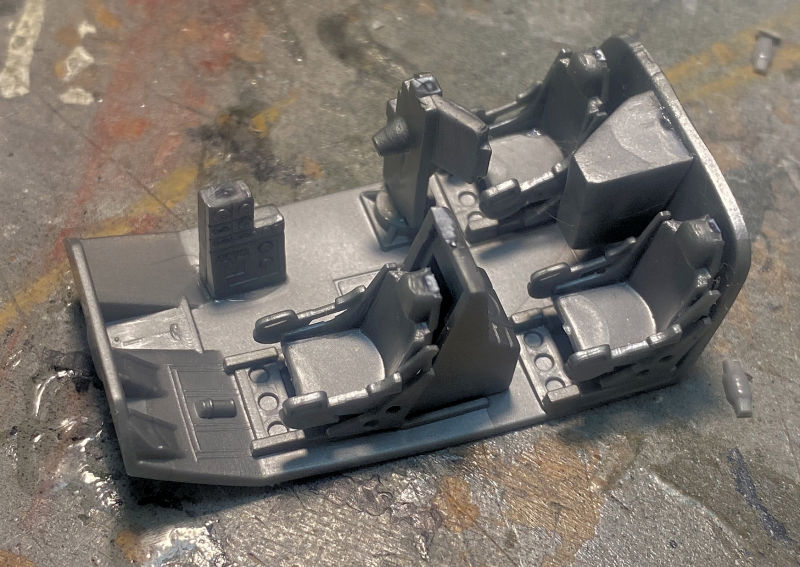
Next is a new project started this year. It;s a US Air Force B-66 Destroyer aircraft that got the cockpit assembled first:

full


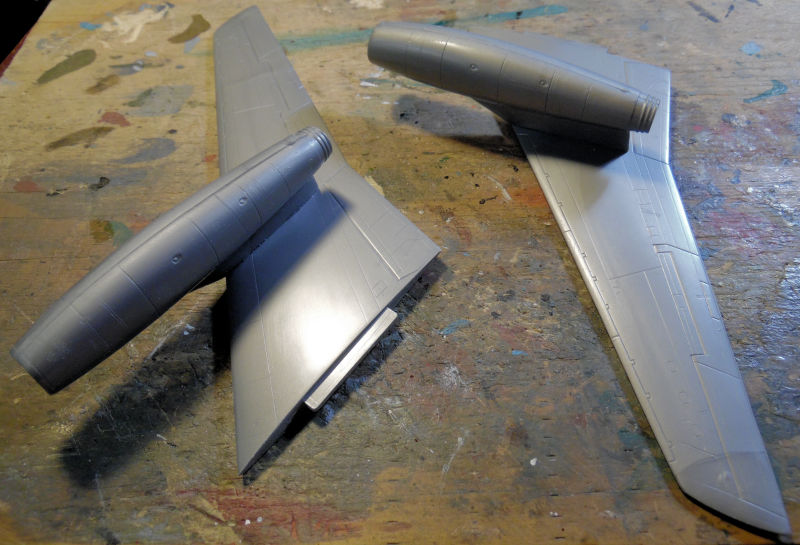
Later the wings and engines were assembled. These went together far better than expected for such an old kit:

full


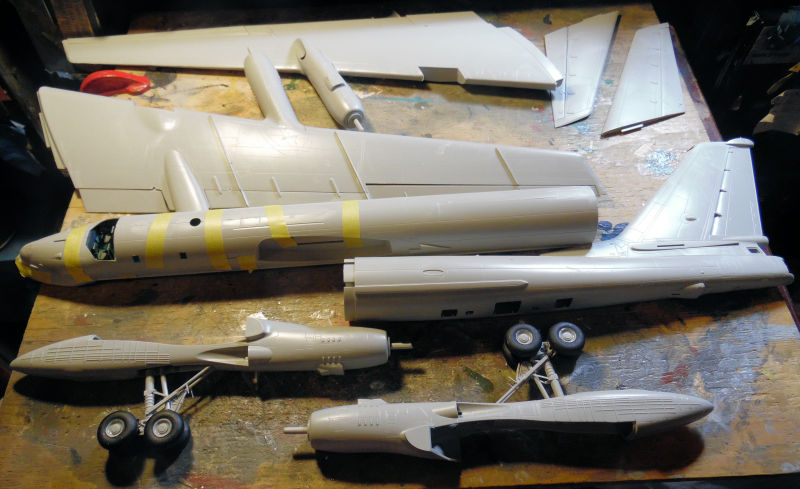
In this next bay we have the Russian Tu-142 Bear H bomber that has been built up to this point:

full


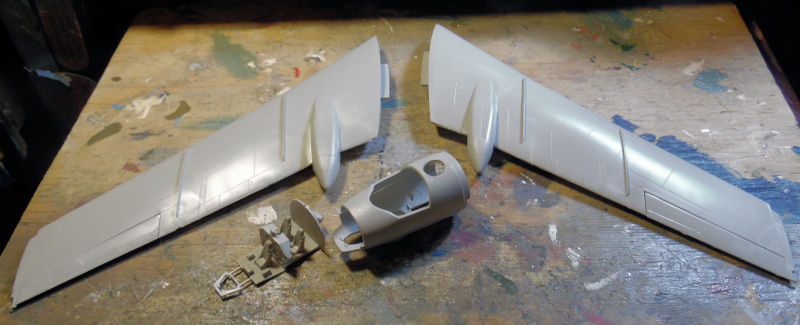
Bot sure what else needs doing before we assemble it, but we'll be revisiting this bay sometime soon. Further down we have one of two Tu-16 Badgers under construction. They have both been built to this stage, but I'm only showing the one for now since the pics are the same:

full


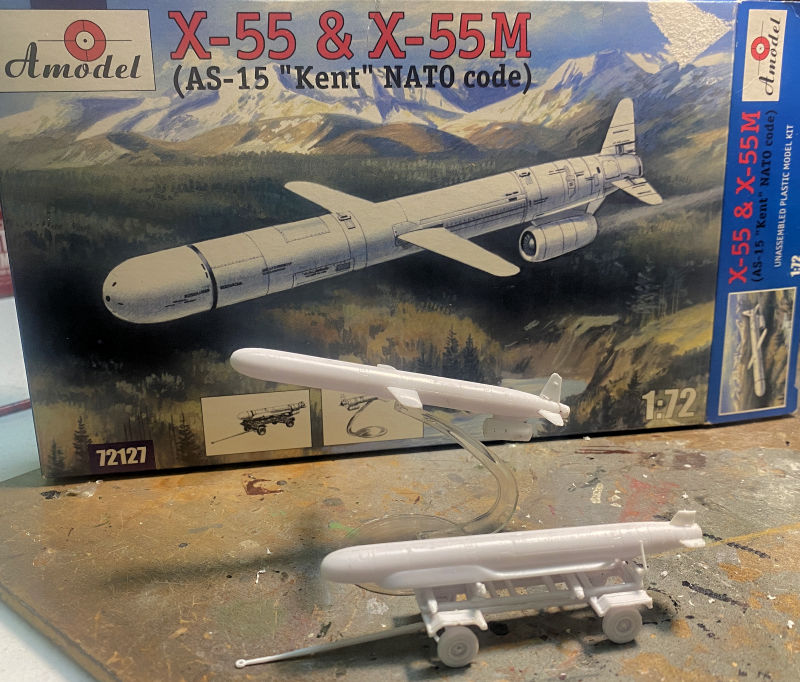
Finally in this last bay we have a simple model of the Russian As-15 Kent cruise missile. There are two in the box, one in flight and one on the transport trailer. They are both ready for paint:

full


That concludes the tour of the Hangar for now, lets head out to the Shipyards to see what's under construction there.


Here in the Shipyards there's a good bit of activity. First, let's head to the small slipways where a couple of my motor torpedo boats are under construction.

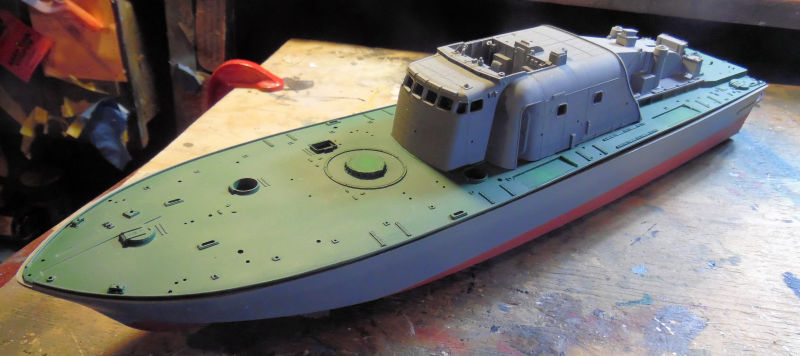
First up is this Japanese PT-15 torpedo boat that has been halfway assembled. Painting will be easy as it's all one color once all the greeblies go on:

full


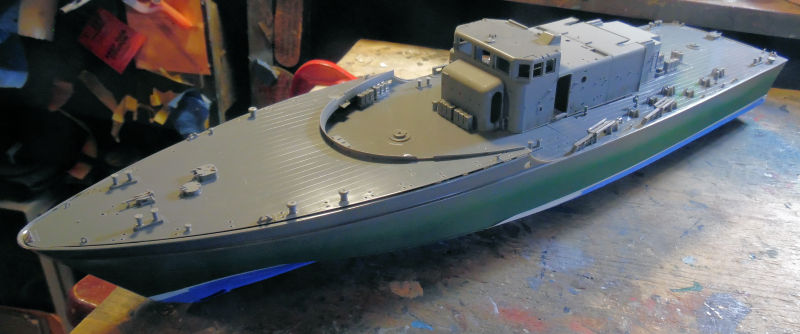
In the next slipway is the British Vospers Perkasa boat that is a little further along. We just have to start adding some of the detail parts:

full


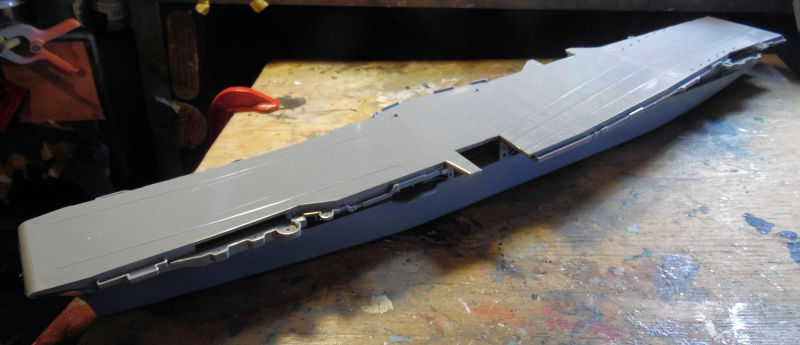
Now we can move onto the bigger drydocks where some new carriers and a steamboat are under construction. This first drydock has the German Aircraft Carrier Peter Strasser which is mostly complete and ready for deck paint:

full


The next drydock has the USS Shangri-La which finally got the hull completed. The deck is just dry fit on this right now:

full


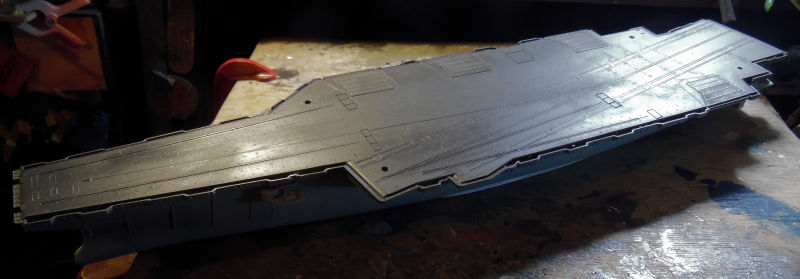
In the next drydock over is the USS Enterprise 1980's fit that needs the deck painted with the lines:

full


In this final drydock, the Robert E Lee is slowly taking shape. This first pic shows it mostly mocked up to this point to give an idea of what will be done next:

full


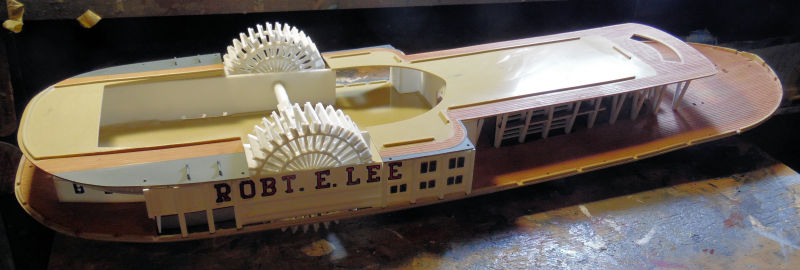
What is actually happening here is this.... the side pieces with the lettering were quite warped so part of them was glued into place with spacers to make sure they glued into the proper and correct position:

full


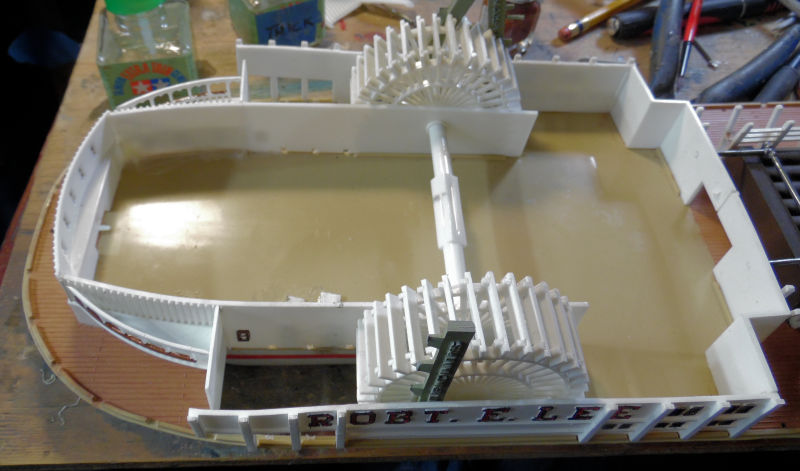
Then once they were dry in front, the back ends were glued and clamped into place:

full


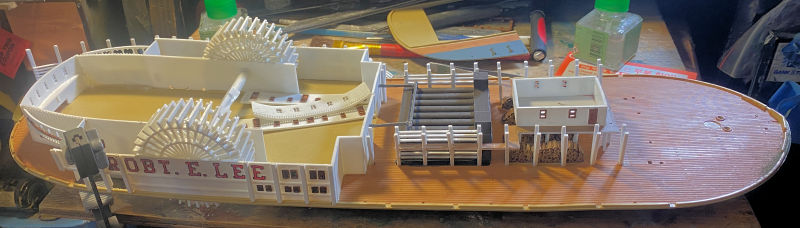
Additional work will slowly commence. It;s like every part is warped out of true so they all have to be warmed and re-positioned not the proper shape, or slowly glued down on one end and slowly worked into place with glue and clamps.


That concludes the Shipyards part of this tour, next is our catch all workshop that currently has two cars under construction.

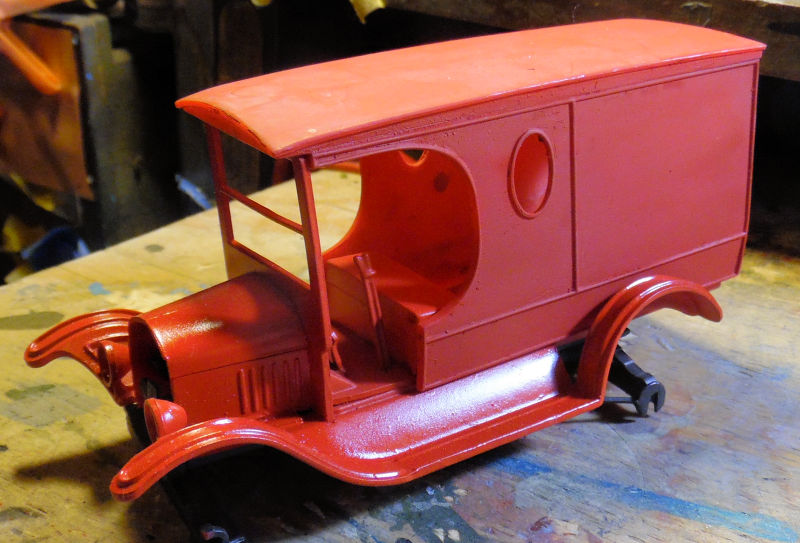
This first one is the 1929 Coca Cola delivery van built up to this point. The red coat has been giving me a lot of difficulty laying down smooth:

full


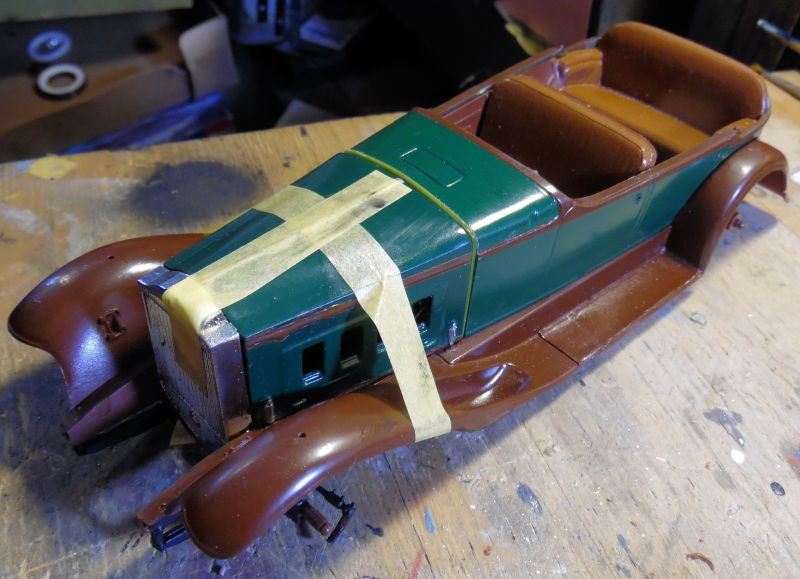
This second car is the Packard roadster that has been fighting me for quite some time. Hopefully it gets finished this year:

full


Now that we are through all these sections of Maddog Manufacturing, we will continue the tour of the Motor Pool in the next post.
 
And the tour now continues in the Motor Pool here.

There's loads to see as we have started a number of new projects while trying to get some shelf queens off the shelf of doom.

Let's start in this first bay...

Here's something we started near the beginning of the year last year and I figure now it's time to get it going again. This is a simple horse drawn supply train from Caesar Miniatures:

full


Another shelf queen of sorts, this is the German SdKfz 9 with a crane that is slowly moving forward:

full


One more shelf queen, this is a Russian Aerosan that we've been trying to build for a game. This will take some finessing but will get done soon:

full


One of the last shelf queens; this Russian SCUD C has been giving me fits. You can see why in this shot, the launcher arm was glued on too high:

full


After some careful work, the launcher assembly was repositioned into the proper place:

full


In these next two bays are two models waiting for additional replacement parts. First is the South African Eland 90:

full


The other is this French AMX 61 self propelled gun, waiting for replacement gun mount parts:

full


We might be able to move forward on that in a bit while we wait for parts.

Moving on, here are a number of New models started this year. First in his next bay are a series of Swedish light tanks, starting with the Strv M38. Lower hull was built first:

full


Then the rest of the main assemblies were completed. Here it is all mocked up:

full


Next to it is this mocked up Strv M39:

full


Then we have the Strv M40K:

full


And finally, this Strv M41L:

full


All of them are in this bay, ready to move forward:

full


In this next bay, we have a new project, the first of my Christmas presents to come in. This is the Dragon Stryker Engineering vehicle. The hull was built first and here it is shown with the dozer blade parts next to it:

full


We then built the dozer blade assembly:

full


Additional detail parts were then added to the main hull:

full


Here it is with the dozer blade positioned in place for a dry fit:

full


Finally in this last bay we have a fast and easy model in production. This is the Dragon M103A2 that I've been wanting for awhile. After twenty minutes, the main hull was almost complete, except for easily broken parts:

full


Later the turret was assembled, except for a number of easily broken parts. This little tank is now ready for paint:

full


And that completes the remaining part of this first tour for 2024. Thank you all for coming in and enjoying the tour, comments are always welcome.
 
You HAVE been a busy boy Mark. That is a whole lot done in a short time. I have trouble getting one done in any kind of short time.
 
Thank you Paul! Some of that is misleading; I had started at least two thirds of those last years, some near the beginning of last year. In fact, four of them are Shelf Queens that have been sitting on my bench for three years or longer. The fact I listed them here shows my determination to get them off my bench and onto my shelf!
 
Hu, huhu huhuhu, he said greeblies...

That blows my mind really. I have trouble doing two at a time. I KNOW I could not keep that many straight. You are a marvel!
 
Thank you Kenny!

Thank you Bob! Sometimes I find it just as easy, especially since the second time around, you remember issues and avoid them. Hey, at one time I build six variants of the Bradley at the same time, and nine variants of the T-34 at the same time.

Thank you Greg! I don't know about a marvel, but I have a good system that mostly works. Having this many going helps me to always have something available to work on when the urge to build particular models strikes, if that makes any sense.
 
Well, despite having a lot of time to work on my hobby thanks to Hobby Days; I have had no real time to start a new tour. Because of that, this will be another two part post so all my projects can be viewed.

So, all aboard the trams everyone, it's time to start our tour!


As always, we start in the Hangar. We only worked on one aircraft this past week. It's the old Italeri kit of the 1/72 scale B-66 Destroyer. The cockpit had been built already so it finally got painted. Yes, it might look a bit sloppy, but it won't be seen once this gets closed up inside the fuselage:

full


full


Later that is what we did, we closed this up, cemented it and allowed it to dry:

full


It was so surprising how well this fuselage.wings and tail fit together! As you can see here, half the cockpit can't even be seen:

full


The canopy was added and masked off for paint next:

full


...which came later. We hit this with a black primer to see what issues we had:

full


We found a considerable number of small issues, (all of which I brought on myself!) so some filler, sanding and more filler and sanding happened:

full


We had started out with Tamiya putty, then moved to Mr. Surfacer 500. Later we shot a gloss black coat on this to see if everything got fixed. It didn't so another round of sanding and filling will be happening.... not that you can see here:

full


Finally, the little AS-15 Kent had it's trailer painted up. Not too much longer before that one gets done:

full


That completes the tour of the Hangar for now, our tour continues in the Shipyards....

Here in the Shipyards, we tried to mask off the main deck of the 1/600 scale USS Enterprise. It started out pretty good:

full


However, we found out that the flexible Tamiya tape doesn't play well with the cold and humidity we had that night. Expensive lesson to learn:

full


The regular Tamiya tape seemed to stick well, unless it was on the flexible stuff, so everything will be replaced with Tamiya tape later.

In the next slipway, we have the Tamiya British Vospers Perkasa. The main bridge was painted and detailed before being closed up inside the cabin:

full


Meanwhile, the barrel broke on the 40mm Bofors so we had to fabricate a new one and replace the broken one. I can hear the comments now, but this was the best way to make sure it glued straight:

full


The crew at least showed up to prepare for training:

full


We started adding some of the detail parts to the main deck; the Bofors is only dry fit right now, that is why it's cocked. There isn't much to see here:

full


More parts went on....

full


....and still more. The torpedoes are only dry fit to see how well they place, we still need to touch them up. The hand rail stanchions are installed, they just need to be rigged:

full


That is as far as we got on that one, so we move on to the next slipway where the Robert E Lee has been fighting me. In this shot, you can see the incredible warp of the rear railings that required us to glue, clamp; wait for it to dry. Then move a little further, glue and clamp, etc. You get the idea:

full


Later the rear deck got added. Because of a mistake made earlier, I had to compensate for it by shaving a section of one side of this so that the paddle wheel housing would fit where it's supposed to... or close enough:

full


Once that was dry enough, we added the upper cabin walls to the deck. These too needed to be finessed into place. The curved section next to the housing needed to be shaped to fit:

full


Later we added the front portion of that deck after prepping the upper parts of the cabins and pylons below. This also needed to be shaved on the one side so it would sit straight and not have a huge gap. You can see here how much persuasion it needed to hold in place:

full


When the tape came off, it looked pretty good:

full


While all that had been drying, we went to work on the Grand Staircase:

full


Again it took some serious finagling to get that staircase installed. We had to fix the railings three times before everything stayed in place as it supposed to do:

full


Here's the look over all so far. It's starting to look like a riverboat:

full


Later the forward cabin went on the deck. This was slightly easier to build, but we still had some issues with some gaps, too-long pieces, and other issues. After dealing with them and getting everything cemented down, I'm happy with the results:

full


Just for fun, we test fit the upper deck on top of all this. It's going to be a bit easier than the previous two decks:

full


That concludes this tour of the Shipyards for now; as we head on over to the Motor Pool, you can see some damaged buildings and sandbag emplacements we are working on for another project:

full


I found a whole mess of Matchbox bases that they used to include in all their armor models, some were even duplicates. My idea is to find a way to arrange them all on a board in some manner, add these ruin pieces, fill in the area between them with putty or something and create some kind of scene/base. It'll be interesting.....


The Motor Pool tour will continue in the next post due to the large quantity of pics for that tour.......
 
And now for our tour of the Motor Pool. There's a lot going on here that also includes a couple of started models as well. So without further ado, let's visit this first bay here.


In this first bay we have the M103A2 Marine tank getting it's base coat:

full


After that dried, we added the decals and some detail painting. This one is very close to being done:

full


Speaking of almost done, in the next bay we have this Russian SCUD C that has been a bit of a challenge all this time. It finally got the correct launcher arms on it:

full


Then all of the new parts were painted up:

full


Later on we weathered the wheels and tires; put them together and installed them on this model. Some additional weathering was applied to the vehicle as well:

full


On this model, they had no call outs for decals, even though there was a full sheet of them included. Well, I had to add something, so this beastie now sports a Guards emblem on the doors:

full


Final weathering was added and the missile was sent out to be painted:

full


Yeah, that beastie is almost done too.

Moving on, in this next bay is the Stryker engineering vehicle. It's got it's basecoat of green, now we just need to find the decals so we can finish this one too:

full


In this next bay is a model we previously started, it's one of two GAZ AAA trucks that has been slowly worked on between other projects. Here we have the cab half built and the bed installed:

full


Only a few additional parts were added to this:

full


In the interest of working on something fast and easy, we pulled out this M109A7 from Foreart and got started on it. Hull was done first:

full


While that was drying, we completed the basic upper turret assembly by adding many of the detail parts to it. We had been having difficulty with the gun mount so that is why we went this route:

full


The hull was indeed fast and easy, we got wheels and tracks, detail parts and everything else installed that wouldn't break with handling:

full


Finally we got the gun mount sorted and were able to finish the turret almost completely:

full


Yes, that turned metal barrel and 3-D printed muzzle brake came in the kit, not aftermarket. It's coming togfether nicely:

full


Next we assembled the turret baskets and then added all the photo etch to this vehicle:

full


Moving on to the next bay, we have this long-term shelf queen. It's the Modelcollect 1/72 scale BMP-3 with full cage armor! It has to have been close to nine years since I picked this up again. First thing that we needed to do was to try and assemble the turret cage armor. This was the result of trying to get the main parts at least completed:

full


Here's our first attempt to mount it on the turret. I figured it would be easier putting the straight lengths of the rear cage on after the main parts had dried:

full


It got done, but still looks like crap! Even then something was off on it:

full


Our attempt to fix it resulted in the loss of a strut:

full


While that was drying, we went ahead and installed the tracks on the wheels and sprockets. These tracks will be covered in deep skirts so we only did the lower runs of track:

full


In testing this in the hull, we found numerous protrusions on the bottom of the cage armor that kept snagging on hull parts... and I hadn't even put in all the hatches and such:

full


Eventually, we attached all the hatches and other additional detail parts to the main hull. Some filing had been done on the bar armor, but it only helped a little:

full


I originally had hoped to paint this with the three tone camouflage, but that ain't gonna happen. Now that the turret is mostly completed, it got a coat of the base color that I'll be painting it:

full


After all that, we wanted to get back to a simple build, so out came this Academy 1/72 scale French Le Clerc tank. Upper and lower hull got assembled first:

full


Then the wheels and sprockets were added, later the tracks went on:

full


Finally, the turret was completed, the tracks added and the side skirts installed:

full


And that quickly, this was ready for paint:

full


Finally, in this last bay, I decided that the last Roden bus I needed to build should be done. Out it came and the main body and chassis were assembled:

full


We then added the interior and painted it:

full


The underside got the suspension installed afterward:

full


While that was drying, the pigeon loft was mostly built:

full


It made for a pretty good fit. This is only dry fit too, I want to keep it separate until everything was done before it gets cemented in place permanently:

full


After that,the lower part got painted, the wheels and fenders got installed and the main window covers went on:

full


Once that was sufficiently dry, the remaining headlights, steering wheel, and other detail parts were added:

full


The top pigeon loft was also painted and for fun, here it is dry fit again on the bus:

full


While that was drying, we went to work detailing the pigeon loft. Pigeons like to nest in straw, so we added some to the pigeon loft interior:

full


We used this rough twine cut into 1/8th to 1/16th inch lengths:

full


Then we slathered the floor with Gator Grip glue and poured the straw inside, pressed it down and then shook the loose straw out:

Now that the straw was in place, we started adding the screen material on all the sections we could before closing it up:

full


Once again the loft was dry fit in place, and the pigeons came home to roost:

full


I expect that in a day or so, we might have this bus finished!


And that concludes this latest tour of Maddog Manufacturing! I do hope you enjoyed the latest progress we've made here. As always, comments are welcome, thanks to all who came in to take this tour!
 
Robt. E. Lee paddle steamer!! Too cool! Your Perkasa is coming along nicely as well!
The pigeon loft bus is very creative!
 
Chris Thanks! I'm enjoying that paddle steamer, even though every parts has to be bent back into shape before gluing it in place! I'm seeing a faint light at the end of the Perkasa tunnel, let's hope it is not a train. I do love the pigeon bus! Check the Armor Forum, you'll see it done with four other vehicles.

Saul, ye you are! And far too much of it I might add! Maybe someday I will have that BMP finished, but I can assure you it will look like crap when I do!


Paul, thank you! I finally have that one done now too!

Stay tuned, more to come soon.
 
Thank you Kenny! I also love that paddle wheeler

Thank you Saul! However, once I get done with it, there will be no room for a 'Z' with all the cage armor going around the hull. I'll just get it done as best I can.
 
Back
Top