• Modelers Alliance has updated the forum software on our website. We have migrated all post, content and user accounts but we could not migrate the passwords.
    This requires that you manually reset your password.
    Please click here, http://modelersalliance.org/forums/login to go to logon page and use the "Forgot your Password" option.

Hobby Boss F6F-3 Hellcat

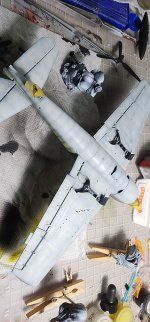
So, I have the butchery on the rudder and rear flaps puttied and sanded. I made little pins for the hinges
20220905_225243.jpg


I drilled holes in the tail wings and fin then glued the pins in place. After a little fine tuning with a sanding stick, the flaps are ready to be glued on.
20220905_230706.jpg


20220905_231033.jpg


You can see where the knife slipped and gouged the plastic. It is puttied and sanded. I will know more after the black primer.
 
I want to make sure before I give it a go, but since all of the other flaps have been cut out and re"hinged" that I should do this one as well. Before I do it, I want to make sure it is actually a flap, although I am about 88% sure it is. It's that 12% I worry about.
Screenshot_20220906-134423_Photo Editor.jpg
 
Negative ghostrider, that is not a flap. That would be the aileron.

you can position it if you like but you should have the opposing Aileron in the opposite position on the other side as well as the stick deflection in the cockpit (if you want to get that deep into it!)
So if the stick is cranked all the way over to the right, the left aileron would be full down and the right would be full up. Generally when an aircraft is stowed or in maintenance they have control stick locks and even control surfaces locks they are put in place so the components don't flap around and hit someone or get damaged.
I am thinking I just want the "separation" rather than tricky positioning. I will leave them straight.
 
Ok, I have the body together and blackbased all over, as well as the zinc chromate primer. This sqiggly line thing is a new technique for me. I have always done a light base then blacked the seams to preshade.
20220908_081516.jpg


20220908_081626.jpg


I mixed an Insignia White with Tamiya white X2 and a little Deck Tan XF55, then thinned it 50/50 with alcohol and sprayed the bottom.
20220908_090624.jpg

While I was at it I did a zenithal light on Red Sonja!
20220908_090717.jpg

So many projects, so little time!
 

Attachments

  • 20220908_090624.jpg
    20220908_090624.jpg
    888.4 KB · Views: 8
Looking at those photos enlarged like that I can see that I need to address the center seam. I don't mind you guys telling me "hey! Fix that seam!". LOL
 
It took a couple of patient days to fix the seams. I used thick superglue and sanding sticks. After sanding until it looked good I used black coat to see what needed to be re-worked. Rinse and repeat until satisfied.
20220911_134650.jpg


After I was satisfied with the seams I blacked the entire bottom again, remarbled with zinc chromate, and repainted insignia white.
I tried to use the blue tape noodle to mask off the pattern for the intermediate blue but was evidently doing it wrong because I could not get the tape to behave at all. I ended up using UHU sticky putty noodles which worked great. I didn't have intermeduate blue so I mixed Tamiya medium blue XF-18 and flat white XF-2 until it seemed right. I sprayed that then added a little more white to hit the panel centers, then let it sit overnight.
20220911_134633.jpg


I also did not have Navy Blue so I mixed Vallejo dark prussian blue and black until it seemed right and sprayed that after masking with putty. Again, I added white to the mix and hit the panel centers.
20220911_134708.jpg


And that is where I am! I removed the mask from the canopy to see what is what and I liked what I saw. I did a little brush and airbrush touch-ups and will let it sit for a while then do the weathering.
 
Nice paint work, Greg.

A note about F6F wing control surfaces. Of the 6 moving surfaces the two outboard are the ailerons, and move in opposite directions. The other four are flaps. All four should all be at the same deflection. The flaps on the F6F were full down (50 degrees) at the beginning of takeoff, and as the speed increased past 93 knots they would gradually rise to the best lift position, 15 degrees deflection at 150 knots. At 170 knots, the flaps will move fully up regardless of the flap control position. A system that was different from other fighters and reduced the pilot's workload on carrier takeoffs. From a modelling perspective it is even more complex, because as the flaps leave 0 degrees deflection they also move back, until the 15 degree position. At the 15 degree position the aft motion stops and the flaps rotate on down to 50 degrees. Because of this motion, the gap between the leading edge of the flap and the trailing edge of the wing does not increase much.
 
Last edited:
Dang I didn't notice the outer flap position Greg, I would have pointed it out. The paint job looks fantastic!
 
Nice paint work, Greg.

A note about F6F wing control surfaces. Of the 6 moving surfaces the two outboard are the ailerons, and move in opposite directions. The other four are flaps. All four should all be at the same deflection. The flaps on the F6F were full down (50 degrees) at the beginning of takeoff, and as the speed increased past 93 knots they would gradually rise to the best lift position, 15 degrees deflection at 150 knots. At 170 knots, the flaps will move fully up regardless of the flap control position. A system that was different from other fighters and reduced the pilot's workload on carrier takeoffs. From a modelling perspective it is even more complex, because as the flaps leave 0 degrees deflection they also move back, until the 15 degree position. At the 15 degree position the aft motion stops and the flaps rotate on down to 50 degrees. Because of this motion, the gap between the leading edge of the flap and the trailing edge of the wing does not increase much.
Is this more correct. I have them all straight.
20220911_220918.jpg


20220911_220911.jpg


You can see the further weathering. The seams look WAY darker in the photo than IRL for some reason.
I really appreciate you guys guiding me on what is correct. Thank you!! What I know about airplanes wouldn't fill a thimble half way.
 
When I try to see a gap or a seam, I use a shiny black sharpie marker to overcoat such. Applying filler or C/A glue to the gap and sanding until the black marker sands away. You won't remove more plastic than is needed. Recoating with the sharpie will be shiny enough to show if you need more filling/sanding/cussing or if you're good!

I use the Sharpie trick to shape the hull profiles on my dinky ship model masters, on my resin Moonbat model, my Dad's Mustang, my vac-form Super Crusader and.................
OK. I use this trick on everything I put together. :rimshot
Excellent!!! I will add this to my bag of tricks for sure! Thank you 😎
 
Back
Top