• Modelers Alliance has updated the forum software on our website. We have migrated all post, content and user accounts but we could not migrate the passwords.
    This requires that you manually reset your password.
    Please click here, http://modelersalliance.org/forums/login to go to logon page and use the "Forgot your Password" option.

Hobby Boss F6F-3 Hellcat

Greg Kimsey

Well-known member
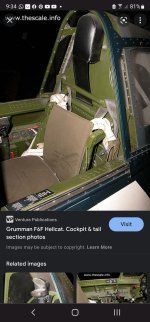
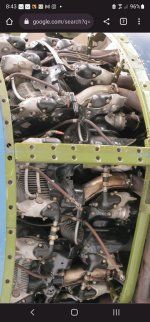
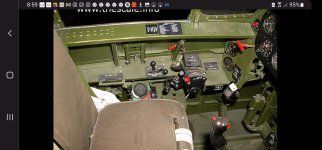
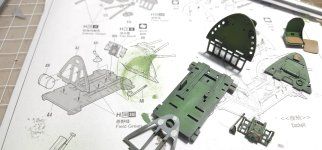
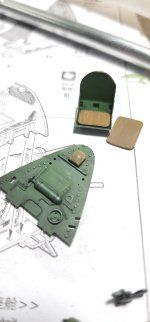
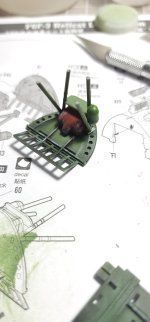
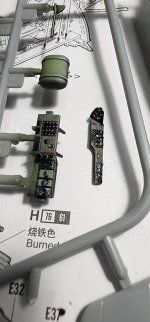
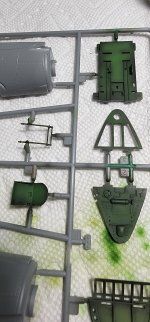
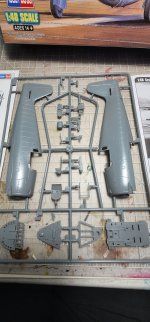
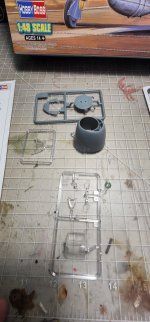
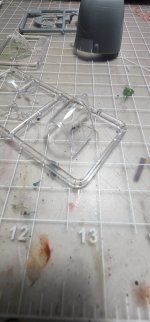
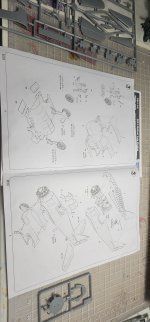
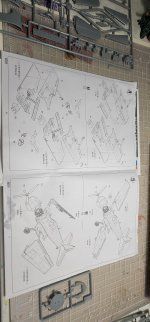
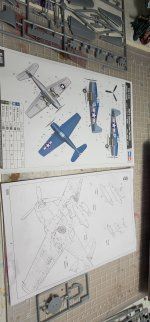
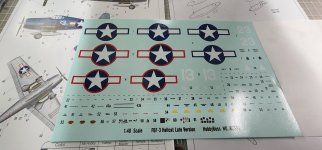
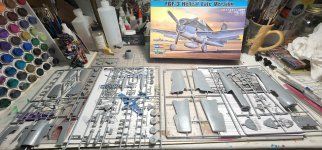
I am abandoning that silly little Heller 1/72 Hellcat I had started. What a horrible little model. I chose the Hobby Boss late version to start instead. I am not sure I have opened a kit this nice before. The detail level is eye popping to me. The clear parts were wrapped in foam cushioning then sealed in a plastic bag. That is a first for me. The cowl was as well along with a part of the motor with delicate parts that could break off. Anyway, that level of care is new to me. With what model kits cost these days I think it is a great idea and they all should do it (and they might as far as I know...it has been years since I opened a newly boxed model kit. The Mustang build was boxed in 1994). I have included shots of the sprues, instructions, and very nice decal sheet in case you are interested in seeing that. I have researched the crap out of this plane as far as my internet skills will go and have some great photo references. I washed all of the pieces and dried them. I have the cockpit pieces based in Tamiya black X-1 thinned 50/50 with alcohol. That thinning suggestion has made ALL the difference in my airbrushing experiences. That tip alone was worth the price of admission! 😁
Thanks guys for helping so much! I hope this build will be as awesome as my minds eye has planned!
 

Attachments

  • 20220825_091321.jpg
    20220825_091321.jpg
    1.2 MB · Views: 21
  • 20220825_091303.jpg
    20220825_091303.jpg
    1 MB · Views: 20
  • 20220825_091345.jpg
    20220825_091345.jpg
    1.2 MB · Views: 15
  • 20220825_091411.jpg
    20220825_091411.jpg
    1.2 MB · Views: 17
  • 20220825_091423.jpg
    20220825_091423.jpg
    941.6 KB · Views: 14
  • 20220825_091517.jpg
    20220825_091517.jpg
    1.2 MB · Views: 15
  • 20220825_091524.jpg
    20220825_091524.jpg
    1.1 MB · Views: 13
  • 20220825_091530.jpg
    20220825_091530.jpg
    1.1 MB · Views: 15
  • 20220825_091542.jpg
    20220825_091542.jpg
    1.1 MB · Views: 15
  • 20220825_091712.jpg
    20220825_091712.jpg
    1.6 MB · Views: 17
  • 20220825_093755.jpg
    20220825_093755.jpg
    1.4 MB · Views: 25
  • 20220825_091238.jpg
    20220825_091238.jpg
    2.7 MB · Views: 22
I have the cockpit (which is very well appointed with dials, buttons, levers, etc) painted and weathered. Instructions called for some parts to be cockpit green and some to be field green. To indicate the field green parts I made a red mark on the sprue edge, and black for the cockpit greens. To weather I used a black/raw umber mix oil paint wash. In the videos I watch, this wash wicks into the creases, corners, and crevaces. Mine,...it just spreads so I just coat everything. Any hints on that would be great. I wipe out the centers and let it all dry. After that I added a tiny bit of yellow to the respective greens and hit the panels, then added a speck if white and hit the centers with the airbrush. After that I used white oil paint and a dry brush. I wiped all of the paint off and raked over the edges to highlight the high spots.
I attached my reference photos to show what I am going by. I made the seat cushions from styrene and painted them khaki brown and weathered them just a bit. I am on the fence about trying to paint the words. I still need to make seatbelts.
There were some ejection pin marks I had to repair. Paint coming next.
For the dials and switches there were decals to apply. Instead, I looked at the decals and hand painted everything. For the dials I, of course, can't paint the numbers, but I skipped around the edges using Vallejo silver grey to indicate notches or numbers, then painted lines for the pointers. I then used the UV activated resin to fill the dials. I made a little red sign out of clear acetate and painted it red for the lower left instrument panel.
That may be it so far. It is Friday which is babysitting grandkids day so worktime will be spotty. Waiting for naptime!
 

Attachments

  • Screenshot_20220822-213439_Chrome.jpg
    Screenshot_20220822-213439_Chrome.jpg
    1.5 MB · Views: 12
  • Screenshot_20220825-084347_Chrome.jpg
    Screenshot_20220825-084347_Chrome.jpg
    1.9 MB · Views: 14
  • Screenshot_20220825-085936_Chrome.jpg
    Screenshot_20220825-085936_Chrome.jpg
    1.4 MB · Views: 12
  • Screenshot_20220825-085909_Chrome.jpg
    Screenshot_20220825-085909_Chrome.jpg
    1.2 MB · Views: 13
  • 20220826_125900.jpg
    20220826_125900.jpg
    1.1 MB · Views: 14
  • 20220826_125808.jpg
    20220826_125808.jpg
    512.9 KB · Views: 13
  • 20220826_075052.jpg
    20220826_075052.jpg
    746.3 KB · Views: 13
  • 20220826_063519.jpg
    20220826_063519.jpg
    814.9 KB · Views: 12
  • 20220826_043835.jpg
    20220826_043835.jpg
    851.6 KB · Views: 15
  • 20220826_125824.jpg
    20220826_125824.jpg
    466.9 KB · Views: 12
I think I figured out how you guys are inserting photos with descriptions!
20220826_152126.jpg

I got the cockpit floor together and touched up. On to the seatbelts.
20220826_160817.jpg

I used white tape for the straps and fly tying silver wire for the hardware. Man...talk about TEENY!
The styrene "seat pads" are easily scratched with the slightest touch. Maybe I should have primed them? They are starting to look crappy from piling paint back on them. Anyway, the searbelts are positioned and superglued. Here is where fit and assebly issues started happening. The pins for the seat support did not want to fit in their holes. No biggie after I enlarged the holes. After that dried it was time to assemble the side instrument panels to the front and back walls. Very awkward to to hold four moving parts together til they dried. I am not sure the left side panels are correct. The top panel hides two knobs beneath it if I have it right. I will know more after it is dry enough to handle and put on the cockpit floor.
 

Attachments

  • 20220826_163201.jpg
    20220826_163201.jpg
    839.1 KB · Views: 10
I started on the motor. I lost a little enthusiasm for the kit here. It is not at all accurate as far as I can tell. The details are "ok", but they didn't go far enough with them IMO. However, I am far from an expert on how model kits are made and what can be done.
This is their vision of the exhaust system...
20220827_160246.jpg


Herr is the RL exhaust system...
Screenshot_20220825-084450_Chrome.jpg


I know it probably can't be seen once the model is complete, but...hmmm. Ihave cut off their "pipes" and am going to attempt to scratch build both the pipes and add wire. (I know it ...or think...it isn't wires, but I don't know what those wire looking things are). I am going to ignore the stuff that should be in that void between the two halves unless someone can give me a suggestion.
Screenshot_20220823-200542_Chrome.jpg
 
i built something here a while ago with a radial and made the exhaust using black electrical wire because you can bend it where you want ..

cant remember what it was though
 
Here we go, A Hasegawa 1/48 hellcat, instead of trying to get the kit exhausts to fit if you use electrical wire you can bend it where you want :) obviously following the original path as close as possible.


DSC_1367.JPG
 
20220827_160532.jpg

I cut the exhaust plate off, leaving a portion so the motor will still fit. I actually had to add a piece back on to make it fit better
Here we go, A Hasegawa 1/48 hellcat, instead of trying to get the kit exhausts to fit if you use electrical wire you can bend it where you want :) obviously following the original path as close as possible.


View attachment 152935
Paddy, that looks so good!!

I will drill out for the pipes. I love the electric wire idea, but think I am going with lead wire for the pipes!
 
Back
Top