• Modelers Alliance has updated the forum software on our website. We have migrated all post, content and user accounts but we could not migrate the passwords.
    This requires that you manually reset your password.
    Please click here, http://modelersalliance.org/forums/login to go to logon page and use the "Forgot your Password" option.

Hobby 2000 BF-109 E4 1/32 FINISHED

Warning to builders of this kit

Here you can see where i have surgically removed the center section wing panel.

_DSC0021.JPG


This panel is fitted in step 3 however you will find it much easier to locate the engine mounts to the wing root in step 18 if you do it before you fit this panel. The answer is to change the whole assembly order to fit the engine straight after you button up the fuselage side (step3-4)
the instructions show the engine fit in step 18 of 19.....

I checked the instructions for the Dragon version on scalemates and the hobby2000 version is identical.

fortunately i use Revell Contacta and i have no idea what they have done with it but it doesnt really stick anymore so disassembly is not hard :)
 
Last edited:
Hmmmm.. what can I say ? More than a little disappointed with this kit. Previous Hobby 2000 models I have attempted have been Hasegawa and very nice. This however is Dragon and to be fair its my first Dragon kit.. It’s a very difficult model to build, over complicated and not helped by very poor instructions. The build sequence leads you down a few blind alleys , some parts called out in the instructions like the fluid tanks on the engine have fixing/ positioning pins but no holes to suit on the engine itself. Following some on-line research to find the correct position I find they are parts for a G6 and not part of the E4 kit and shouldn’t be in the instructions in the first place. Some of the sprue attachments are on the glued surface and well thought out, others are right on the finished surface. As I have detailed in the blog above, the kit is well known for its fit issues around the cowling over the guns and I have detailed a crude fix for that.

All the control surfaces are movable however the chances of success / for the average modeller I would say are less than 50/50 here. All the hinges are PE. The parts are in some cases under 1mm and incredibly difficult to work with, there are no plastic alternatives and I have glued all the control surfaces in position because A/ its totally unnecessary to have moveable surfaces on a static model and B/ the Skill level required to get them operational is 1000% more than the rest of the kit would otherwise require.

There are some very nice guns/cannons in the wing, well moulded and detailed…but they sit in a hole! With no detail under an access panel that to scale would be 1.5 inches thick 😊 ….on the underside of the wing, never to be seen again…

The wing root to fuselage fit is poor and needs filling, the over complicated construction means that the dihedral can be whatever you want and could be different for each wing without great care.

I could go on and on….the kit includes 2 sheets of Eduard PE, not optional, you do need some of these fittings but most of it is poor and doesn’t fit and its not detail up, there is no plastic alternative. It just puts even a basic build out of reach of the average builder especially the junior builder in my opinion.

_DSC0032.JPG
_DSC0037.JPG


Are these 2 floppy bits of PE up to the job ? Same with flaps and ailerons ? How do you stick these to the tail fin so there is no slack ? bearing in mind you would need to stick both simultaneously ? As soon as you push them into the fin they retract back into the rudder.


_DSC0040.JPG
 
Paddy pretty sure I did this kit a while back, especially looking at how the rudder attached. I put some thick CA deep in the receiving slot of the PE hinge then snugged it up. It still works to this day. But I recall making the rest static also.
 
I have an Eduard 1/32 E4 mostly assembled I noticed the wings had nothing to set the dihedral and so did a little research. Made a part out of 3/32 thick acrylic to set the dihedral of the bottom wings part which was a bit floppy. By doing that part, it made the wings solid and there were no gaps to fix. Got it right first try. It isn't a bad kit, just a bit of a pain in some places It is on the "to be done" shelf and is mostly together. I just want to add some extra little details before paint. Here is the link if you are interested:
Franz von Werra's Bf109 E4
 
My problem is steve i spent a life time as a production design engineer. People in all professions would come to me with ideas or things that didnt work and my job was to give them a product that did what they wanted. You end up looking at everything from an ease of production, ease of use and a practical point of view.
I once designed a banana stretcher :) The problem growers have is a banana stays green for most of its life then turns yellow in the space of a week. The growers needed to know when they would turn yellow about 3 weeks before. They found that the tensile strength of the skin reduced over the life of the banana especially as they neared the point of turning yellow, so by stretching and measuring the skin you could tell how far a green banana was from turning yellow :)
90% of problems with kits are easily avoidable if someone just built the dam things pre production using the parts and instructions supplied, instead they take a chance later and its too expensive to put things right once the faults are found. There really is no excuse for parts that dont fit (eduard), instructions with impossible build sequences or detailing parts in the instructions from another kit altogether or 2nd or 3rd boxings with the same well known faults in the modern day of computer design, 3D print and hand held scanners etc..
WnW proved my point, it can be done and it can be done well. Tamiya and Hase have it pretty much sussed but some of these eastern Europeans and Chinese are taking the pee :)
 
In all fairness Paul you basically re engineer your kits :) to put them right which sort of proves my point.
I get that for the manufacturer to get the finished thing into production is the main aim so they can start to recoup their outlay but i just think it cost no more to make a part right rather than wrong..it cost nothing to proof read your instructions or just make sure you have the right parts in the right box :)
 
Hi Paddy ! Test question for you . I always thought that Hasegawa, Tamiya and Fujimi used a better grade of plastic than the current date manufacturers.
Since Hobby 2000 is using old Japanese molds , are they using old quality plastic or the new soft stuff ?

I worked around engineers all my life . The aircraft ones sometimes left me wondering but the ones working in the bearing manufacturing realm were more inclined to work to getting the work it out the back door than making things work for the best.

Would be interested on your thoughts about the plastic . Some glues have changed also .
 
Since Hobby 2000 is using old Japanese molds , are they using old quality plastic or the new soft stuff ?
The question would be what does it state on the packaging? If it states Japanese molds, made in Poland, then they are suing the same plastic stock we see on many other Polish manufacturers. If it states Made in Japan boxed in Poland (or EU) then it those are sprue trees from the Japanese manufacturer. I have yet to get a Hobby 2000 kit so check myself.

If anyone has any Hobby 2000 releases using molds form Academy and Hasegawa, then we can tell as the plastic used by the Japanese and Korean companies are slightly different. If both are the same, then the Poles are injecting their plastic into the borrowed molds.

I hope that made sense!

Wait, I am fluent in Polish, let me just ask them!
:smack: Why didn't I think of that before typing of all this?
 
This is what i found on "large scale planes"

Hobby 2000 is a Polish distributor of model kits and related products from several different brands, in this regard they are the biggest game in town here.
Being a distributor of Hasegawa, in 2018 they decided to give a try to the idea of reboxing some Japanese kits. This turned out to work fairly well for them and since then they slowly build up their range of kits in different scales, with plastic sprues delivered by various brands being supplemented with Cartograf-printed decals, paint masks and sometimes also resin parts. Until now, they've released 6 aircraft kits in 1/32 scale (3 Spifire Mk.I/II/VA boxings with Revell plastic and 3 Bf 109 E boxings with DML plastic); 18 aircraft kits in 1/48 scale using Hasegawa, DML and Bronco plastic; 57 aircraft kits in 1/72 scale using Hasegawa, Fujimi, Revell, DML and Academy plastic, 4 tanks in 1/72 scale using DML plastic and 2 AFVs in 1/35 scale using Takom plastic. They also have a range of good quality masking tapes - see a test here: https://www.kfs-miniatures.com/tasmy-maskujace-hobby-2000/

I would guess this is correct, i built their 1/48 Harrier GR7-9 a while back and it was very much Hasegawa and boxed as a British GR7-9 which no one else was doing. I have no complaints with the plastic on this 109, reviews say its an excellent kit so my problems have been of my own making but i have found it over engineered with some parts almost over detailed and others with no detail at all like i have commented, excellent detailed guns in just holes in the wing with not even a hint of a gun bay for example.

That said Full marks too Hobby 2000 because there are new cartograf decals, include canopy masks and 3 frets of PE at a boxing price of £38 GBP which is probably not far off the Dragon price of 15 years ago.
 
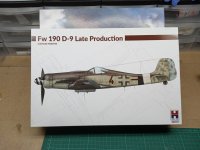
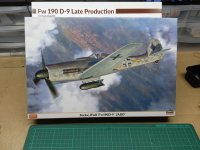
Got these two ,
same plastic sprues .
Polish kit has a note in it stating kit is made in Japan, also different instruction booklet ,canopy masks and new decal sheet .
 

Attachments

  • IMG_20241005_133653.jpg
    IMG_20241005_133653.jpg
    747.9 KB · Views: 30
  • IMG_20241005_133824.jpg
    IMG_20241005_133824.jpg
    856.1 KB · Views: 27
Got these two ,
same plastic sprues .
Polish kit has a note in it stating kit is made in Japan, also different instruction booklet ,canopy masks and new decal sheet .
I need to get the late FW 190 kit with the TA-152 tail. Found one, just need to buy now.
 
Polish kit has a note in it stating kit is made in Japan, also different instruction booklet ,canopy masks and new decal sheet.
Thanks @Piet! Made in Japan means that they bought the sprue trees and didn't borrow the molds. :good:
 
_DSC0048.JPG


_DSC0049.JPG


_DSC0050.JPG


_DSC0052.JPG


_DSC0053.JPG


_DSC0054.JPG
_DSC0056.JPG


_DSC0057.JPG


_DSC0059.JPG


_DSC0061.JPG


Ta Daaaa... this will look good next to my FW-190 i made last month (or the month before) :)
I think i have said all i can about this during the build
The first picture shows all the cowlings on. They do fit well but the top cowling needs a small amount of downward pressure to sit in place the cover over the gun platform is the same but following major surgery it does fit (removed in pic 9)
 
Back
Top