• Modelers Alliance has updated the forum software on our website. We have migrated all post, content and user accounts but we could not migrate the passwords.
    This requires that you manually reset your password.
    Please click here, http://modelersalliance.org/forums/login to go to logon page and use the "Forgot your Password" option.

hawkenstein 2 finished

Re: hawkenstein 2 12/7 update

Very nice Joe . Is the top of the fuselage going to stay that open ?

If so, you migh want to consider the plumbing for that air intake . :idonno

Cheers, Christian B)
 
Re: hawkenstein 2 12/7 update

Fantastic work Joe, realy like it. You going to have the stringers/frame where the panels button down, can't think of the name of them...Chris can you help?
 
Re: hawkenstein 2 12/7 update

Sorry Bob. I'm sure they have a name but it was always something for the sheet metal people to be worried with so I have forgotten.

Cheers, Christian B)
 
Re: hawkenstein 2 12/7 update

Joe,

Really good work! One note, from my experience with aircraft, the exhausts may be browned and discolored but not rust. They should have a metallic look.

0MVC-013F.jpg


0MVC-014F.jpg


0MVC-015F.jpg


Regards,
 
Re: hawkenstein 2 12/7 update

You going to have the stringers/frame where the panels button down, can't think of the name of them...Chris can you help?

I'm not Chris but the non structural ones are called stringers, structural ones which run horizontally are longerons, and there are also bulkheads (usually vertical and may be hollowed or solid depending on function) plus the Dzus fasteners for items which are removed often such as cowlings.

P-40StructuralRepairFig10.jpg


P-40DEE1FStructuralRepairFig27crop.jpg

Note that the stringers are not called out but are between the upper and lower longerons.

Regards,
 
Re: hawkenstein 2 12/7 update

Very good Saul . A bunch of good old French words . Thanks :drinks


Cheers, Christian B)
 
Re: hawkenstein 2 12/7 update

Very good Saul .

Got my A & P licenses (Airframe & Powerplant) from Aviation High School in Long Island City, NY.

By the way, those scans are from two P-40 Structural Repair manuals.

Regards,
 
Re: hawkenstein 2 12/7 update

christian good point. dont have anything that shows that. hey saul, you have anything that shows that plumbing?

saul another good point. this was just a base for me. i will be working more with the exhausts when i get to the stage of painting the fuse. experience tells me if i get them the way i want them now i will screw them up at that point.

i definitely should have placed the stringers, however i didnt. to get the engine and firewall in place the correct way i permanently attached them this time. the firewall was taking a lot of abuse with all my fitting and such.


joe
 
Re: hawkenstein 2 12/7 update

Joe, you are really bringing this old kit to life. I love what I am seeing so far. What scheme are you going to do?
 
Re: hawkenstein 2 12/7 update

Joe, you are really bringing this old kit to life. I love what I am seeing so far. What scheme are you going to do?

many thanks for the kind words. no idea on the scheme yet. still trying to figure out if i am going to be able to finish construction in my lifetime.


joe
 
Re: hawkenstein 2 12/7 update

many thanks. worked some on it last night. no pics because not much visable progress.


joe
 
Re: hawkenstein 2 12/7 update

ok as i wrap up the interior forward and midsections i wanted to really show what has been done. there is still just a couple of clean up things, touch up on the oil reserve tank and belts for the seat. i also wanted to give a bit of perspective on what i have done.

first up let me show you somewhat how this kit would build up out of box. this is done with school/white glue.

out-of-box-6.jpg

out-of-box-5.jpg

out-of-box-3.jpg

out-of-box-4.jpg

out-of-box-3.jpg


and then the pit out of box.

out-of-box-1.jpg

out-of-box-2.jpg


as you can see there was not much too it. very bare bones.

now with what i have done.

finished-pit-7.jpg

finished-pit-6.jpg

finished-pit-5.jpg

finished-pit-4.jpg

finished-pit-3.jpg


and the pit.

finished-pit-2.jpg

finished-pit-1.jpg


again some minor clean up and the belts. not happy with the seat but after four attempts this is the best i have done with it. i just cannot get it the way i want. i think i am trying too hard to get it like the picture.

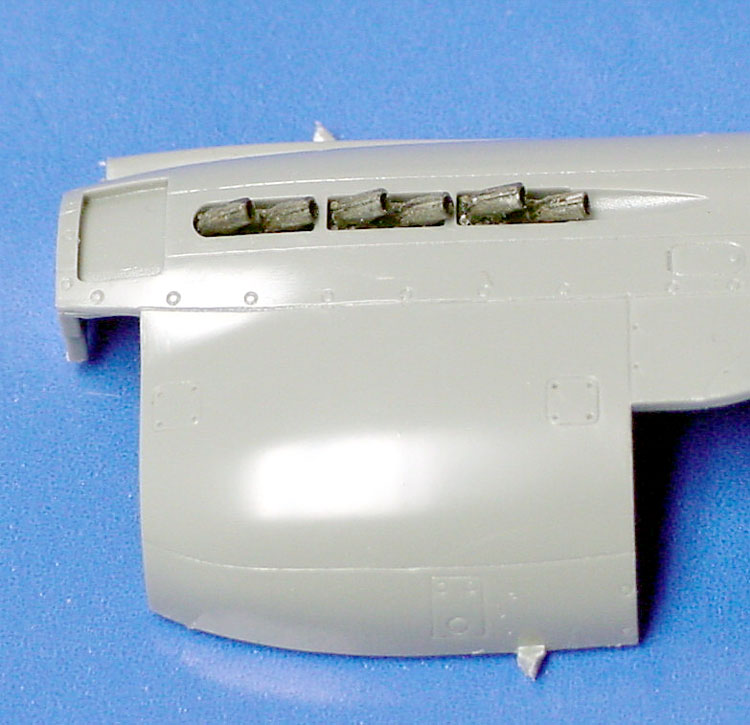
last is a side by side exterior fuse set of pics.

side-by-side-2.jpg

side-by-side-1.jpg


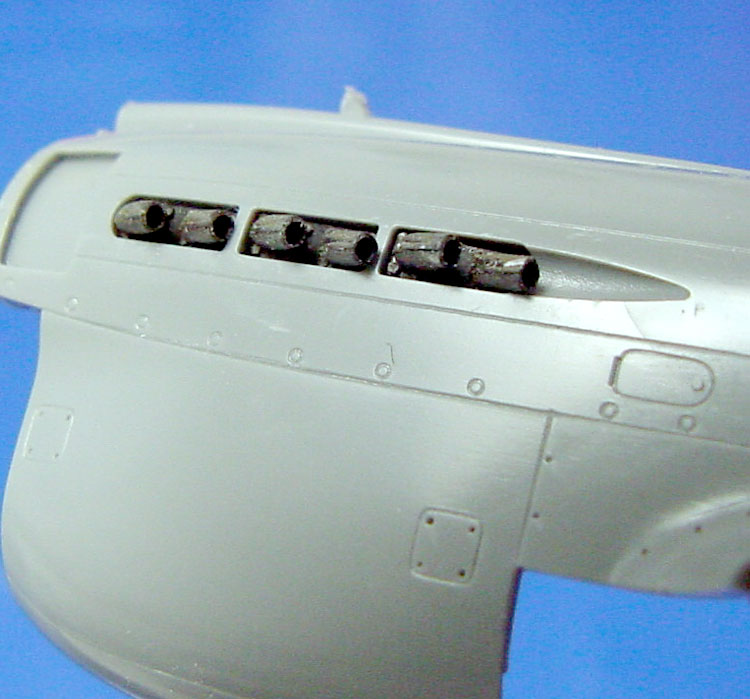
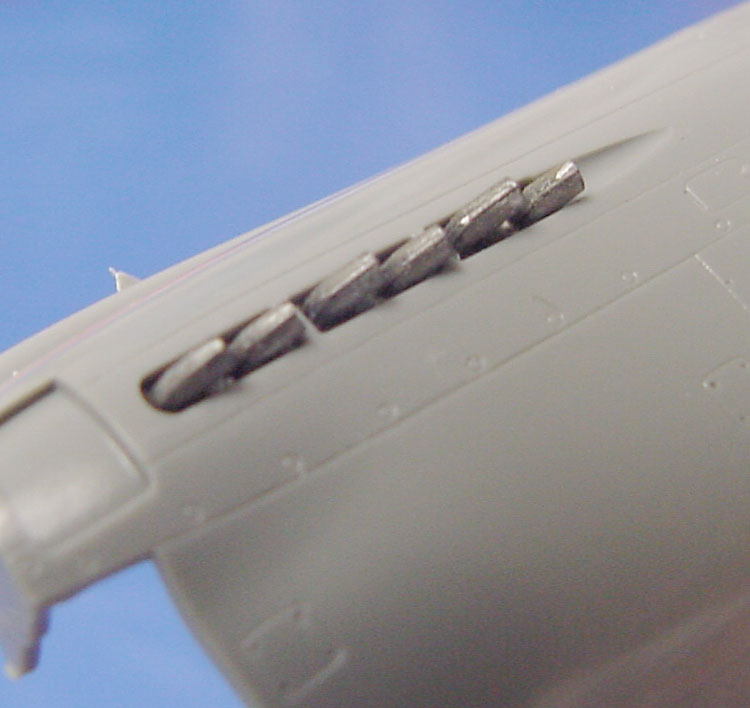
well there you have it. like i said it is not the best but it is the best i have done to this point. you will notice that there are now gun mounts as well. they wont pass an up close inspection but they do look passable. will be doing the minor clean up and belts and then it is on to the tail wheel assembly.

comments, criticism, critiques encouraged.


joe
 
Back
Top