
-
Modelers Alliance has updated the forum software on our website. We have migrated all post, content and user accounts but we could not migrate the passwords.
This requires that you manually reset your password.
Please click here, http://modelersalliance.org/forums/login to go to logon page and use the "Forgot your Password" option.
You are using an out of date browser. It may not display this or other websites correctly.
You should upgrade or use an alternative browser.
You should upgrade or use an alternative browser.
Double D's :)
- Thread starter matrixone
- Start date
 ....
.... Duke Maddog
Well-known member
looking good! You've certainly nailed that preshading technique.
Thanks guys!
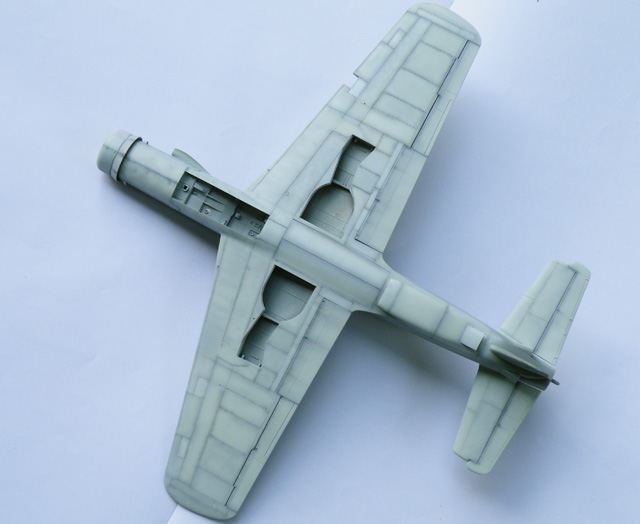
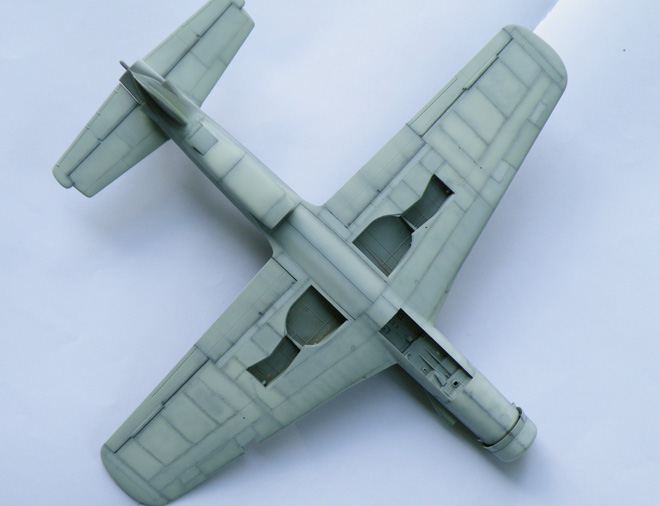
Over the years a lot of modelers have said some bad things about pre-shading but I believe no weathering techniques should be abandoned just because they are not the latest fad.
The pre-shading done on the bottom of this Do 335 is a bit too strong for my taste but after the markings and other weathering effects are on it should look okay. Normally on my models I prefer the pre-shading to be barely seen on the finished product.
This Do 335 will get extra heavy weathering on it as well as special armament of an aircraft that has seen a lot of combat against the heavy bombers of the Allies. :hmmm
Matrixone
Thank you Ian and James!
The painting of the splinter camouflage is now finished and here is how I did it.
The first step was mixing the colors needed...I use Model Master enamels but their Luftwaffe shades of paint are pretty far off the mark in most cases and in the case of RLM 81 and RLM 82 they are WAY off the mark! Mixing up passable looking RLM 82 is easy and have done it many times before but RLM 81 was a totally different story, RLM 81 is nearly impossible to pin down exactly what color it was...it has been described as a dark green color in some publications and in other publications claim its a brown color(s). Even the various paint chips that I have show variations in RLM 81 so what version do I choose for the Do 335?
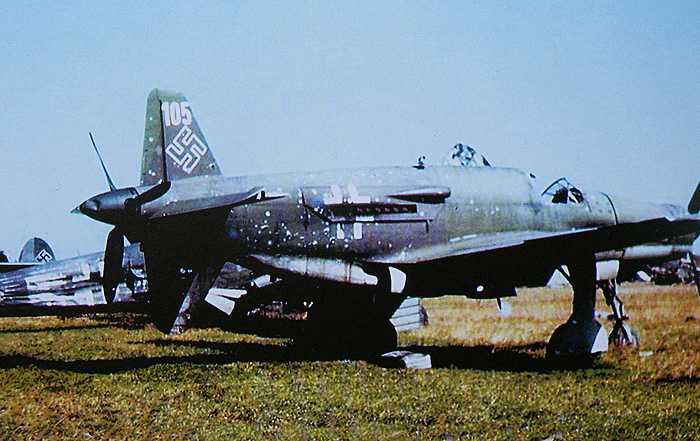
What I ended up doing is looking at the color photograph of W.Nr.240105 that was taken shortly after the end of the war and compared the colors on that photograph to the color chip pages and tried to see which one of those was the best match for RLM 81. After looking at things outside in natural daylight the color chip of RLM 81 from the Merrick book was a very close match so I used that as a guide to help me mix up some RLM 81. Normally color photographs from the 1940's are not that good for judging colors but in the case of the color photograph of W.Nr.240105 it has both good color balance and lighting and on the top fin and rudder RLM 81 and RLM 82 stands out nicely.
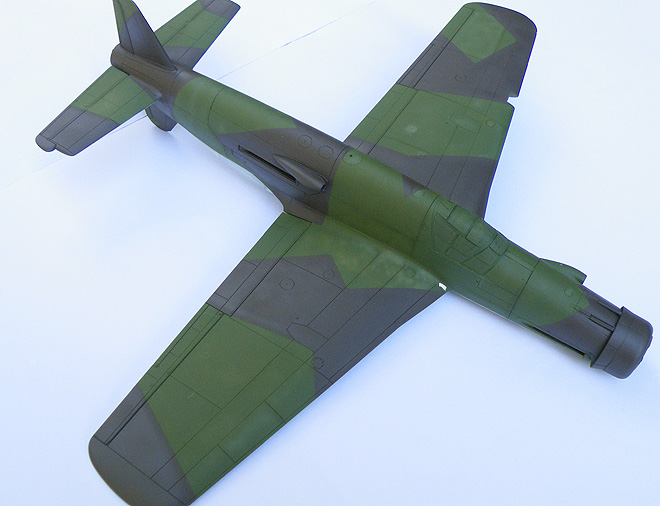
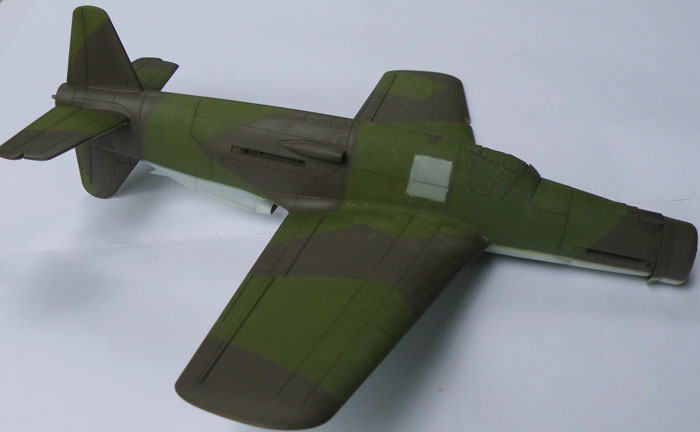
I sprayed on RLM 82 first and let that dry a day and then masked off the splinter pattern and sprayed on the RLM 81.
After looking at all the Do 335 photographs I could get my hands on it was easy to see that aside from the early prototypes the splinter pattern on most Do 335's was not hard edged but had a tight but soft demarcation line between the colors just like the Do 335 in the NASM.
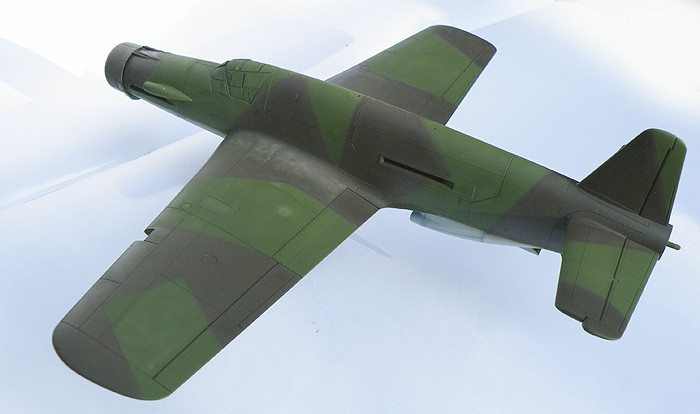
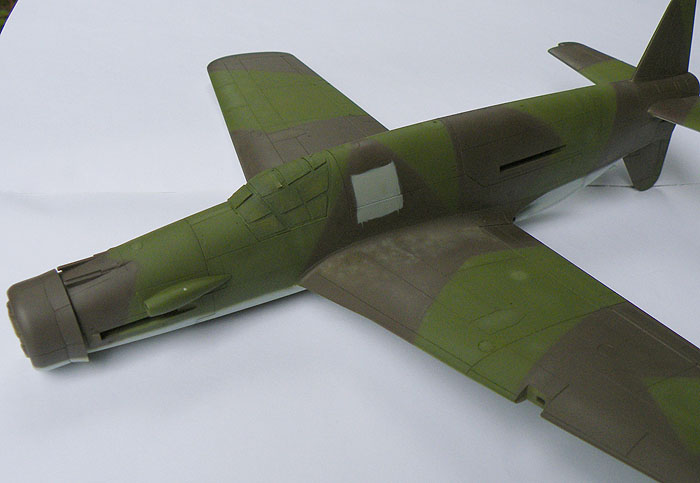
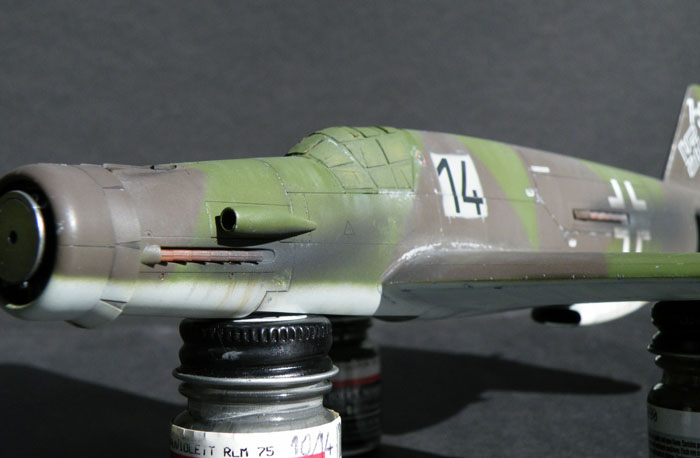
After removing the masking tape I went back over the edges of the splinter pattern and sprayed a narrow line of RLM 81 just inside the areas painted in RLM 81, this was very effective in softening the demarcation line without them looking too soft. I don't think I could get this effect freehand spraying the splinter pattern as it would have been too soft looking at the edges.
Here is the model just after the masking tape had been removed...
...and here it is after the edges were softened a bit. Also I did some paint fading/scuff marking around the wing roots with the airbrush with lighter versions of 81 and 82.


Matrixone
The painting of the splinter camouflage is now finished and here is how I did it.
The first step was mixing the colors needed...I use Model Master enamels but their Luftwaffe shades of paint are pretty far off the mark in most cases and in the case of RLM 81 and RLM 82 they are WAY off the mark!
Mixing up passable looking RLM 82 is easy and have done it many times before but RLM 81 was a totally different story, RLM 81 is nearly impossible to pin down exactly what color it was...it has been described as a dark green color in some publications and in other publications claim its a brown color(s). Even the various paint chips that I have show variations in RLM 81 so what version do I choose for the Do 335?What I ended up doing is looking at the color photograph of W.Nr.240105 that was taken shortly after the end of the war and compared the colors on that photograph to the color chip pages and tried to see which one of those was the best match for RLM 81. After looking at things outside in natural daylight the color chip of RLM 81 from the Merrick book was a very close match so I used that as a guide to help me mix up some RLM 81. Normally color photographs from the 1940's are not that good for judging colors but in the case of the color photograph of W.Nr.240105 it has both good color balance and lighting and on the top fin and rudder RLM 81 and RLM 82 stands out nicely.
I sprayed on RLM 82 first and let that dry a day and then masked off the splinter pattern and sprayed on the RLM 81.
After looking at all the Do 335 photographs I could get my hands on it was easy to see that aside from the early prototypes the splinter pattern on most Do 335's was not hard edged but had a tight but soft demarcation line between the colors just like the Do 335 in the NASM.
After removing the masking tape I went back over the edges of the splinter pattern and sprayed a narrow line of RLM 81 just inside the areas painted in RLM 81, this was very effective in softening the demarcation line without them looking too soft. I don't think I could get this effect freehand spraying the splinter pattern as it would have been too soft looking at the edges.
Here is the model just after the masking tape had been removed...
...and here it is after the edges were softened a bit. Also I did some paint fading/scuff marking around the wing roots with the airbrush with lighter versions of 81 and 82.
Matrixone
Thank you Ian and James!
The painting of the splinter camouflage is now finished and here is how I did it.
The first step was mixing the colors needed...I use Model Master enamels but their Luftwaffe shades of paint are pretty far off the mark in most cases and in the case of RLM 81 and RLM 82 they are WAY off the mark!
What I ended up doing is looking at the color photograph of W.Nr.240105 that was taken shortly after the end of the war and compared the colors on that photograph to the color chip pages and tried to see which one of those was the best match for RLM 81. After looking at things outside in natural daylight the color chip of RLM 81 from the Merrick book was a very close match so I used that as a guide to help me mix up some RLM 81. Normally color photographs from the 1940's are not that good for judging colors but in the case of the color photograph of W.Nr.240105 it has both good color balance and lighting and on the top fin and rudder RLM 81 and RLM 82 stands out nicely.
I sprayed on RLM 82 first and let that dry a day and then masked off the splinter pattern and sprayed on the RLM 81.
After looking at all the Do 335 photographs I could get my hands on it was easy to see that aside from the early prototypes the splinter pattern on most Do 335's was not hard edged but had a tight but soft demarcation line between the colors just like the Do 335 in the NASM.
After removing the masking tape I went back over the edges of the splinter pattern and sprayed a narrow line of RLM 81 just inside the areas painted in RLM 81, this was very effective in softening the demarcation line without them looking too soft. I don't think I could get this effect freehand spraying the splinter pattern as it would have been too soft looking at the edges.
Here is the model just after the masking tape had been removed...
...and here it is after the edges were softened a bit. Also I did some paint fading/scuff marking around the wing roots with the airbrush with lighter versions of 81 and 82.
Matrixone
:love

Heavens Eagle
Well-known member
Hey Les! Mighty fine looking paint there. While I like the MM enamels as well have also heard that they miss the mark color wise. Can you tell us about what you used to obtain your color mix? I know you van't tell us exactly, Mixing paint is as much an art as painting it on. If you could advise us of the colors you used it would be a helpful start.

")
Thanks guys!
Chuck,
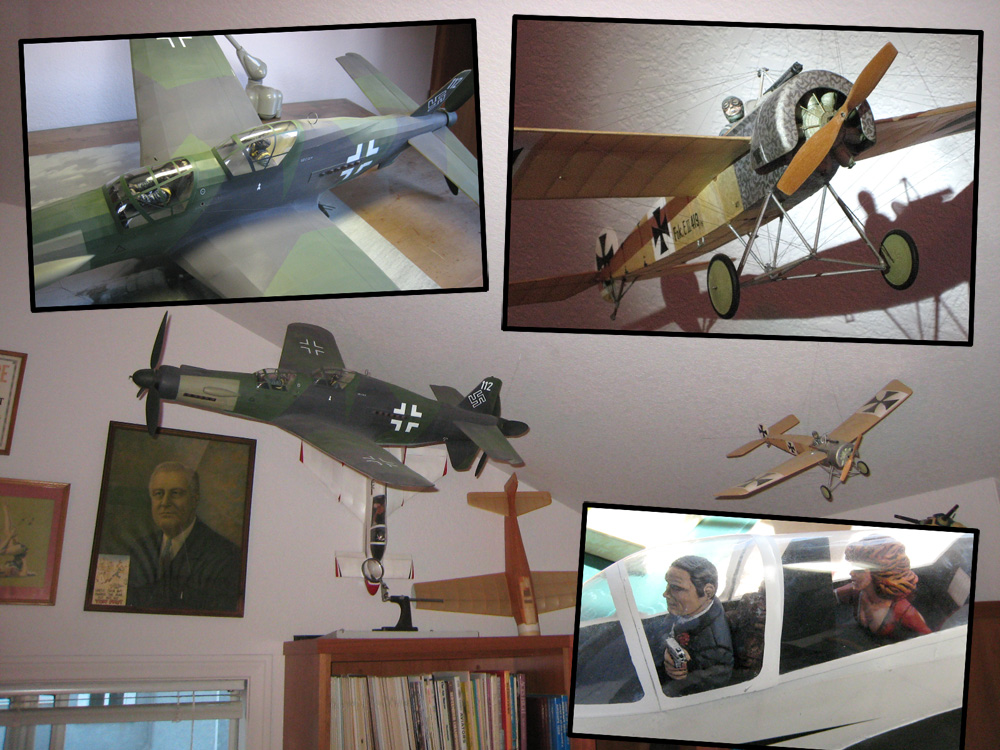
That's an amazing looking free flight Do 335! Many years ago I did some free flight stuff, mostly HLG and I built a Carl Goldberg Viking 0.49 free flight kit...great fun back in those days. :cheer:
Paul,
The RLM 82 medium green was mostly Testors Dark Green with some yellow added. The RLM 81 was made with Testors Model Master II Schokel Brown as a starting point and Testors Model Master II RLM 81 was slowly added to it until I had a near perfect match with the color sample. Keep in mind when trying to match colors its best to do your final checks in natural light, indoor lighting no matter how good or bright will not work as good, in fact I waited until a nice day with the sun out to paint the Do 335 for this very reason.
Here are some Do 335 photographs that may be of some interest to fans of this aircraft.
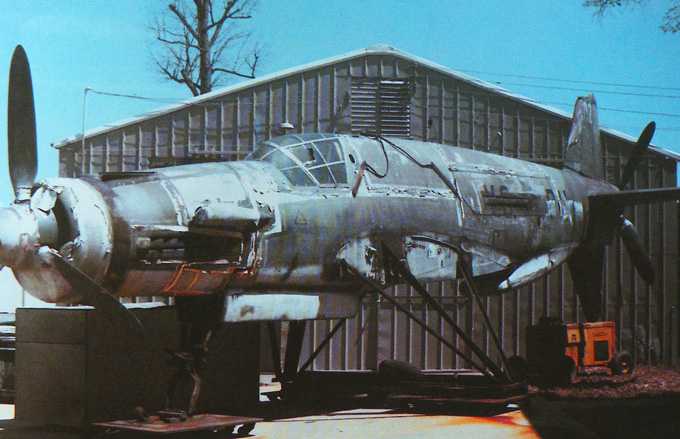
Here is the NASM Do 335 W.Nr.240102, having been outdoors for nearly 20 years the RLM 81 and RLM 82 was badly faded out but if you look closely the camouflage pattern can still be seen.

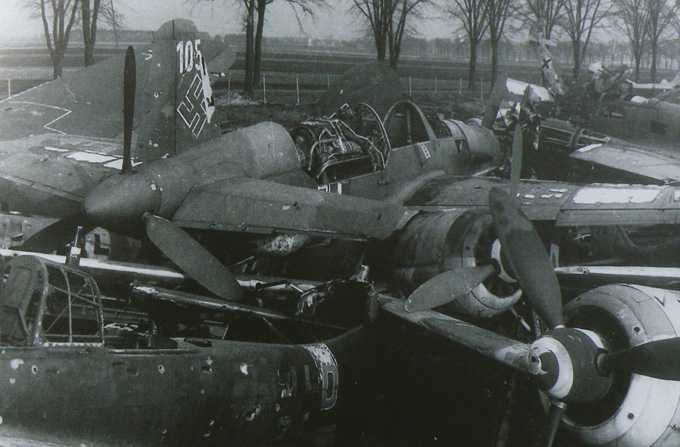
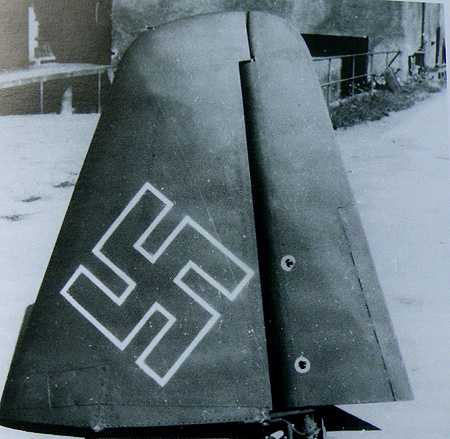
This is a different Do 335 W.Nr.240105 that was photographed just after the end of the war, it was too badly shot up to be any use and ended its days in a scrap yard. Notice the variation in the demarcation lines of the camouflage, some places its nearly a hard edge and other places its quite soft looking.
Here is a photograph of some Do 335's in the assembly hall at Oberphaffenhofen, notice the tail surfaces were already painted before they were bolted onto the airframe.
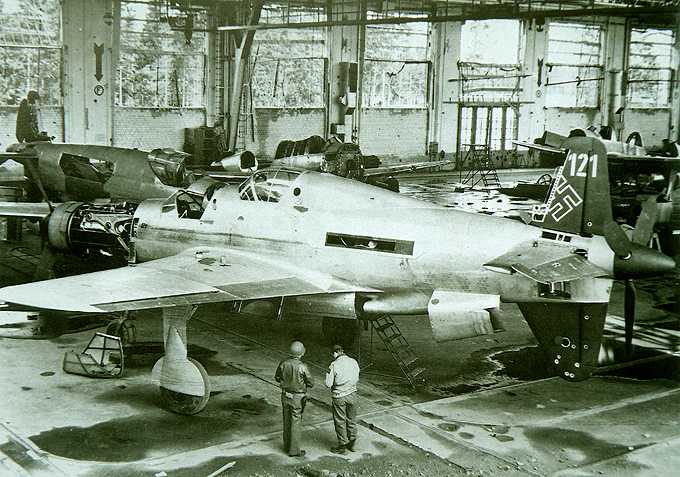
The tail surfaces were built and painted by a sub-contractor and were shipped to the Do 335 assembly hall.
Whats interesting here is the variation in the camouflage demarcation lines mostly with soft edges.
Matrixone
Chuck,
That's an amazing looking free flight Do 335! Many years ago I did some free flight stuff, mostly HLG and I built a Carl Goldberg Viking 0.49 free flight kit...great fun back in those days. :cheer:
Paul,
The RLM 82 medium green was mostly Testors Dark Green with some yellow added. The RLM 81 was made with Testors Model Master II Schokel Brown as a starting point and Testors Model Master II RLM 81 was slowly added to it until I had a near perfect match with the color sample. Keep in mind when trying to match colors its best to do your final checks in natural light, indoor lighting no matter how good or bright will not work as good, in fact I waited until a nice day with the sun out to paint the Do 335 for this very reason.
Here are some Do 335 photographs that may be of some interest to fans of this aircraft.
Here is the NASM Do 335 W.Nr.240102, having been outdoors for nearly 20 years the RLM 81 and RLM 82 was badly faded out but if you look closely the camouflage pattern can still be seen.
This is a different Do 335 W.Nr.240105 that was photographed just after the end of the war, it was too badly shot up to be any use and ended its days in a scrap yard. Notice the variation in the demarcation lines of the camouflage, some places its nearly a hard edge and other places its quite soft looking.
Here is a photograph of some Do 335's in the assembly hall at Oberphaffenhofen, notice the tail surfaces were already painted before they were bolted onto the airframe.
The tail surfaces were built and painted by a sub-contractor and were shipped to the Do 335 assembly hall.
Whats interesting here is the variation in the camouflage demarcation lines mostly with soft edges.
Matrixone
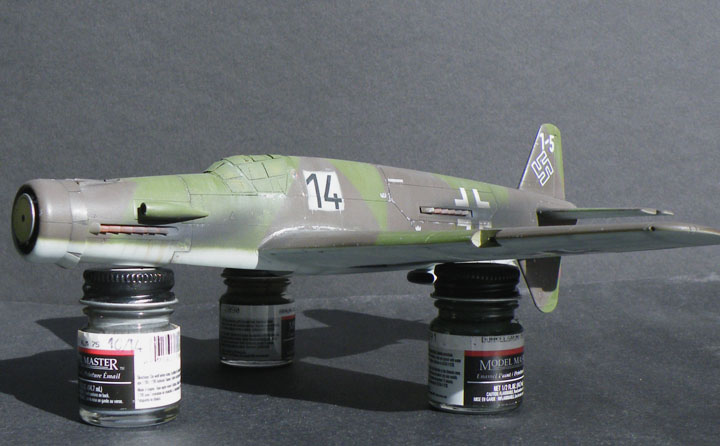
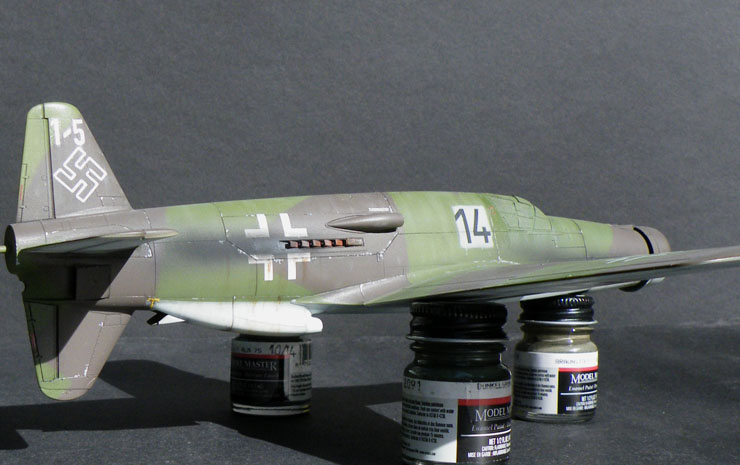
I needed to add the patch of lighter colored paint in the area where the aircraft number is to be placed.
The effect I was after was of a roughly painted on square that was added to cover up an older aircraft number so a new number could be painted on the fuselage. This type of thing happened to a number of late war aircraft especially those that were transferred from one unit to another, neatness while doing this job was not deemed important compared to getting the aircraft back in service ASAP.
It might not be seen easily but I added some tiny drips of paint to give the impression of the paint being quickly slopped on.
Matrixone
This Do 335 has its markings on as well as much of the weathering it will have done to it, much more weathering than this and it will start to look cartoonish.
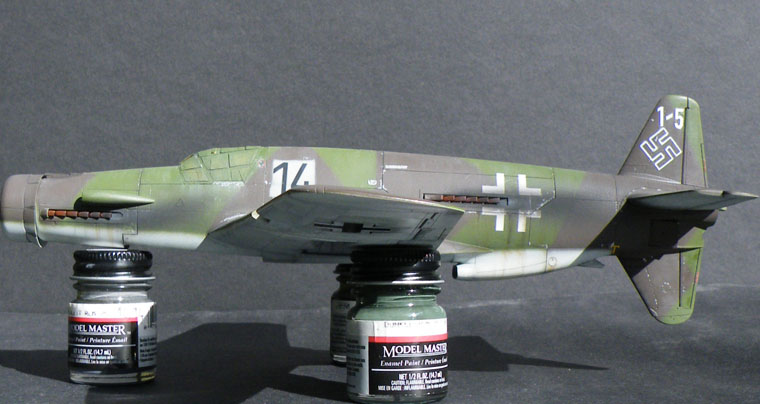
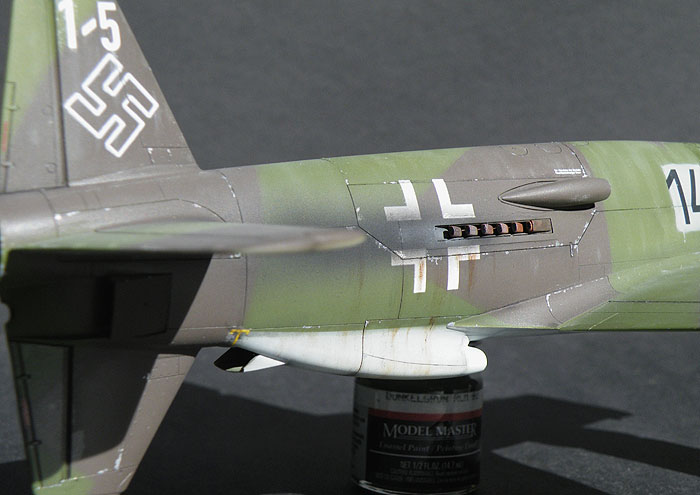

The special armament for this aircraft has been built and painted and will be one of the last things added to this build.
Matrixone
The special armament for this aircraft has been built and painted and will be one of the last things added to this build.
Matrixone
Can't believe I missed the previous update. Les the weathering is just spot on! Can't wait to see her up on legs.
phantom II
Master at Arms
Dang, someone stole the wheel from under that one
Cheers, Christian B)
Cheers, Christian B)
Similar threads
- Replies
- 104
- Views
- 21K
- Replies
- 54
- Views
- 11K
- Replies
- 20
- Views
- 2K
- Replies
- 50
- Views
- 9K