
-
Modelers Alliance has updated the forum software on our website. We have migrated all post, content and user accounts but we could not migrate the passwords.
This requires that you manually reset your password.
Please click here, http://modelersalliance.org/forums/login to go to logon page and use the "Forgot your Password" option.
You are using an out of date browser. It may not display this or other websites correctly.
You should upgrade or use an alternative browser.
You should upgrade or use an alternative browser.
1/48 scale Bf 109's x 2
- Thread starter matrixone
- Start date
Skinny_Mike
Well-known member
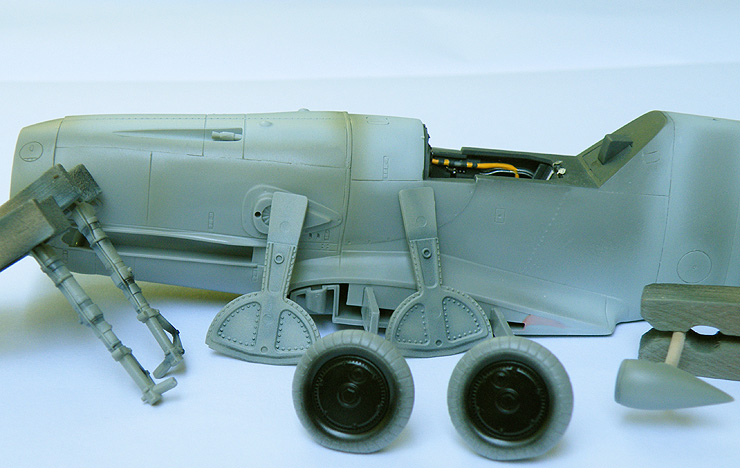
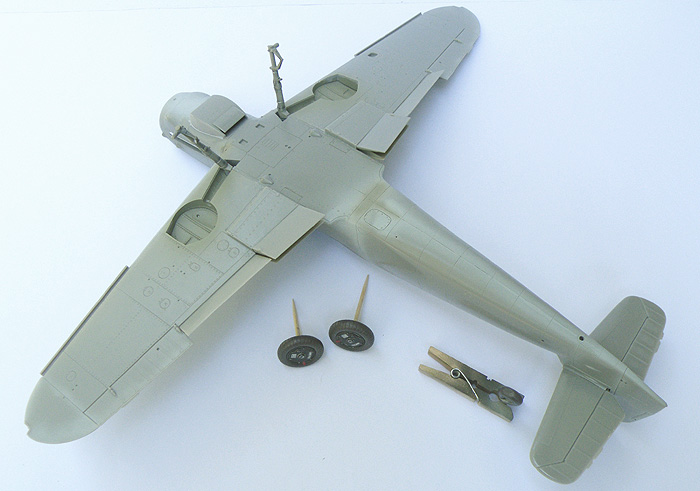
Not much to see in this update, the landing gear legs and gear doors have been painted and given some pre-shading and the supercharger intake has been assembled and given a coat of RLM 02 primer.
The wheel hubs were given a coat of semi-gloss black and the tires will soon be painted my custom mix of 'rubber'.
Matrixone
The wheel hubs were given a coat of semi-gloss black and the tires will soon be painted my custom mix of 'rubber'.
Matrixone
phantom II
Master at Arms
very nice less thanks for the update not be interesting to know the recipe for your custom rubber formula unless its a top secret

Swordsman,
My custom tire mix is made from the following paint colors...Testors Rubber(in the small square bottle), flat white, and tan.
When I mix up a batch of this paint color I start out with adding Rubber to some flat white, the darker Rubber color will quickly turn the flat white dark and that's why I don't add the flat white to the Rubber color of paint because it will take much more of the white paint to lighten the Rubber to the shade of paint I am after and will waste less paint that way.
Sometimes I will add some flat light tan to the custom mixed rubber color but not more than a drop or two.
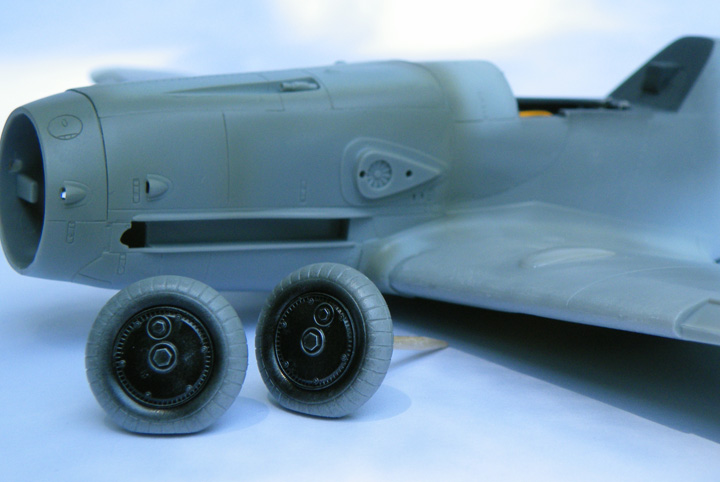
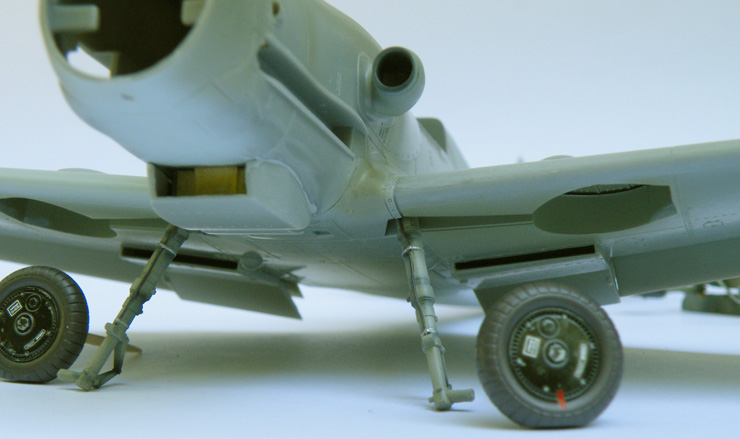
A little bit more was done on the Hasegawa Bf 109G-10, the wings were joined to the fuselage and some light dry brushing of silver paint to the wheel hubs, the dry brushing made the molded in detail of the wheels stand out much better...now I can finally start painting the tires 'rubber'.
Matrixone
My custom tire mix is made from the following paint colors...Testors Rubber(in the small square bottle), flat white, and tan.
When I mix up a batch of this paint color I start out with adding Rubber to some flat white, the darker Rubber color will quickly turn the flat white dark and that's why I don't add the flat white to the Rubber color of paint because it will take much more of the white paint to lighten the Rubber to the shade of paint I am after and will waste less paint that way.
Sometimes I will add some flat light tan to the custom mixed rubber color but not more than a drop or two.
A little bit more was done on the Hasegawa Bf 109G-10, the wings were joined to the fuselage and some light dry brushing of silver paint to the wheel hubs, the dry brushing made the molded in detail of the wheels stand out much better...now I can finally start painting the tires 'rubber'.
Matrixone
Swordsman,
My custom tire mix is made from the following paint colors...Testors Rubber(in the small square bottle), flat white, and tan.
When I mix up a batch of this paint color I start out with adding Rubber to some flat white, the darker Rubber color will quickly turn the flat white dark and that's why I don't add the flat white to the Rubber color of paint because it will take much more of the white paint to lighten the Rubber to the shade of paint I am after and will waste less paint that way.
Sometimes I will add some flat light tan to the custom mixed rubber color but not more than a drop or two.
Matrixone
VERY good timing with this...
 hyeah
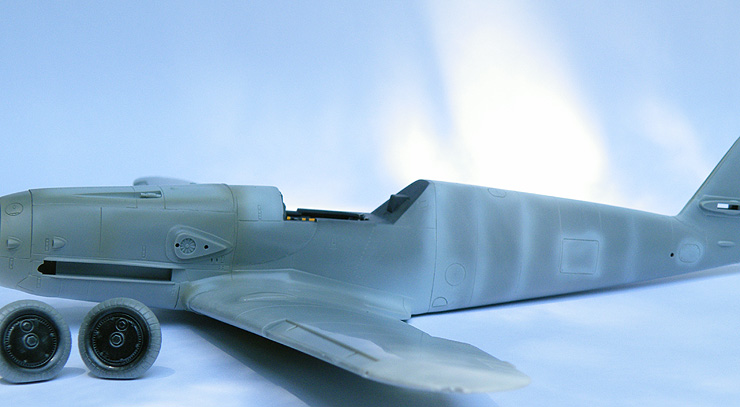
hyeah The Hasegawa G-10 is getting close to paint, only a few small bits to add now.
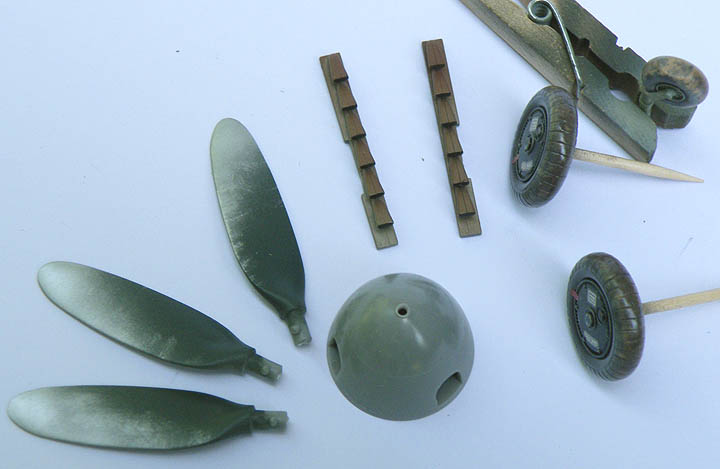
The basic airframe is assembled and I finally painted the 'rubber' on the tires.
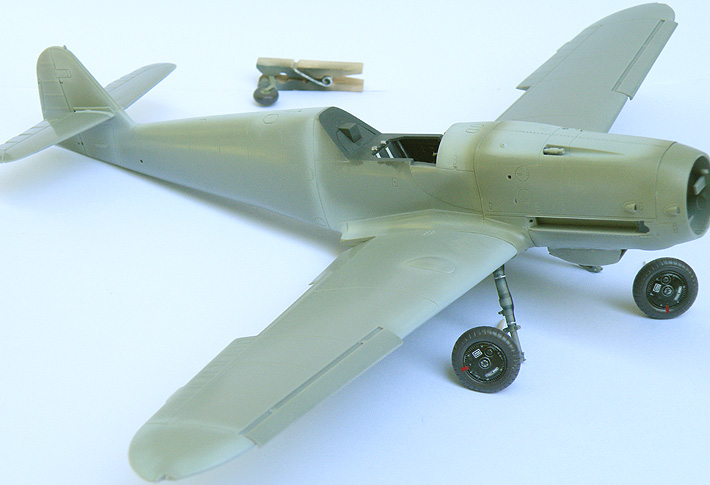
The landing gear legs are not glued in just yet and are placed on the model for these pictures. I really like the molded in detail Hasegawa included on these parts, with some detail painting and careful weathering they look good on the finished model.hyeah
Matrixone
The basic airframe is assembled and I finally painted the 'rubber' on the tires.
The landing gear legs are not glued in just yet and are placed on the model for these pictures. I really like the molded in detail Hasegawa included on these parts, with some detail painting and careful weathering they look good on the finished model.
hyeah
Matrixone
Thanks for looking Ed and Luiz!
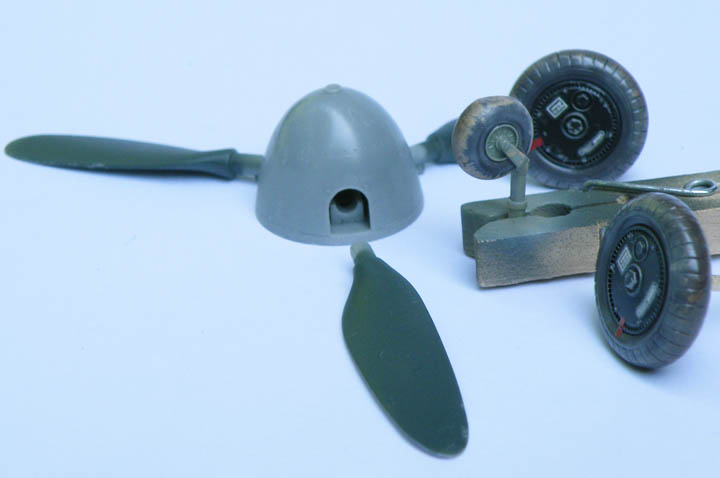
Not much has been done on this model lately, the wheels have been weathered a bit and the exhaust stacks and prop blades have been painted.
This first picture shows the back of the prop blades, a great many Bf 109's had the rear of the prop blades with a lot of paint worn away near the tips.
The tires will have some additional dirt applied to them inside the grooves of the treads.
I had wanted to paint this model and the Revell 'Erla'G-10 at the same time but may not do that because the deadline to get the Erla 109 finished is fast approaching so this Hasegawa kit will have to wait to get painted.
Matrixone

Skinny_Mike
Well-known member
This first picture shows the back of the prop blades, a great many Bf 109's had the rear of the prop blades with a lot of paint worn away near the tips.
Ok Les - time for a tutorial... How did you do that? I really like this affect!
Thanks
Mike
Thanks again for looking.
Mike,
The wear on the back of the propeller blades was super easy to do and here is what I did to achieve that:
1. The prop blades were sprayed RLM 70
2. On the rear of the prop blades I sprayed on some metall, the metall was not thinned much and the reason for this is I wanted to have sort of a grainy look to represent the paint being eroded.
3. To avoid too much of the paint splatter look I did some dry brushing with the same metall paint.
A step that has yet to be done is using a silver artists pencil on the very leading edge of the prop blades near the tips, this step will be done after the flat clear coat has been sprayed on...I want at least some of the wear to look fresher than the others to better represent the wear to have occurred over a period of time rather than all in one day.
Matrixone
phantom II
Master at Arms
Very nice touch on the propeller
Cheers, Christian B)
Cheers, Christian B)
You rock that airbrush Les :dude
Similar threads
- Replies
- 104
- Views
- 22K