• Modelers Alliance has updated the forum software on our website. We have migrated all post, content and user accounts but we could not migrate the passwords.
    This requires that you manually reset your password.
    Please click here, http://modelersalliance.org/forums/login to go to logon page and use the "Forgot your Password" option.

1/48 scale Bf 109's x 2

Thanks guys!

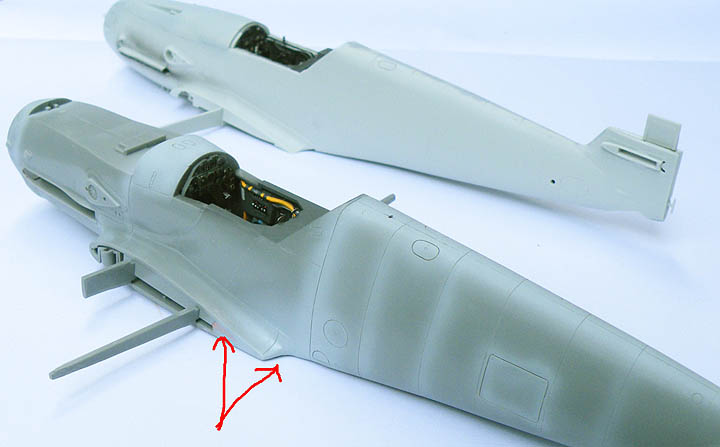
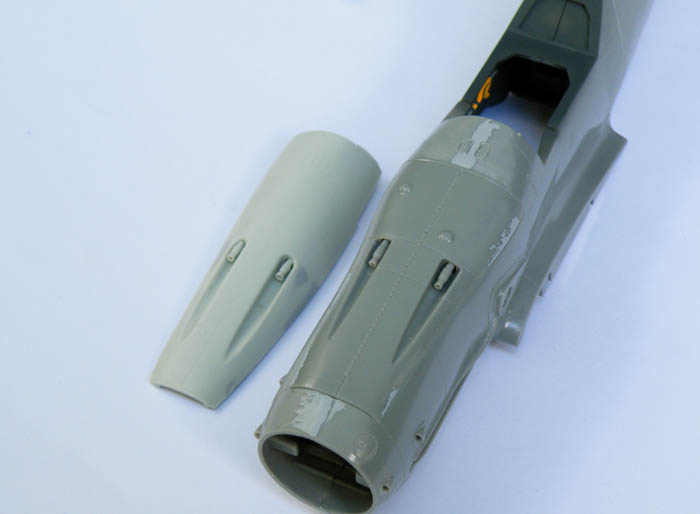
Not much progress to show on the Hasegawa G-10 but here is a picture anyway, this is a comparison of the Hasegawa and Revell 'Erla' G-10 gun cowls. The MG's are too close together on the Revell kit and should be farther apart, the old Hasegawa is closer to being correct...and this is why there SHOULD be new kits of the 109, it seems nobody can get it 'right'. :smack

hdc1ba01.JPG


Matrixone
 
More tedious work done on the Hasegawa G-10, the seam lines that needed filled were taken care of and the rudder trim tabs were removed as they are not needed on the aircraft I am doing. As a comparison you can see behind the rudder I modified is a stock rudder with the trim tabs still intact.

hd476b2d.JPG


I sprayed on some RLM 76 to check the seam lines so I could find out if more work on them will be needed before going any further.
h76f2756.JPG


h83b6683.JPG


Now that some of the really boring work is nearly over the rest of the build should go very quickly.

Matrixone
 
Thanks Luiz!

Something I learned from the other Hasegawa large scale 109's I have built is to use some plastic card to thicken up the rear of the belly pan, if you don't the belly pan will sink in too far and leave a step where there should be none. This is one of the few things in this kit that does not have a near perfect fit.

h1ace2e3.JPG


h46f55b0.JPG


Matrixone
 
Thanks Bob, the plastic card I used is slightly too thick but some careful sanding of it will yield a perfect fit of the belly pan later on.

I still need to finish detail painting the seat harness before I can install the cockpit, wing spar, and belly pan.


Matrixone
 
Here is the G-10 after the belly pan has been glued in place and blended in, the plastic card made getting a good fit here really easy. On my other 1/32 scale Hasegawa Bf 109 builds I struggled to get this area right.


h1bfc0c9.JPG


In this picture the arrow points to a spot that needs a bit more work, its better to find it now than after getting the model painted with its camouflage paint. The wings have had their seam lines filled with super glue and smoothed out, the test spray of RLM 76 proved they are ready for final assembly. :D

hf823b18.JPG


Matrixone
 
Thanks!

I don't have the ability to re-shape model kits to make them as they should be but I do make an effort to get the wing roots and things like this 109 belly pan correct even though I sometimes have more success on some models more than others. Nothing gets me more upset than painting a model only to find the seams were not properly filled or sanded smooth enough.

This kit is so quick building I will not do too much more on it until I get further along with the Revell kit. My plan is to paint them both at the same time so I can reduce the need for so many color changes in the airbrush.

Matrixone

Good thinking on painting at once. Less work & materials
 
Thanks!


My plan is to paint them both at the same time so I can reduce the need for so many color changes in the airbrush.

Matrixone

I do the same thing when I have multiple kits going, (which is all the time!) I get as many of them to the paint stage as I can and shoot them all at once. Great minds think alike.
 
Thanks guys!

Running out of paint is a real problem for me so I will be taking whatever steps I can to reduce paint consumption. :(

Anyway....I glued on the gun cowl and built the landing gear legs and painted them, all is looking good so far. :D

hcd38ecc.JPG


This model will be sat aside for a few days until I get further along with the Revell 109.


Matrixone
 
Back
Top