• Modelers Alliance has updated the forum software on our website. We have migrated all post, content and user accounts but we could not migrate the passwords.
    This requires that you manually reset your password.
    Please click here, http://modelersalliance.org/forums/login to go to logon page and use the "Forgot your Password" option.

1:35 sculpt in progress

BradJ

Member
Hi there folks

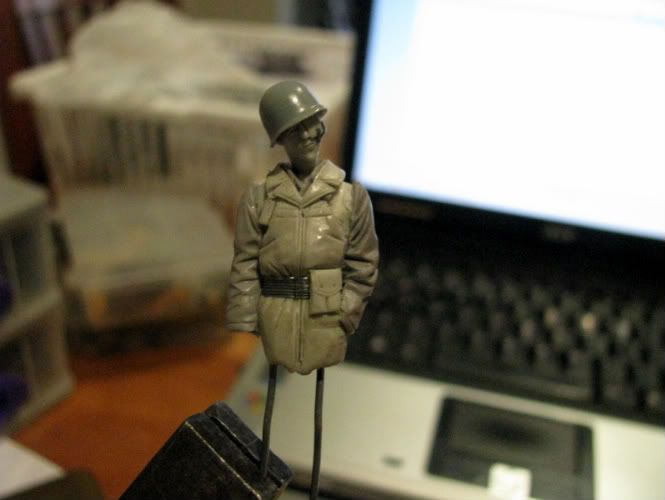
Here is a quick snap of one of a few figures I have on the go at any one time...
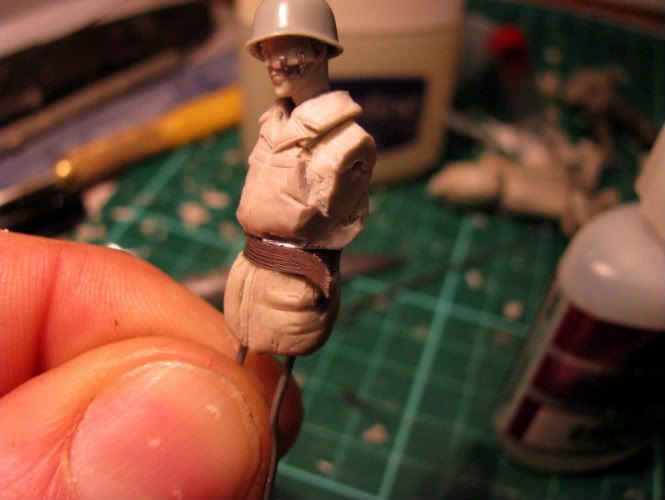
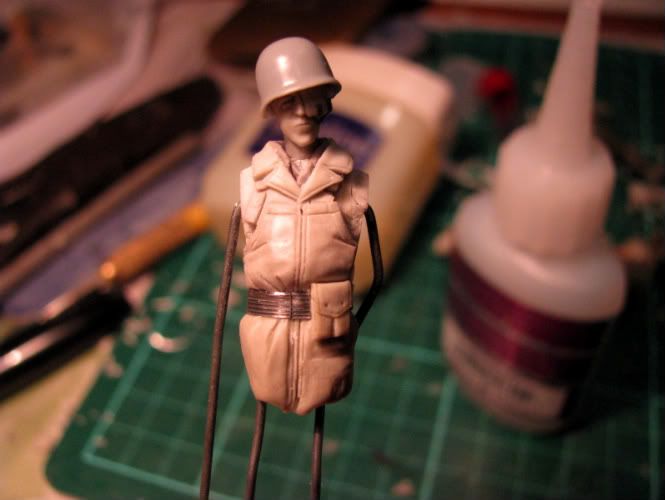
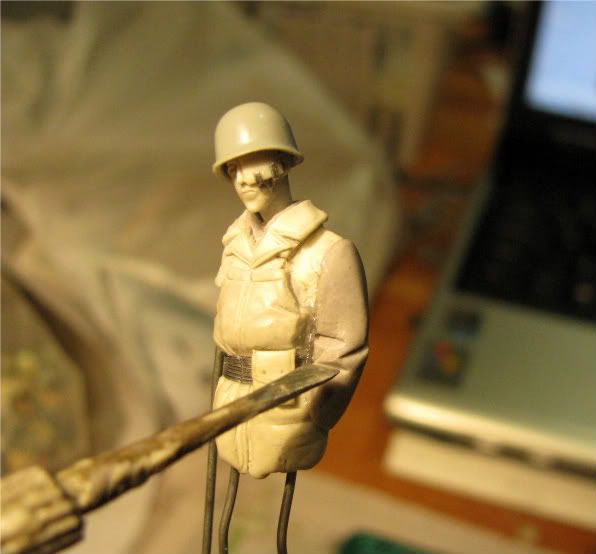
The plan here is to have a slightly bedraggled and injured Armored Infantry doughboy showing the fatigue of sustained warfare. He will be suitable for a late autumn/fall to deep winter scene.

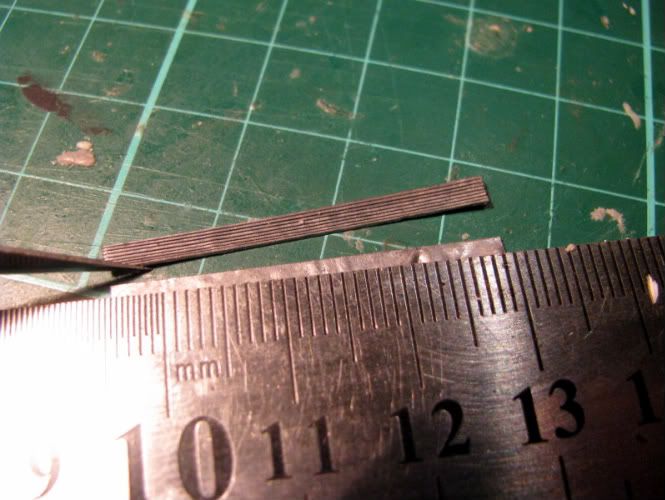
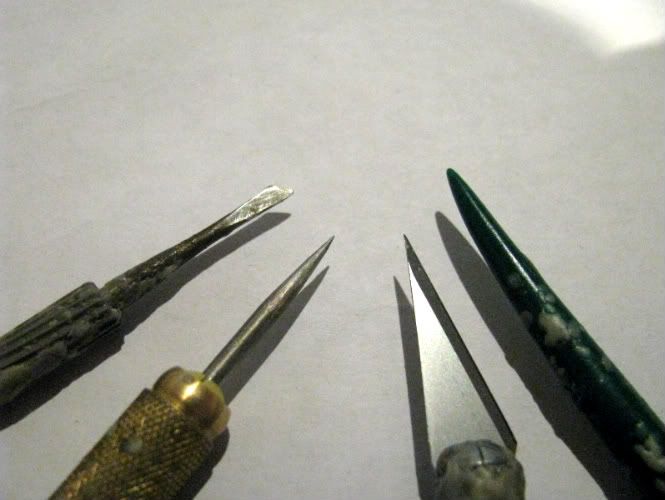
I started with a resin torso and pelvis, and to this has been added Magic sculpt, both plain and tinted. I intend to have a bandolier and web belt with equipment in place, which will add to a bulked out appearance.

IMG_1040.jpg


The helmet is a plastic item and I have tried to show a face that is a little pained and mostly expressionless. The dressing over his eye is 'taped' with lead foil.
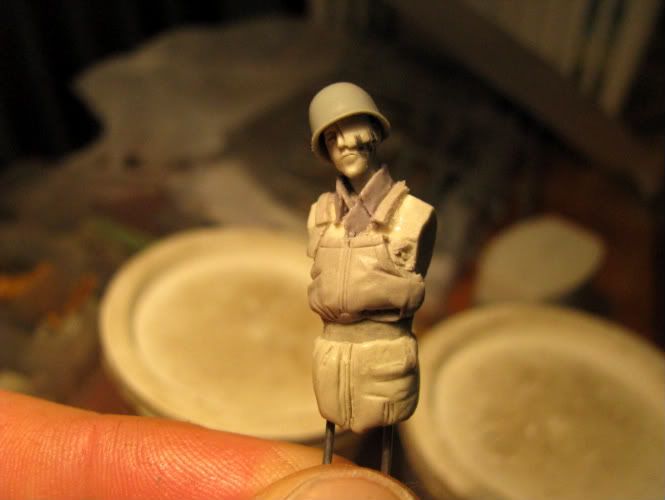
The belt line is ready to be carved back to the level/depth needed, and the coveralls below the beltline are to be re-done, as this was only initially added to use up some putty I had left...
Oh, and now viewing a close up photo, I can ay that th blob at the bottom of the front zipper shouldn't be there, and the sides of the coveralls under the arms will be carved down and shaped when the back will be started soon enough...
If there is interest enough I can show some further progress shots as they develop?
Brad :side:
 
jenny croft wrote:
YES Definately . He looks way nice , what will his arms be doing Brad ?

Jenny :kiss:

Just hangin'...

:pinch:

Ok sorry. I'm thinking the pose lends iself to a right arm holding a weapon (yet to be determined) and the left could be hanging with a cigarette, OR depending on which way I decide to go with his legs (they are currently right slightly in front of left indicating a slow walk) as they could be altered to be a static pose which could show the left arm bent and holding his belt or a canteen or similar?
Brad :side:
 
Brad,
Yes more please...
He looks great so far, I'm looking forward to seeing him born out of your
Frankenstein's laboritory...(bubbles an screams)... :evil:
(I'm also ringing my hands, but you can't see that either). :laugh: :lol: ;)
He is going to look great, I'm sure of it.
Shawn
 
Hey thanks so much for the feedback you all...
I too await his arising from putty to something useful!
I have sculpted his M41 (Parsons) jacket collar, and it is in place with a little of the shirt collar showing around the neck line. Next I will attach a lead foil belt which I find is easy to scribe when flat the rows of grooves that are present along the length of the belt. To do this one takes a clean flat section of the lead foil sheet, and with a steel rule (so the hobby blade doesn't cut into the ruler edge) one scribes a succession of lines at a close and even spacing to a length of maybe 40-50mm (1.5"-2"). Approx. 8 or 9 lines should suffice. This is now easy to cut free from the sheet and with a dab of ca can be pinned to a readied belt area on the figure. Make sure to have bulked the belt area out to the girth required for the figure and his/her associated clothing.Pin it where the clip/buckle will be, and carefully apply some more ca to the back of the belt as one furls it onto the figure. There should be enough to overlap, and this can be trimmed where necessary, be it just short of the other to alow the placement of a buckle, or touching the starting point where one can fashion a buckle out of the lead at this meeting point. (Does this make sense?)
Photos to follow... A quick battery charge is required!
Brad :side:
 
Welcome to the latest edition to the B-Rad Putty and Paint show...

*minus the paint.

:pp

Peruse the pictures as he pushes and prods the putty to perfection!

Stare as he stretches and stipples the substance to shape!

Gawk as he grabs and gouges the goods greedily...


:blink


Great stuff as always Brad, you should take a family portrait of all these killer sculpts you have in progress, I bet you have a box or two worth of figures sets by now? I bet more than half of them would happily find there way into my stash too.

Rock on mang.
 
John, Bob, thanks for your interest also...


Ken Abrams wrote:
Welcome to the latest edition to the B-Rad Putty and Paint show...

*minus the paint.

:pp

Peruse the pictures as he pushes and prods the putty to perfection!

Stare as he stretches and stipples the substance to shape!

Gawk as he grabs and gouges the goods greedily....

(y) :D :D :D Funny stuff mang.

Sounds like I am a carny type in a freakshow... Well the line blurs sometimes around here...
;)
 
Ok as promised/threatened here are some more photos... The collar can be seen finished (for now) with some seam detailing to the edges...
I should just revise my initial measurements on the length of this belt! As can be seen it is not much more than 30mmm, and this is sufficient for the waist of a 1:35 scale figure easily.

IMG_1043.jpg


I have probably scribed about 7 lines in the belt?

After pinning one end of the belt to just off centre on his front, it is wound carefully around the figure with ca added thinly to the back of the belt before pushing into place with a finger tip. It is important to not crease the belt as it is near impossible to smooth out any dents without damaging the surface of the lead. With my figure I cut the excess belt on his front left, and managed to hide this join behind the .45 ammunition pouch on his front left, as can(cannot!) be seen in the successive photo... I then simply added a vertical cut where I wanted the join for the buckle position.

IMG_1044.jpg


IMG_1045.jpg


Once this was done, I had a good thunking session to get the ol grey matter in gear in regards to the arms' poses.
I settled on left hand in pocket of winter trousers (coveralls) and the right will be by his side, as he will be in a standing, not moving pose.

The putty here is obviously tinted which can be handy for defining the areas of new and cured putties amongst other things.

IMG_1046.jpg


Hope this is of interest!
Brad :side:
 
Hey man very , very cool work !!!

The web belt looks beautiful , he's coming together nicely .

I like em , let me know when you get a backer and start producing your figs. my money's in for a few sets of figs .
 
That is really, really nice. Any chance of you posting what tools you use. I would have never thought of that shape of tool in the pic. Thanks and please post more.

Joe
 
Well thankyou Jenny Laura Glenn and Joe.
Joe, here is a pic of the tools I use. The tool in question is quite handy for getting in to recreate long folds, and as it is not symmetrical, when reversed it assists with different angles of approach. As can be seen, all the tool differ at their business ends, and these are my "big 4" if you will... The green tool is a plastic DAS modelling clay tool, and the tip when new is a lot sharper point. This one is great for smoothing and more specifically folds. You'd be surprised at the things that can be done with a #11 blade too, which means there is no need to go a hunting for tools to make a start on something! ;)


IMG_1049.jpg


Here is his other arm, sculpted whilst watching a replay of the US vs. Slovenia match (US was robbed!!)

I have opted for a simple hanging right arm, which wil receive most animation when I sculpt his hand which wil be holding a cigarette...

IMG_1050.jpg


Brad :side:
 
Back
Top