• Modelers Alliance has updated the forum software on our website. We have migrated all post, content and user accounts but we could not migrate the passwords.
    This requires that you manually reset your password.
    Please click here, http://modelersalliance.org/forums/login to go to logon page and use the "Forgot your Password" option.

Special Hobby Tempest 1/32 finished

paddy

Well-known member
This is my take on the Special Hobby Hawker Tempest MkV High Tech model.

Today I opened the box to start the build here, after 4 hours with my nose in the internet I had got nowhere really except to say it looks like early service Tempest had the traditional Green RAF cockpit colour, later the top section of the cockpit wall was painted matt black and post war models seem to have a silver cockpit frame and a black seat. I have decided to build an early version complete with Typhoon style full D-Day markings/stripes, the larger Typhoon style wheels and the long barrel cannons so its interior green for me. However, it has to be said if you believe the instructions the long barrelled cannons were fitted to the later built aircraft and post war.
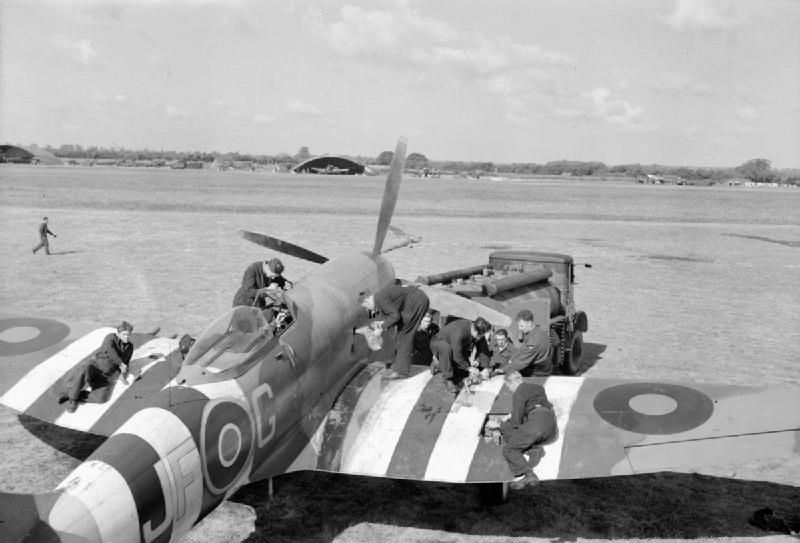
Early Tempest had a very hard life, put into service in time for D-Day and operation Market garden they were operated from ALG’s (Advanced landing Grounds), these were suitable fields near the south coast of England and in the case of Woodchurch where my subject aircraft and Roland Beamont were based not far from where I live, about 36 miles as the crow flies from France. While based at Woodchurch Roland shot down 2 me-109s over the D day beaches and went on to knock down 32 V1 flying bombs over Kent in this Aircraft.


First thing you notice is the size even with clipped wings against Tamiya's 1/32 spit


a lot of the parts have plentiful attachment points,see leading edge above, some quite heavy but removing parts from spru's and cleaning up is all part of the job :)

Not much else to report but at least i now have a page set up here to add too.
Ordered a new compressor for the airbrush in the early hours of this morning after way too much wine so god knows what i have bought now :)...on reflection and now sober it looks cheap and nasty....we will see what arrives in the post :)
 
Special Hobby Tempest 1/32

I am looking forward to this. I edited the title so that the complete company name shows as it is needed for searching.

Regards,
 
Special Hobby Tempest 1/32

I am looking forward to this. I edited the title so that the complete company name shows as it is needed for searching.

Regards,

Something different that Cloisterman's Tempest? I am aghast. Really, I am looking forward to this, Paddy. While I am not trying to negate anything Pierre accomplish I just was wondering if there were any other markings than his out there.

This will be a real treat
 
Special Hobby Tempest 1/32

Thanks Saul

Always been a fan of Roland Beamonts story from his battle of Britain days to Hawker test pilot, then back to front line as wing commander of three Tempest squadrons and on to be test piot for the EE Lightning, The EE Canbera and the doomed TSR2 project.


Hawker Tempest of Beamont's Wing at Newchurch, 1944​
 
Special Hobby Tempest 1/32

This looks good Paddy! Have a Pacific Coast Tempest in the stash, but have done nothing with it. Will be watching closely!

:popcorn
 
Special Hobby Tempest 1/32

Having been away from model making for a few years I am just finding my feet again
Really disappointed in the direction Eduard seem to have gone ? I bought a pre painted set of cockpit PE for the Tempest and while it looked ok on the sheet i started to shave detail off the kit instrument panels and relevant parts to be replaced by PE. As i was doing it i thought this is daft because the Kit detail is really very very good and however good PE might appear it is basically 2D and the kit detail is molded in 3D...however i went ahead. As i then started to fold this PE the painted surface just "fell off" It seems the finish is a vinyl sticker where as i am sure it used to be a screen print ? anyway as i folded small boxes and levers the surface detail just pinged off and of course by this stage i had already removed the plastic cast detail.
So...first observation, Even had the Eduard PE been any good i would not have been as good as the original plastic mouldings, some parts of the kit are resin and i am struggling with these parts as well. Unfortunately parts like the throttle quadrant simply foul the side instrument panel so you can either fit one or the other. My guess is the quadrant is too big.Some parts i have saved by sticking the PE to the plastic then sticking the printed vinyl back on to the PE but I am not happy with the way it is going and if the kit was not so expensive i would start a new and work with he parts in the box.


You cann see here the throttle quad should sit above the panel on the top rail but its way to big so i need to think what i am going to do b
 
Special Hobby Tempest 1/32

I find Eduard's pre-painted approach to be best in the smaller scales. Like you, the lack of depth in bezels, and so on, is noticeable in the larger scales.

Regards,
 
Special Hobby Tempest 1/32

Eduards doesn't fit? The shock of it! :bang head (Sorry Paddy, I'm still carrying a grudge about Eduard and fit issues)

Press on, just use the Eduard if it looks better. :popcorn
 
Special Hobby Tempest 1/32

Well here we are, firstly I have to say the fit of parts so far has been exemplary! forget the idea that this is a short run kit with all the problems you might expect. Holes line up and locating ridges for the cockpit frame (for example) are spot on The cockpit assembly is one of the more challenging assemblies I have done but the alignment of the many interior components with the pin holes in the outer frame is nothing short of spot on.. If I had a minor criticism I would say the resin parts are mostly unnecessary in the pit, thankfully all the original parts from the non “high tech” version are on the spru’s in plastic and I have to say are so good I would stick with them next time. Same would go for the Eduard PE. The kit parts are so good that unless you struggle with painting detail then the original plastic parts could well build into a better pit. For those that like to go way ahead of me on detail there is potential here to do so but remember the pit opening once the halves are joined is fairly small. For this reason, I have done things a bit brighter and vivid than normal so it will not look to dark inside.


Special Hobby Tempest 1/32

Fuselage halves join nicely and pit locates well


Next job will be cutting the wings to take the Eduard flaps...wish me luck :yipee

 
Special Hobby Tempest 1/32

Shes looking good. I have found Eduard to be kind of disappointing lately with the coloured stuff looking like it was printed on a dot matrix printer. But it does look better than my efforts. Annoying that it cracked and shed on you.
:popcorn
James
 
Special Hobby Tempest 1/32

I,m sure eduard used to screen print the PE, this stuff i have here is PE, vinyl coated and its simply not even glued as far as i can see.
#


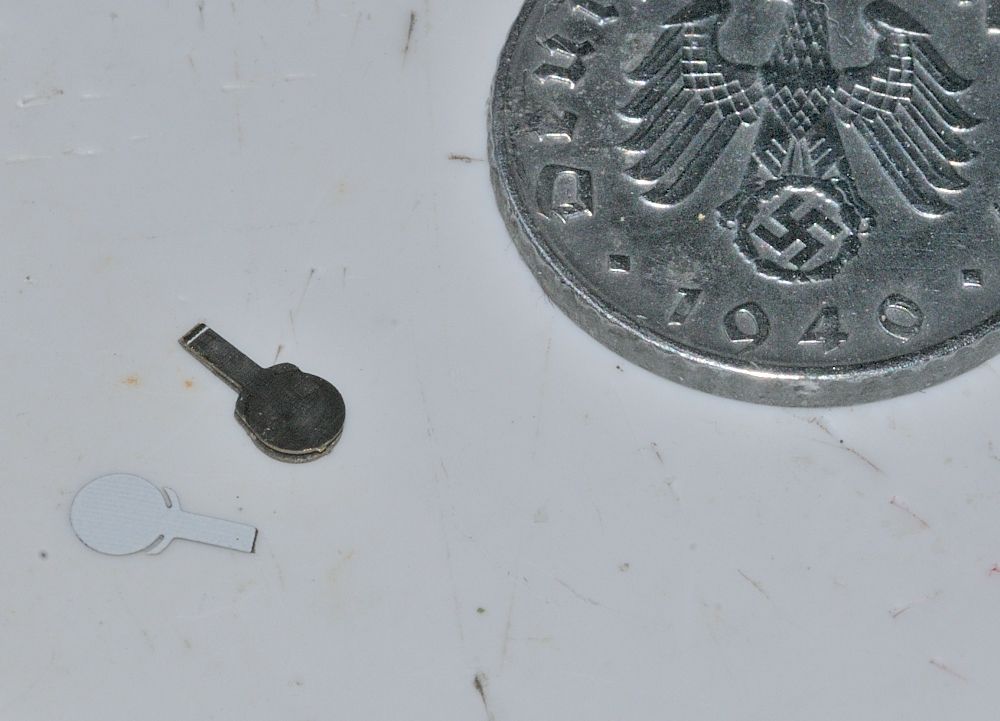
The piece on the left is the painted surface that has just fallen off the PE part on the right..
 
Special Hobby Tempest 1/32


No going back now. Half hour of scribing along the panel lines with a surgical scalpel and flaps removed :)
 
Special Hobby Tempest 1/32

Screen printed. that's what I was looking for on Sauls thread. I saw it way back when I was working on the Wildcat. Odd pattern and not even close to being correct. Eduards serves a purpose but there's much better options out there.

Looking good Paddy. :popcorn
 
Special Hobby Tempest 1/32

Paddy, that's outta sight, man. I was wondering if that pe was Eduard or another Cz company. I guess the kit could be built with out all that pe and still look outstanding.
 
Special Hobby Tempest 1/32

Paddy your Tempest is really coming along fine!! Making me really think about acquiring that new one coming out soon.


I have always thought that if Eduard did not prep their PE correctly that the painted surface would most likely come off. I really don't like their painted seat belts for just that reason. Of course they are now making them out of steel and painted. The old brass could be way too stiff and since it was painted you couldn't anneal it. Now they have steel and it can be even harder and stiffer. :facepalm

I am finding that I like the HPH cloth/paper seat belts. Even if I have to cut them out, a little workie on the paper like stuff and it looses some of the stiffness and can be made to lay more like the cloth belts. They still have PE that is etched for them by Eduard. I think Eduard's etching processes are some of the best, just some of their designs are half arsed poor. Either they are not researched well enough or the designer, just, plain, goofs.
 
Special Hobby Tempest 1/32

First real sign that this is not mainstream seems to be the instructions, probably done by a graphic designer rather than a model builder ( sorry Chuk :) )


section 28 and 29 clearly show the undercarriage wells being assembled into the bottom half of the wing however by section 30 they are clearly assembled in the top half of the wing. You can't assemble in the top half of the wing because all the positioning points are on the bottom half but you cant then add all the little webs and parts in section 30 while its assembled in the bottom half...
Maybe i'm missing something :laugh:
 
Back
Top