
-
Modelers Alliance has updated the forum software on our website. We have migrated all post, content and user accounts but we could not migrate the passwords.
This requires that you manually reset your password.
Please click here, http://modelersalliance.org/forums/login to go to logon page and use the "Forgot your Password" option.
You are using an out of date browser. It may not display this or other websites correctly.
You should upgrade or use an alternative browser.
You should upgrade or use an alternative browser.
Project : 1918230HPWnWDH91/32
- Thread starter paddy
- Start date

Double stringing that rigging line is a PITB ain't it? Maybe a spot of glue to get that pig tail to lay down. I've been trying to think of how to make it look like how they have the pig tail wrapped but coming up short.

centaur567
Well-known member
Masterpiece in the making!! Gary S.

Brokeneagle
Master at Arms


paddy
Well-known member
A problem i had with Italeri a while back was the plastic becoming ultra brittle when subject to Spirits based washes. I couldn't prove it either way in tests but i found the wing struts on this model seemed to lose the pin ends very easily after being painted with spirit based oils ?
The pin ends are 1mm which is handy as i was able to drill the end of the struts 0.5mm, incert a hard steel pin and then fix some 1mm alloy tube over the steel pin on abouty 50% or the struts
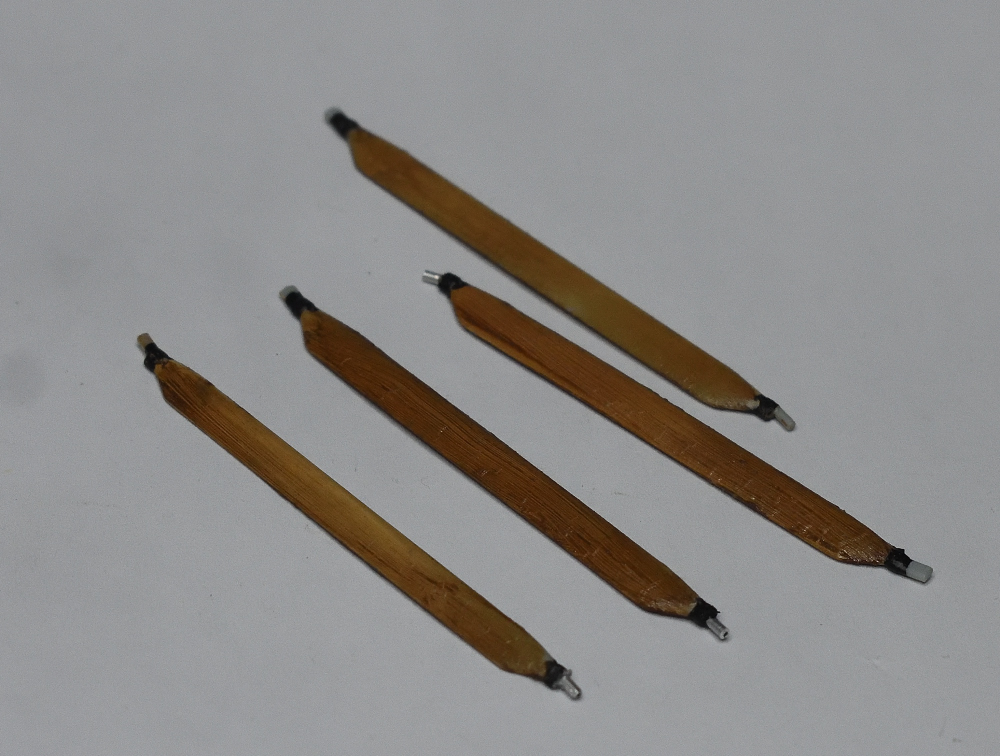
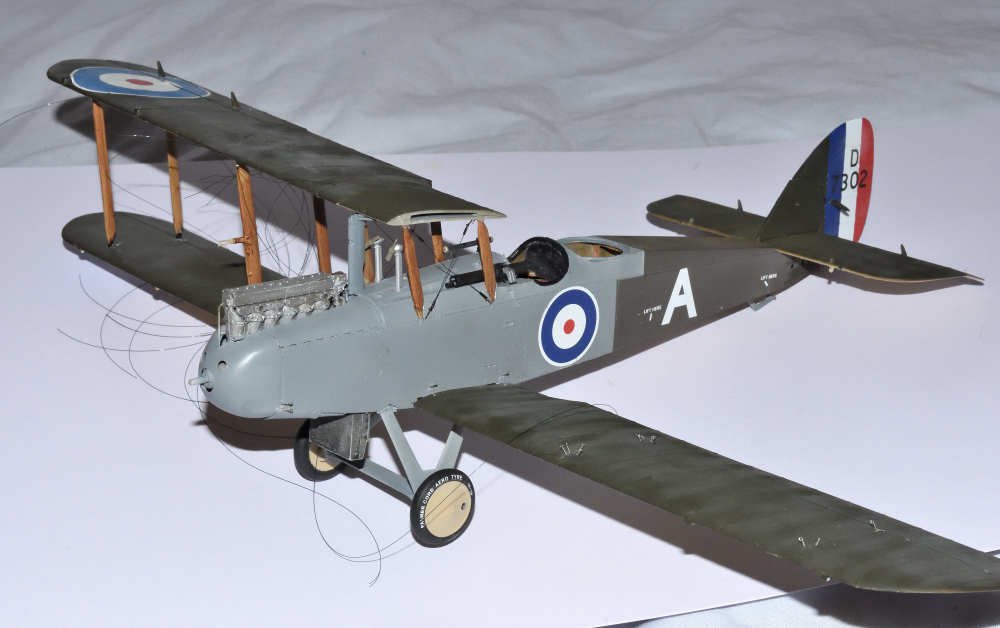
The pin ends are 1mm which is handy as i was able to drill the end of the struts 0.5mm, incert a hard steel pin and then fix some 1mm alloy tube over the steel pin on abouty 50% or the struts
Last edited:
paddy
Well-known member
One step forward , half a dozen back. thats just the way some builds go. Another decal failure on te top wing despite this being clear coated
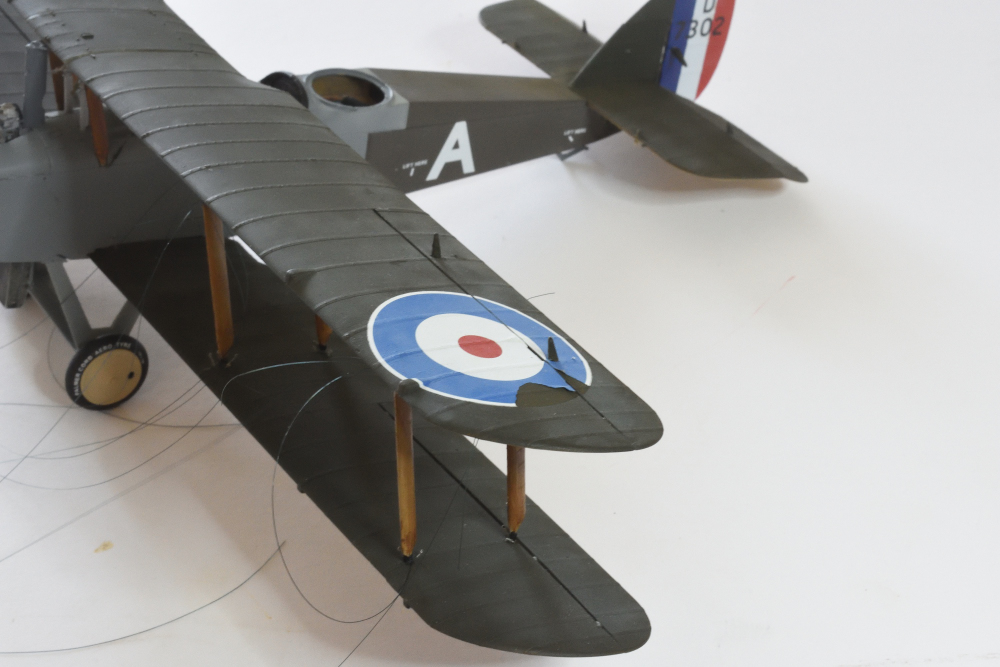
I absolutely refuse to shell out any more money on this, i dare not tot up what its cost so far. maybe i can turn the damaged roundel into battle damage .....I will continue with the build but TBH this is not a model that would ever make my display cabinet , too many compromises. its also a reminder why i gave up with these scales and went to bikes and cars at 1/12 and 1/9.... its and age deterioration thing .
.
I have a couple more WnW in the stash so i will make a few bob on ebay with those i think sometimes you have to adapt to your limitations.
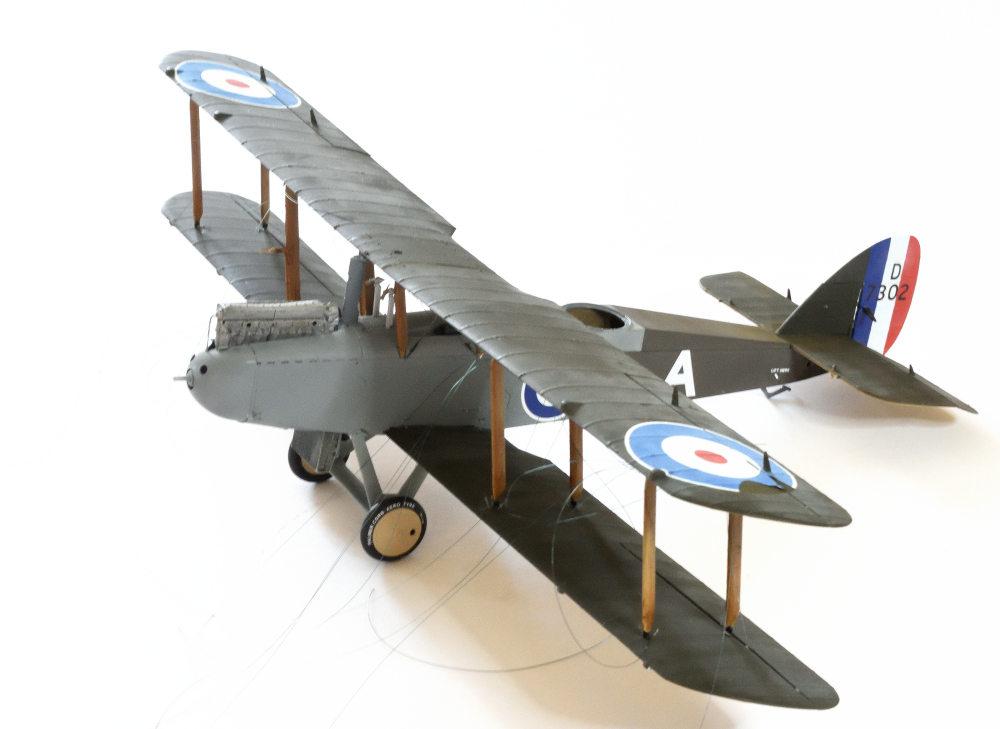
With the top wings now fitted the model doesnt really have any strength/integrity , if its anything like the Brisfit i built years ago, that will come with the rigging, much like the real thing. With the top wing in position i now have a very small window to work through to do the rigging. TBH i am looking forward finishing this, its a bit of a chore
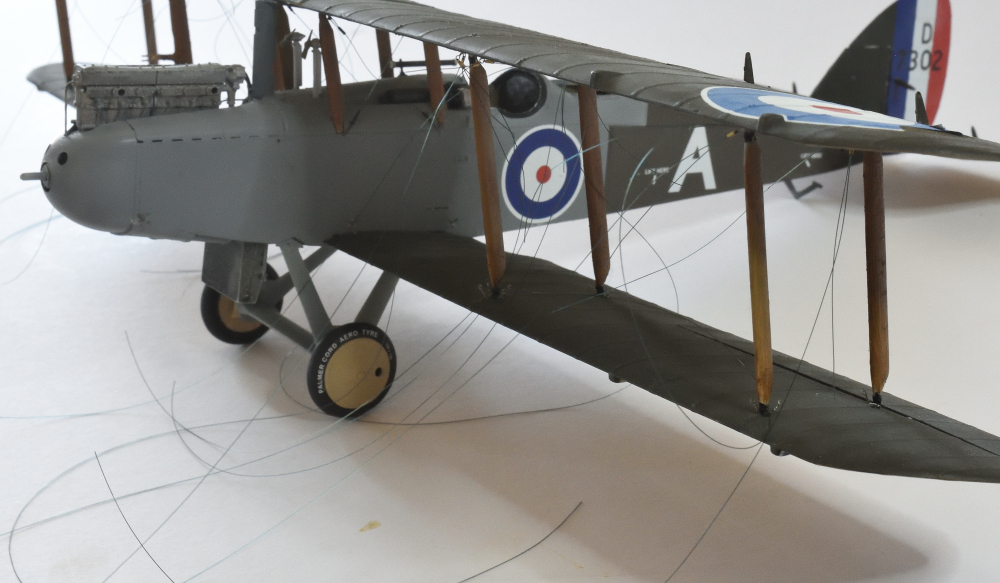
I absolutely refuse to shell out any more money on this, i dare not tot up what its cost so far. maybe i can turn the damaged roundel into battle damage .....I will continue with the build but TBH this is not a model that would ever make my display cabinet , too many compromises. its also a reminder why i gave up with these scales and went to bikes and cars at 1/12 and 1/9.... its and age deterioration thing
.I have a couple more WnW in the stash so i will make a few bob on ebay with those i think sometimes you have to adapt to your limitations.
With the top wings now fitted the model doesnt really have any strength/integrity , if its anything like the Brisfit i built years ago, that will come with the rigging, much like the real thing. With the top wing in position i now have a very small window to work through to do the rigging. TBH i am looking forward finishing this, its a bit of a chore
paddy
Well-known member
If you ever want to remove decals, or paint for that matter them Mr Color leveling thinners is your friend.. this took less than 1 minute and its safe on the styreene
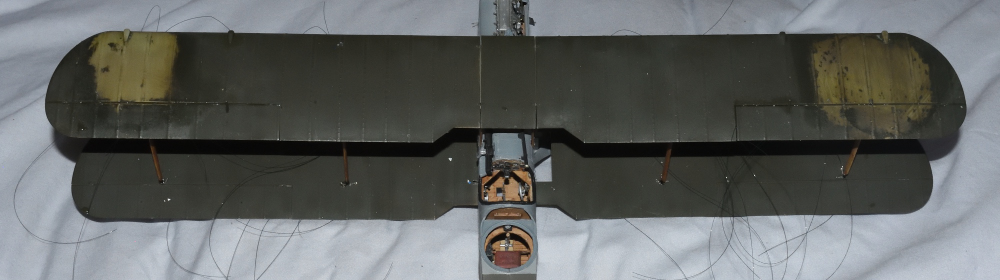
I found another pair of decals so just need to slash some paint around with my new airbrush and hope the next decals stick though tbh i cant see what else i can do as i used micro sol and set last time and clear coated them
I found another pair of decals so just need to slash some paint around with my new airbrush and hope the next decals stick though tbh i cant see what else i can do as i used micro sol and set last time and clear coated them

paddy
Well-known member
i have never used them Saul ? i did actually look to see if they were commercially available for 1/32 the other day, its a definite possibility but i do actually have hundreds of old decal sheets , its just the WWI stuff that in short supply. There were so many styles over the years for RAF and RFC

Heavens Eagle
Well-known member
Years ago I got a 1/24th scale MPC (airfix) Stuka kit. (1980 btw) Built it painted it up. The decals were NOT decal material. They were like mylar. They wouldn't stick, they just curled off. They were so thick that you could hold and handle them.
As this was 1980 and decals were not available especially in this size, I had only one option. I used the decals to make my own masks. I used tracing paper, and Scotch double stick tape on the under side. Masked it, and airbrushed the markings with my original single action Badger airbrush. For the time and my experience, it turned out quite well. I still have that model in pieces in a box, I should pull it out and rebuild it. (Sometime)
As this was 1980 and decals were not available especially in this size, I had only one option. I used the decals to make my own masks. I used tracing paper, and Scotch double stick tape on the under side. Masked it, and airbrushed the markings with my original single action Badger airbrush. For the time and my experience, it turned out quite well. I still have that model in pieces in a box, I should pull it out and rebuild it. (Sometime)
centaur567
Well-known member
BUMMER
Heavens Eagle
Well-known member
I get it Paddy. The decal issues are one of my biggest fears on building these expensive kits. It is something that can end up way out of control and FUBAR an entire build no matter how well done it is.
I guess that is why I have been enjoying all the scratch building on the sFH 18. No decals to mess up. It is all paint and building which is something I can do and overcome. Decal application, and destructing are one of the main reasons I tend to stall out on builds. The instrument decals on the 251 and how to deal with them is what stalled that build. Yeah it has other mechanical issues that I just needed to ponder over for the hull parts, but the decals put some road blocks that just intimidate me. (yeah, the guy that will cut something built completely apart to redo it right)
I guess that is why I have been enjoying all the scratch building on the sFH 18. No decals to mess up. It is all paint and building which is something I can do and overcome. Decal application, and destructing are one of the main reasons I tend to stall out on builds. The instrument decals on the 251 and how to deal with them is what stalled that build. Yeah it has other mechanical issues that I just needed to ponder over for the hull parts, but the decals put some road blocks that just intimidate me. (yeah, the guy that will cut something built completely apart to redo it right)
paddy
Well-known member
I will finish this but i will take from it some hard learnt lessons. Stop buying old kits, especially when they are more than they were new 15 yeas ago. And i must stop this after market thing, i haven't used the gaspatch turn buckles......
By the way i haven't forgotten about the pocket watch. We have a shop in the town here
and i left it with them and said no rush ...that might have been a mistake
but i will take from it some hard learnt lessons. Stop buying old kits, especially when they are more than they were new 15 yeas ago. And i must stop this after market thing, i haven't used the gaspatch turn buckles......By the way i haven't forgotten about the pocket watch. We have a shop in the town here
Dorking Clock Centre | Clock and Watch Repairs
We are a family-run business specialising in the repair and servicing of clocks and watches based in Dorking Surrey.
www.dorkingclockcentre.co.uk
and i left it with them and said no rush ...that might have been a mistake
Heavens Eagle
Well-known member
Usually,
Most watch shops service watches in the order that they are taken in. In this case with an antique watch, depending on what it needs, it could take longer. If it needs pivots redone on a wheel, or something really odd repaired, it shouldn't be too bad. I would check back with them in 6 or 8 weeks and ask about it and where it sets in the cue.
Most watch shops service watches in the order that they are taken in. In this case with an antique watch, depending on what it needs, it could take longer. If it needs pivots redone on a wheel, or something really odd repaired, it shouldn't be too bad. I would check back with them in 6 or 8 weeks and ask about it and where it sets in the cue.
One of the reasons I'm looking for the minimal rigging, even though I've been eyballing that damn Eindecker!
centaur567
Well-known member
Go ahead. I double dog dare ya. Gary S.One of the reasons I'm looking for the minimal rigging, even though I've been eyballing that damn Eindecker!
Similar threads

- Replies
- 89
- Views
- 20K


- Replies
- 7
- Views
- 3K


