• Modelers Alliance has updated the forum software on our website. We have migrated all post, content and user accounts but we could not migrate the passwords.
    This requires that you manually reset your password.
    Please click here, http://modelersalliance.org/forums/login to go to logon page and use the "Forgot your Password" option.

PART 1 INTRO (Build 1) U9 - WW1 UBOAT [DAS WERK - 72001 1/72] UPDATE 20th Nov 2022

Das Werk Uboat.jpg


This new release will be build 1 from my list, as it stands at this time. This is the new release kit from Das Werk and the first time a WW1 UBoat has been done in this scale. The first edition release also has a nice surprise (only available with this edition), an additional softcover book being included with the history of the sub and information on the model creation.
I have also purchased a few extras -

  1. RC SUBS PE set
  2. DAS WERK Saddle Tank painting stencils
  3. WW1 U-Boat Badge (repro)
  4. Custom wooden base with gloss black perspex top sheet (currently covered with a protective cover layer).
boxweb.jpg

I have rearranged my workspace again over the last week, moving my computer hardware and artworks into a new office area in the next room.

deskweb.jpg

This now enables me to utilise my long bench space that I built 4 years back specifically for large builds.......
 
Last edited:
View attachment 134201

This new release will be build 1 from my list, as it stands at this time. This is the new release kit from Das Werk and the first time a WW1 UBoat has been done in this scale. The first edition release also has a nice surprise (only available with this edition), an additional softcover book being included with the history of the sub and information on the model creation.
I have also purchased a few extras -

  1. RC SUBS PE set
  2. DAS WERK Saddle Tank painting stencils
  3. WW1 U-Boat Badge (repro)
  4. Custom wooden base with gloss black perspex top sheet (currently covered with a protective cover layer).
View attachment 136344
I have rearranged my workspace again over the last week, moving my computer hardware and artworks into a new office area in the next room.

View attachment 136343
This now enables me to utilise my long bench space that I built 4 years back specifically for large builds.......
 
Cool. I just ordered this one for myself. Where did you get the extras from for it Ian? Also do you know of any books for this sub?
James
 
Have you seen the add ons for these?
Only what I have as listed above....
  1. RC SUBS PE set
  2. DAS WERK Saddle Tank painting stencils
James pointed me in the direction of the Das Werk dry Dock, which looks impressive but I would rather do one of the Mk7's or 9's in a dry dock, or maybe even the Type 21 at the end in a dock in 1945.
 
Cool. I just ordered this one for myself. Where did you get the extras from for it Ian? Also do you know of any books for this sub?
James
Hi James, only PE set that I know of which I have purchased (see photos above) .
1. RC Subs PE set
https://www.rcsubs.cz/index.php/photo-etched-sets/65-sm-u-9-1-72-das-werk-dw72001
The RC Subs PE sets are very nice and quite extensive but just be wary of the limited customer communication. Very abrupt with one word answers. There are kits in stock at present but don't delay as he has a quota on the amount he sells for each financial period for some reason.

2. Das Werk Saddle Tank Stencils
I find the DasWerk site a little bit hard to navigate to find these accessories so just look them up on google. You can't buy direct anyway.

3.The only source I have is the book that comes with the first edition of the kit. This is also available as a PDF download from their site on the kit page.
 
Last edited:
I find builds like this to be highly interesting. I'm thinking of trying my hand at a warship one of these days.
I know what you mean, I am a vehicle diorama guy but really enjoy Sci-Fi too and found that my childhood interest has been ignited again with all the new 1/72 scale submarines now available.
 
I know what you mean, I am a vehicle diorama guy but really enjoy Sci-Fi too and found that my childhood interest has been ignited again with all the new 1/72 scale submarines now available.
Yes the range is great. Im in the process of collecting and building the range of 1/72 u boats. Does anyone know if theres a company that produces the "Milk Cow" u boat fueling version?
 
Well i finally got back to this if only to properly photograph it ........i will do a quick review of what I think of the model in the box.
DSC02654web.jpg

A QUICK REVIEW - DAS WERK 1/72 U9 CLASS.
OK, here we go......at first glance, as I remove the bags from the well constructed and solid box, the overall quality of the DAS Werk kit is what really stands out. From the box art, to the thick cardboard of the box itself and even the re-sealable sprue bags (that seem to be the way of all the modern manufacturers now), this kit is 'right up there' for quality.
DSC02676web.jpg
If you purchased a kit from the first production run, Das Werk provide a full book on the U series sub with lots of detail and ref pictures, which is great because I didn't have any info on this sub. Actually, I didn't know ANYTHING about WW1 subs! You can see a picture of it on the left hand side of the hull sprue picture in the next photo - a perfect bonus and very smart of Das Werk.
THE PARTS
The kit has 4 large sprues and a decal sheet for 4 options from U9 - U12.
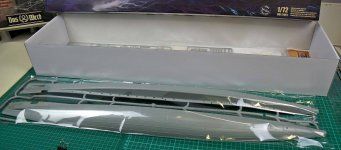
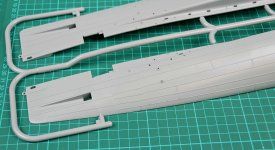
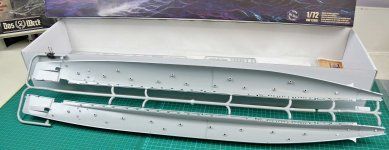
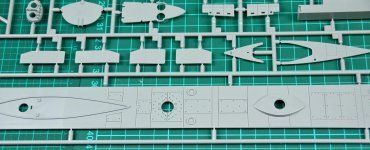
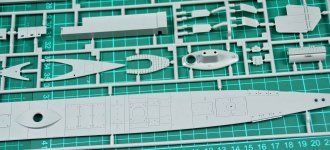
The first sprue is for the 2 hull parts, which are quite long at 80 cm but still shorter than the Mk7. For me, the hull shape is what makes this early sub pretty sexy, with the ultra blunt bow and flat ballast tank tops. The less streamlining of this early design makes it look even 'meaner'. The detail is very sharp and crisp and will come up great with paint and weathering.
See attached thumbnails for a better look.
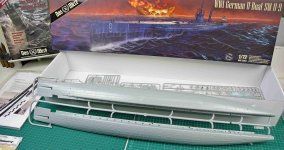
DSC02658web.jpgDSC02655web.jpgDSC02674web.jpgDSC02671web.jpgDSC02673web.jpg
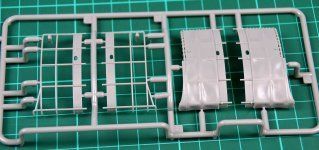
The other 3 sprues make up the deck and smaller details as well as the Conning Tower. The C.Tower having the option of the canvas wrap or the bare frame for the comand platform, with them being interchangeable even after completion, which is a pretty cool detail and again very smart of Das Werk.
DSC02659web.jpgDSC02668web.jpgDSC02667web.jpg
The last sprue has a number of interesting parts such as the main deck and a really nice stand with the label in Imperial German style script.
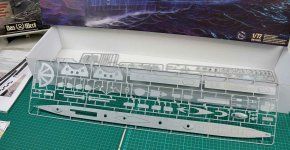
DSC02656web.jpgDSC02677web.jpgDSC02678web.jpgDSC02679web.jpg
Finally, there is the Decal sheet that has plenty of options for the first 4 U class boats as well as an imperial flag.
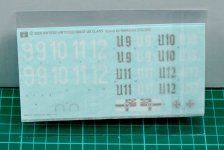
DSC02660web.jpg
So now we have looked at the kit , here are a few extras I purchased to go with it......
EXTRAS
1.
I also purchased the masks from Das Werk to paint the anti -slip texture for the saddle tanks which should make that process easier.
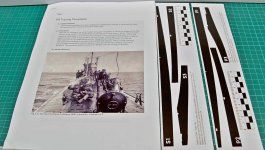
DSC02663web.jpg
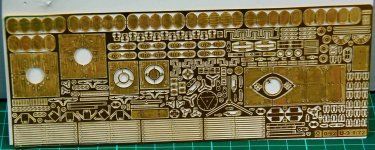
2. I purchased the full PE set from RC Subs and as far as I know it is the only one available still.
DSC02662web.jpgDSC02664web.jpg
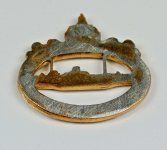
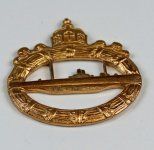
I also intend to have a full scale badge with each build, as I did for my original early Mk7 in 2007, so I purchased a 'repro' WW1 Kreigsmarine sub badge from Ebay.
This came in full metal, which is great but I needed to grind off the pin and sand the rear flat to attach it to my base.
DSC02665web.jpgDSC02666web.jpg
 
Last edited:
The latest progress..............just a little bit.
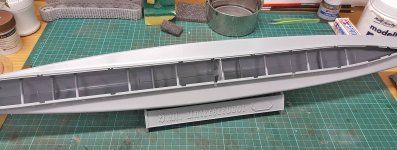
The main update here is to let you know what I found when gluing the 2 halves. The parts go together well but need some careful sanding at the points where the sprue is detached/ cut. The difficult part is the deck piece and how it fits into the top of the hull.
The hull is strengthened using internal pins that brace the width at set positions. This is a great feature having found the Revell model hulls more difficult to line -up and glue, however it comes at a price. The instruction sheet advises to only glue the pins into one side and this works fine with the deck stage, as it needs to slot into the slight overhang of the hull top and be positioned from the rear moving toward the front.
20210807_155032.jpg


This is not 'do-able' if you glue the hull halves before putting the deck on, however, if you don't glue the hull halves the pins keep popping out of the sockets, as you keep the gap widened to fit the deck in. Once they 'pop' you need to get your hand in again to line them up. They don't all pop but enough do to make it frustrating.
I decided to properly brace the hull first by glueing the pins on both sides and then also glueing and clamping the hull seam that runs the length of the bottom of the hull. Once it was dry I carefully trimmed one side of the deck edge down (very slightly - 1/4mm) to allow it to 'click-in with a minimum of force as I worked it from the back forward. Once this was adjusted enough to fit in easily, I took the deck out again and continued to work on the assembly separately.
20210807_155105.jpg
20210807_154804.jpg


Please take note of the above, as it may save you some grief, though you may find the way the instructions advise to be OK.
Advice - Test the procedure before glueing.
20210807_155105.jpg
 
Last edited:
Interesting. Thanks for the heads up. Would love to start this but still waiting for buddy to be able to sell me the upgrade parts. Not impressed with him although the parts look good. Watching with interest.
James
 
Interesting. Thanks for the heads up. Would love to start this but still waiting for buddy to be able to sell me the upgrade parts. Not impressed with him although the parts look good. Watching with interest.
James
Thanks James and good luck with the upgrades. I noticed there is now a 3d printed part for the exhaust pipe storage part - I had a look and can't be bothered dealing with him again, so I am just going to add some sprue strips to the smooth sides and paint the square holes in black on the smooth sides in between the added sprue.
 
Back
Top