
-
Modelers Alliance has updated the forum software on our website. We have migrated all post, content and user accounts but we could not migrate the passwords.
This requires that you manually reset your password.
Please click here, http://modelersalliance.org/forums/login to go to logon page and use the "Forgot your Password" option.
You are using an out of date browser. It may not display this or other websites correctly.
You should upgrade or use an alternative browser.
You should upgrade or use an alternative browser.
Nacht~Jager Pz. Gren. 120mm
- Thread starter panzerace007
- Start date
panzerace007
Active member
Hey Guys ,
Thanx for th kind words !!
@Ron - Thanx Dude ! I think I figured( no pun intended) out th color.It's a rusty~orange color. Looks like I might call on one of Vallejo's Rust colors or mix a batch with Brunt Cad.Red + German Camo light brown ..... I'll mix a lil' & see what WE can see.
@JAMES - Thanx Brotha' ! The :evil: is in th details ..... A lot of Breath holding !
@LUPANZER - Thanx for th kind words !!
AndyFettes
Master at Arms
Looks awesome Erik,
I think the tone you`re after is more orangey than red
On the basic that the red print was very light and the tan shone through underneath I would most certainly use orange as that what the visual impression of the colour was
Maybe a small mix of Orange base plus tan plus red may be of use but practice and have a look what you deem to be better
As I say great looking model
panzerace007
Active member
ANDY !
Thanx for th kind words .
Duly noted on th tones of th second color. That's th way I was leanin' , Maybe even a rust color , on th orange side. I'll piddle around with it tomorrow !
Again Thanx & Long time no see !!
@MIKE - Thanx Brotha' !! :drinks
:drinks
:erik
Thanx for th kind words .
Duly noted on th tones of th second color. That's th way I was leanin' , Maybe even a rust color , on th orange side. I'll piddle around with it tomorrow !
Again Thanx & Long time no see !!
@MIKE - Thanx Brotha' !! :drinks
:drinks
:erik

panzerace007
Active member
LUIZ , & BUDDHO ,
Thanx for th kind words !!
Well .... Then let's strike up th Band ...
:erik
Thanx for th kind words !!
Well .... Then let's strike up th Band ...
http://www.youtube.com/watch?v=22W38jJk81s
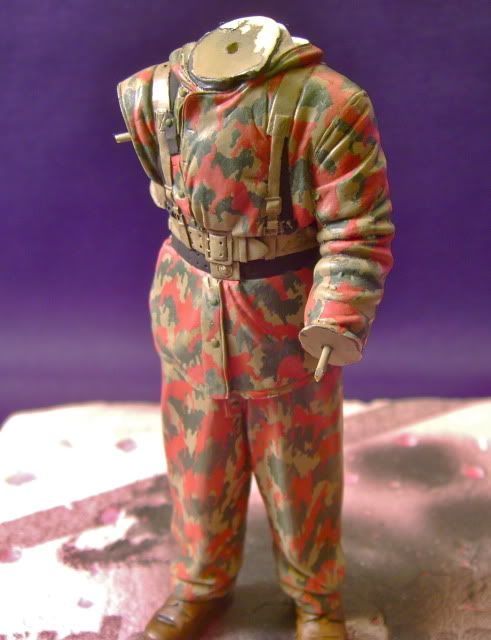
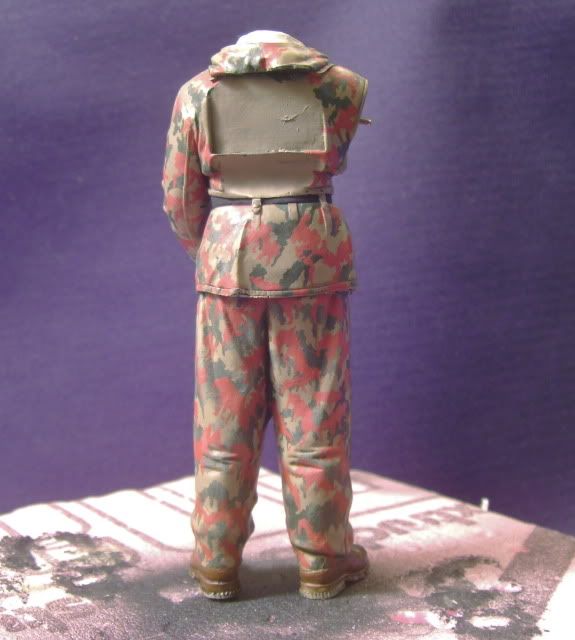

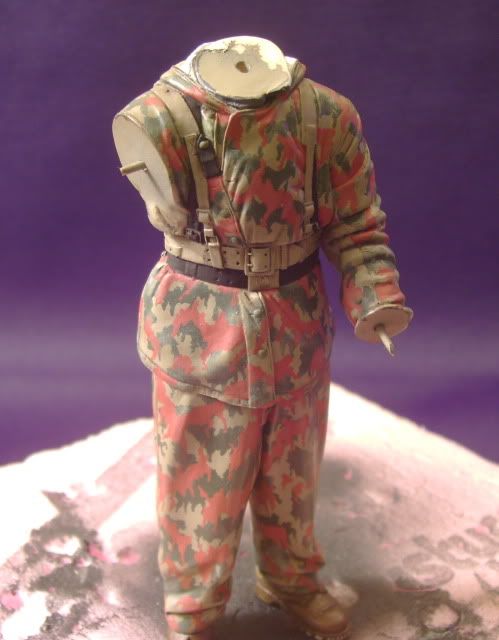
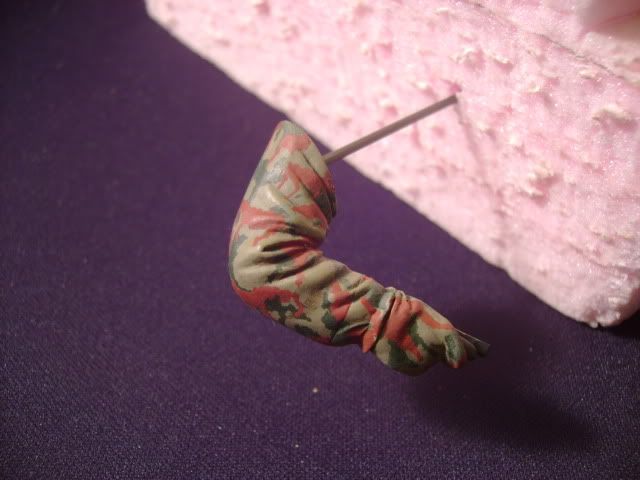
I've added th second stage camo. I used Vallejo Burnt Cad. Red + Light Brown (#929)( which to me has a lot of orange in it) + a dash of Flat Red. I also added highlights to th folds by adding German Camo Beige to th base of both th Green & Red colors. I've also started to pick out some of th web gear.
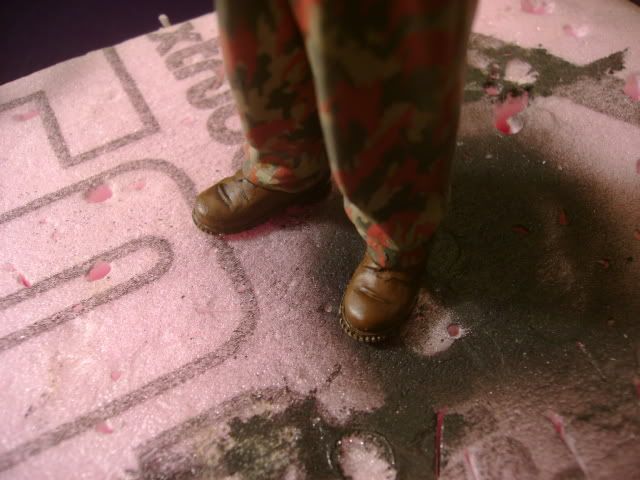
Th boots are done in Leather Belt & has been washed with Vallejo Games Sepia Ink , maybe a touch to much on one of th boots, But I'll add some scuffs etc to them.
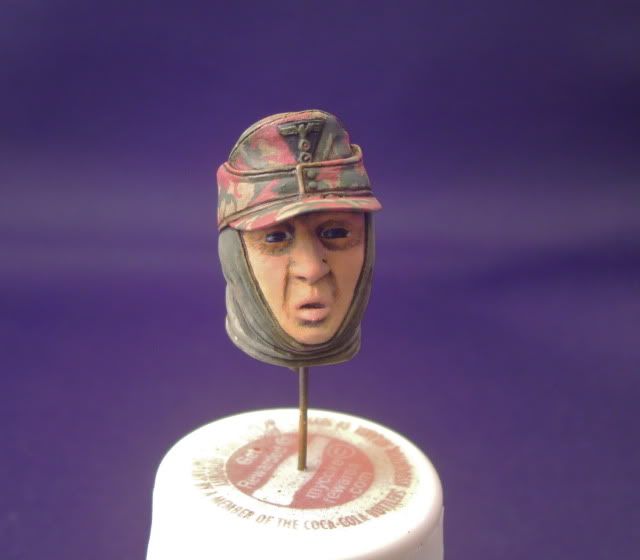
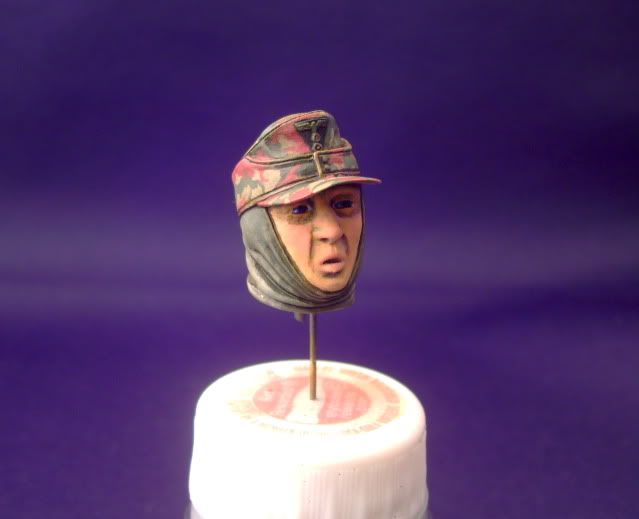
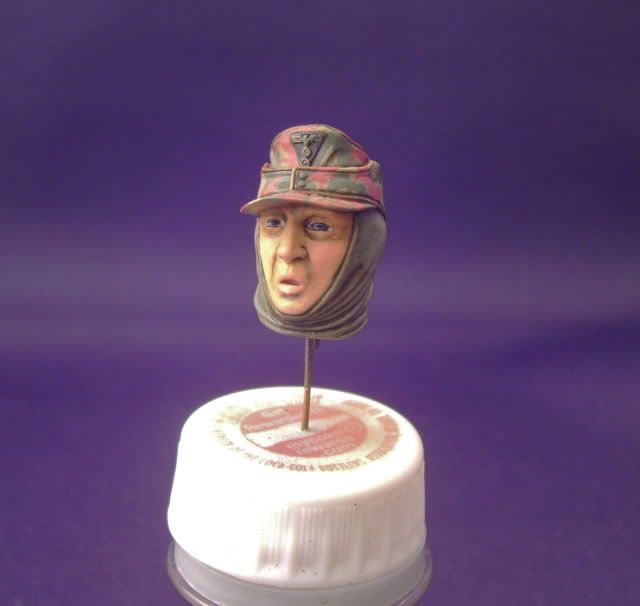
The Flesh is Oil, I added some rosiness to th Cheeks . I'm not happy with th way it's photographed. I'm learning there is a difference to taking Pix of Armor vs. Figures . The Balaclava was shadowed with Vallejo Black Grey, Dry brushed with Field Grey & highlighted with Field Grey + German Camo Beige. I've also started a pin wash with th Sepia Ink. I used Formula P3 Cygnar Blue Base for th eyes, with a touch of white for some reflection & white in th corners ?? I also dropped some Future in there for that Cold Glossy look ?? :idonno - Thoughts ?
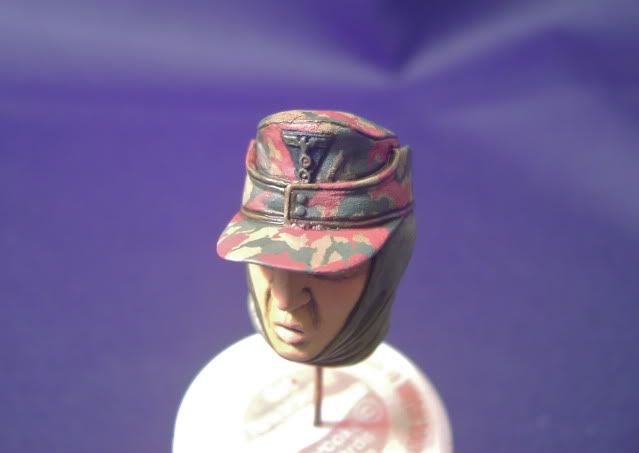
The Patch is very much imagined. I figured ( no pun intended ) , that being a Night Fighter, th Patch would be Subdued. Black background, Dk.Green Eagle with Red inserts to distinguish that He's a Nacht~Jager Vampir
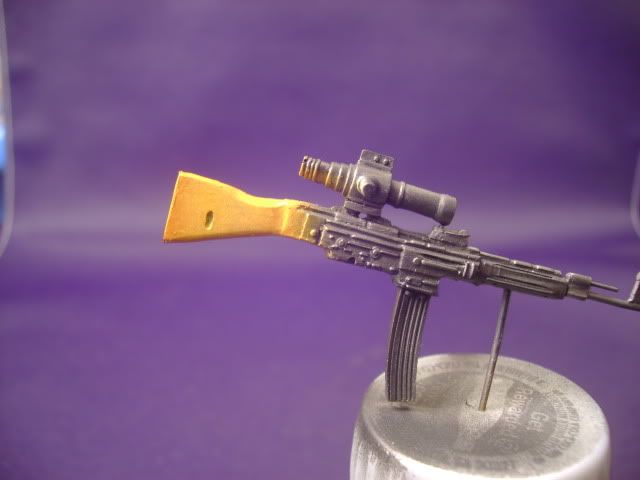
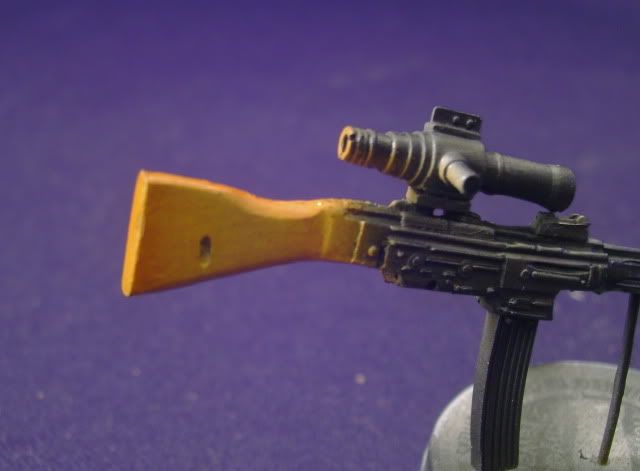
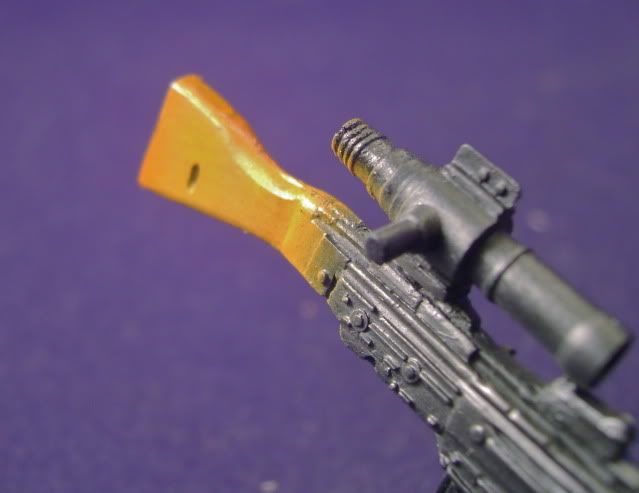
I tried something new here on th Stock of th STG 44. I used USCHI van der Rosten's Wood Grain Decals. I wish I would've used th darker grain pattern, but I used th pale one ( look for a Review - This stuff ROX !!) I shot th stock in Tamiya Wooden deck tan as a base, Alclad Aqua Gloss Clear, place th decals ( I cut 3 patterns , tracing th sides & top of th stock on Blue Painter's tape, placing it on th decal sheet & with a Fresh #11 blade cut out th water slide decals. I then misted a coat of Vallejo Transparent Yellow, & finally outlined th stock with Tamiya's Clear Orange. I still need to go back & add some Raw Umber Oil to it to bring out th grain.
Well ... That's where We're at for now. I still need to add th 3rd Camo layer ( Black) wire up th Scope & Black Light to th Power Pack & Batteries ... Almost Done !!
As always ... If you see anything glaringly bad .. please let Me know ..... Again sorry for th bad pix of th Face .. it really looks cool in person. .... "Yeah .. sure it does", Naw really .. it looks a lot better than I thought it was going to
I've added th second stage camo. I used Vallejo Burnt Cad. Red + Light Brown (#929)( which to me has a lot of orange in it) + a dash of Flat Red. I also added highlights to th folds by adding German Camo Beige to th base of both th Green & Red colors. I've also started to pick out some of th web gear.
Th boots are done in Leather Belt & has been washed with Vallejo Games Sepia Ink , maybe a touch to much on one of th boots, But I'll add some scuffs etc to them.
The Flesh is Oil, I added some rosiness to th Cheeks . I'm not happy with th way it's photographed. I'm learning there is a difference to taking Pix of Armor vs. Figures . The Balaclava was shadowed with Vallejo Black Grey, Dry brushed with Field Grey & highlighted with Field Grey + German Camo Beige. I've also started a pin wash with th Sepia Ink. I used Formula P3 Cygnar Blue Base for th eyes, with a touch of white for some reflection & white in th corners ?? I also dropped some Future in there for that Cold Glossy look ?? :idonno - Thoughts ?
The Patch is very much imagined. I figured ( no pun intended
) , that being a Night Fighter, th Patch would be Subdued. Black background, Dk.Green Eagle with Red inserts to distinguish that He's a Nacht~Jager Vampir
I tried something new here on th Stock of th STG 44. I used USCHI van der Rosten's Wood Grain Decals. I wish I would've used th darker grain pattern, but I used th pale one ( look for a Review - This stuff ROX !!) I shot th stock in Tamiya Wooden deck tan as a base, Alclad Aqua Gloss Clear, place th decals ( I cut 3 patterns , tracing th sides & top of th stock on Blue Painter's tape, placing it on th decal sheet & with a Fresh #11 blade cut out th water slide decals. I then misted a coat of Vallejo Transparent Yellow, & finally outlined th stock with Tamiya's Clear Orange. I still need to go back & add some Raw Umber Oil to it to bring out th grain.
Well ... That's where We're at for now. I still need to add th 3rd Camo layer ( Black) wire up th Scope & Black Light to th Power Pack & Batteries ... Almost Done !!
As always ... If you see anything glaringly bad .. please let Me know ..... Again sorry for th bad pix of th Face
.. it really looks cool in person. .... "Yeah .. sure it does", Naw really .. it looks a lot better than I thought it was going to:erik
panzerace007
Active member
BUDDHO ,
Thank You for th kind words !! Much appreciated. I'm glad that you Dig it !! Th Camo pattern is a Very Late War Pattern meant to combat I.R. , but th Jerries were th only ones using th Camo & th I.R. ... Go figure
I'm Glad that you are Diggin it !!
Thanx again for th kind words !!
Thank You for th kind words !! Much appreciated. I'm glad that you Dig it !! Th Camo pattern is a Very Late War Pattern meant to combat I.R. , but th Jerries were th only ones using th Camo & th I.R. ... Go figure I'm Glad that you are Diggin it !!
Thanx again for th kind words !!
I"m diggin' in man! Do they have a darker grain?
panzerace007
Active member
I"m diggin' in man! Do they have a darker grain?
Hey MOONIE - They have a few different types of Wood Grain decals & are made for 1/25th -1/35th , 1/48th & 1/72nd. Originally designed to be used with th Wing Nut Wings German Planes , but I'm finding ways to use them in other ways.
- http://www.uschivdr.com/products/ - I believe They have 4 different ones. - Pale ( th one I used ) Rich , Course & Fine
LUIZ , MIKE, & MOONIE - Thanx for th kind words !! I'm Glad that you're Diggin it !! Much appreciated ! ( taking a Bow -Emocon would look cool here
) Hey Guys ..... Any hints on lighting Figures for best results in Pix ? I just really wish i could get some good lighting on th Face to show off th shadows & th Rosie Cheex .
Thanx again everybody !!
http://www.youtube.com/watch?v=7mXBbVc4Df8

panzerace007
Active member
"ARGH...... Cruel Fate .... Why Do you mock Me" :vmad ..... So Close ..... I've got th 3rd. stage Camo on - Black , & I have most of th equipment on .... I just hit a snag gettin th Strap on for th STG 44 & I'm wiring up th I.R. gear ....
Here's a dumb question ... Has this G.B. 's deadline been extended by any chance ???
:erik
Here's a dumb question ... Has this G.B. 's deadline been extended by any chance ???
:erik
Erik you just keep pluggin' along. Word on the street is there will be an announcement in our monthly email about this Campaign.
AndyFettes
Master at Arms
Erik awesome pattern of the camo mate looks great 
Cant wait to see progress
I shall now translate into Erik language
dude ! rock on, off the hook, yeah baby
Cant wait to see progress
I shall now translate into Erik language
dude ! rock on, off the hook, yeah baby
Hey Erik.
The camo is great! He does look very cold!
Hang in there, it's gonna be sweet!
Bob
The camo is great! He does look very cold!
Hang in there, it's gonna be sweet!
Bob
Similar threads
- Replies
- 15
- Views
- 3K