• Modelers Alliance has updated the forum software on our website. We have migrated all post, content and user accounts but we could not migrate the passwords.
    This requires that you manually reset your password.
    Please click here, http://modelersalliance.org/forums/login to go to logon page and use the "Forgot your Password" option.

hawkenstien 3...........finished

hawkenstien 3...........interior 50%

first the fuel tank.

painted and some wear and tear.

painted-interior-7_zps773262d4.jpg

painted-interior-6_zpsdfe3c590.jpg

Joe, will this fuel tank be visible on the completed model? If so, I can inform you that no aircraft mechanic would allow a tank with flaking paint in the aircraft. Dirty, grimy, but the paint is protective so no chipping. Also, the aircraft's fuel tank was checked for leaks. If the pilot smelled fuel in the cockpit, a complete inspection was done.

First, spills near the fuselage drain were checked out. Spouts, fillers, and drains were wiped and checked. If the aircraft was hit near the fuel tank, it was removed for inspection. All dents, scrapes, gashes, scratches, et cetera, were attended to and remedied when necessary.

If you wish (and it's not too late), repaint the fuel tank and limit the weathering to some grime.

Regards,
 
hawkenstien 3...........interior 50%

many thanks for the info. got carried away and well you see the result.

will repaint the tank. get it more up to what it should be.


joe
 
hawkenstien 3...........interior quick update

well after a couple of productive days in the bunker i have some progress to report.

first up, redo on the painted fuel tank. made it less worn out.

painted-interior-15_zps2002e69c.jpg


notice i have also put in a couple of lines. not sure if they will be seen but i figure i better do them anyway.

next up was some of the little things that can get knocked off. cowl flap handle and assembly and the handle on the starboard floor.

painted-interior-14_zps9ca05a54.jpg

painted-interior-13_zps00e703ef.jpg

painted-interior-12_zps934b5784.jpg

painted-interior-11_zps312163f1.jpg


now you will notice i have now started the seat frame. i have also constructed the seat. not much fun. lots of four letter words and such. that is for the next update though.


thats it for now.


all comments, critiques, and criticism are encouraged.


joe
 
hawkenstien 3...........interior quick update

Now the ground crew has thumbs up!

Regards,
 
hawkenstien 3...........the little things

well its the little things that make life go round.


for models its the little things that we grind on for hours at a time.

for me it just means i am doing the little things to try to button up the cockpit.

first up is the throttle assembly.

i came in under my estimate for pieces for this. only 12. i was thinking 18 or so.

Throttle-2_zps26145163.jpg


yes that little thing is on a popsicle stick. and then a close up.

Throttle-1_zps4f9964a6.jpg


also worked on the seat and the frame. now this is a bugger and a half. took me the better part of four hours to try to fashion it.

the detail on the sides are for the seat belts. the detail on the back is noticed in the pictures but cant tell you what it is. a tether of some kind goes through the loop and is attached to the lower part of the frame.

seat-4_zps0c64ac78.jpg

seat-3_zps0faaed64.jpg

seat-2_zps5487f707.jpg

seat-1_zps110f348e.jpg


now with these two things done what do i have left?

large item(s):

-instrument panel
-foot pedals
-attach seat/frame

small item(s):
-rods for throttle controls
-assorted wires and tubes for radio and boxes.
-attach radio


not sure if i have missed anything. need to take some time to study the pictures and decide.


all comments, critiques, and criticism are encouraged.


joe
 
hawkenstien 3...........pit 90%

well it isnt much but it was time consuming.

trying to get the pit done. want to get it finished so i can try something different than anything i have done on the engine. to that extent first up was a small assembly on the starboard side.

painted-interior-16_zps45c7663a.jpg


with that done and the throttle rods attached all that is needed is the ip work. so i wanted to see what it looked like in place.

painted-interior-19_zpsf3d80f52.jpg

painted-interior-17_zps6c0bc471.jpg

painted-interior-18_zps524786fc.jpg


now up to this point all of seven kit pieces have been used. with that being said from this point on in the interior will be mainly kit pieces. there will be details thrown in here and there but for the most it will be kit pieces.

now for the ip. there are four kit pieces. they lack somewhat in the detail so i enhanced it a bit.

ip-1_zpsb01518a7.jpg

ip-2_zpsdfb98c96.jpg

ip-3_zps3d4dc94b.jpg


i got this together and thought wow i can move on......not so fast....... all the wiring for the ip will be seen. ok. next session will be to fashion the back of the panel and add some wiring.


many thanks to all who have followed along to this point. i hope i havent bored you too much.


all comments, critiques, and criticism are encouraged.


joe
 
hawkenstien 3...........pit 90%

Keep at it! You're getting closer to the finish line!

Regards,
 
hawkenstien 3...........pit 90%

That's lookin' great, Joe! You must know this plane inside and out by now- cheers!
 
hawkenstien 3...........pit 90%

So much dedication and hard work going in to this build.
:good:

Ian
 
hawkenstien 3...........pit 90%

you are all very kind. thank you.

chuck i wish. if i knew all there was about it i would not have to redo the stuff that i have done wrong so fa.


joe
 
hawkenstien 3...........pit 90%

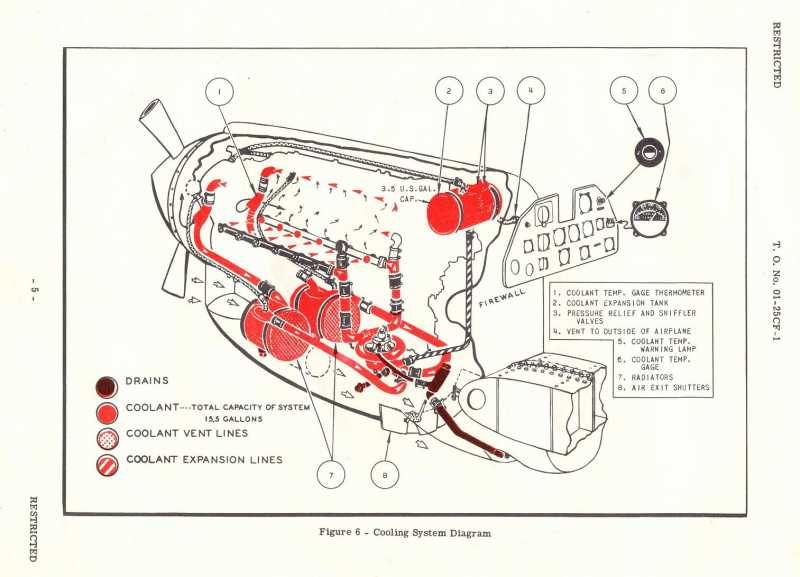
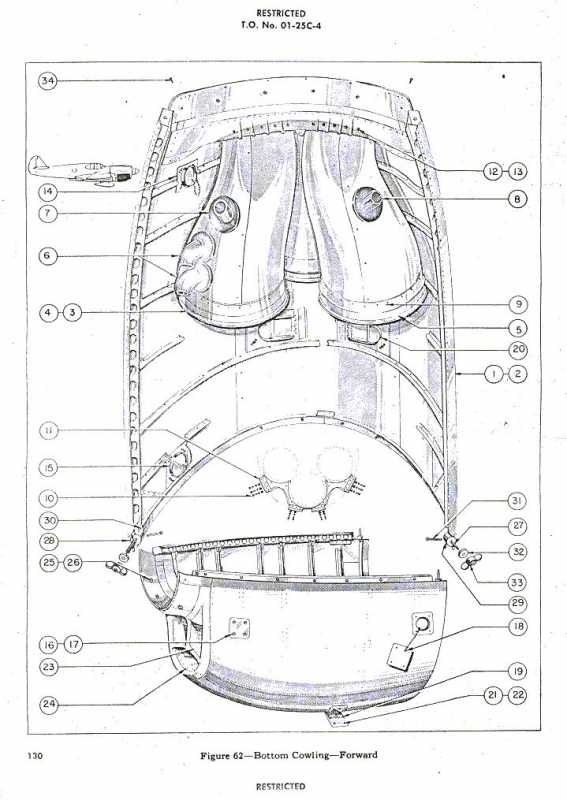
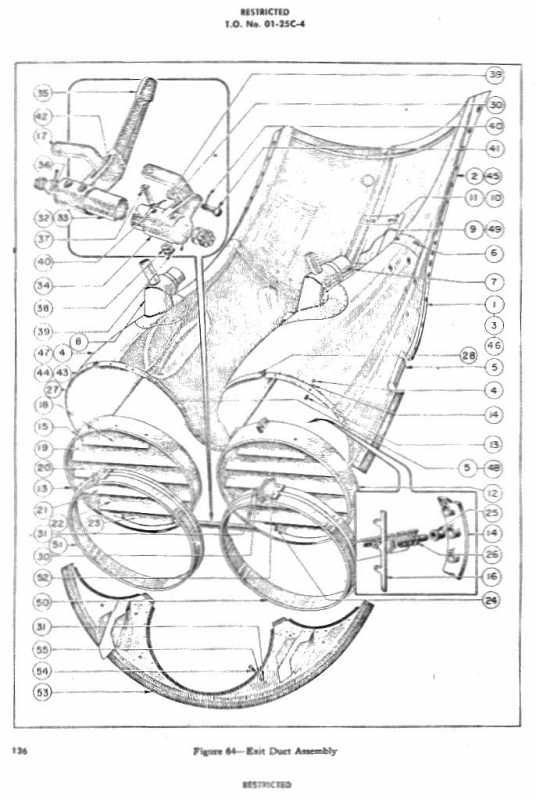
Some more images to help:

P-40C

Click to visit site for more details.


P-40_FlyingTiger_maintenance.jpg


What color to paint the engine?
385402_original.jpg


A nice link is here.

These images may help but are for later birds...

P-40D

h4f3c2b5.jpg


h8b1c7e8.jpg


h1394b9a.jpg


Regards,
 
Back
Top