• Modelers Alliance has updated the forum software on our website. We have migrated all post, content and user accounts but we could not migrate the passwords.
    This requires that you manually reset your password.
    Please click here, http://modelersalliance.org/forums/login to go to logon page and use the "Forgot your Password" option.

Bronco Marder II D

wbill76

Member
I've been working on Bronco's lovely little Marder IID vehicle as my latest project. All the major construction work is done now, it's getting ready for the paint and weathering process. If you've not attempted one of the recent Bronco offerings, they are a real treat in terms of detail but have a TON of tiny parts to achieve that detail, so there is a trade-off of sorts to be made in the bargain. B)
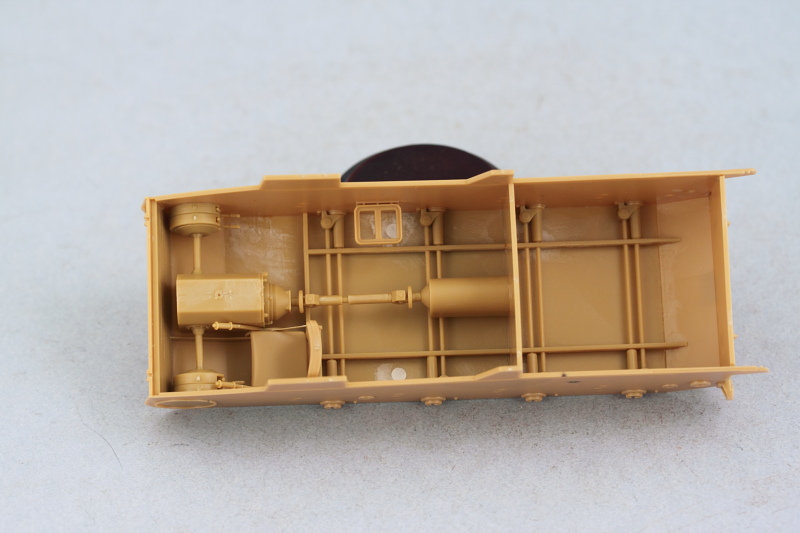
The hull interior:

Step4.JPG


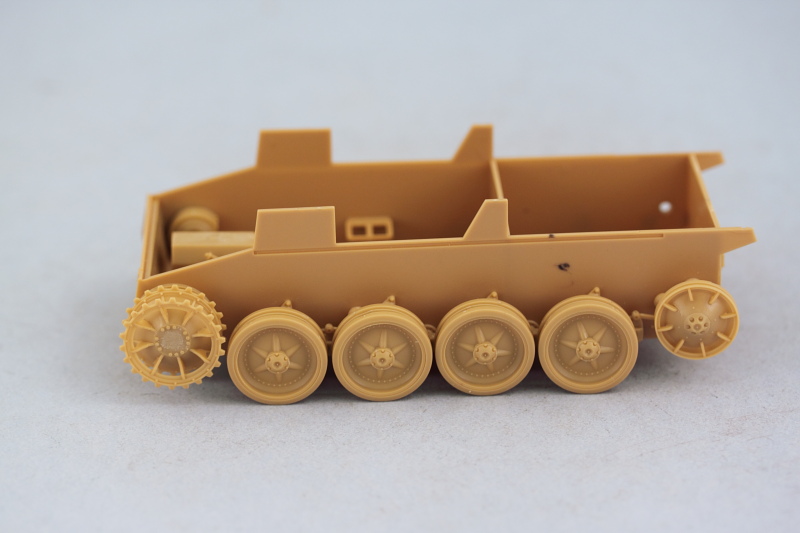
Suspension and road wheels (with separate rubber rim parts and excellent bolt detail)

Step8.JPG


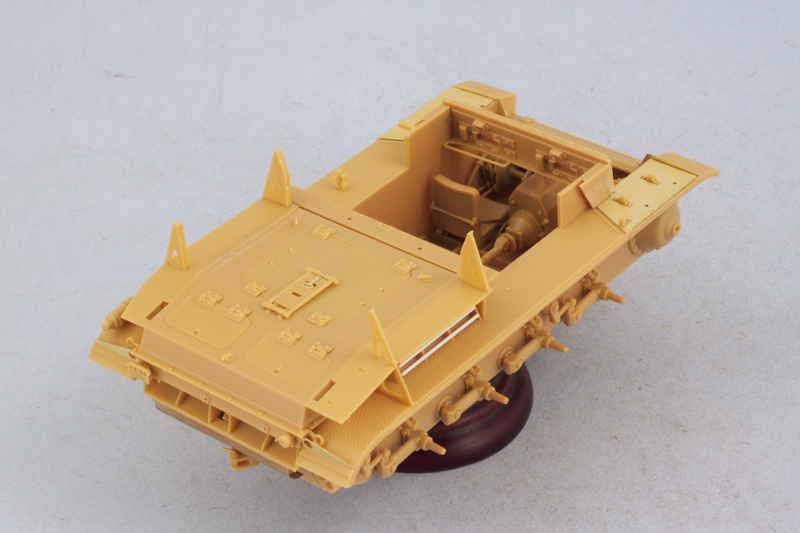
Upper hull with the fenders and engine deck fitted.

Step18.JPG


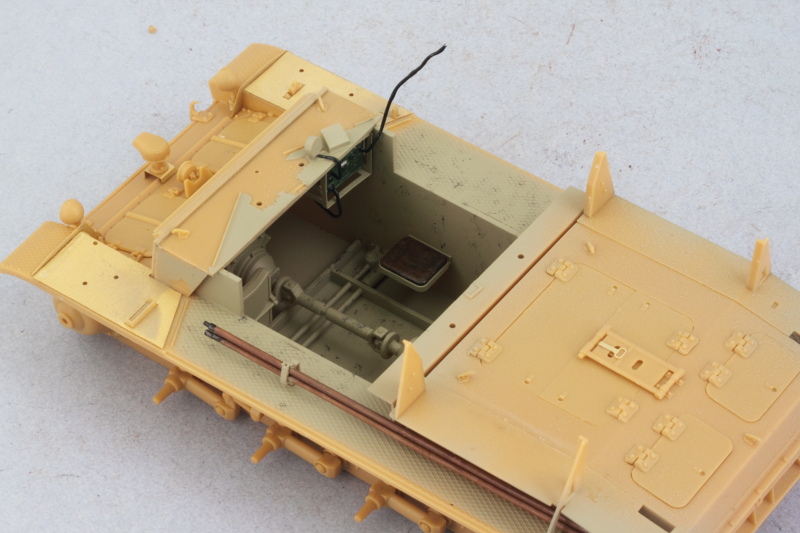
Some interior paint work and detailing

Step29.JPG


Fighting compartment in place including the 100% PE rear 'cage' portion.

Step34.JPG


Main gun and shield assembled and test-fitted.

Step38.JPG


Step39.JPG


You can see the full build log so far here, figured this is easier than trying to retype/transfer it all here in one go vs. the summary version above! :) http://www.bpmodels.net/Model/Album/phpBB2/viewtopic.php?t=168

Will keep you posted from here on out as the real fun begins!
 
Thanks James and MP, it's been a fun build so far and makes the Alan kit look like it was molded by a 6-yr old. ;)
 
Now there's a familiar face! Thank you kindly sir, although I'm not sure if it's the skills or just the hobby knife blades that are getting sharper! :)
 
Hey Bill! Thanks for sharing your work and I must say that looks really great! (y) (y) Looking forward to the rest of the story!
 
Paint work was the order of the day for this latest round of progress. Figuring out when and how to paint things is important with this vehicle given its somewhat unique design characteristics with that mesh back end to the fighting compartment. I decided to go ahead and paint only the interior of the fighting compartment, the exterior of the mesh areas, and the gun and mount in this round. First up was the application of a primer coat by airbrush using MM Italian Dark Brown.

Step40.JPG


After that had dried, the base coat went on using the same 50/50 Dunkelgelb/Light Gray mix used earlier on the hull interior. The gun and mount are dry-fit only and will remain separate until the camo pattern is on to make it easier to avoid paint over-spray issues in the fighting compartment.

Step42.JPG


Since I already had the airbrush loaded up with primer and the DY mix at various points in the day, I took advantage of that and painted the road wheels. They were primered at the same time as the vehicle and then the rubber rims were airbrushed with MM enamel Gunmetal while still on the hubs. Once that had dried, I removed the outer rubber tire and used a circle template to mask the hub and avoid getting paint on the rim since they are too tight to tolerate any paint interference with the rubber rim going on. Hubs were airbrushed with the DY/LG mix and then the rubber rims put back in place.

Step41.JPG


Rounding out things, I worked on some of the fighting compartment interior details. The crew seat cushions were hand painted in a multi-step process. First a base coat of MM enamel Gunmetal was applied, then I dry-brushed several layers in the order of MM enamel Leather, some of the DY/LG mix, another Leather pass, and then a final very light layer of the original enamel Gunmetal. I also applied some Black artist pastels in a couple of spots to even things out a bit.

The kit-supplied gas mask containers were installed as well along with the jack block and holder. For the jack block, I added some wood grain texture to the block since Bronco molded it smooth using the point of a square needle file to score the plastic and then lightly sanded it down. The block was base coated with the DY/LG mix, then given a light wash of MM enamel Leather to bring out the grain texture.

Step43.JPG


The interior and gun will be allowed to thoroughly cure before moving on their weathering stages as the next step.
 
Gunmetal and Leather? :hmmm That's a new one on me. Looks good Bill, don't be surprised if you see my copying that. '

:popcorn
 
Thanks MP! Feel free to copy away, it's something I picked up and played around with from another builder somewhere along the line as well, so no claims to originality on my end. :D
 
Started in on the fun part this round with the weathering work on the fighting compartment and the rear portion of the gun. As a foundation, I created some scuffs/chipping by stippling MM enamel Burnt Umber in various areas and then sealed that up with a coat of Future and allowed it to cure overnight before applying more weathering. First step involved a wash of MM enamel Raw Umber, then some dry-brushing of the 50-50 base-coat mix, then a second wash of MM enamel Raw Sienna, more dry-brushing of the base-coat mix, then a pin wash of MM enamel Burnt Umber, and a last very light dry-brushing of the base-coat mix where the pin wash had been applied to round things out. All those layers were then sealed together with an application of MM Lusterless Flat via rattle-can to remove the remaining Future gloss and unify everything together.

Step44.JPG


The gun received slightly different treatment. I hand detailed all the various parts such as the breech lever, the gunner's and loader's triggers, the breech block, the sight, and the control wheel knobs and then it too was given a coat of Future on the inside portions only since there's more paint work to be done on the exterior pieces later. The gunner's sight was molded solid on both ends so I used a pin vise and micro-drill bits to open up both their faces for added detail. Chipping/scuffing was done with the same stippled Burnt Umber approach prior to the Future and then post-Future a wash of Raw Umber added followed by careful dry-brushing of the 50-50 base-coat mix to create the weathering. That was all sealed up with a dose of the MM Lusterless Flat at the same time as the fighting compartment.

Step45.JPG


Step46.JPG


And just to be sure it all 'looks right' together, here's a top-down shot showing the gun in position along with the weathered fighting compartment.

Step47.JPG


Next up will be spending some time on the MK workable tracks, need to get them squared away and fitted properly before finishing up the hull details and getting it painted.
 
Back
Top