
Duke Maddog
Well-known member
Wow, I didn’t realize it had been so long since the last tour went through. I had thought that I’d hosted a tour previously, it apparently didn’t happen. Now since I have so much progress to show, I realize this will have to be a two-part tour. The first tour will depart for the Hangar and Shipyards first, then we will return to board the trams for the tour to the Motor Pool. The reason for this is I was so busy with so much other stuff in between bench sessions, much of it was preparations for the San Diego Comicon, among other things. I just kept on building, getting carried away. And then I contracted Covid. When that happened, I just kept on building and painting since that was about all I felt like doing when I wasn’t resting.
So, without further ado, the first trams are here. All aboard!
Here in the Hanger, work progressed on the helicopters, starting with the two AH-1 Cobras.
The early Cobra got the decals applied. I applied four or five applications of decal solvent to the Decal on the boom:
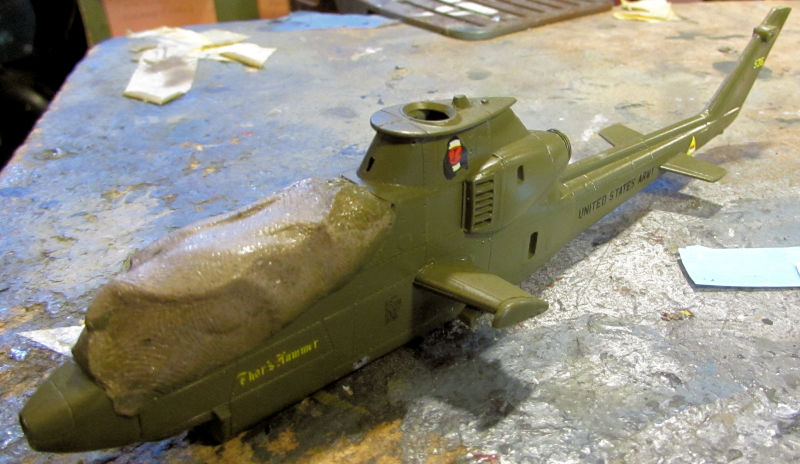
Later the dullcoat went on:
That’s when I noticed the decals on the tail boom again. I’ll never understand why every time I build one of the AH-1 Cobras from any company; the “United States Army” decals always silver on the boom! Never fails! After four more rounds of puncturing the decals and applying more solvent under them; watching it leech underneath from capillary action; we finally got them un-silvered.
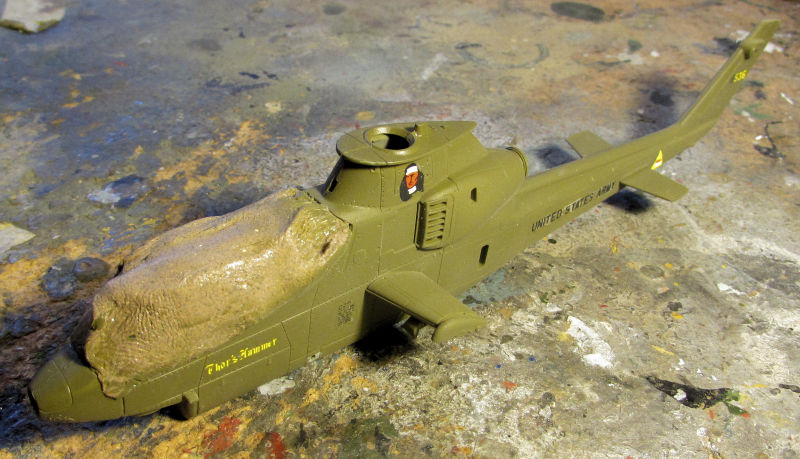
The same happened with the Cobra Late, decals on after the gloss:
Followed by the dull coat again:
You can see we had the same issue on the boom, only this time not as bad. Still, further continuous attempts with sharp Exacto blades and solvent finally fixed it….so far
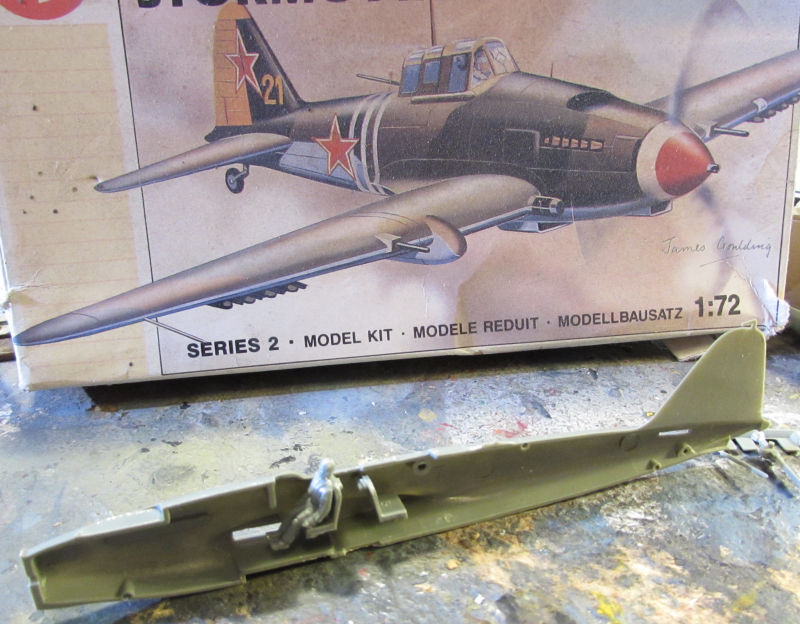
On another day, I was cleaning up and reorganizing the Hobby Room and came across several old kits that had been stashed out of sight. This Stormovik was in a broken-up box with a few loose parts inside. So, after checking to see everything was there, to keep from loosing any of the parts I decided we should start it:
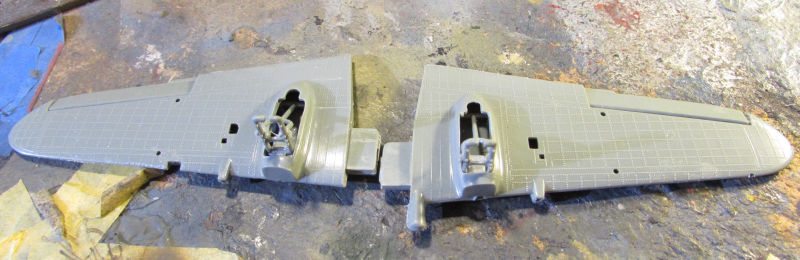
After doing the “cockpit”, we got ready to close the fuselage. That’s when I found one piece had gone missing: the rear seat gunner. So, when this gets posed, I’ll just explain that the pilot is waiting for the gunner to return from his bathroom break…
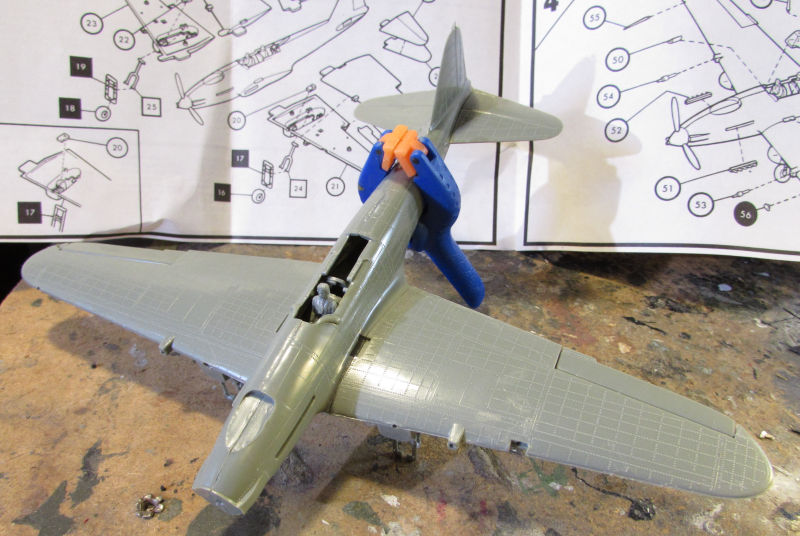
The instructions tell you that this can be built with retracting and extending landing gear. Maybe at one time, but this kit did everything it could to insure that glue got in all the places it wasn’t supposed to go; so everything was glued in the extended position after we assembled the wings:
The fuselage and wings were then assembled:
The tail feathers are only dry fit on, I forgot to take them off for the pic. The clamp is because I found a gap that I added extra Tamiya Thin to so it would seal closed.
That was enough on that one. This last one was re-shot with a Flanker Blue Grey, which is darker than the original coat I gave it. This way I can mask off the darker parts with Silly Putty and then shoot the lighter Russian Topside Grey:

Now we can mover on to the Shipyards where the ship builders have been working very hard.
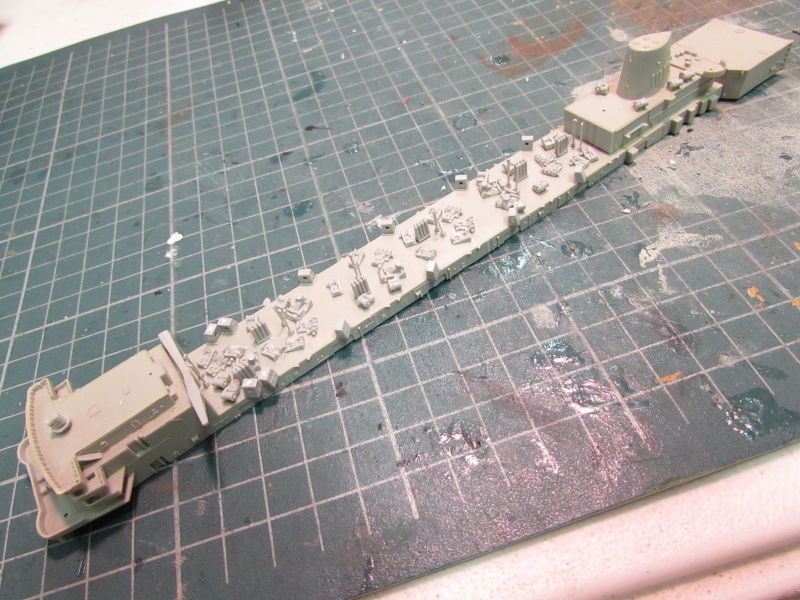
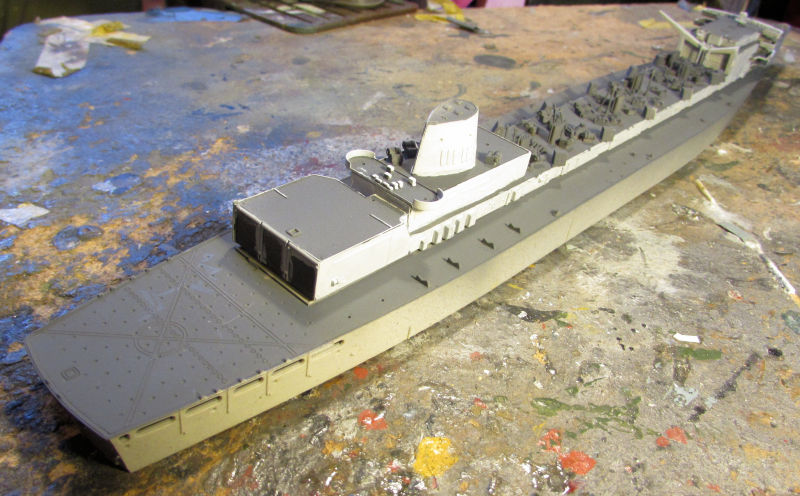
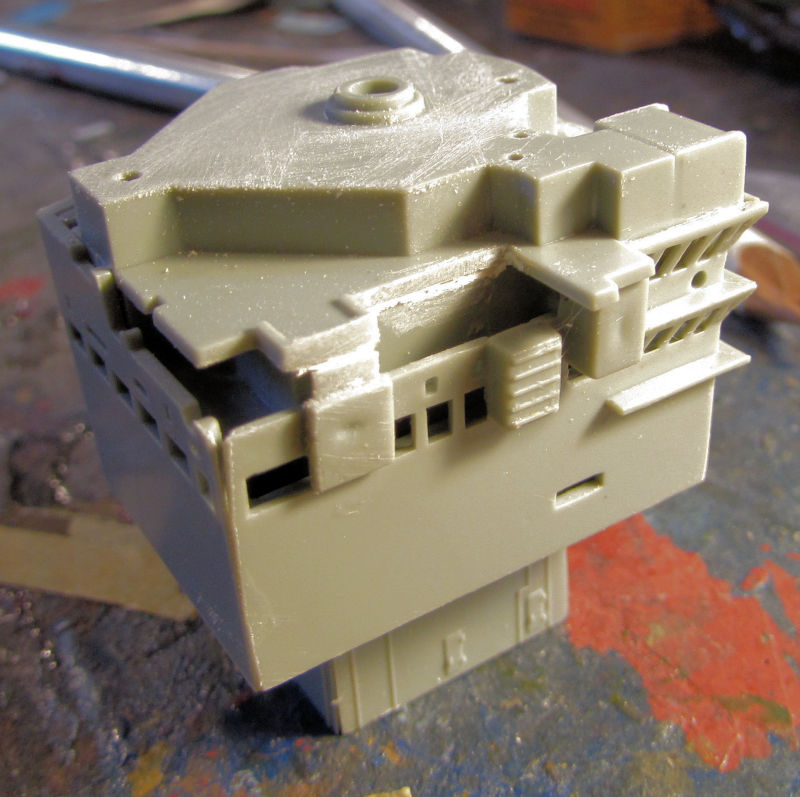
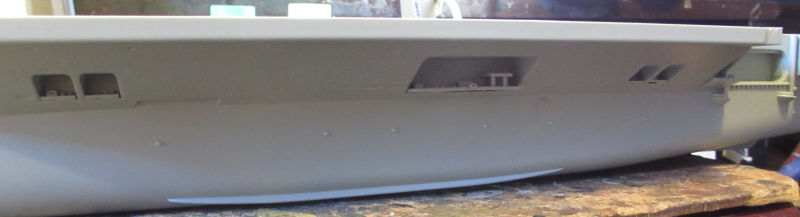
Let’s stop at this first slip where the USS Sacramento had been sitting for awhile before work resumed. There are a ton of tiny greeblies that go on the upper deck of the superstructure and so we started on the first ones:
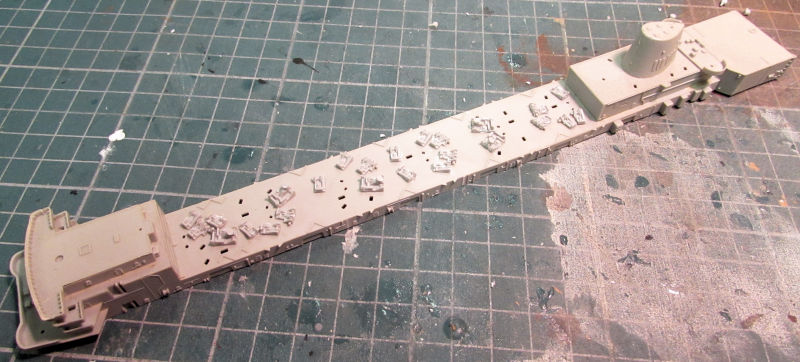
These were difficult to get right since the instructions were as clear as mud as to where everything was supposed to go among the forest of holes on top. Fortunately, we were able to figure them out. This looks pretty good on the hull:

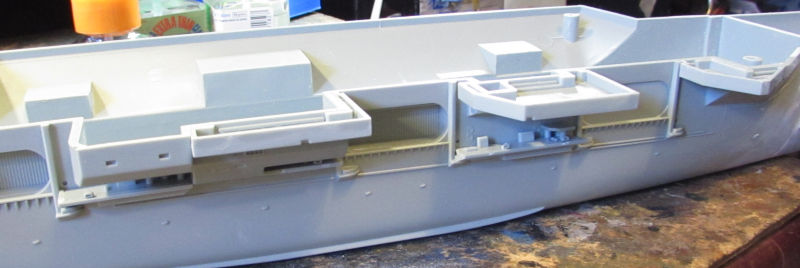
Next came the second round of details on this upper deck. There were a lot more:
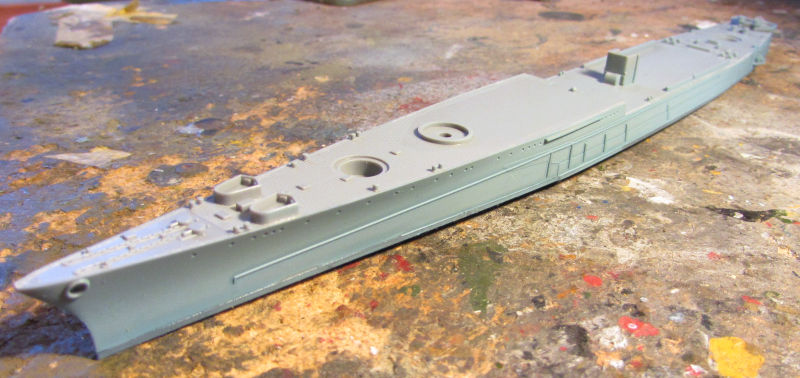
She was then staged again, this time with the lower hull which we will be adding to the top hull. She’s looking more impressive:
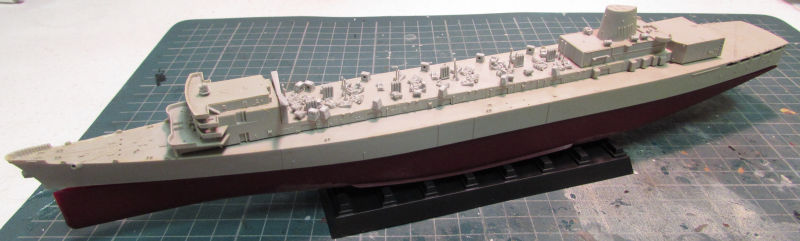
Once they were all dry, we placed the superstructure on the hull and then shot a gunship grey over the decks:
The color schematic calls for a light grey, so I found my Testor’s Model Master Light Grey and we proceeded to start painting the sides of the superstructure. This ain’t so easy to do:
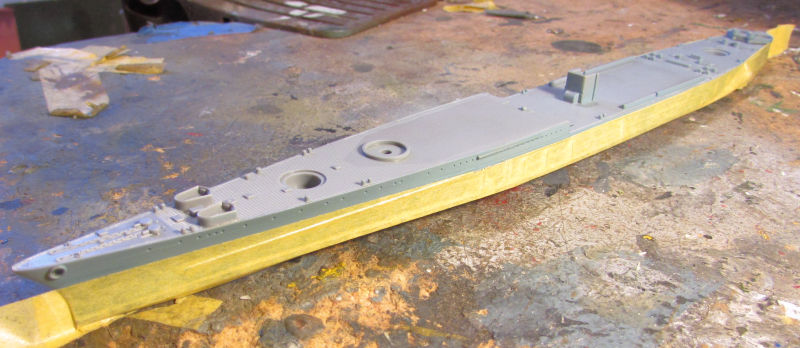
The superstructure is just sitting on the hull; it’s much easier to paint without it being attached.
The view from the stern:
I’ll be painting the hangar doors a different grey. Probably Dark Gull or Neutral. We’ll see.
Another ship we started to paint was the USS Indianapolis in the next slip. We started with the lower color, a Navy Blue Grey:
I used the Federal Standard color. Later we taped this off to paint the upper part of the hull:
That hasn’t happened yet, but I did get a supply of the correct deck color. Hopefully soon…
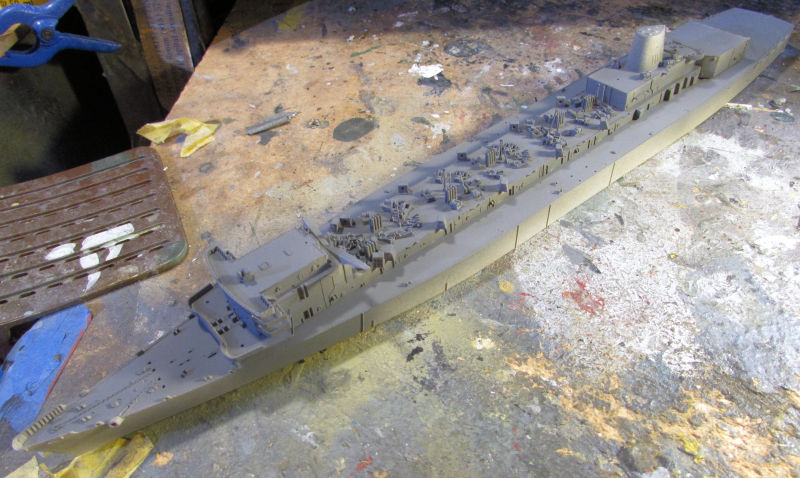
In this third slip, we did some refinements on the island of the USS Enterprise:
The side decks under the island were installed next:
And on the other side, additional deck parts and sponsons were also installed:
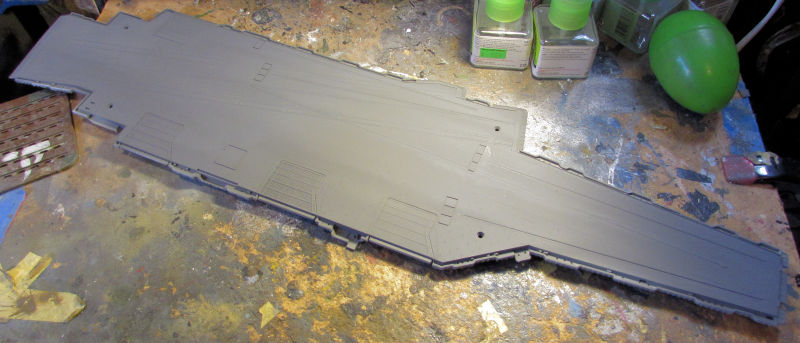
This hull is about ready for paint. Only a few more details to add. Meanwhile, we did shoot paint on the flight deck. It didn’t turn out a swell as I expected, so we’ll be trying again soon:
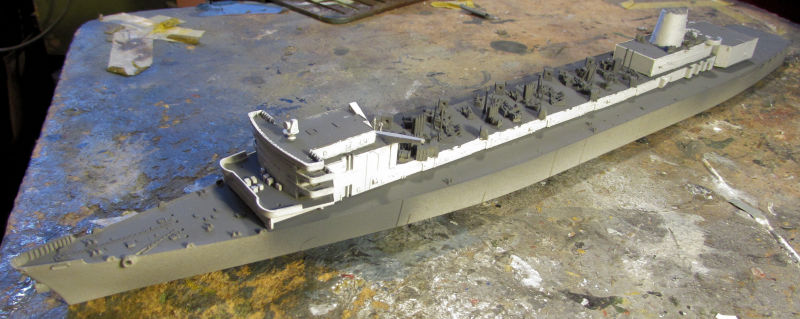
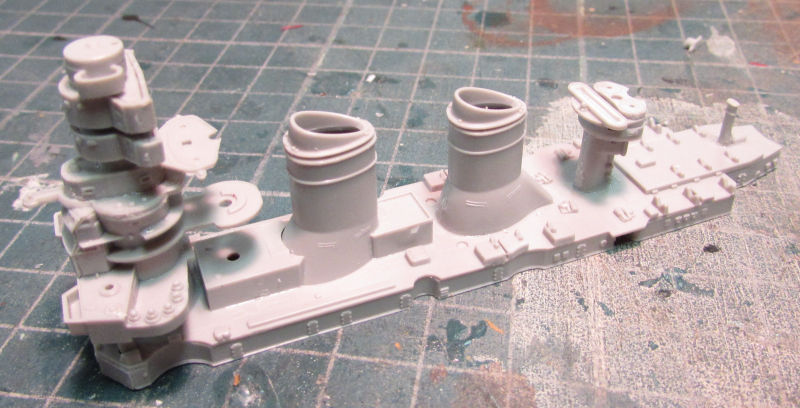
In this fourth slip, more progress was made on the Italian battleship Vittorio Veneto. Her superstructure was built up with the basic parts first:
I then had the upper hull, lower hull and superstructure dry fit to see how this was developing:
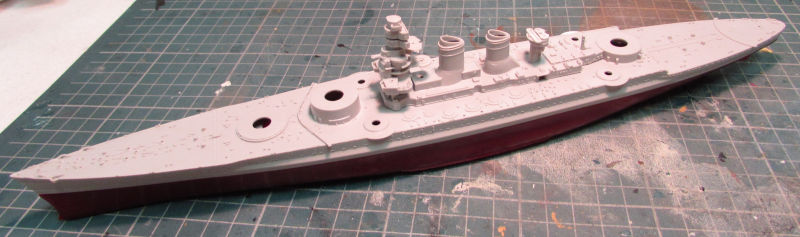
After that I decided to cement the upper hull to the lower hull:
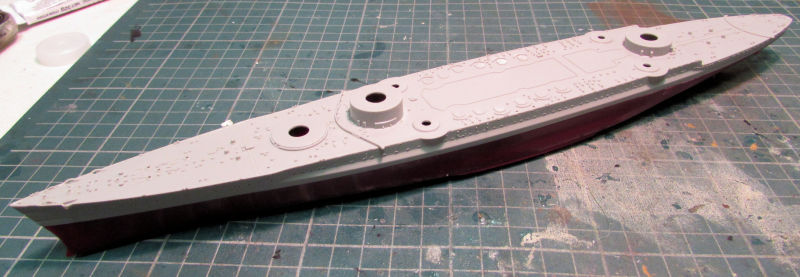
Once we finished that, we added additional parts to the superstructure to finish the basic assembly:
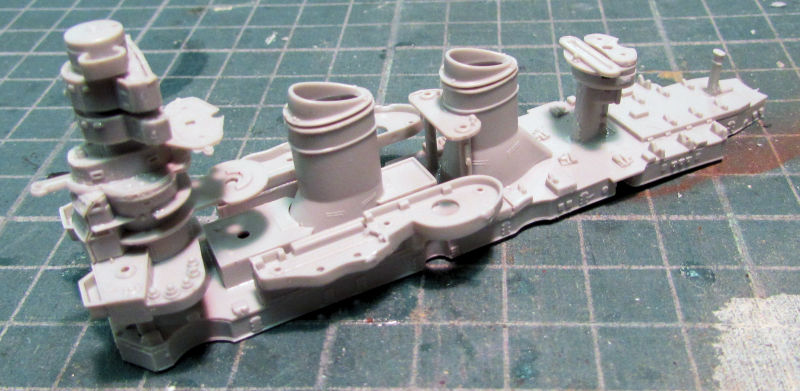
Now the only thing that is left to add to that are the guns, boats, gun directors, spotlights and other miscellaneous details.
That completes this tour of the Hangar and Shipyards. Now we’ll make our way back to the main entrance again so you can board the next trams for the Motor Pool.
So, without further ado, the first trams are here. All aboard!
Here in the Hanger, work progressed on the helicopters, starting with the two AH-1 Cobras.
The early Cobra got the decals applied. I applied four or five applications of decal solvent to the Decal on the boom:
Later the dullcoat went on:
That’s when I noticed the decals on the tail boom again. I’ll never understand why every time I build one of the AH-1 Cobras from any company; the “United States Army” decals always silver on the boom! Never fails! After four more rounds of puncturing the decals and applying more solvent under them; watching it leech underneath from capillary action; we finally got them un-silvered.
The same happened with the Cobra Late, decals on after the gloss:
Followed by the dull coat again:
You can see we had the same issue on the boom, only this time not as bad. Still, further continuous attempts with sharp Exacto blades and solvent finally fixed it….so far
On another day, I was cleaning up and reorganizing the Hobby Room and came across several old kits that had been stashed out of sight. This Stormovik was in a broken-up box with a few loose parts inside. So, after checking to see everything was there, to keep from loosing any of the parts I decided we should start it:
After doing the “cockpit”, we got ready to close the fuselage. That’s when I found one piece had gone missing: the rear seat gunner. So, when this gets posed, I’ll just explain that the pilot is waiting for the gunner to return from his bathroom break…
The instructions tell you that this can be built with retracting and extending landing gear. Maybe at one time, but this kit did everything it could to insure that glue got in all the places it wasn’t supposed to go; so everything was glued in the extended position after we assembled the wings:
The fuselage and wings were then assembled:
The tail feathers are only dry fit on, I forgot to take them off for the pic. The clamp is because I found a gap that I added extra Tamiya Thin to so it would seal closed.
That was enough on that one. This last one was re-shot with a Flanker Blue Grey, which is darker than the original coat I gave it. This way I can mask off the darker parts with Silly Putty and then shoot the lighter Russian Topside Grey:
Now we can mover on to the Shipyards where the ship builders have been working very hard.
Let’s stop at this first slip where the USS Sacramento had been sitting for awhile before work resumed. There are a ton of tiny greeblies that go on the upper deck of the superstructure and so we started on the first ones:
These were difficult to get right since the instructions were as clear as mud as to where everything was supposed to go among the forest of holes on top. Fortunately, we were able to figure them out. This looks pretty good on the hull:
Next came the second round of details on this upper deck. There were a lot more:
She was then staged again, this time with the lower hull which we will be adding to the top hull. She’s looking more impressive:
Once they were all dry, we placed the superstructure on the hull and then shot a gunship grey over the decks:
The color schematic calls for a light grey, so I found my Testor’s Model Master Light Grey and we proceeded to start painting the sides of the superstructure. This ain’t so easy to do:
The superstructure is just sitting on the hull; it’s much easier to paint without it being attached.
The view from the stern:
I’ll be painting the hangar doors a different grey. Probably Dark Gull or Neutral. We’ll see.
Another ship we started to paint was the USS Indianapolis in the next slip. We started with the lower color, a Navy Blue Grey:
I used the Federal Standard color. Later we taped this off to paint the upper part of the hull:
That hasn’t happened yet, but I did get a supply of the correct deck color. Hopefully soon…
In this third slip, we did some refinements on the island of the USS Enterprise:
The side decks under the island were installed next:
And on the other side, additional deck parts and sponsons were also installed:
This hull is about ready for paint. Only a few more details to add. Meanwhile, we did shoot paint on the flight deck. It didn’t turn out a swell as I expected, so we’ll be trying again soon:
In this fourth slip, more progress was made on the Italian battleship Vittorio Veneto. Her superstructure was built up with the basic parts first:
I then had the upper hull, lower hull and superstructure dry fit to see how this was developing:
After that I decided to cement the upper hull to the lower hull:
Once we finished that, we added additional parts to the superstructure to finish the basic assembly:
Now the only thing that is left to add to that are the guns, boats, gun directors, spotlights and other miscellaneous details.
That completes this tour of the Hangar and Shipyards. Now we’ll make our way back to the main entrance again so you can board the next trams for the Motor Pool.
 . The ships and the train look bigger than your usual scale, what size are they?