
-
Modelers Alliance has updated the forum software on our website. We have migrated all post, content and user accounts but we could not migrate the passwords.
This requires that you manually reset your password.
Please click here, http://modelersalliance.org/forums/login to go to logon page and use the "Forgot your Password" option.
You are using an out of date browser. It may not display this or other websites correctly.
You should upgrade or use an alternative browser.
You should upgrade or use an alternative browser.
Amtech Ta 183 in 1/48 scale
- Thread starter matrixone
- Start date

Ditto! :v
phantom II
Master at Arms
Thanks guys!")
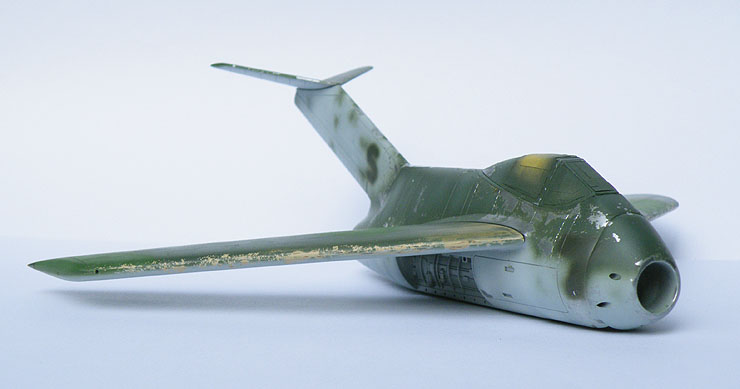
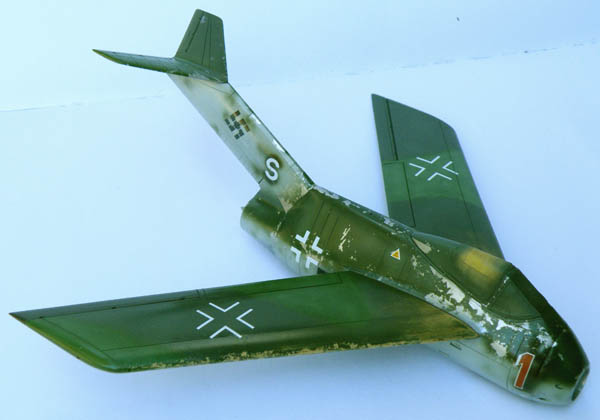
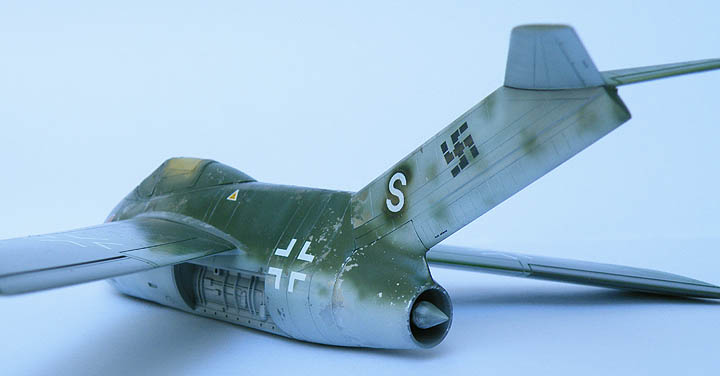
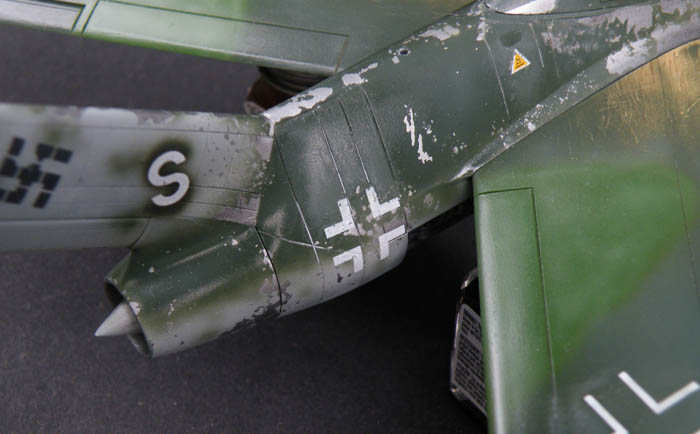
In these pictures you can see the results of the paint chipping effects I was after.
This image shows the wood grain effect showing through the worn off paint on the wing roots.
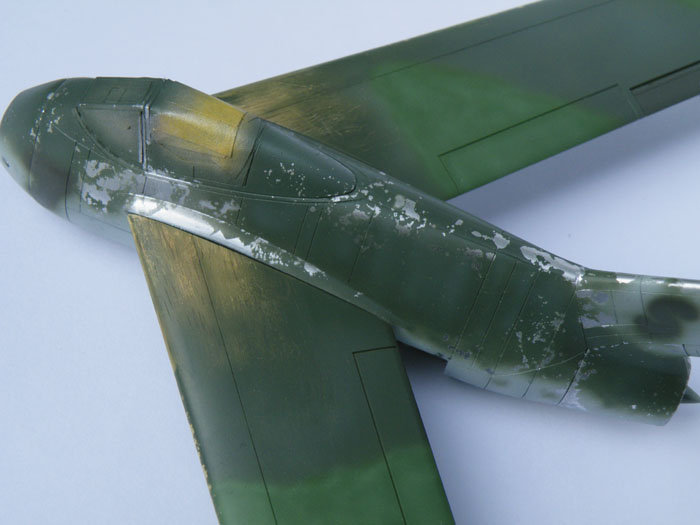
The sprayed on ''S'' on the lower part of the fin will be the place where the white S decal will go. I am finishing this as a Ta 183 that is worn out and has been retired from frontline service and being used as a trainer to help convert Me 262 pilots on how to fly the type. My inspiration for this came from looking at Me 262 photographs that had some Me 262's marked in a similar fashion and were used for training pilots.
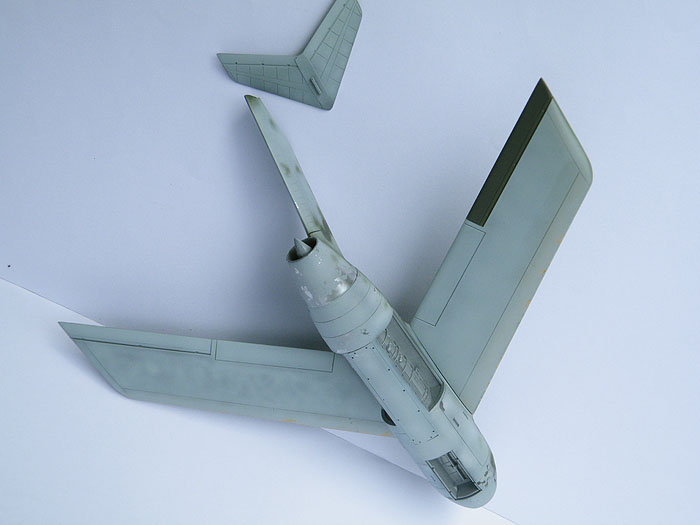
In this image of the undersurfaces one of the ailerons is painted in RLM 81, I did this to represent the aileron being a replacement part after the original was damaged in combat.
Many of the smaller bits for this model have been painted and are ready for installation so the next thing that will be done will be the spraying on the clear gloss coat and then adding the decals.
Matrixone
From here it looks very much like Balsa wood .
Cheers, Christian B)
Thanks guys!
Not too much left to do except add the clear gloss coat, this would have already been done by now but I have been having some problems with two of my other builds and they are slowing all my other builds down.
Whenever I do manage to get the gloss coat and decals on I will lightly sand down a few of the decals to represent the markings having some wear and tear on them...no sense having a battered looking finish and then having fresh markings, that would look a bit strange to me.
Matrixone
Skinny_Mike
Well-known member
Looking good Les!
Thank you Mike!
The Ta 183 is on hold for a day or two while I get the Messerschmitts and Do 335 ready for final assembly, the Messerschmitts have been a real P.I.T.A. but the Do 335 has been a joy to work with and more than makes up for the problems with the Messerschmitts.
Matrixone
The Ta 183 is on hold for a day or two while I get the Messerschmitts and Do 335 ready for final assembly, the Messerschmitts have been a real P.I.T.A. but the Do 335 has been a joy to work with and more than makes up for the problems with the Messerschmitts.
Matrixone

lupanzer
Master at Arms
Thanks guys!
Not too much left to do except add the clear gloss coat, this would have already been done by now but I have been having some problems with two of my other builds and they are slowing all my other builds down.
Whenever I do manage to get the gloss coat and decals on I will lightly sand down a few of the decals to represent the markings having some wear and tear on them...no sense having a battered looking finish and then having fresh markings, that would look a bit strange to me.
Matrixone
Very good observation....

Luiz
Thanks for looking in Gator and Luiz!
Luiz,
Its a bit of a risk sanding down decals to represent wear and tear but that's the value of having old models to keep around to experiment with, I have tried sanding down decals before and have found sanding with very fine grade sandpaper and water works quite well but care must be taken to know when to stop, like pre-shading its better to under rather than over-do this effect. Also make sure the decal is well anchored to the surface of the model...aftermarket decals usually stick better than kit decals do, I have had some kit decals without enough adhesive on them to stick very well without resorting to using Future.
Matrixone
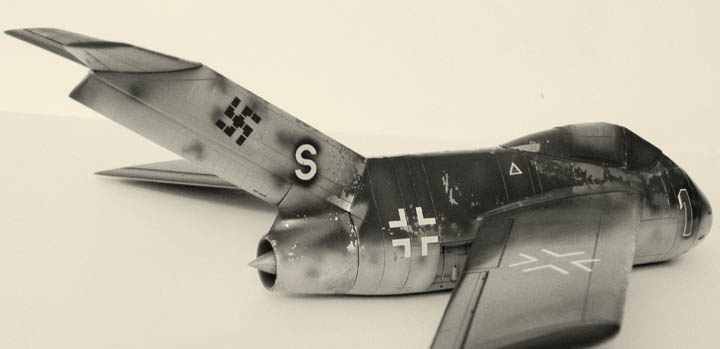
Pretty cool Les, like how you do the B/W photo cause it shows how the tones get lost like the original shots, so hard to tell some camo schemes from the greyscale photos.
Thanks very much Chuck and Bob!
Chuck,
My thinking for this war weary Ta 183 is of an airframe that is totally worn out and no linger fit for frontline service and has been handed down to one of the fighter Schules and that's the reason for the 'white S'.
There were a few Me 262's that wore the ''S'' marking on them and it was later found out they were airframes used to help train pilots on how to fly the new jets, I figure if the Ta 183 had actually been built and was used in combat there might have been a least a few of them marked and set aside to assist in training Me 262 pilots on how to fly the new 'wonder weapon'.
Bob,
Some of the early reference books on Luftwaffe camouflage schemes made some rather curious declarations on colors and camouflage schemes on late war fighters usually based on only a single black and white photograph of an aircraft...lighting conditions can really make a world of difference on how camouflage schemes look especially if there is light reflection on a semi-gloss finish.
Luckily today there is a lot more information available on Luftwaffe paints and camouflage schemes to avoid the pitfalls of guessing what paint scheme a particular aircraft seen in an old photograph might have worn.
That black and white image of my Ta 183 is a good example of the problem trying to decipher what the camouflage pattern is on it because of the gloss finish and light reflection, the right wing in particular looks like it might have been painted in a much lighter color than it really was.hmy:
Matrixone
Chuck,
My thinking for this war weary Ta 183 is of an airframe that is totally worn out and no linger fit for frontline service and has been handed down to one of the fighter Schules and that's the reason for the 'white S'.
There were a few Me 262's that wore the ''S'' marking on them and it was later found out they were airframes used to help train pilots on how to fly the new jets, I figure if the Ta 183 had actually been built and was used in combat there might have been a least a few of them marked and set aside to assist in training Me 262 pilots on how to fly the new 'wonder weapon'.
Bob,
Some of the early reference books on Luftwaffe camouflage schemes made some rather curious declarations on colors and camouflage schemes on late war fighters usually based on only a single black and white photograph of an aircraft...lighting conditions can really make a world of difference on how camouflage schemes look especially if there is light reflection on a semi-gloss finish.
Luckily today there is a lot more information available on Luftwaffe paints and camouflage schemes to avoid the pitfalls of guessing what paint scheme a particular aircraft seen in an old photograph might have worn.
That black and white image of my Ta 183 is a good example of the problem trying to decipher what the camouflage pattern is on it because of the gloss finish and light reflection, the right wing in particular looks like it might have been painted in a much lighter color than it really was.
hmy: Matrixone
Thanks Luiz.
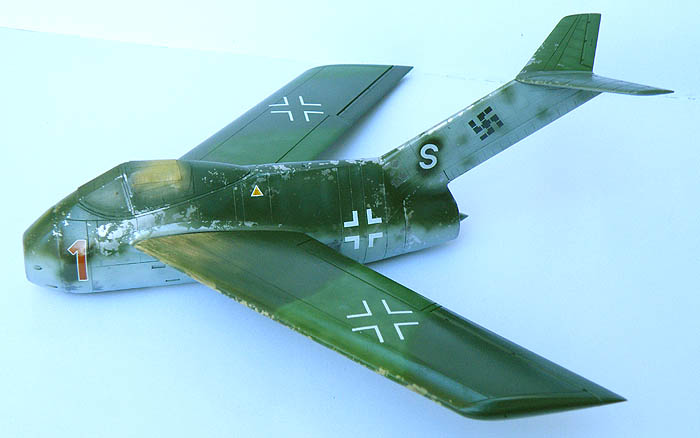
A few more pictures, not too much was done on this model today except for lightly wet sanding the national markings to give them a bit of weathering, they don't look that good here but do have a worn look to them and after the flat clear coat they should be fine.
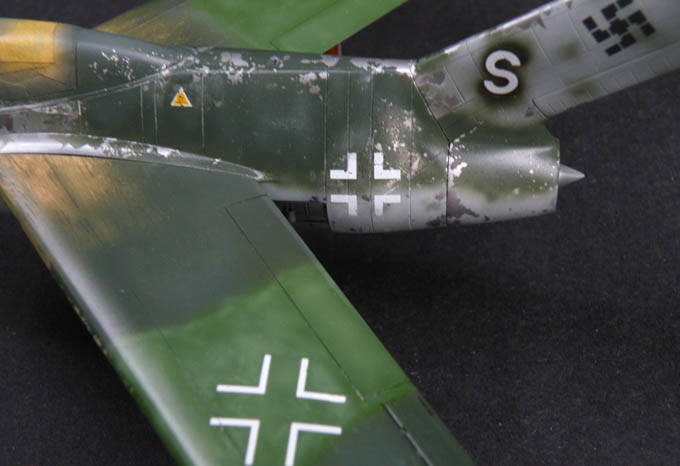
After wet sanding the markings some of the Future was sanded down too and the residue settled in the panel lines and made the look light gray, since these pictures were taken I washed off the model again and removed the sanding residue from the panel lines.
I also sanded down the yellow triangle markings for the fuel filler ports.
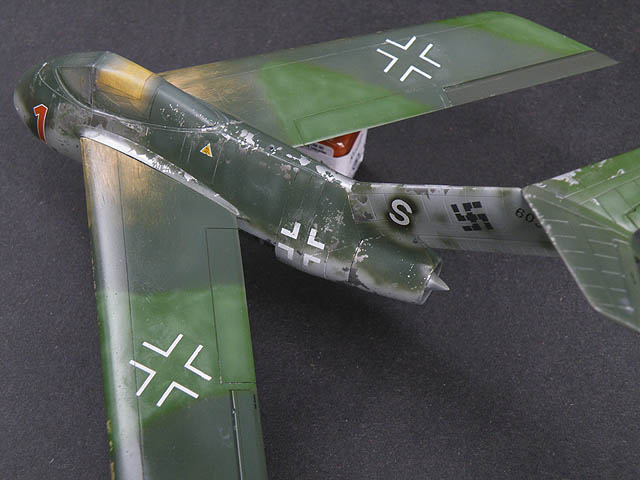
Here is a picture of the undersurface, notice the plain black simplified crosses. This style of cross was used often on the undersurface of the wings on Fieseler build Fw 190D-9's and thought they would work well on this model of W.Nr. 603008 built by Fieseler, this aircraft was the 8th of the first batch of 20 Ta 183A-1a's built, all other Ta 183's were the Ta 183B-2 version which had the more powerful He S 011 jet engine fitted.

Matrixone
A few more pictures, not too much was done on this model today except for lightly wet sanding the national markings to give them a bit of weathering, they don't look that good here but do have a worn look to them and after the flat clear coat they should be fine.
After wet sanding the markings some of the Future was sanded down too and the residue settled in the panel lines and made the look light gray, since these pictures were taken I washed off the model again and removed the sanding residue from the panel lines.
I also sanded down the yellow triangle markings for the fuel filler ports.
Here is a picture of the undersurface, notice the plain black simplified crosses. This style of cross was used often on the undersurface of the wings on Fieseler build Fw 190D-9's and thought they would work well on this model of W.Nr. 603008 built by Fieseler, this aircraft was the 8th of the first batch of 20 Ta 183A-1a's built, all other Ta 183's were the Ta 183B-2 version which had the more powerful He S 011 jet engine fitted.
Matrixone
Dave The Chef
Member
I agree with Luiz, your work is always a pleasure to behold Les B)
Thanks for the comments guys!
I am really looking forward to getting the flat clear coat put on this model, its so hard to judge exactly what the weathering will look like until then.
My plans are for the final bit of paint chipping to be done on it after the flat clear coat is put on to give the impression of the paint chipping or wearing off was done over a period of time and not all at once.
Matrixone
Similar threads
- Replies
- 171
- Views
- 38K