• Modelers Alliance has updated the forum software on our website. We have migrated all post, content and user accounts but we could not migrate the passwords.
    This requires that you manually reset your password.
    Please click here, http://modelersalliance.org/forums/login to go to logon page and use the "Forgot your Password" option.

Advance to Arnhem 1/16 scale

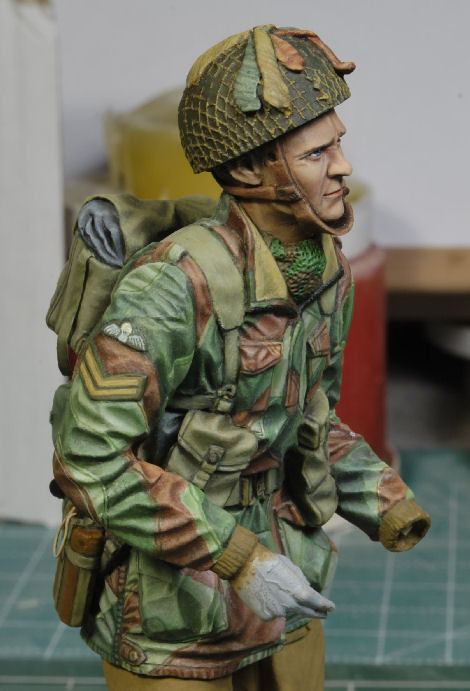
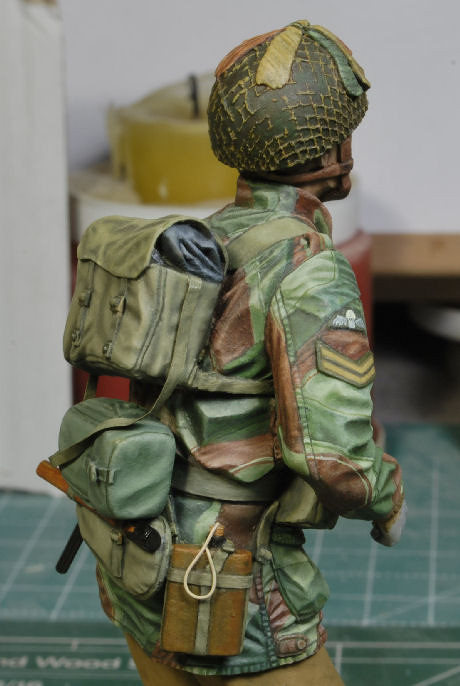
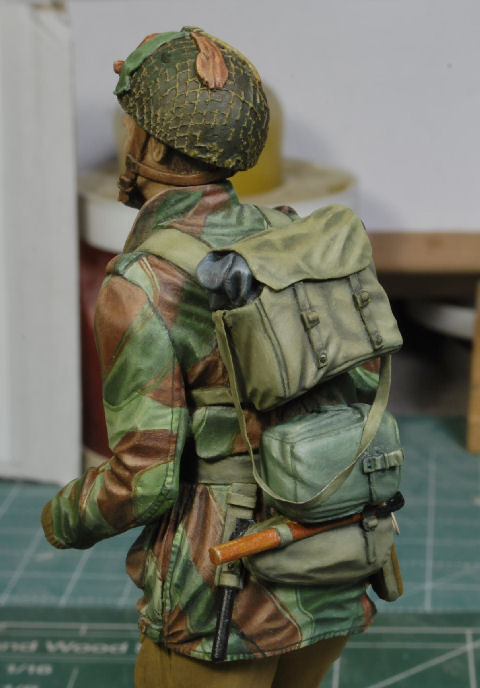
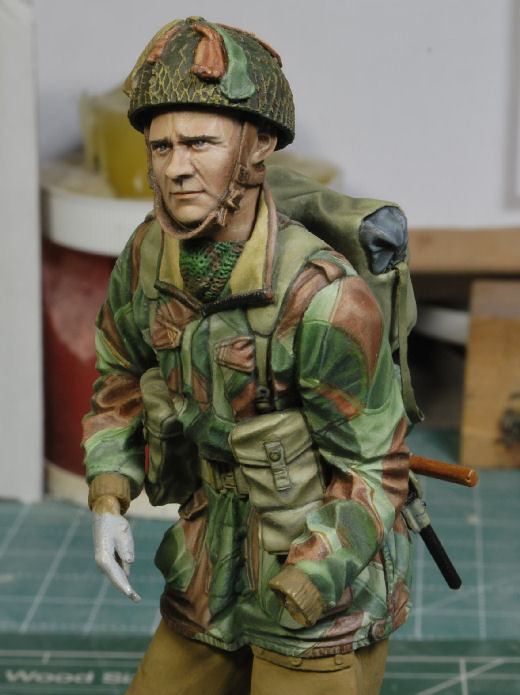
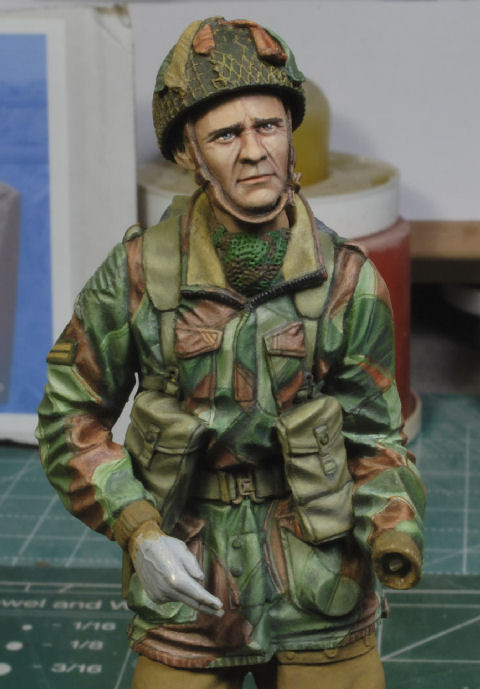
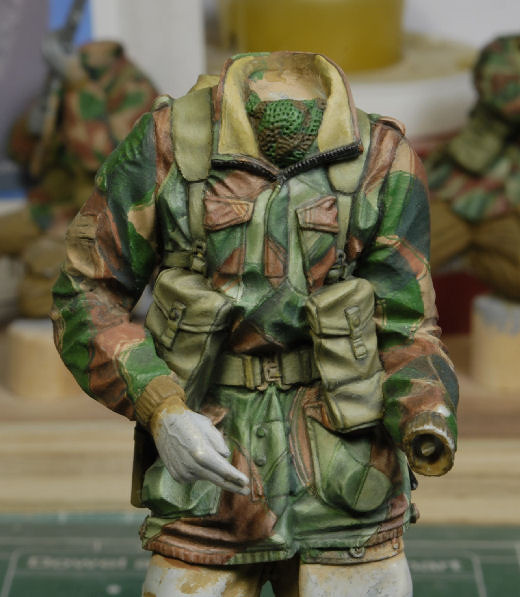
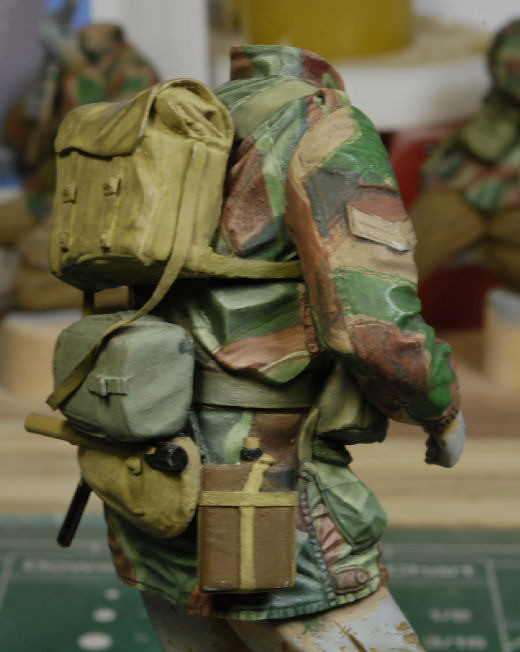
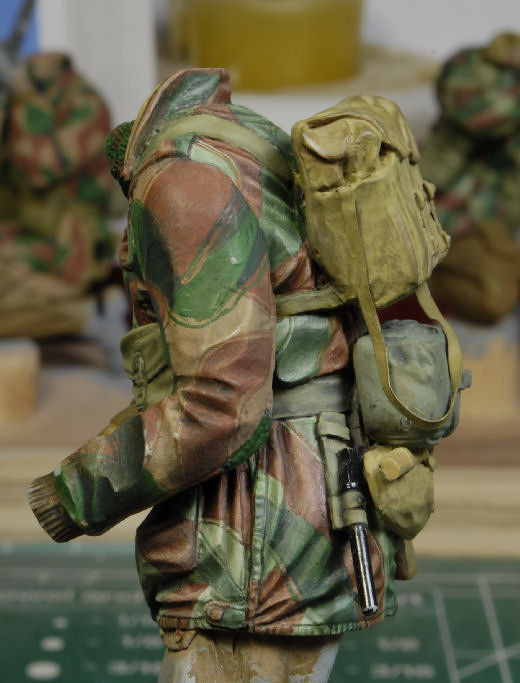
Back at it again. I completed the front and back of the smock on Corp Reynolds. Since I was already up front the ammo pouches, belt, and shoulder straps were completed as well. Once the arms and gear are finished I will paint the hands on all the figures before "Dull Coating" them, then paint all the brass and metal parts.

Shading and highlighting this particular camo pattern can appear daunting and intimidating, but actually, once you get into it it's just a matter of changing out colors. I just followed the natural light fall projection in each area, switched the colors already on my palette and carried on. It is time consuming, I'll tell ya that much, but it's been a fun experience.

_DSC0118b-vi.jpg
_DSC0116b-vi.jpg
_DSC0117b-vi.jpg


More to follow soon. Cheers, Ski.
 
this is just too much ... say the truth, these are 1:1 wax cabinet figures, right? it looks just great
 
Corp Reynolds Done for Now

Plugging along I was able to complete the upper torso of Corp Reynolds. I still need to address the scarf, but for now this figure is going to be set aside while I start figure #3.

The Corporal patch and Para patch were both hand painted, I couldn't get a quality print from my printer. They were not difficult, but the Para patch had to be done more than once, lol.

This Denison smock camo pattern is time consuming and very detailed. Though I did not actually get this pattern nailed to a "T" I'm calling it good. There comes a time when you just have to move on and get er done. I do like the tones on this figure in particular, so I'll carry that forward for the last two.

Once again, when all the figures are completed I will "Dull Coat" all of them at once and go back and paint the brass buckles and snaps.

_DSC0122b-vi.jpg
_DSC0124b-vi.jpg
_DSC0128b-vi.jpg
_DSC0127b-vi.jpg
_DSC0130b-vi.jpg
_DSC0119b-vi.jpg


So far I'm having a blast and I'm looking forward to getting to the base. I'm gonna say this again, when you have finely sculpted figures it makes the painting process a heck of a lot more fun! Great work Stevo!!


Thanks for watching and more to follow. Cheers, Ski.


P.S. I better not forget the 5 o'clock shadow, shall I?
 
Ok, it's amazing what you'll find when you really take a microscope to you own pics, yikes! I see a dark blob/spot on the upper left portion of the helmet. Not sure what the heck it is, but it "will" be addressed.

Call it out if you see any anomalies, minus the dust particles, I'm still lookin, HA! ;)
 
Yeah photos of your build will always make things look different and thus you will find things.

Really looking good Steve! I learned that good quality figures are always more fun to work on and paint. If the sculpt isn't right, no amount of paint will correct it.

Awesome.gif
 
Been away from the computer a lot lately, but was happy to get back on and see your progress. The camo on the smock is outstanding, Brother!
 
Back
Top