• Modelers Alliance has updated the forum software on our website. We have migrated all post, content and user accounts but we could not migrate the passwords.
    This requires that you manually reset your password.
    Please click here, http://modelersalliance.org/forums/login to go to logon page and use the "Forgot your Password" option.

Point Du Hoc

Steve Ski

Well-known member
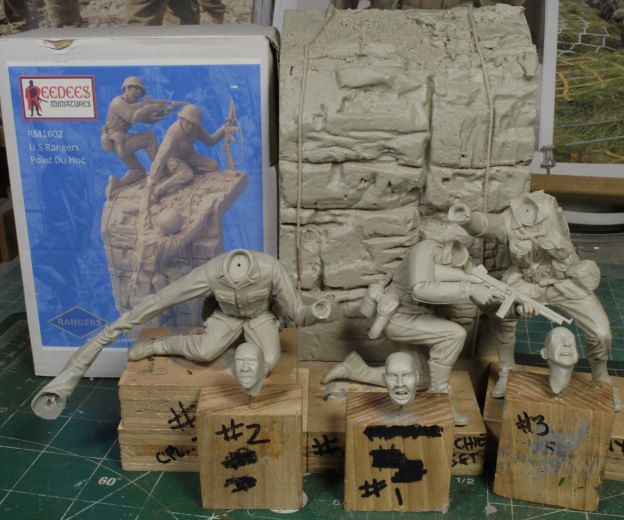
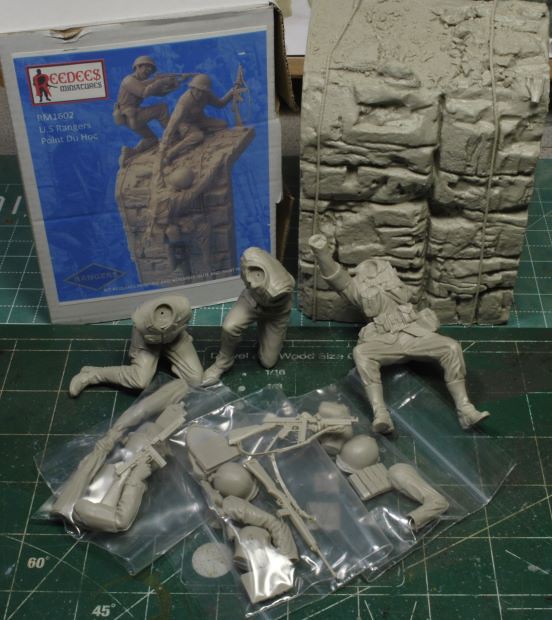
This is the wonderful set: RM1602, US Rangers, Point Du Hoc, vignette from Reedees Miniatures in 1/16th scale. These resin figures and base are created and sculpted by Steve Reedees. This set can be found at: https://sites.google.com/site/reedeesminiatures/figuresaccessories/116-120mm

When you open the box the first thing you see is every parts set is carefully packaged and separated according to each figure within the set. The casting is incredible, and I’ve never seen anything but top-quality work coming from Reedees Miniatures, quality control is top shelf!

Call me biased, but I’ve worked with several of Steve’s figures, from 1/16th to 200mm, including weapons kits from the armory on his website. The kits have always been reliably well done, clean and crisp, requiring minor clean-up. This makes a painter like me very happy. BTW, the weapons are incredibly well done, too, and accurate. Did I say that already?

Seeing this set makes the painter in me want to get after it and get to “sniffin some paint and gluin my fingers together”. Sorry, I had to include my personally coined phrase on this set, it’s that good. Let’s just hope I can do it justice. So, here we go, let’s get er done!
_DSC0372b-vi.jpg


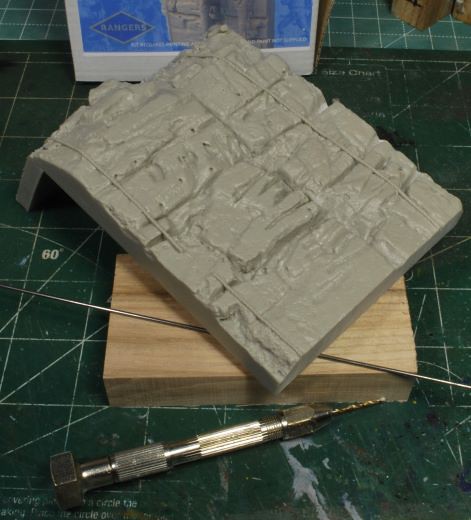
As we get further along, I’ll add a few pics of the rock wall section. Wow, very well done and minor slag as can be expected, but nothing needing any serious adjusting or heavy filing. I’ll break each figure down so you can see the quality of the sculpting and casting.

Quick note; I ran a test fit on the two adjoined figures within this set, spot on fit. This is going to be a fun run from all indications, working on a very welcome planned and carefully sculpted set. Ruck On, Bby!

More to follow, mue pronto, and thanks for watchin. Cheers, Ski.
 
Getting Started

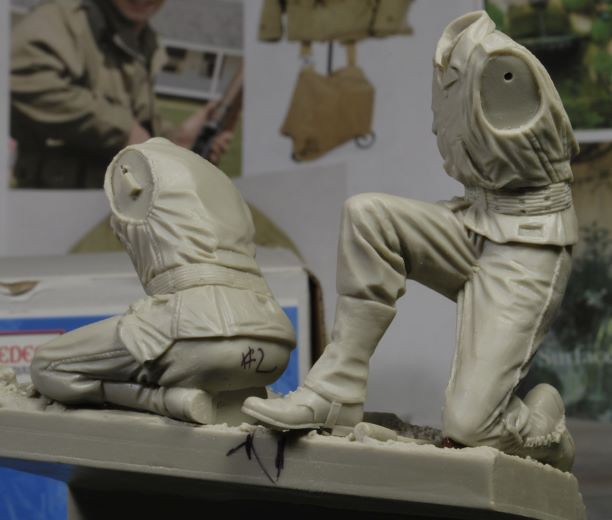
The first thing you’re going to notice from this set is how clean the cast is and the lack of serious seam work required. I only found a few areas requiring attention and most of those were found after the primer coat.

When you get a set of figures like this the clean-up process moves quickly and the fun begins much sooner. After all, we know there will always be some clean-up, but what we’re really after is the fun of painting. This is pretty standard for Reedees Miniatures. I am never disappointed, and the craftsmanship is incredible.

_DSC0426b-vi.jpg
_DSC0427b-vi.jpg
_DSC0429b-vi.jpg


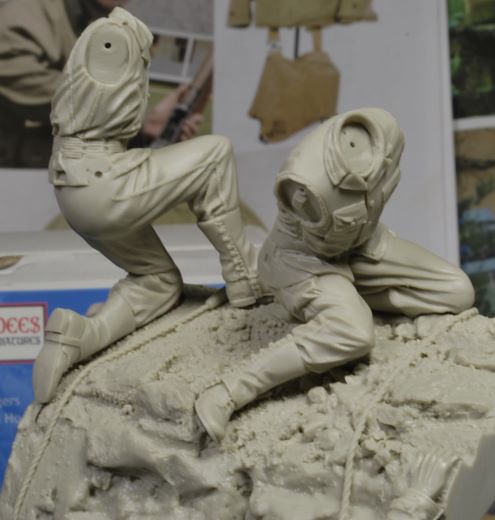
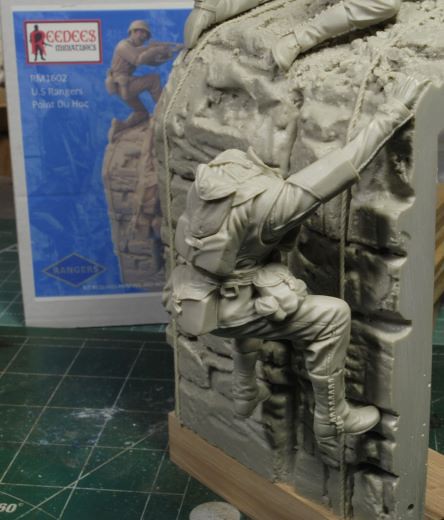
The climbing Ranger fit right into his slot and hung there without any form of aid, meaning, he is very well placed. The other two were temporarily set in place so I could get a general idea of how this set will end up on the base.

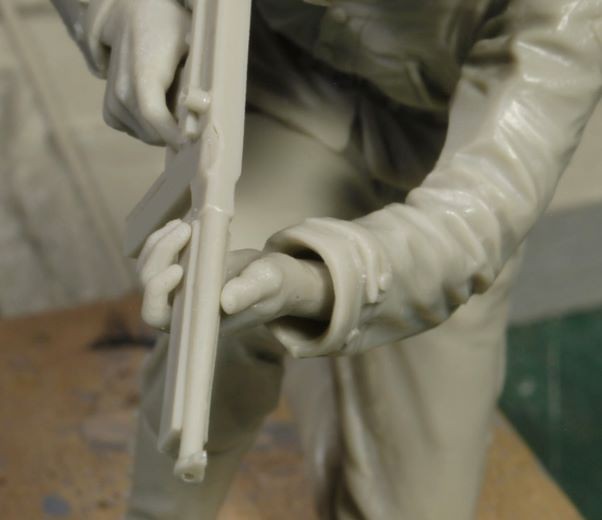
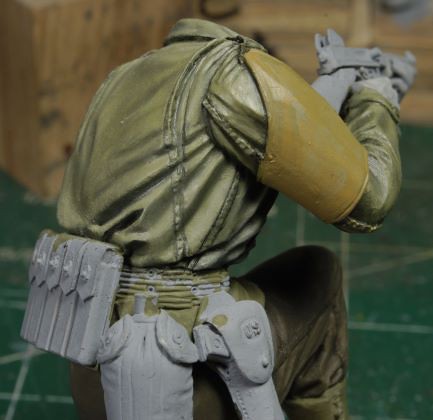
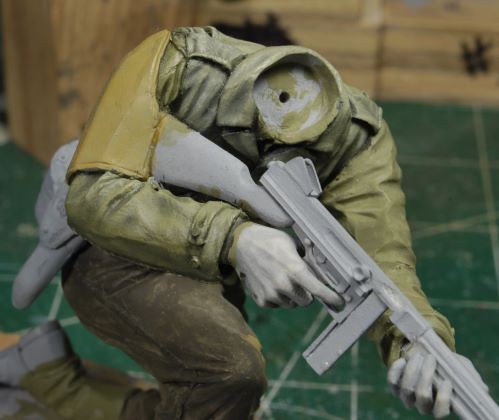
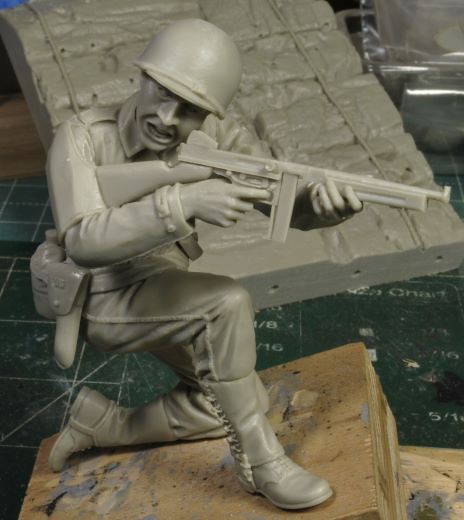
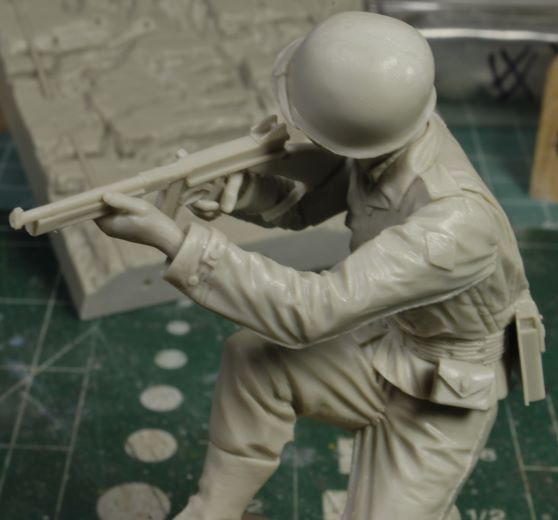
After the general clean-up I began test fitting the arms, hands etc. The way Steve worked these figures is impressive. The arm fits snuggly and fits well, avoiding the need for any putty or filing. You will also notice the support hand for the Sgt. fits into its sleeve and tucks right under the Tommy gun fore stock naturally. I can see there was a heck of a lot of time taken to make this grip look realistic. Once again, the craftsmanship is glaring on this set. You can see from these photos just how well the arms lock into the shoulder. There are also keyways and pins that assist in the alignment, another great plus.

_DSC0433b-vi.jpg
_DSC0434b-vi.jpg

_DSC0435b-vi.jpg
_DSC0437b-vi.jpg

_DSC0439b-vi.jpg
_DSC0440b-vi.jpg


The set is now ready for some primer and a final review of each piece to catch any seam lines or small casting holes. This process was quick and easy, not much had to be done.

_DSC0443b1-vi.jpg


Base Stand Set

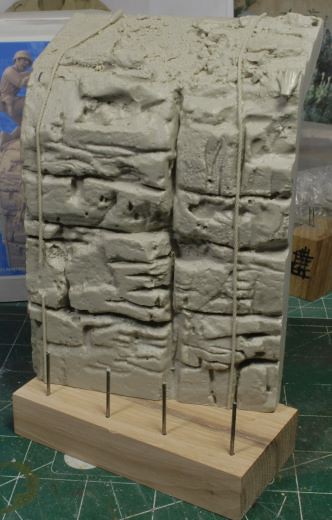
For the base I pilfered a scrap piece of Rustic Hickory from the shop and cut it to size. I sanded it and pinned it to receive the base, then later covered it with blue masking tape to avoid scratches and dings. There was one small rope section that broke off which was replaced with twisted copper wire to match.

_DSC0422b-vi.jpg
_DSC0432b1-vi.jpg


Primed and Base Coated

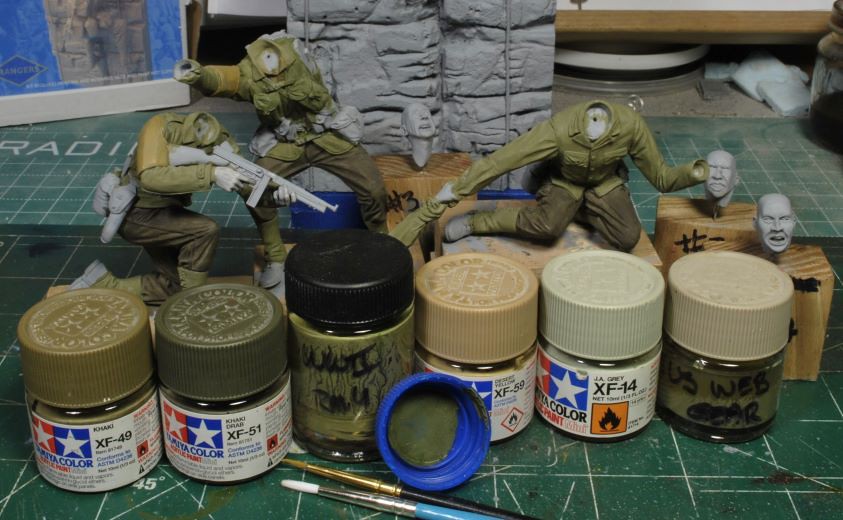
After a good coat of Floquil Primer and inspection I moved right on to the base coat. As you can see from the photo, I used Tamiya paints and made a few custom colors for web gear and other parts.

_DSC0444b-vi.jpg


As per my standard process I will begin with the heads and move onto each figure in order. So, let the fun begin!

_DSC0448b1-vi.jpg


More to follow soon and thanks for watchin. Cheers, Ski.
 
Let’s Face It, Again!

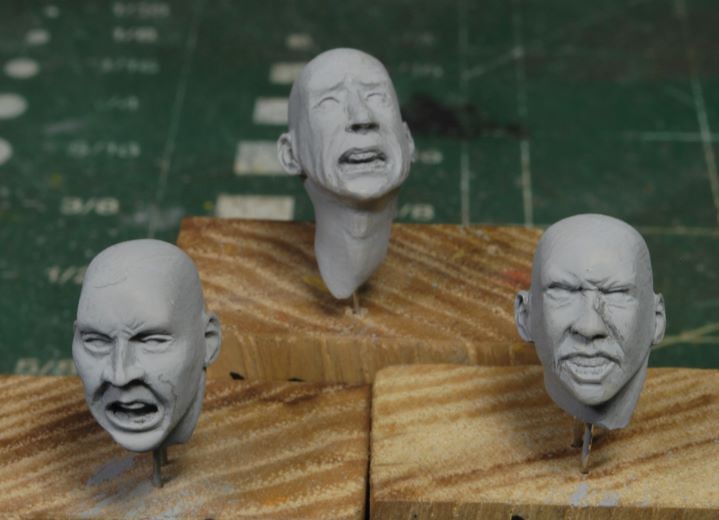
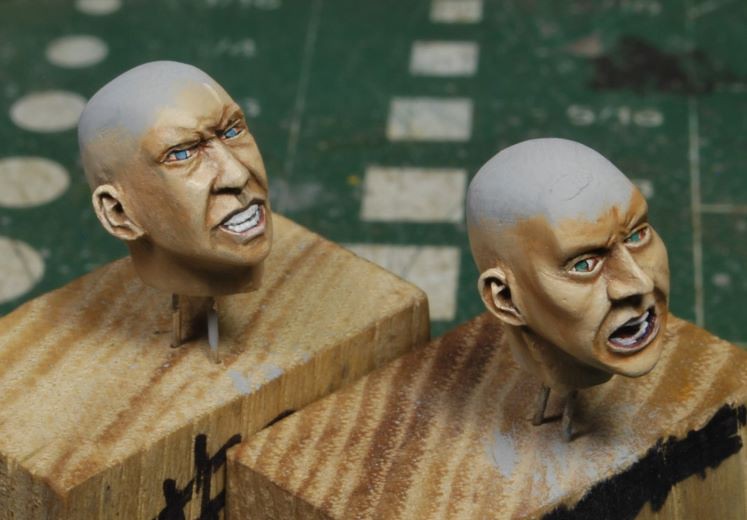
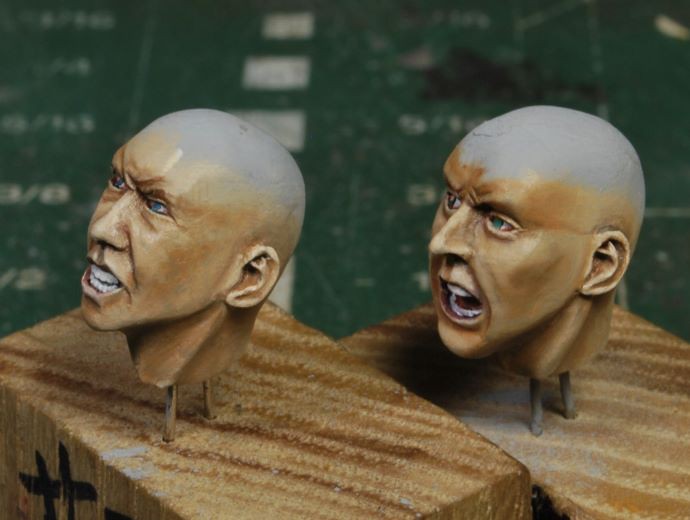
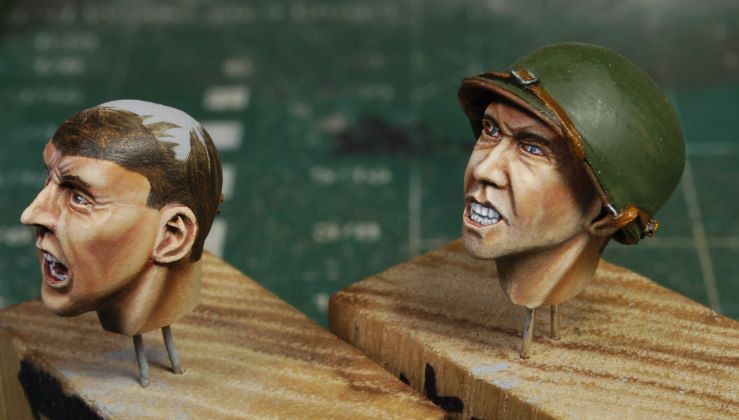
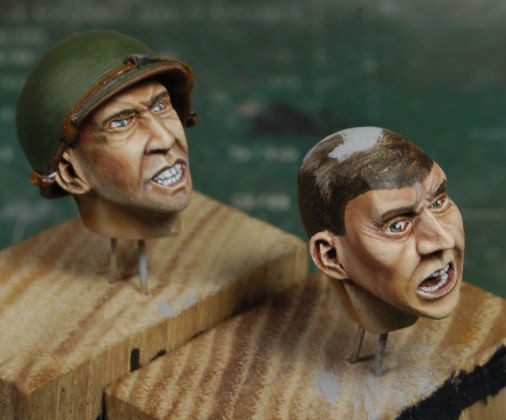
Getting started on the faces is always a re-learn process for me, regardless of how many faces I’ve painted in the past. It may sound like a pain in the hinny, but I’m used to it and expect it. This process is not a negative approach, but what I would call a warm-up session. So, I pick the likely candidate to be the ginny pig, or “crash test dummy,” and off I go. It’s always “crash and burn” on the first paint fling, so crash test dummy would be the appropriate term, HA!

_DSC0450c-vi.jpg


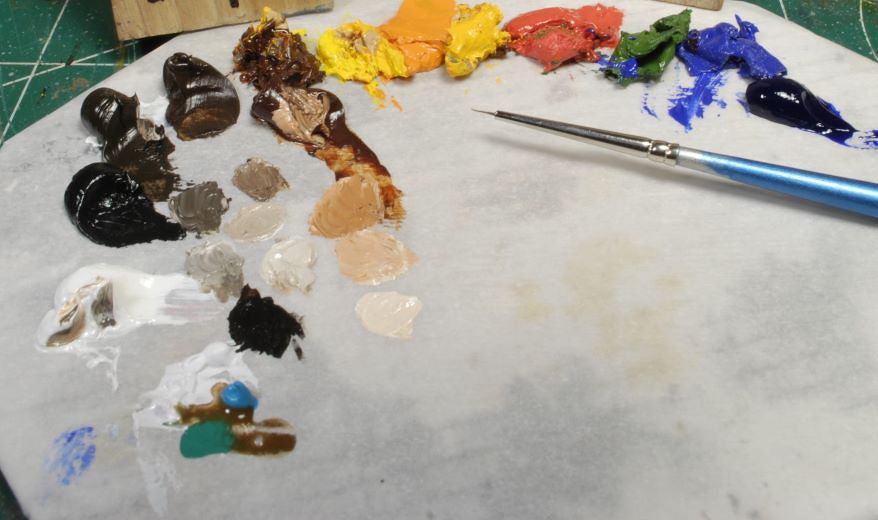
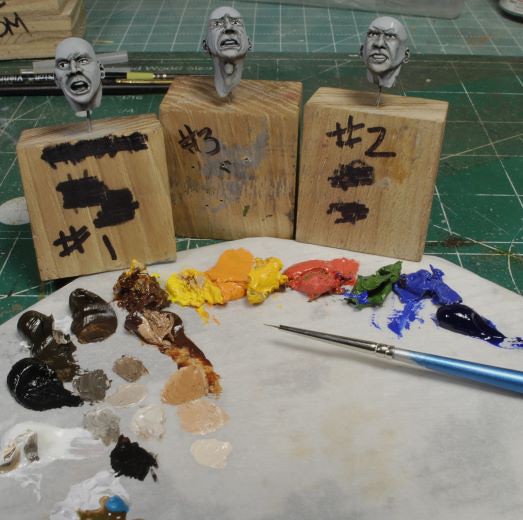
My mix for the flesh work is very simple, as you can see from the palette, Windsor & Newton Burnt Sienna and Titanium White. To the left side of this string of tones I also have a small run for Brunt Umer and another for Raw Umber. These two darker tones are used sparingly to give depth where needed, such as above the eyes, under the lower lip, under the chin, behind the ears, and the inside of the mouth. Very rarely will you actually see a solid black tone in real life, so I rarely if ever use it on my flesh work. Working each shade from dark to light on the palette I now have the basic mixes for the flesh work. Time to fling some paint!

_DSC0450b-vi.jpg


With the colors laid out on the palette I run an initial pass with a very light and very thinned shadow tone in all the deep recesses, then come back and lightly spread, or fan, those out with a damp brush. This process really needs to be very thin and light or they will all become crash test dummies in a hurry! I use a mix of Ivory Black and Raw Umber. After the initial shadows are placed it’s time to work the main flesh tones.

_DSC0453b-vi.jpg


I didn’t take any sequential photos of the process, because I really don’t like to disrupt the momentum once I get into the grove, it kills the flow. I have taken SBS sequential photos in the past on prior builds, so I won’t be doing that on the facial work here. I will again refer to Daria Callie’s oil painting videos for quick reference.

https://www.youtube.com/channel/UCyGgRLbgcXjON9ZS5DaqMOQ

Yes, Daria works on canvas and we work three dimensional, but I find the concept is the same for oils. I found that by following the basic concepts of her approach I have eliminated a lot of the “heavy oiling”, or over painting, which can lead to a blotchy appearance if not corrected. If this video helps, good deal, and if not, forget about it.

_DSC0457b-vi.jpg
_DSC0461b-vi.jpg


There is still quite a bit of work to be done on both of these faces, such as feathering in more details, refining certain areas, but the initial passes have been made and the base tones will need to set up and dry for a bit.

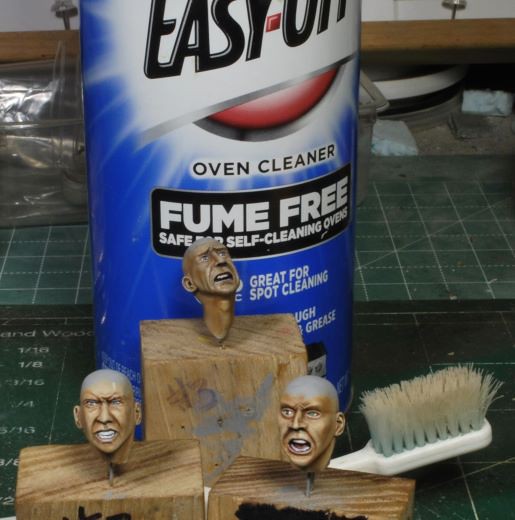
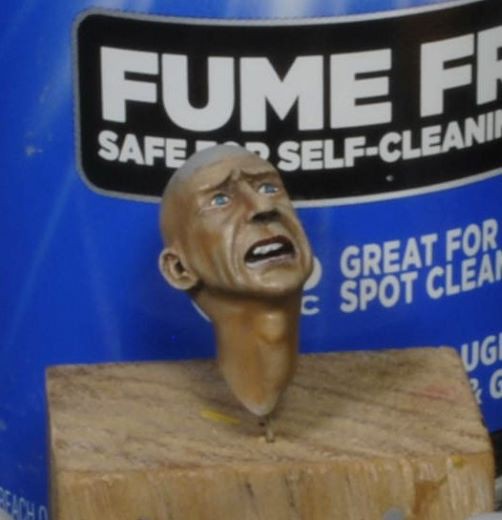
One handy tool in the model bunker is the trusty Oven Cleaner. As you can see, this fellow is getting his bath for a re-do. Actually, this will be his second bath. It’s not uncommon to make three runs before I get back into the swing of things.

_DSC0454b-vi.jpg
_DSC0454c-vi.jpg


More to follow soon and thanks for watchin. Cheers, Ski.
 
Last edited:
Feathering in the Details

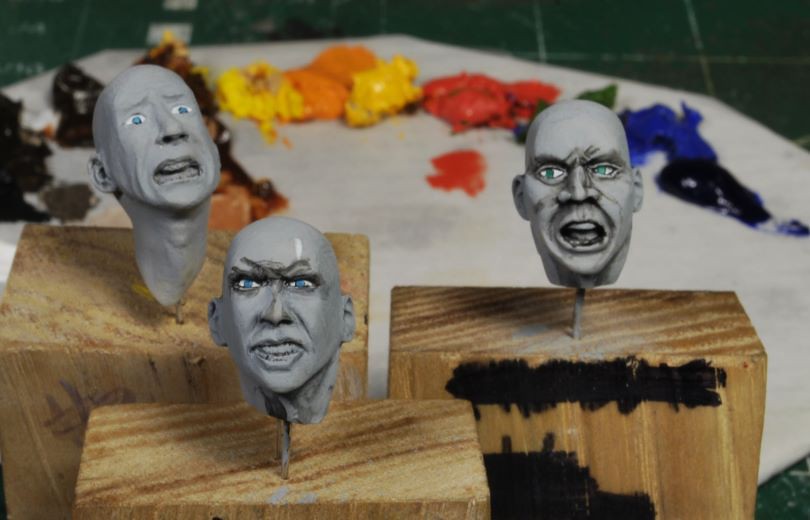
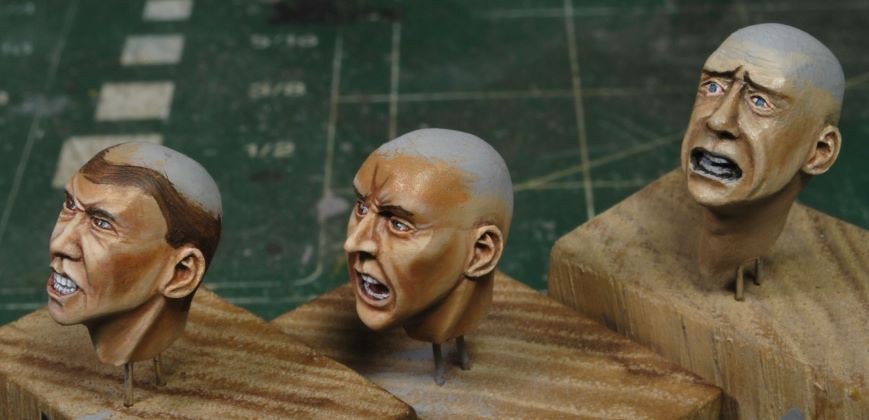
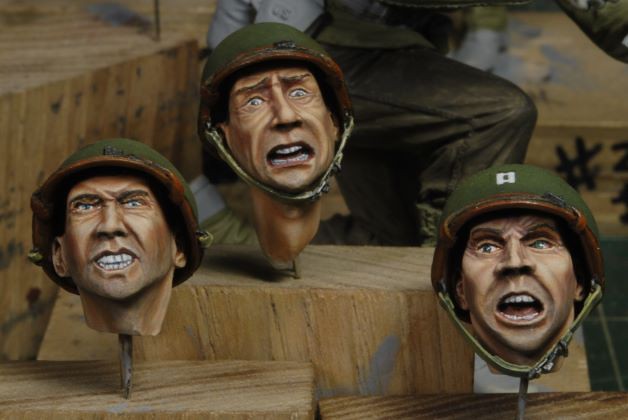
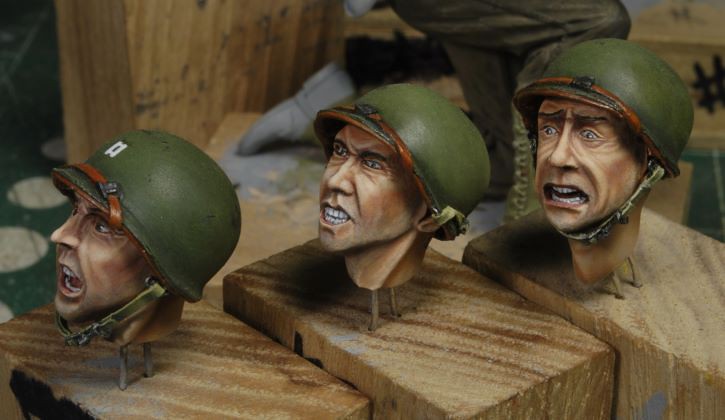
Once the basic facial work has been done and the oils set up for a day or two, I go back over each face and add in more defined highlights and shadows. As you can see from the three faces, they are each in a different phase of this process. Number three just might get another oven cleaner bath, he’s looking pretty shabby, again, what a bummer.

_DSC0462b-vi.jpg


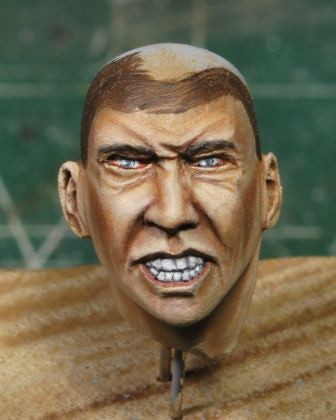
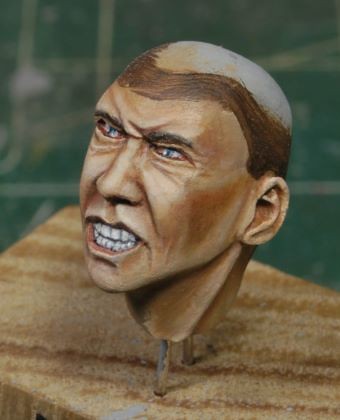
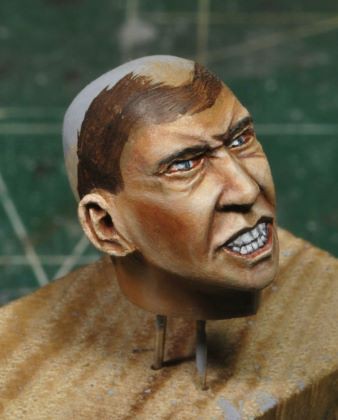
Using a very minute amount of paint I apply in the desired areas and then feather it in using a damp brush. The feathering brush is barely damp at all. We just need the oils to feather into the surrounding areas for a smooth transition. If too much paint is added the work area may become out of cinque with the rest of the face and then it’s a fight to bring it back in without total distortion of the desired tones.

_DSC0468b-vi.jpg
_DSC0465b-vi.jpg

_DSC0466b-vi.jpg


No names for these guys yet, but I’m working on it. This face above has a bit more red on the cheeks than is necessary and will be toned down slightly. There’s still quite a bit to do to just this face alone, but much of the fine tuning will be done in a few days.

More to follow soon and thanks for watchin. Cheers, Ski.
 
A Little More Detail

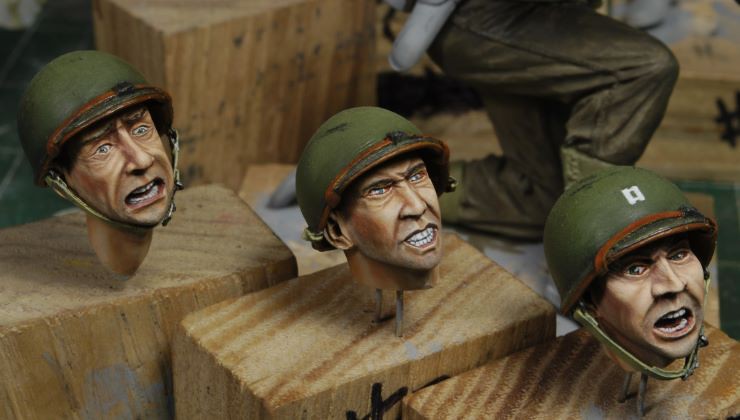
Adding a few more minute details it appears the number two figure is pretty close. I added the helmet and took care of the leather work and buckles/clips. I also added in the 5 o’clock shadows. Number one will be touched up a little more before his helmet is attached, then off to work Number three.

_DSC0470b-vi.jpg
_DSC0472b-vi.jpg


More to follow soon and thanks for watchin. Cheers, Ski.

P.S. We now have names for these guys; #1 is Walt, #2 is Bruce, and #3 is Luke.
 
Finishing Faces, Working upper Torsos

The faces for this crew are now complete minus a few touch-ups here and there. Luke, the terrified fellow, was not wanting to cooperate with my brush. After I convinced him, that Bruce wasn’t going to let him go, he began to be more manageable.

Sometimes faces just don’t want to work, so I’m finding that working them over several days, feathering, and filtering necessary tones works best. Poor Luke, he’s the cleanest kid on the block with four oven cleaner baths to his credit, HA! I have also added the 2nd Ranger Battalion emblem on the back of the helmets, not seen in these photos. The helmet tones will be adjusted more towards the drab range, btw.

_DSC0473b-vi.jpg


_DSC0476b-vi.jpg


_DSC0480b-vi.jpg


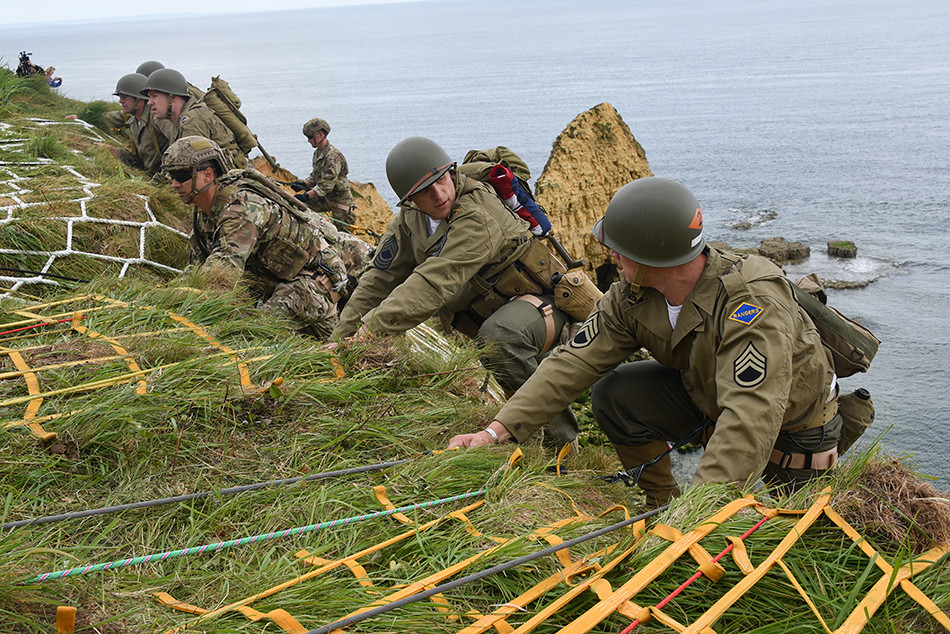
Reference photos show a myriad of tan and olive drab shades for WWII US GI uniforms, so I won’t be too worried about the shade I’ve chosen. The button and rivet counters can now relax, it has been decided. I have matched the oils to an almost exact tone by taking a dab of oil and swiping it onto the photo posted on my easel. It may not appear so close now, but it will later when the oils dry.

POINTEDUHOC060520191392127702-vi.jpg

https://www.dday-overlord.com/en/normandy/commemorations/2019/photos/pointe-du-hoc More photos can be found on the net referencing the D-Day Pont Du Hoc 75th Anniversary.

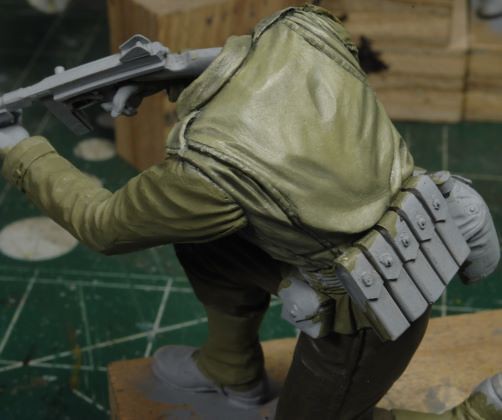
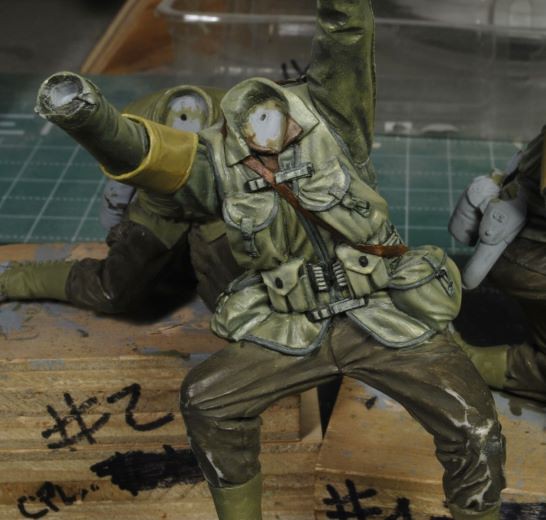
I decided to start with Capt. Walt and get some oils on the canvas, so to speak, while Sgt. Luke was drying for a bit. I really do like how Steve works these wrinkles and folds, very crisp and clean, much easier to paint. I will be working my way down the figure as I usually do.

_DSC0484b-vi.jpg


_DSC0486b-vi.jpg


_DSC0487b-vi.jpg


I will address all three upper torsos before I move onto the next phase while the palette still has a good oil mix. Remixing another batch days from now may not come out within the same tonal range, and that is what I am trying to avoid here, offset tones.

Progress is a bit slow, but steady, so more to follow very soon. Thanks for watchin. Cheers, Ski.
 
Getting Luke Up to Speed

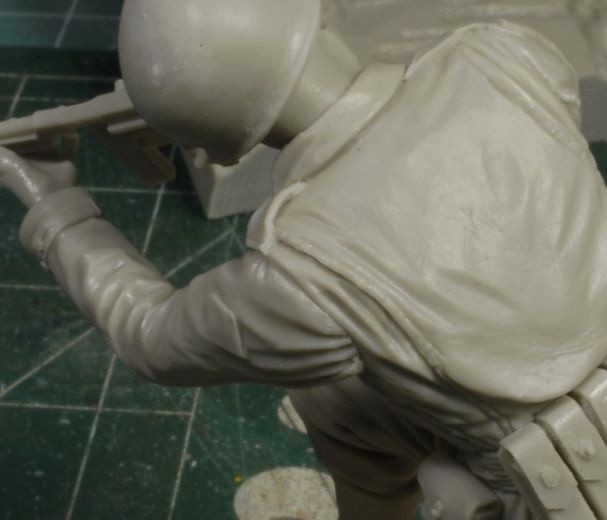
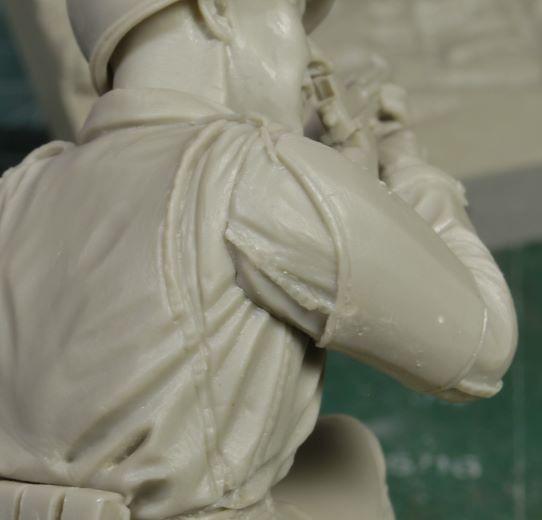
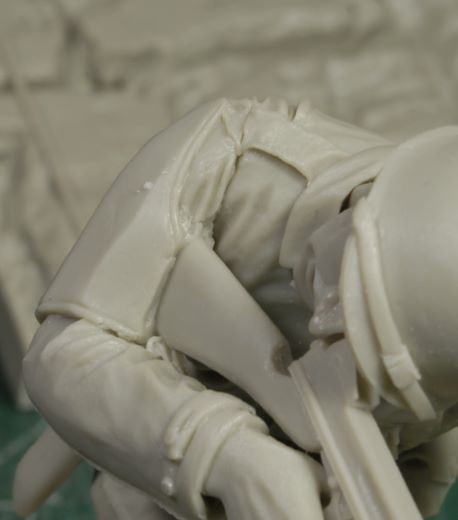
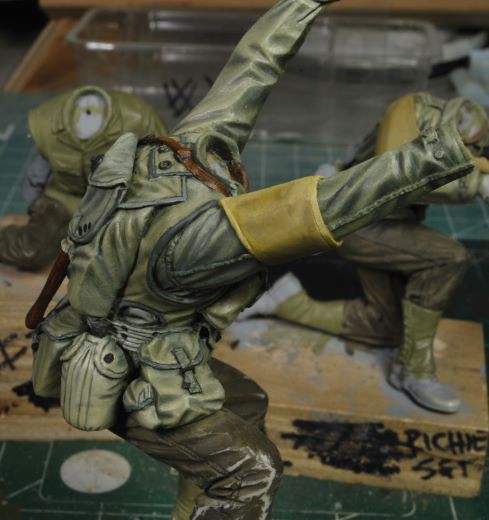
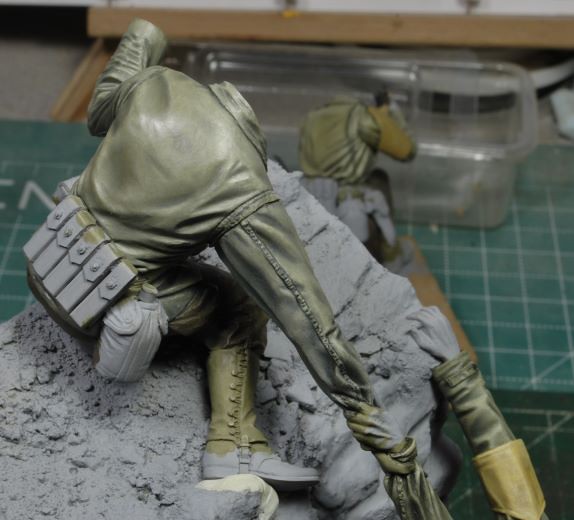
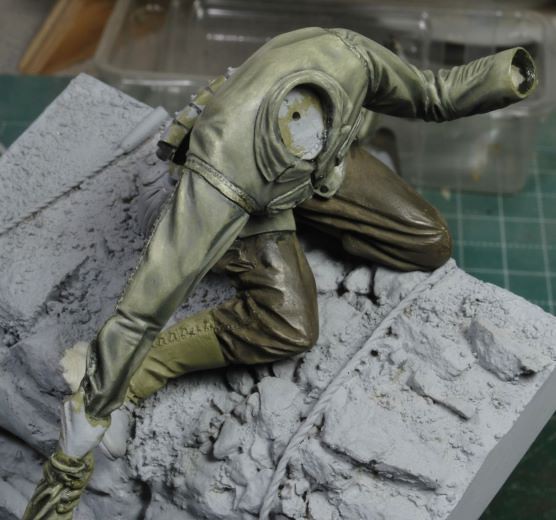
I started to work on Luke’s jacket and decided that since the area was so small, I would continue on and work his vest before moving on to Bruce. What I did not take into consideration was the coupling of two figures together. I had never worked adjoining figures in the past, so this was a learning experience for me. I can clearly see that sculpting adjoining figures is not an easy task but rather a complicated one.

I did perform a test fit to the base with both figures before I started painting and thought everything was good to go. Right about the time I was finishing up Luke’s gear something told me to recheck before I kept going. Sure enough, I boofed! What I finally realized was that I had not aligned Bruce’s arm correctly to accept Luke’s shoulder section. That slight off-line attachment of Bruce’s arm caused a good 3/16th of an inch alignment problem for Luke on the cliff.

You might think, ok, do some work on the cliff to remedy the issue, but that didn’t’ work so well. That caused even more problems. So, I worked in some Epoxy Sculpt to clean up my mess on the cliff and began to rework Bruce’s arm for a much better fit. Long story short, a lot of time was wasted because I neglected to retest the fit when the arms were glued in place.

Well, like this was the first time I’ve messed up, right? Na, it happens all the time, lol. This was a simple oversight that required a lot of unnecessary tweaking. Lesson learned once again. Ruck Onward.

_DSC0491b-vi.jpg
_DSC0493b-vi.jpg


_DSC0495b-vi.jpg
_DSC0497b-vi.jpg


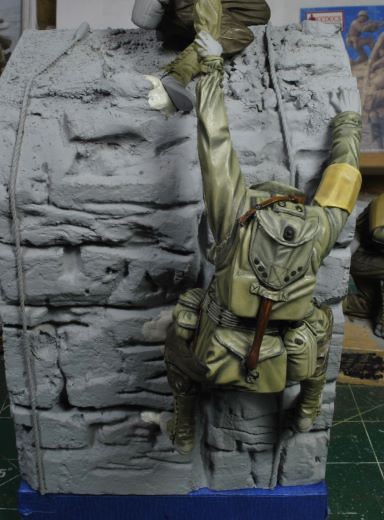
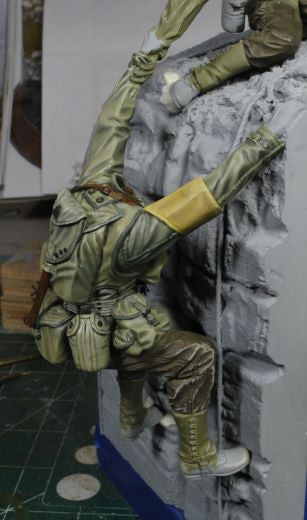
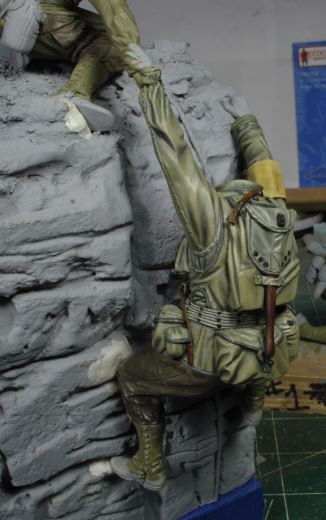
I need to point out now that the details on Luke’s vest are incredible and it’s obvious to me that Steve has taken a lot of time and expended a lot of effort to make this vest accurate with crisp clean details. Kudos, Stevo!

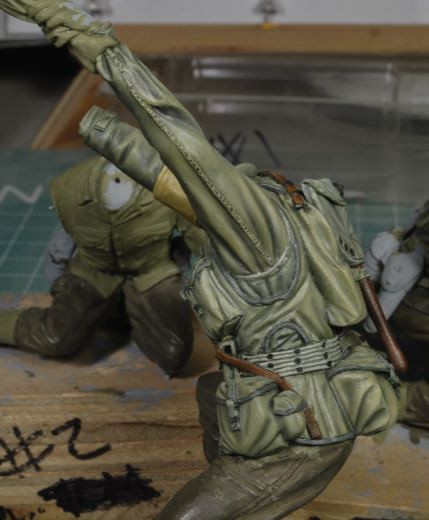
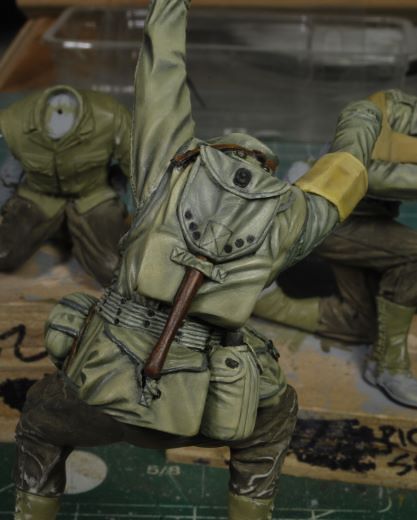
You may also notice that I have a tonal variation issue with Luke’s left arm. That arm section was not attached when I started to paint Luke and once again I boofed, this time on the tones of the jacket arm. Like I said, having never done adjoining figures before, I missed details that otherwise should have been addressed much earlier. The tonal variation has been addressed since taking these pics, and still a bit more needs to be done, but that is a minor issue which is easy to address compared to an arm realignment.

_DSC0499b-vi.jpg
_DSC0503b-vi.jpg


_DSC0505b-vi.jpg


I would also like to add that the precision of the fit for Luke on the cliff is incredible. Steve has sculpted the arm to hand fit, and boot placement, so well that Luke can hang on by himself without any anchor or glue, impressive. Luke is pulling a big fake with that scared look on his face, isn’t he? HA!

I will be working Bruce’s arm and his jacket together to get the same color tones before I go any further. I really don’t fancy having to go back and address another boof, two is enough for now, wouldn’t ya say?

More to follow soon and thanks for watchin. Cheers, Ski.
 
Working the Shoulder Fit

Just before I shut down the bunker to build another cabinet, I was working the shoulder fit. Once these two figures are solidly anchored to the cliff, I will do some minor shaving and filing to clean up the rebuilt connection and then paint any areas required. Remember, there never was a fit issue until I neglected to pay attention to the fit when I first glued the arm in place. Steve did a great job making this connection, I just boofed it up, Lol.

_DSC0507b-vi.jpg


_DSC0510b-vi.jpg


Once the new cabinet is finished, I will resume this vignette. It shouldn’t be too long; it’s a simple design and I have the right tools.

Thanks for watchin, more coming soon. Cheers, Ski.
 
Back
Top