• Modelers Alliance has updated the forum software on our website. We have migrated all post, content and user accounts but we could not migrate the passwords.
    This requires that you manually reset your password.
    Please click here, http://modelersalliance.org/forums/login to go to logon page and use the "Forgot your Password" option.

Dragon M48A3 Mod B Viet Nam 11th Armored 1969

Well, I took some photographs this morning, hopefully they will help and not be too late:

DMLPattonHull01.jpg

Extreme close up images like these help me find gaps which I will fill with thick CA at this point.

DMLPattonHull02.jpg

The seam seen at the left is hidden behind the mud guards.

DMLPattonHull03.jpg

The engine deck needs work in the form of 'cake frosting' welds, done with Gunze Sangyo's Liquid Putty, and casting surfaces for which I use Mr. Surfacer 1000, also from Gunze Sangyo.

DragonM48A3Turret01.jpg

Attach the piece to eliminate the seam and add casting texture. I need to add the casting marks (I chose the front one, option 1) and then add a second coat of Mr. Surfacer 100.

I blame Mr. T's M103 build for having me start this kit!
:evil:

Hopefully, it will end up like this:
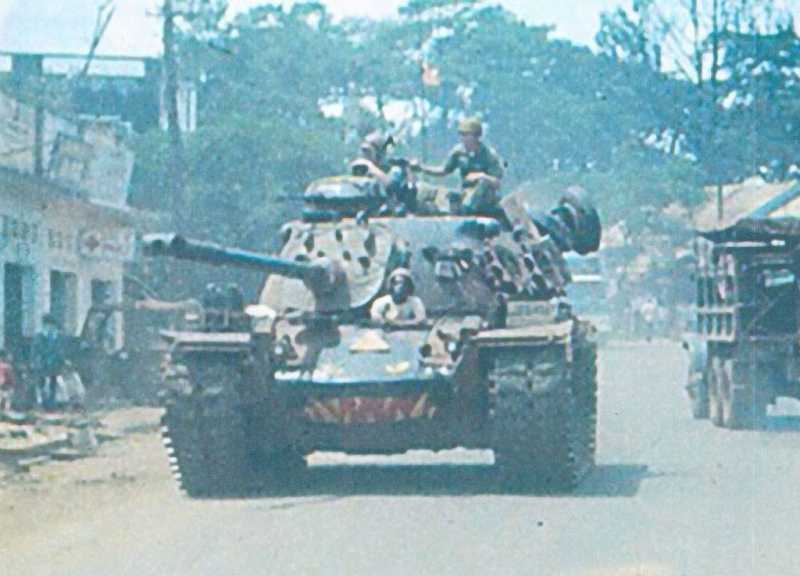
h262eb0d.jpg


Regards,
 
Reference photos :good:

this is a M48A2 engine deck

M-48A22C_p23.png

M-48A22C_p22.png


M60 Slick engine deck

IMGP4570.jpg

IMGP4578.jpg


M48 lower hull details

M48_016.jpg

M48_017.jpg

M48_018.jpg

M48_019.jpg

M48_039.jpg

M48_040.jpg

M48_043.jpg

M48_056.jpg

M48_057.jpg

M48_058.jpg

M48_060.jpg

M48_061.jpg

M48_062.jpg

M48_073.jpg

M48_072.jpg

M48_071.jpg

M48_074.jpg

M48_076.jpg

M48_282429.jpg

M48_282629.jpg

M48_282829.jpg

M48_28329.jpg


M48A2 turret details

M-48A22C_p27.png

M-48A22C_p28.png

M-48A22C_p4.png

M-48A22C_p6.png


M48 turret details

278.JPG

M48_281129.jpg

M48_281229.jpg

M48_281329.jpg

M48_281429.jpg

M48_281829.jpg

M48_281929.jpg

M48_282029.jpg

M48_28729.jpg

M48_28829.jpg

M48_032.jpg

M48_033.jpg

M48_037.jpg

M48_047.jpg

M48_048.jpg

M48_049.jpg

M48_050.jpg

M48_077.jpg

M48_078.jpg

M48_079.jpg
 
More progress last night

DSC02111_zps5b0ea001.jpg

DSC02112_zps719ce101.jpg

DSC02113_zpsc86d0315.jpg

DSC02118_zps493d76fe.jpg

DSC02120_zps89015463.jpg


I have to say my biggest disappointment with the kit is the molded on storage box handles :(
DSC02115_zps8c5a2e04.jpg
 
I have to say my biggest disappointment with the kit is the molded on storage box handles

That is strange especially since Italeri's Grand Old M47 has them separately. If you want flat and lifeless, there are some from Eduard but I have a set from Tiger Models for my build:
456963-14091-15.jpg


Regards,
 
Very very cool . Love seeing how you bring this up a few notches in detailing to a whole other level. (y) (y) (y) (y) (y) (y) (y) (y) :notworthy :notworthy :notworthy :notworthy :notworthy :notworthy :notworthy :D
James
 
I took advantage of getting off with a half shift tonight :ro:

added casting texture, casting marks and numbers to the gun mantel
DSC02124_zps7096f827.jpg


also drilled a hole in each of the search light mounts
DSC02123_zpsa91a8fc3.jpg


I started to scratch some new storage boxes for the fenders. Not that the kit ones are wrong. I just find it hard to do damage to them. (more to come)
DSC02127_zps4f6fe40d.jpg

DSC02121_zps88d4ae3c.jpg

DSC02122_zpsb7323ba5.jpg


Last is making a filler piece for the bottom of the turret race.

First the spot that needs filled
DSC02128_zpsad7a02c8.jpg


Next I rubbed the edges with a color pencil
DSC02129_zpsc086c1c3.jpg


I then use scotch tape and cover the spot
DSC02130_zps98298042.jpg


Taking the tape and transfer it to sheet plastic
DSC02131_zps68aa7873.jpg


Cut it the piece out, pull the tape and test fit. The part still needs some filing, but hope someone has not seen that before. :good:
DSC02132_zps18d115b9.jpg
 
Back
Top