• Modelers Alliance has updated the forum software on our website. We have migrated all post, content and user accounts but we could not migrate the passwords.
    This requires that you manually reset your password.
    Please click here, http://modelersalliance.org/forums/login to go to logon page and use the "Forgot your Password" option.

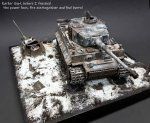
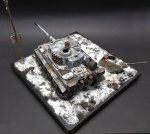
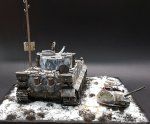
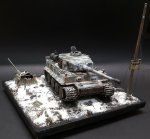
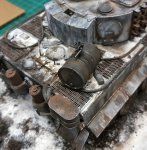
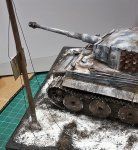
Tiger 1 early - Winter Russia 1942 -completed

Groundwork process for Vegitation, track muck and Mud
VEG:

This is my process for making small stringy vegitation to use on the ground work and for adding to the rocks and dirt in the tracks to add to the realistic detail effect in scale.
Weeds........ cut the lower stringy roots after you shake out the dirt. Then either add them to you mud mix directly or soak them in white glue /water mix for a couple of days then leave to dry out. Paint or don't paint - its up to you and how they apply to the conditions on your base.

20200419_173935.jpg

20200419_171123.jpg 20200419_171127.jpg

Making Russian Mud : Part 1
View attachment

1. Create the mix using pigments, oils dirt and some [very]small stones. Whatever you have that you are familiar with. Make sure the color matches the theatre of operations too.
20200419_175055.jpg
2. Pour / force the mix through a siv into another bowl to reduce the amount of moisture in the mix ,down to the consistency you are looking for. Clumpy, Thick, Medium or Runny.
View attachment
Remove desired bits with long flat ended tweezers to your groundwork or onto your tank.
View attachment 20200419_191229.jpg
 
Last edited:
Making Russian Mud : Part 2
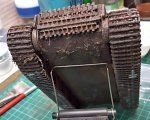
Attaching the mess to your vehicle
w3.jpg

Attaching the mess to your vehicle
so that it looks like it has actually driven through your dio and not arrived by helicopter. :geek:
Like in the last post I used tweezers to push it into the tracks and spread it into clumps in the desired locations.
I leave the turret off so I can hold the chassis while I work, as its all going on down low!:D
'Clump -up' the mud mix to your personal preference. No 'hard & fast rule here, just try to get it to look realistic. Looking at references on the net will help you decide on where - i find pictures of catepillars on muddy work sites help and trucks in the mud, plus the obvious, military photos.
w.jpg w1.jpg w2.jpg w5.jpg w6.jpg w7.jpg w9.jpg
 
Last edited:
FIXING THE CHASSIS TO THE BASE
Thank you all for following , we are in the final run now so not long to go......
This is a simple step - I remove the turret first so that I can apply pressure safely via the interior of the hull. I then apply a strong white glue in lines up and down the track impressions on the ground making sure i don't go beyond the actual position of the tank.
Push tank down into the desired position and let dry for one day - I advise a few test fits and mods before applying the glue and comitting.

I changed my mind on the position of the vehicle and turned it around so that it had backed into the spot next to the T34 turret. I will explain my thinking in the next section.
After this stage is dry, I move on to the blending of the edges of the model with the actual groundwork.
w10.jpg
w11.jpg
 
Last edited:
Completed, bar the figures and the chassis bow MG!
So now I had to blend the ground work with the edges.
When you begin this phase i find that I have to have a clear vision of the final effect that I want. I wanted the tank to have backed in recently but be stationary, which would allow for a little bit of wet mud, a little bit of snow on the tracks and some new freezing on the track fronts where the moisture has stayed and not been thrown off so much as at the other end [at the rear}.
20200426_004958web.jpg

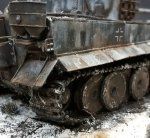
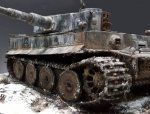
The sides now needed to look embedded into the ground, so taking advantage of the concave impression created at the start and the wet mud mix, I worked on hiding the lower section of the tracks and reproducing mud that had stuck near the outer front wheel (early Tiger wheel configuration was notorious for this), the top of the tracks and blending the lower leading edges(front and rear) with the ground.
Remember these photos are very close and the actual model looks better at a human scale than at this macro position.The advantage of using pieces of weed root in the mud mix really comes to light in these photos, as they add an impotant level of detail to what would have been a bit bland.
 

Attachments

  • 20200426_004936web.jpg
    20200426_004936web.jpg
    244.7 KB · Views: 71
  • 20200426_005128web.jpg
    20200426_005128web.jpg
    244.5 KB · Views: 70
  • 20200426_005155web.jpg
    20200426_005155web.jpg
    247.6 KB · Views: 64
  • 20200426_005019web.jpg
    20200426_005019web.jpg
    523.5 KB · Views: 60
  • 20200426_005220web.jpg
    20200426_005220web.jpg
    249.8 KB · Views: 65
  • 20200426_005228web.jpg
    20200426_005228web.jpg
    249.1 KB · Views: 66
  • 20200426_005325web.jpg
    20200426_005325web.jpg
    300.4 KB · Views: 73
  • 20200426_011121web.jpg
    20200426_011121web.jpg
    488.6 KB · Views: 68
  • 0 bytes · Views: 2
Last edited:
Completed - part 2
This section has a mix of the tank attached without the wires, fuel drum etc, then after I finished the extras.
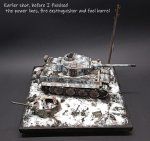
As mentioned above I changed my mind on the position of the vehicle and turned it around so that it had backed into the spot next to the T34 turret rather than facing the other way and driving through. After completing the groundwork the balance of the scene changed slightly due to the completed white snow making the scene appear smaller to my eye. When I turned it around and had the tank back-in, the balance worked much better [with the T34 turret and the additional angular offset of it's gun]. This now also called for a change in figures as the vehicle is now stationary.
Back to the dwg board on that aspect, though I am pretty set on a couple of figures pointing off to a skirmish accross the steppe.
The final shot is my idea using the half completed figures.
20200426_004721web.jpg

20200501_122213web.jpg

20200430_192415.jpg
 

Attachments

  • 20200426_004331web.jpg
    20200426_004331web.jpg
    408 KB · Views: 70
  • 20200426_004449web.jpg
    20200426_004449web.jpg
    538.9 KB · Views: 72
  • 20200501_122559web.jpg
    20200501_122559web.jpg
    247.5 KB · Views: 73
  • 20200501_122644web.jpg
    20200501_122644web.jpg
    245 KB · Views: 66
  • 20200501_122259web.jpg
    20200501_122259web.jpg
    444.4 KB · Views: 70
Last edited:
Some more......
I ended up purchasing some Tamiya Powder snow effect and was waiting for this in the mail. I applied this over the power lines on the ground and was happy with the light snow cover it dried as.
I still might do a little more weathering on the front of that sign post though.
20200501_123040web.jpg


In the photo below you can see where I have splattered the mud outwards from the rear tracks to similate the mud 'flinging off the tracks partially as it slowly backed into position.
20200426_005103.jpg

montage.jpg
 

Attachments

  • 20200430_161049.jpg
    20200430_161049.jpg
    249.2 KB · Views: 69
  • 20200430_161124.jpg
    20200430_161124.jpg
    390.8 KB · Views: 68
  • 20200430_193424_001.jpg
    20200430_193424_001.jpg
    162.7 KB · Views: 68
  • 20200430_193511_001.jpg
    20200430_193511_001.jpg
    355.5 KB · Views: 73
Last edited:
Thats great news James . Glad to pass on some new ideas for your next idea!
Can't wait to see it in the summer.
:ro:
 
Back
Top