• Modelers Alliance has updated the forum software on our website. We have migrated all post, content and user accounts but we could not migrate the passwords.
    This requires that you manually reset your password.
    Please click here, http://modelersalliance.org/forums/login to go to logon page and use the "Forgot your Password" option.

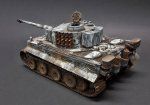
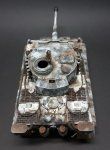
Tiger 1 early - Winter Russia 1942 -completed

Looking very cool. That's an interesting way of weathering the white and looks quite effective. Looking forward to more.
James
 
Looking Great! :good:

Interesting approach to the white wash, I'll have to give that a try myself.
:popcorn
 
OK, where here and this new site looks great!
Thanks Iron Mike, MP, James, Paul, Skinny Mike, Mike W, John, Luiz and errains. :)
One detail I want to make clear before I show the latest update on the Tiger 1. This model has a major detail that is actually incorrect for this paint scheme, but I have done this knowingly. I always try to make my models as accurate as possible, especially my Tiger tanks, however, this one is an exception to the rule. It does not depict any particular unit either, as that would contradict with the details , so it is a generic depiction only.
Please also remember that this is an OOTB project and does not have any super detailing.
As you know from post number 1 on this thread this is a commission for a collector. The collector wanted a Grey Tiger 1 in Russia, winter 1942/3 but wanted the tracks mounted on the turret sides (as Tigers look even cooler with that feature). I had to bend the rules with this model as the German Grey Tigers from late '42 to early '43 did not have them.
The track link mounts on the turret sides (mod April'43 )was not a feature added to the factory production vehicles until after the German Grey paint production phase was ceased. Additionally the loaders roof periscope was added a month before as a new feature in March '43 (I have not included this either). I also used the modified Feifel air filters that were not an available mod until March. I did not use the periscope mentioned to try to keep it closer to the German Grey period in looks, in spite of the track link mounts. The Feifels were a case of 'it hardly mattered' by the time i got to the back. o_O:whistle::giggle: .
In spite of all of the above I like the way the tank looks and are very happy with the Grey/Winter paint scheme.
The bow MG still needs to be added as with all the wet effects once the tank is attached to the base.......... yes there is a base or have you forgotten. I think I have:unsure::coffee::giggle::geek:.

View attachment 20200401webupdate.jpg20200402_web update.jpgView attachment 20200401 webupdate.jpg20200401_010813web.jpg20200402_162813web.jpg
 
Last edited by a moderator:
How the Paint progressed from plastic to final pigments.
As an additional post I thought I would add the progression of paint, altogether in one place.
The bow MG still needs to be added.
The tank will get an additional final layer once attached to the base on all the lower parts so as to blend it into the ground work.
Please follow the pics to see the paint progressed...

1. Plastic model with mud texture added to lower hull.
plastic base web.jpg

2. Two tone grey - airbrushed acrylic german grey as a base then added some black and sprayed around selected details to create a subtle tone variation.
grey base web.jpg

3. Maskol - Maskol rubber liquid has been applied to the tank over the German grey base with a 'nasty' brush. Think " paint out the white, i'm keeping the grey" when doing this stage.
maskol grey web.jpg

4. White overspray - The tank has been oversprayed with White acrylic paint through an airbrush, over the dry Maskol fluid. Maskol has been removed by peeling & rubbing once dry leaving areas of the grey exposed. Vary the thickness of the airbush layer.
initial white.jpg

5. Oil paint top layer - additional white oil paint has been applied with a varitey of brushes to achived a brighter white over the airbrushed acrylic layer while also adding a brushed on deterioration effect to the overall appearance to simulate a field applied cammo.
Brown staining with earth pigments has also begun.
early 1web.jpg
View attachment
6. Hull - Chips, mud, more staining, general grime from the crew.
hull early paint web.jpg

7. top layer details - rust, metal edging on selected parts, engine grime and dried mud. Lighter mud added to upper track surfaces.
Some mud and white wash detail added as dripping or running with a 'Rake' brush.
20200402_162916web.jpg

8.completed -
Hatch added, smoke grenade mounts added to the turret and damaged, Weld seams applied to the turret roof.
20200401_webupdate.jpg


20200401_010400web.jpg
 
Last edited:
The image shows my test tank and the various color stages tested against different colors and edges. I have included this because it has become a vital tool now that I work with wet pigments as well as Acrylics and oils. The wet pigments are very hard to predict when wet and the thinner you go the harder it gets so I gave up predicting and turned to testing.
I need to know exactly how its going to look when i work with so many layers.
Stay tuned for more updates on the base and attaching the tank, then figures etc.

View attachment
 
Awesome!!
I really...really like the way the white camo is coming out...I going to totally steal this technique.
 
Last edited:
The image shows my test tank and the various color stages tested against different colors and edges. I have included this because it has become a vital tool now that I work with wet pigments as well as Acrylics and oils. The wet pigments are very hard to predict when wet and the thinner you go the harder it gets so I gave up predicting and turned to testing.
I need to know exactly how its going to look when i work with so many layers.
Stay tuned for more updates on the base and attaching the tank, then figures etc.

View attachment 137

Looking great so far! Funny I too use a Russian tank as a test bed, but mine is a kv2!
 
Sweet!
Anyone notice the slide show? Click on an image and you get a pop out that you can scroll through the rest of the images. And with Ian's images it's well worth it!!
 
Sweet!
Anyone notice the slide show? Click on an image and you get a pop out that you can scroll through the rest of the images. And with Ian's images it's well worth it!!

i did, very kewl. You do have to be signed in for it to work.
 
Back
Top