Dang Greg, missed this, the prop shafts look good. Progress!

-
Modelers Alliance has updated the forum software on our website. We have migrated all post, content and user accounts but we could not migrate the passwords.
This requires that you manually reset your password.
Please click here, http://modelersalliance.org/forums/login to go to logon page and use the "Forgot your Password" option.
You are using an out of date browser. It may not display this or other websites correctly.
You should upgrade or use an alternative browser.
You should upgrade or use an alternative browser.
RMS TITANIC 1/350 Academy/Minicraft and some PE
- Thread starter dollar19
- Start date
It's been a while........ got caught up in a bunch of stuff. But I have been tinkering on the old girl.
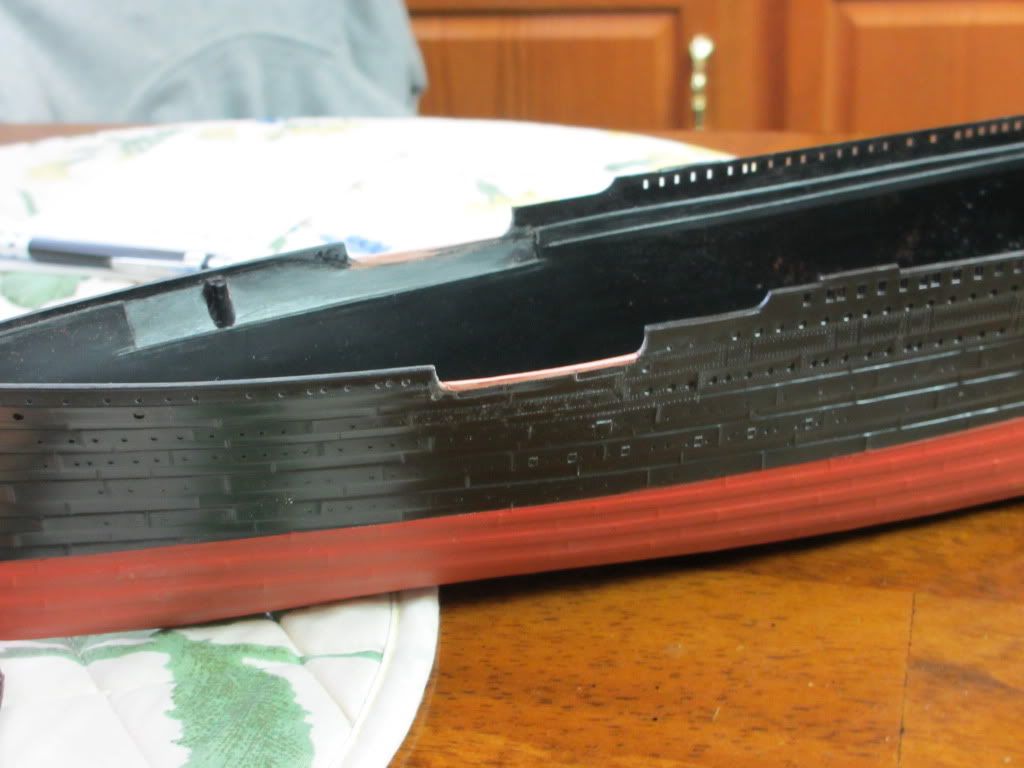
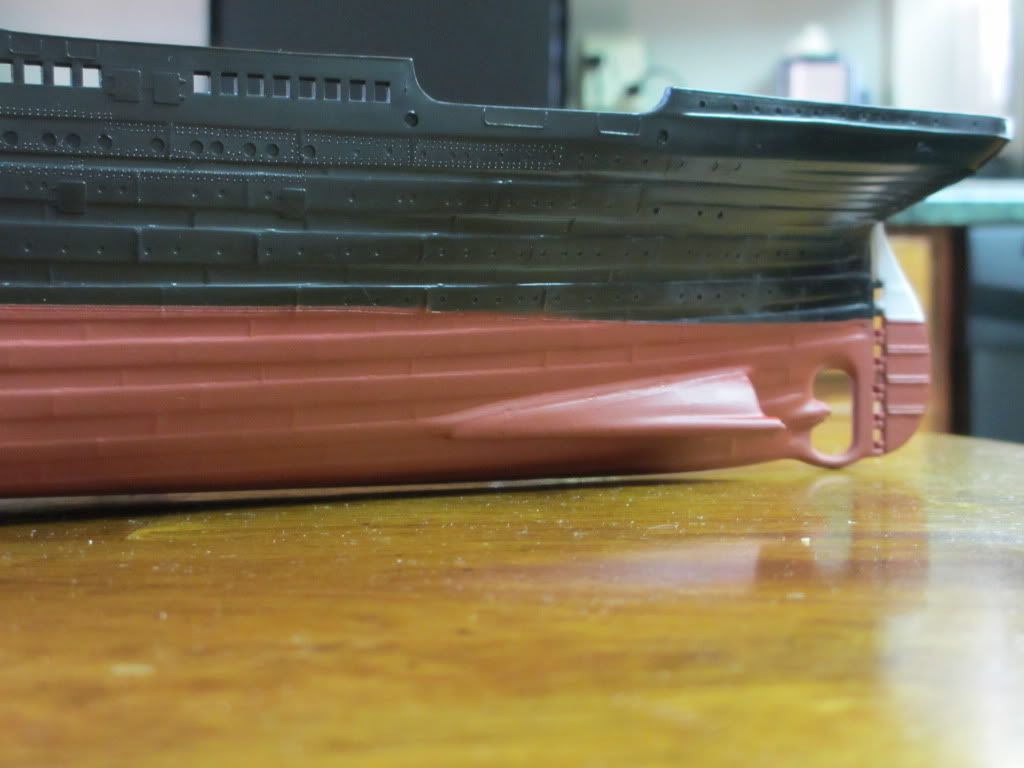
I got a coat of RED on the underwater hull as a primer and found I had to go back and do some touch up filling and sanding around the shafts and bilge keels.
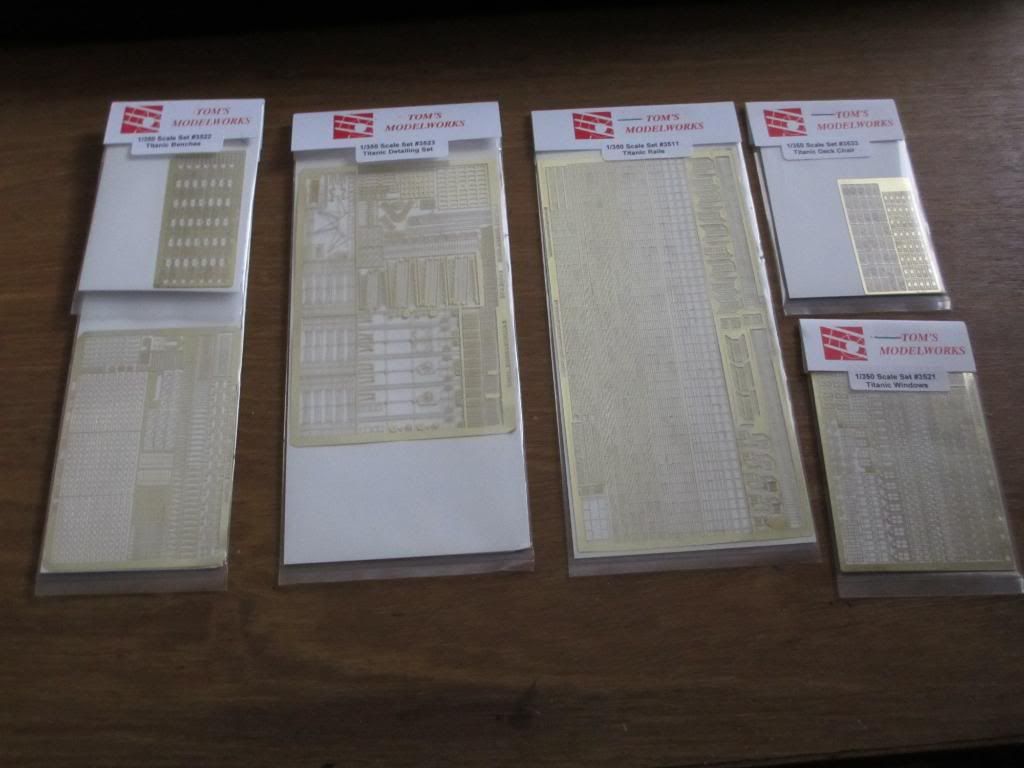
I did get my order off to Tom's for some PE.
It finally came in today!!!!!!!!!!!!!! OH dear God what have I done?! I bought everything they make for the Titanic. So I'm $70 lighter in the bank account, and majorly intimidated. But in for a dime, in for a dollar.
I'll get some pics up in a day or so, life and work are kinda hectic right now.... But rest assured I'm back on the build.
I got a coat of RED on the underwater hull as a primer and found I had to go back and do some touch up filling and sanding around the shafts and bilge keels.
I did get my order off to Tom's for some PE.
It finally came in today!!!!!!!!!!!!!! OH dear God what have I done?!
I bought everything they make for the Titanic. So I'm $70 lighter in the bank account, and majorly intimidated. But in for a dime, in for a dollar. I'll get some pics up in a day or so, life and work are kinda hectic right now.... But rest assured I'm back on the build.


arg...That's a lot of PE buddy, looking forward on this one.
I have gotten a round of sanding done to the shafts and a coat of anti fouling red sprayed on. Nothing worth a picture but moving forward. I hope to get in some bench time this weekend and some pictures to post them.
I have also acquired a 10x jeweler's visor to help with the PE. It looks so intimidating but none of it seems all that complicated. Mostly one or two bends and glue it on. I say that now!! :idonno We'll see...
I have also acquired a 10x jeweler's visor to help with the PE. It looks so intimidating but none of it seems all that complicated. Mostly one or two bends and glue it on. I say that now!! :idonno We'll see...
Not worth pictures?!! Oh what you said!!!
That's the impression i'm getting with the PE on the Graf Spee, very small but not really that hard to work with.
That's the impression i'm getting with the PE on the Graf Spee, very small but not really that hard to work with.
kryptosdaddy
Well-known member
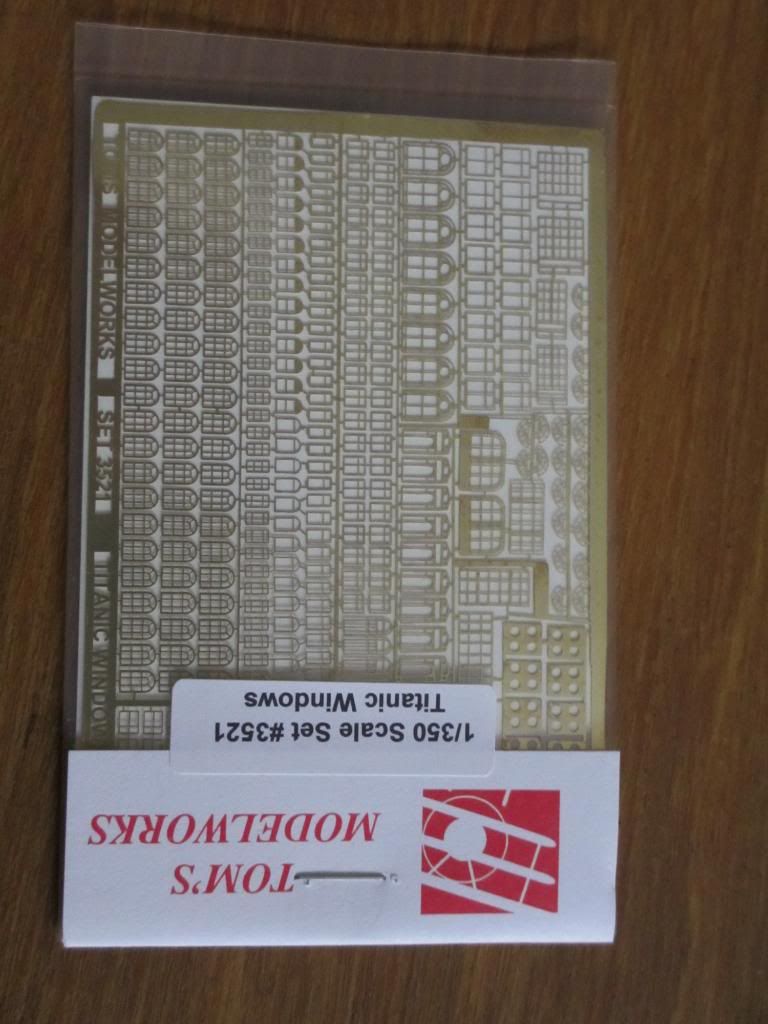
Tom's does make some nice PE. Are you going to carve all those windows out?
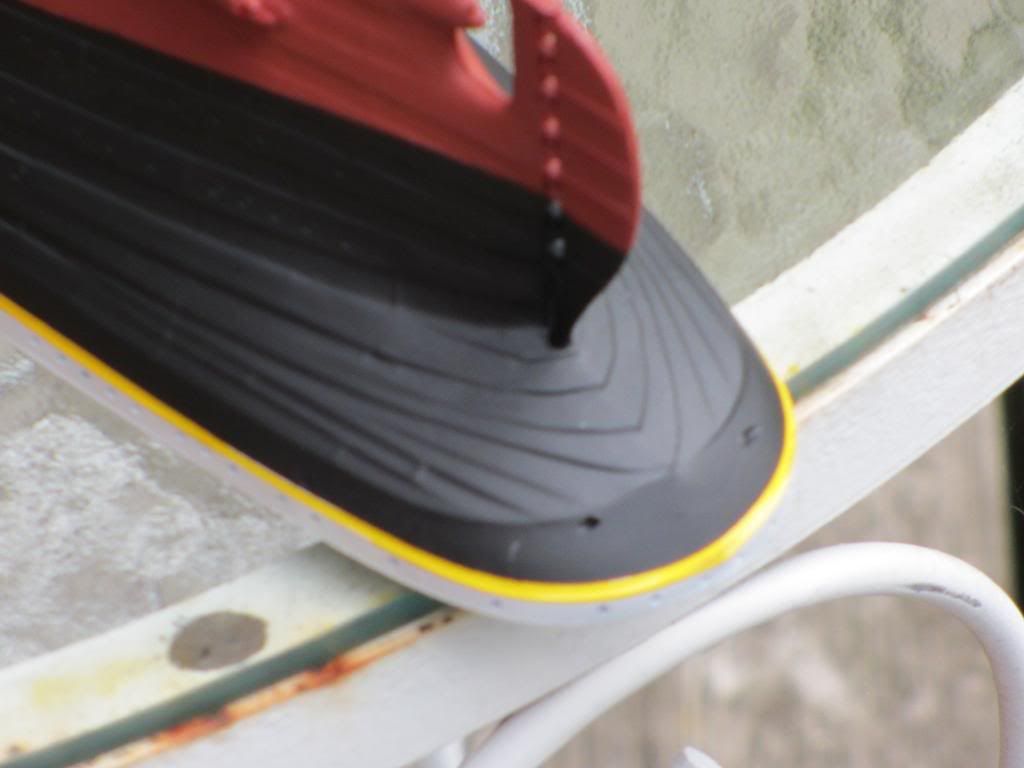
I finally got around to filling in the well deck openings. They were originally molded too deep. The biggest thing about this is the yellow/gold cheat line between the black hull and white upper works would not match up correctly if not fixed. It's still a little rough, but I think I can smooth it out and make it look good.
There's mutiple layers of Bondo and CA used on this so it's pretty strong.
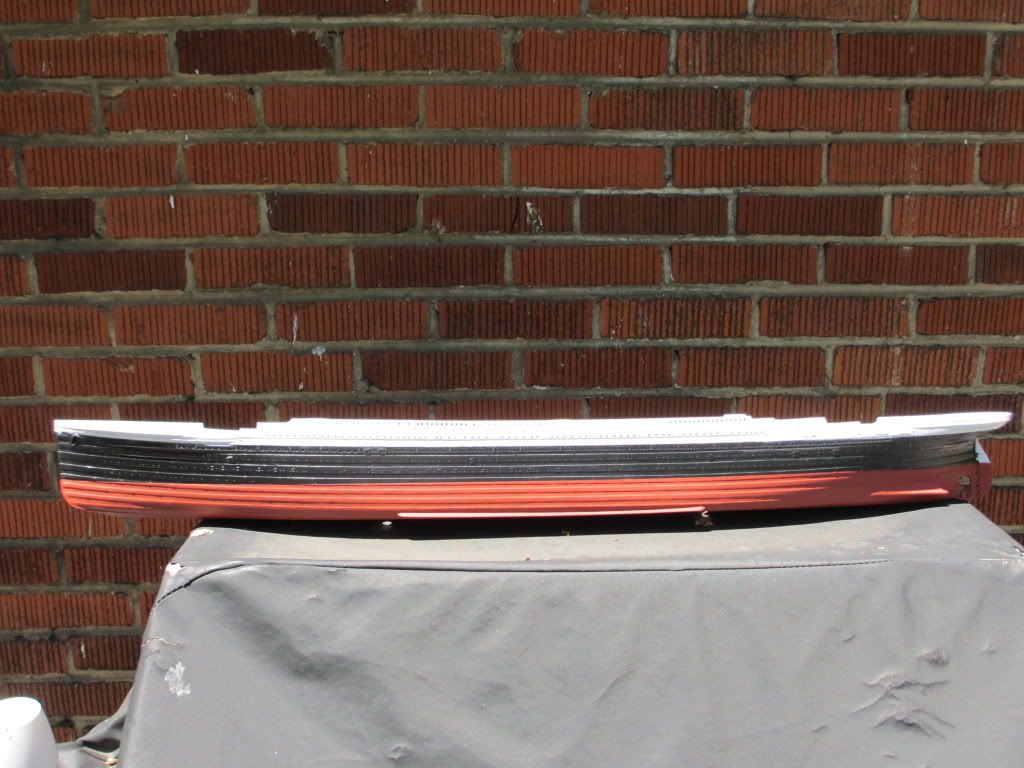
And I now have the correct red on the lower hull.
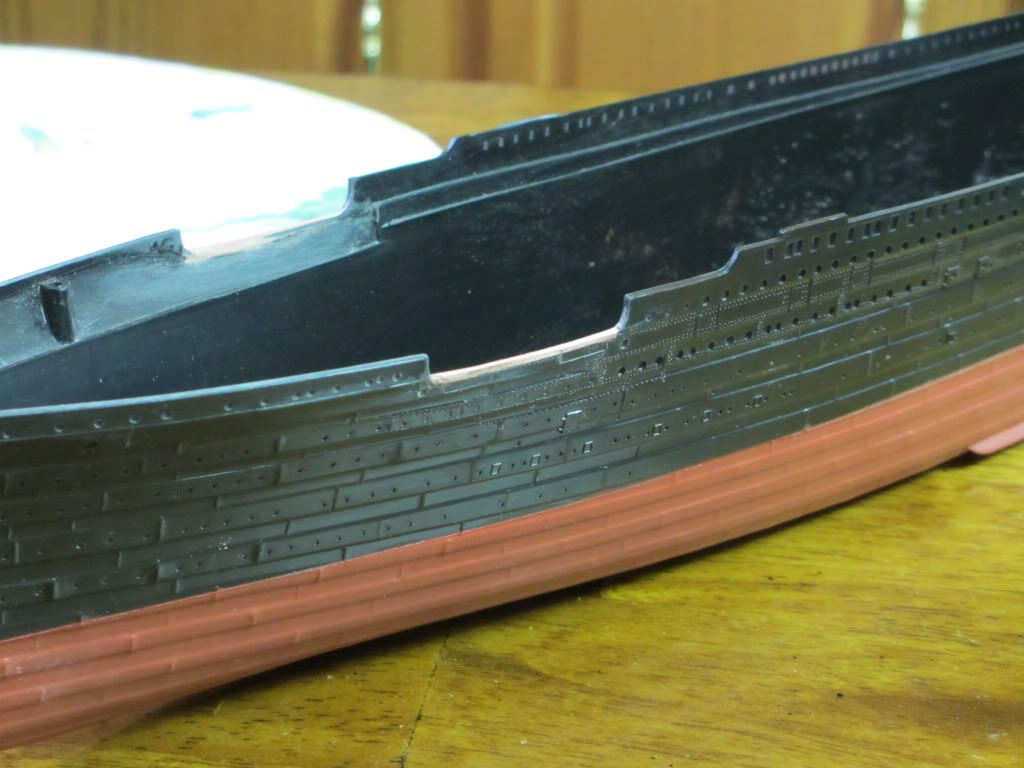

The result of a hard days labor.

There's mutiple layers of Bondo and CA used on this so it's pretty strong.
And I now have the correct red on the lower hull.
The result of a hard days labor.
Kreighshoer
Active member
dang - what a boat
Thanks Martin and Laura.
Martin, I'm surprised you didn't pick up on the grill the ship is sitting on!
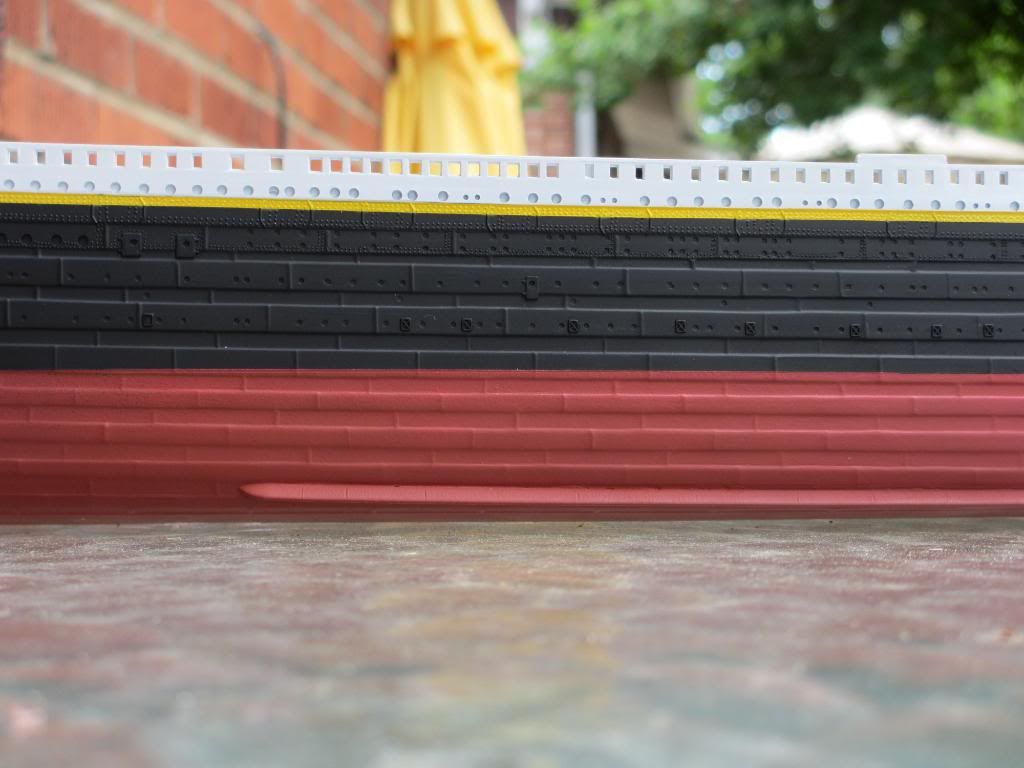
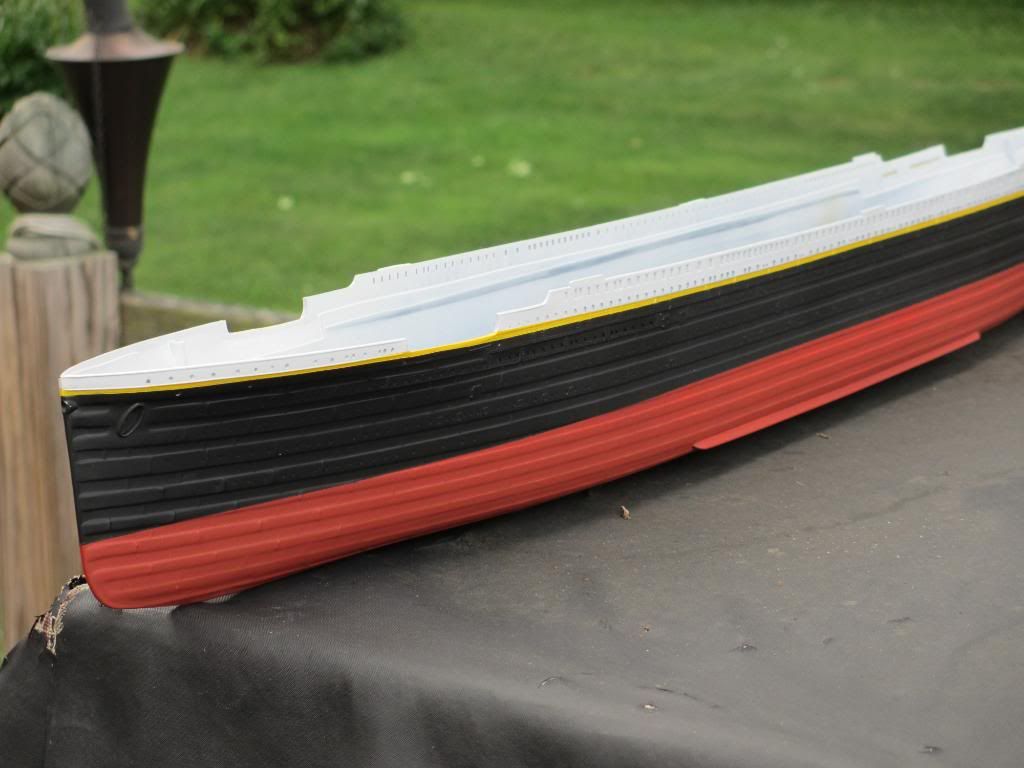
This morning I masked off and sprayed the yellow cheat line. Now for a nice long drying spell, and a remask to bring the black up to it. I purposely sprayed the white further down than needed so there would be a white base for the yellow and plenty of room to work when it comes time for the black.
I picked up some Pactra pin strip tape for R/C models and I plan to lay down a strip of the 3/64 tape over the yellow and cover the white above that with blue masking tape before I shot the black. I've got my fingers crossed that this method will leave me a crisp strip of yellow between the black and white.

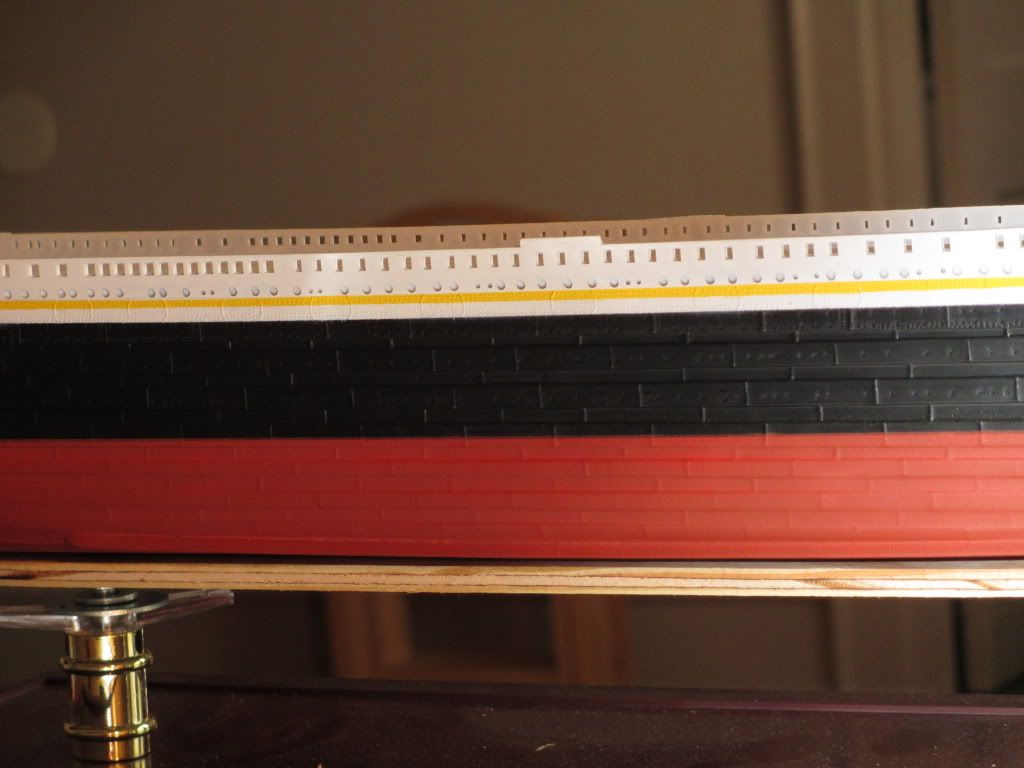
Well my idea for using pinstrip tape bit the big one. There was too much detail to get a good seal and I had black paint seep under the tape all along the length of the hull.

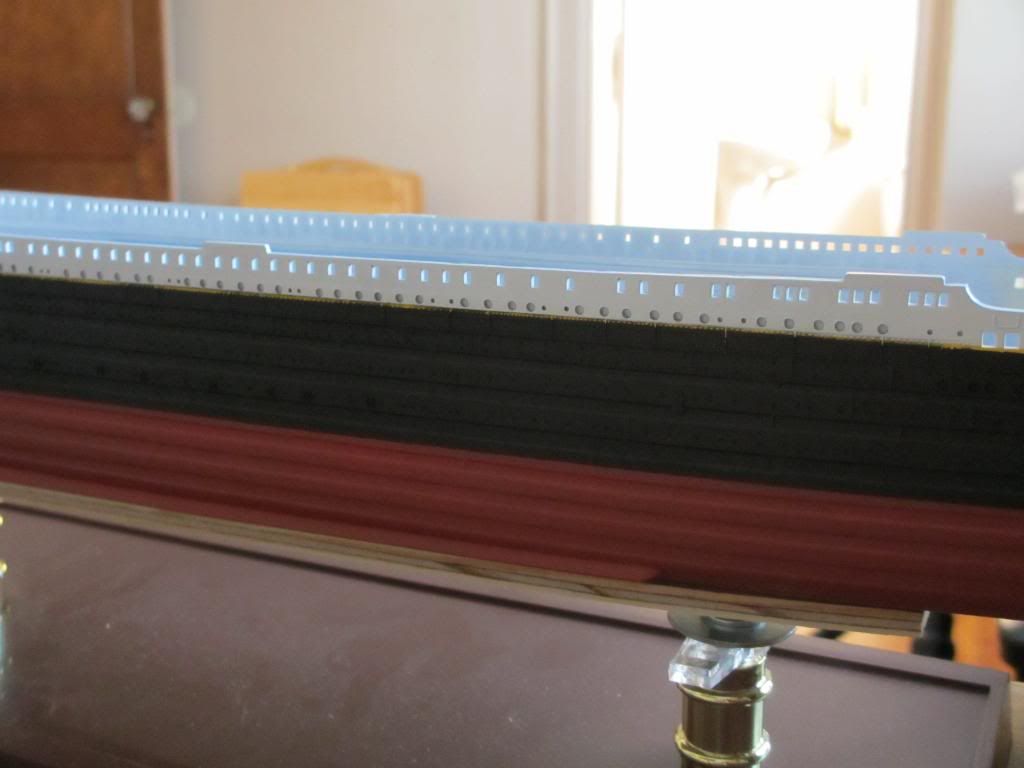
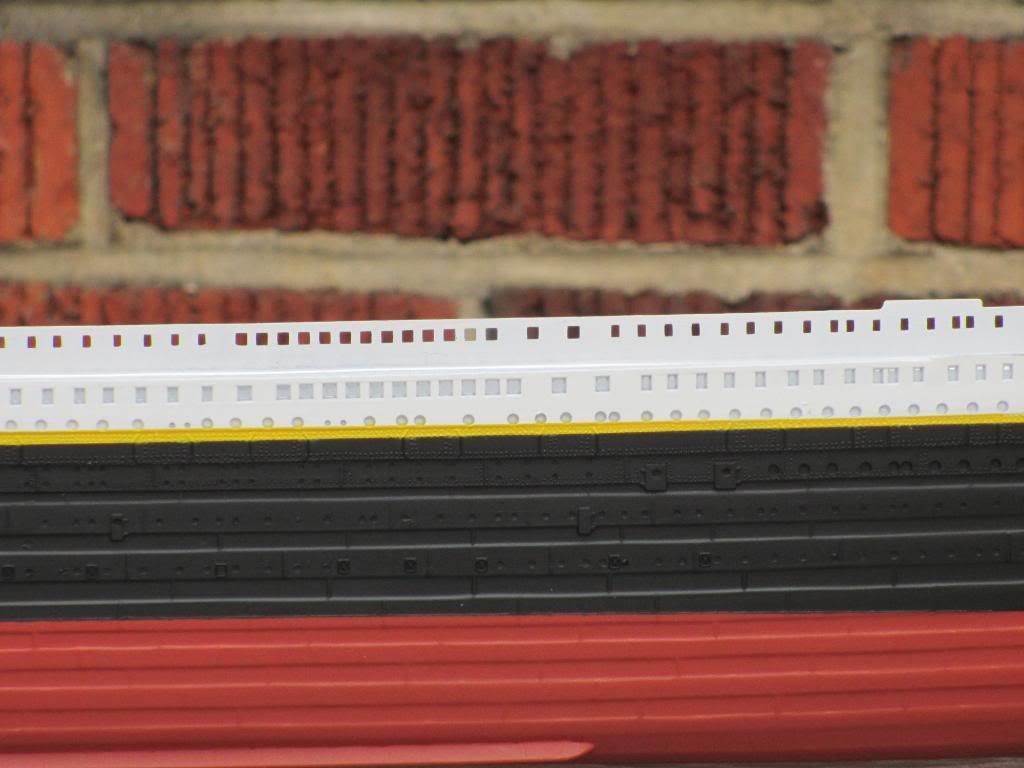
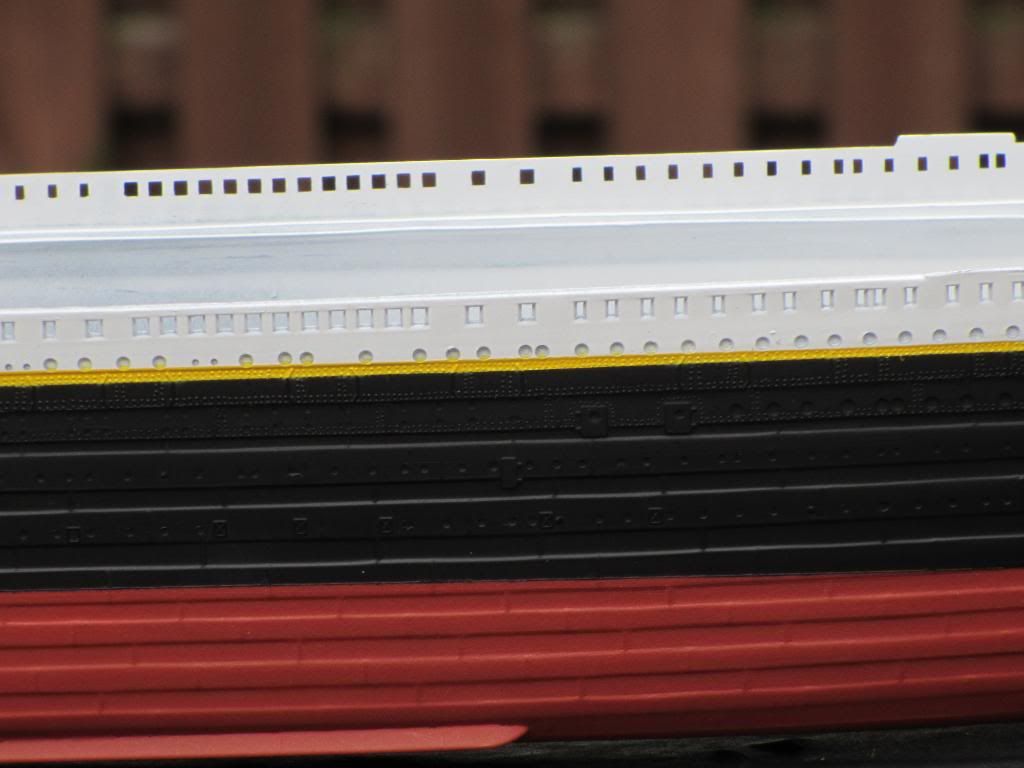
So I let everything dry real good and went back and re-masked the hull leaving the yellow line open and fired up the AB and repainted the yellow. Thanks to Tamiya tape and a nod from the model gods, it all turned out better than I had hoped for. It is a little over scale but I'm okay with it. If you look closely you can see a double row of rivets in the yellow area.... the yellow is supposed to break between the two rows. Like I said ..I can live with it.


Now on to the main deck and a lot of PE window frame and deck chairs.
Thanks for looking!
So I let everything dry real good and went back and re-masked the hull leaving the yellow line open and fired up the AB and repainted the yellow. Thanks to Tamiya tape and a nod from the model gods, it all turned out better than I had hoped for. It is a little over scale but I'm okay with it. If you look closely you can see a double row of rivets in the yellow area.... the yellow is supposed to break between the two rows. Like I said ..I can live with it.
Now on to the main deck and a lot of PE window frame and deck chairs.
Thanks for looking!
Nice work Greg! the yellow really sets it off.
I hope you have the blue tarp close at hand
I hope you have the blue tarp close at hand
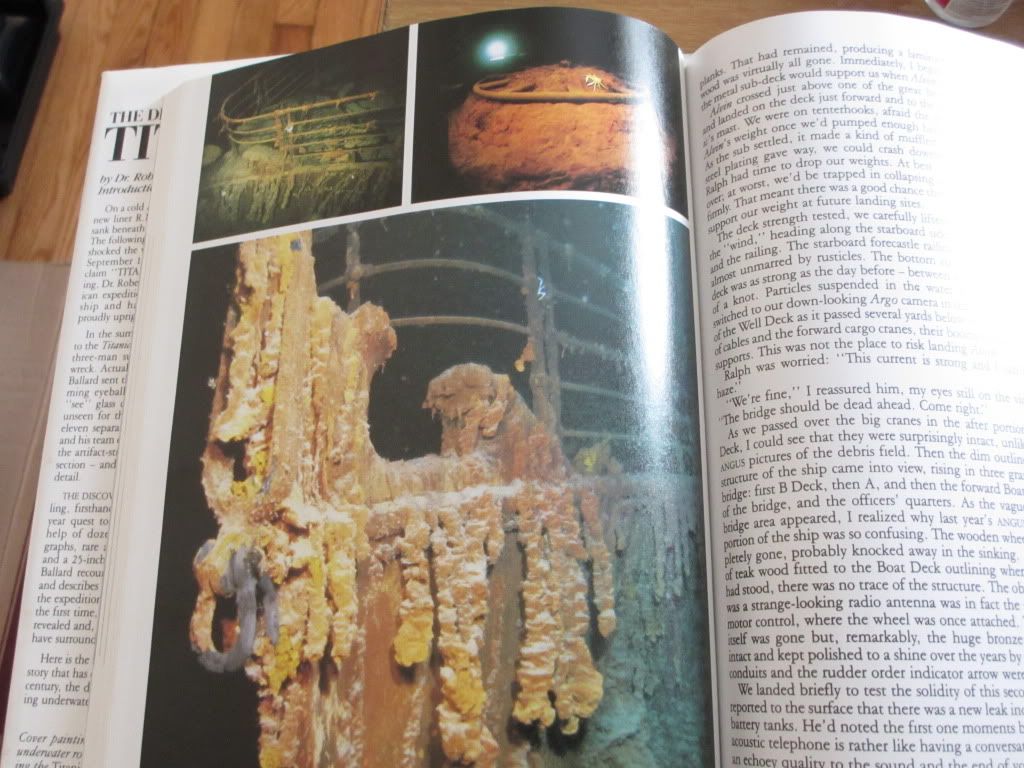
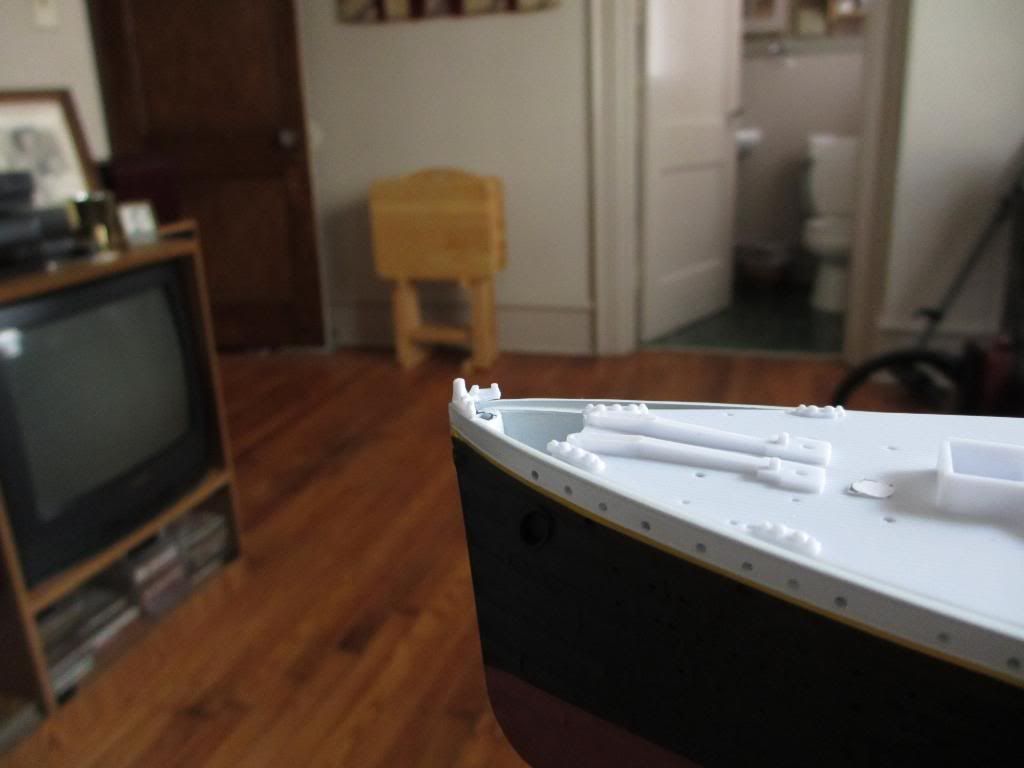
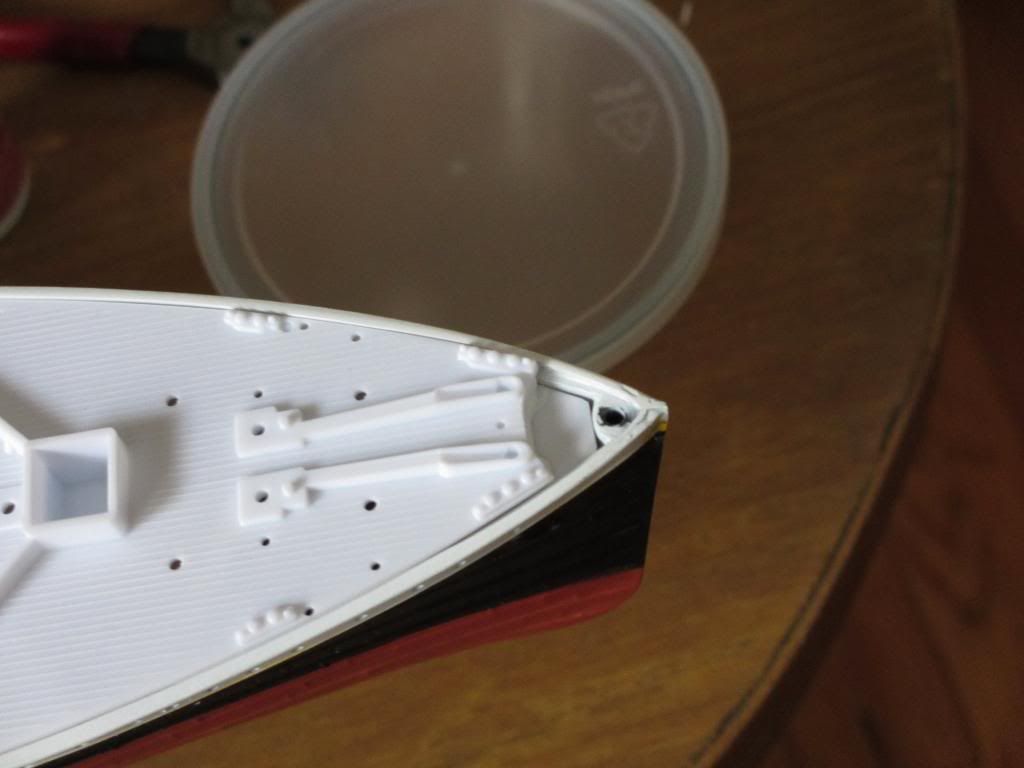
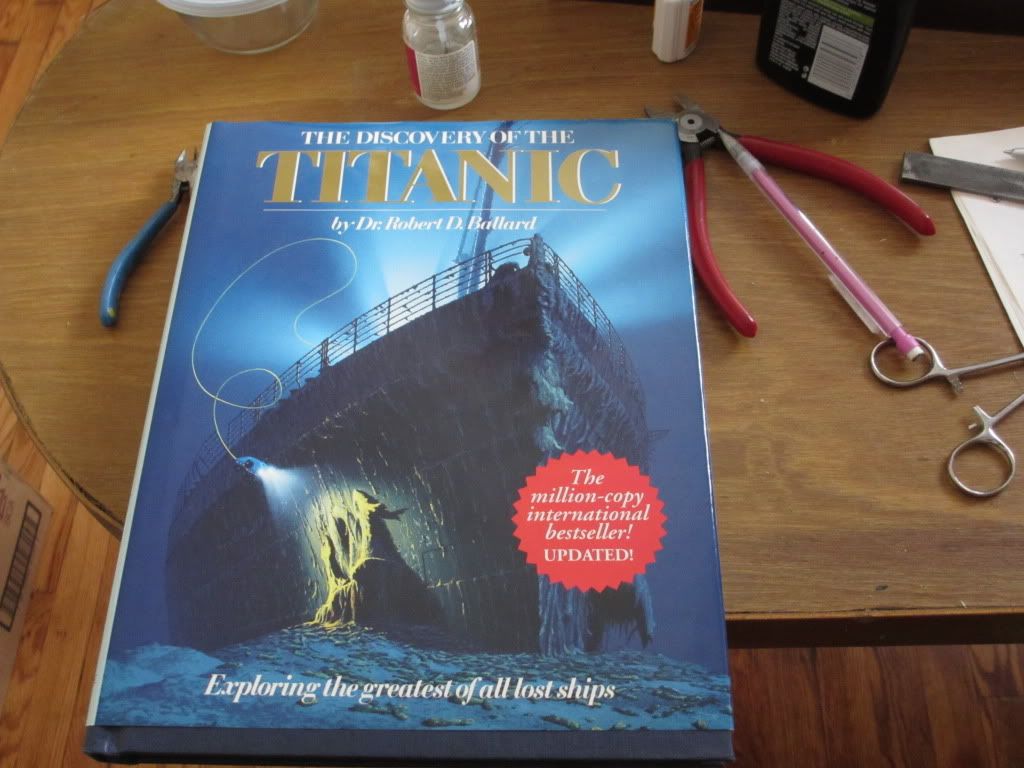
The fo'castle deck is molded incorrectly. There is a well at the very forward end for the center anchor to store in. Using the Rivet Counter website as a reference and some pictures from Bob Ballard's book, I started hacking away.
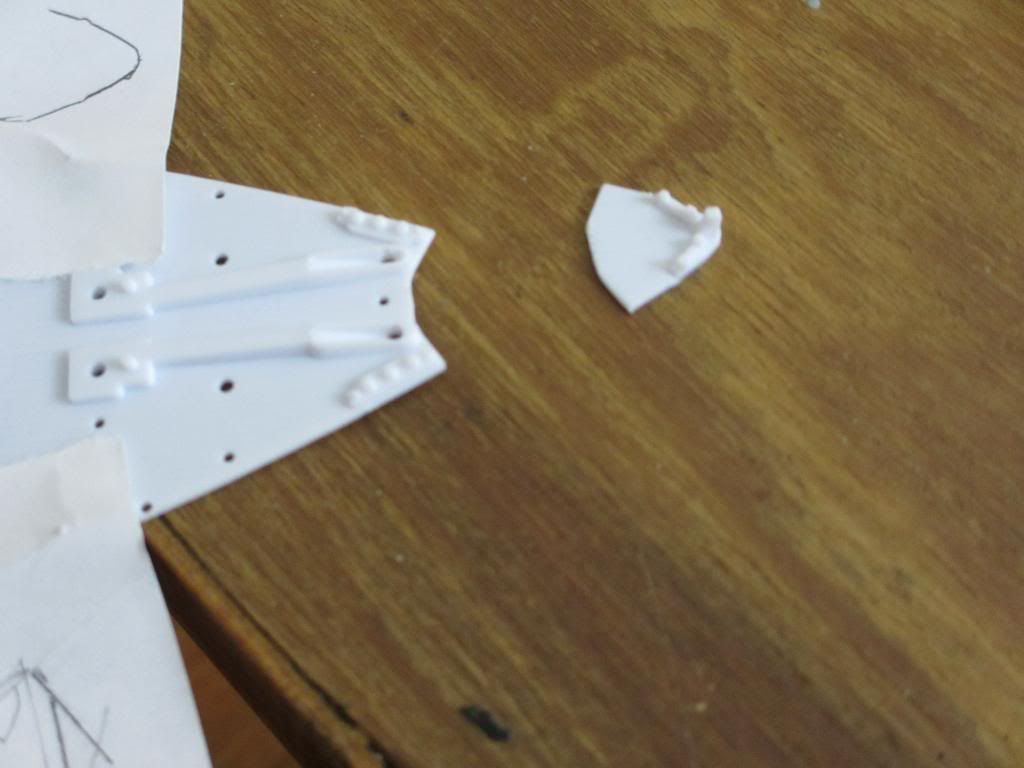
Next I glued some scrap styrene to the underside of the deck to create the depth of the well and act as a bulkhead for the well. After getting the shape cut and sanded, I glued another scrap piece to that to act as a shelf to hold the well decking.

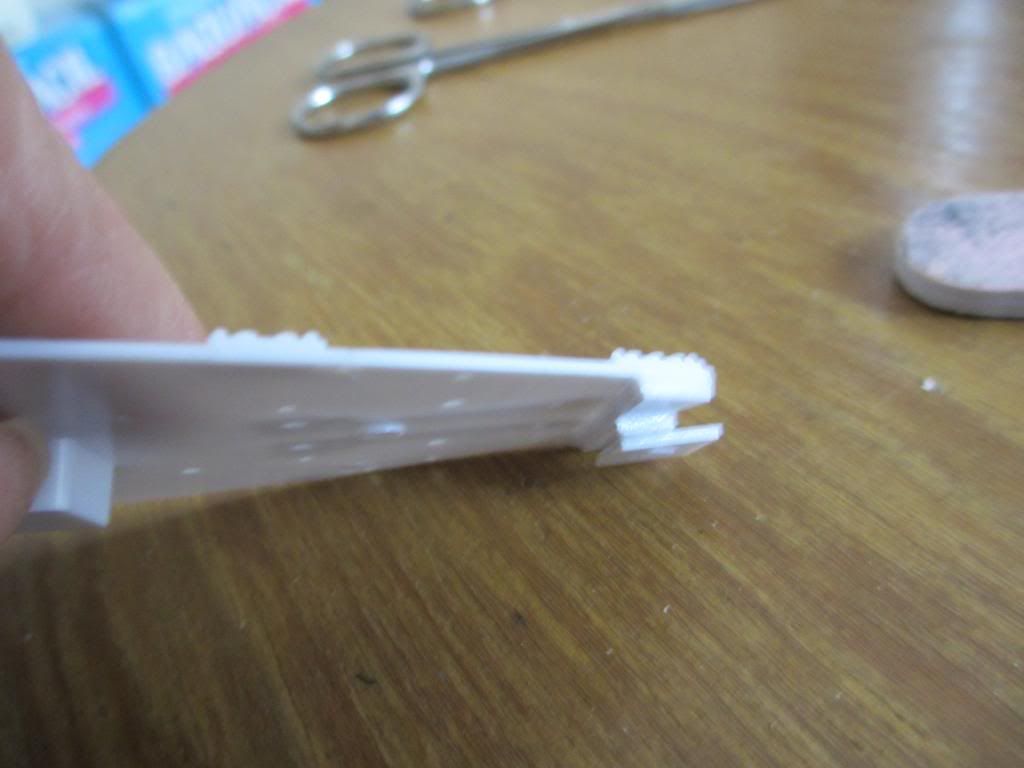


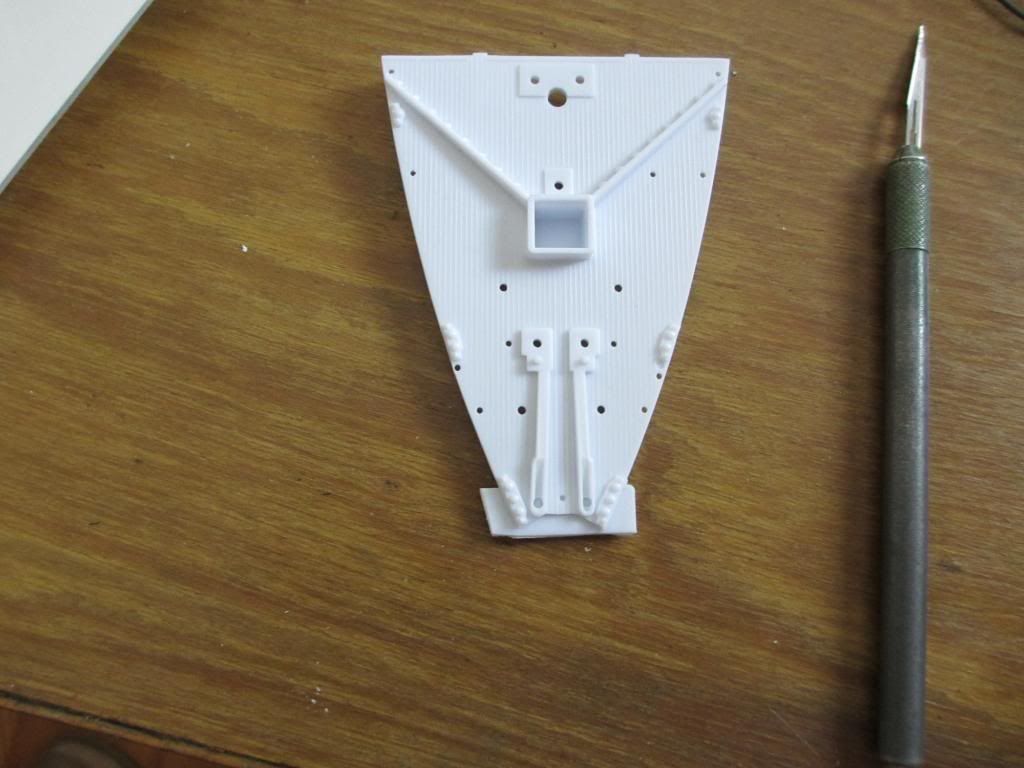
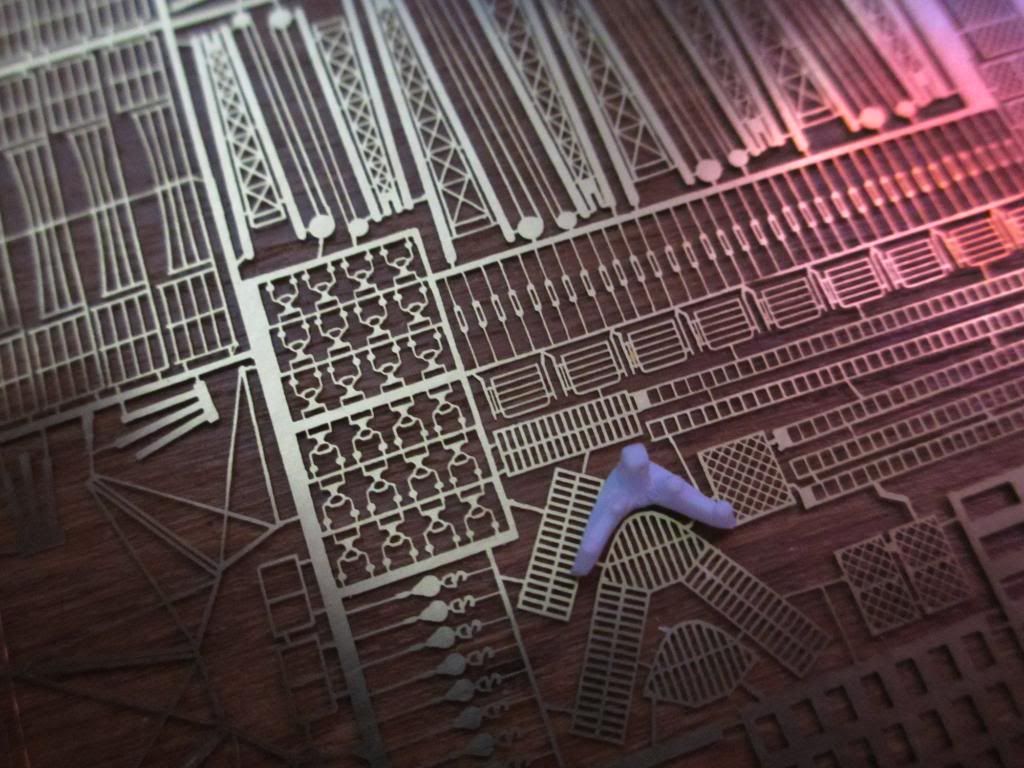
And then a little dry fitting. The hole will get some sheet plastic to make the well floor, and a PE grating and an anchor, that I've got to scratch build.


Slow progress I know, there seems to be some modification on every step of this model. Hopefully, things will speed up once I can get past all of these must do things and get to the "you can't see it from my house" stuff. :laugh:
Anyho that's today's update.......
Greg
Next I glued some scrap styrene to the underside of the deck to create the depth of the well and act as a bulkhead for the well. After getting the shape cut and sanded, I glued another scrap piece to that to act as a shelf to hold the well decking.
And then a little dry fitting. The hole will get some sheet plastic to make the well floor, and a PE grating and an anchor, that I've got to scratch build.
Slow progress I know, there seems to be some modification on every step of this model. Hopefully, things will speed up once I can get past all of these must do things and get to the "you can't see it from my house" stuff. :laugh:
Anyho that's today's update.......
Greg
Thanks guys!
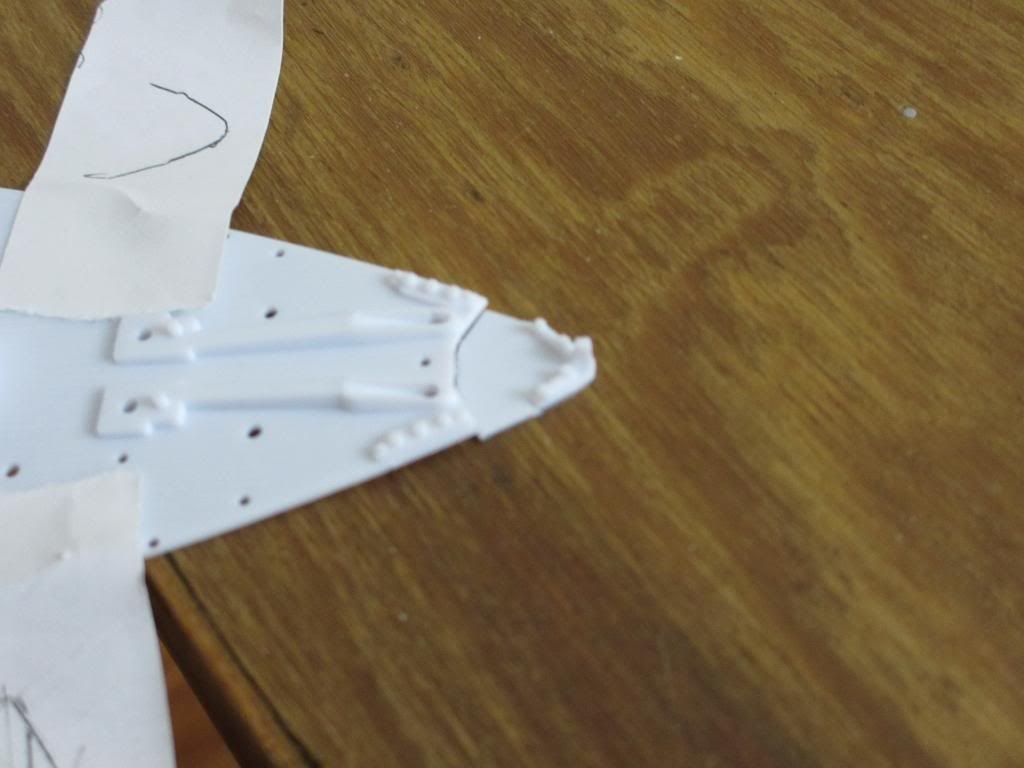
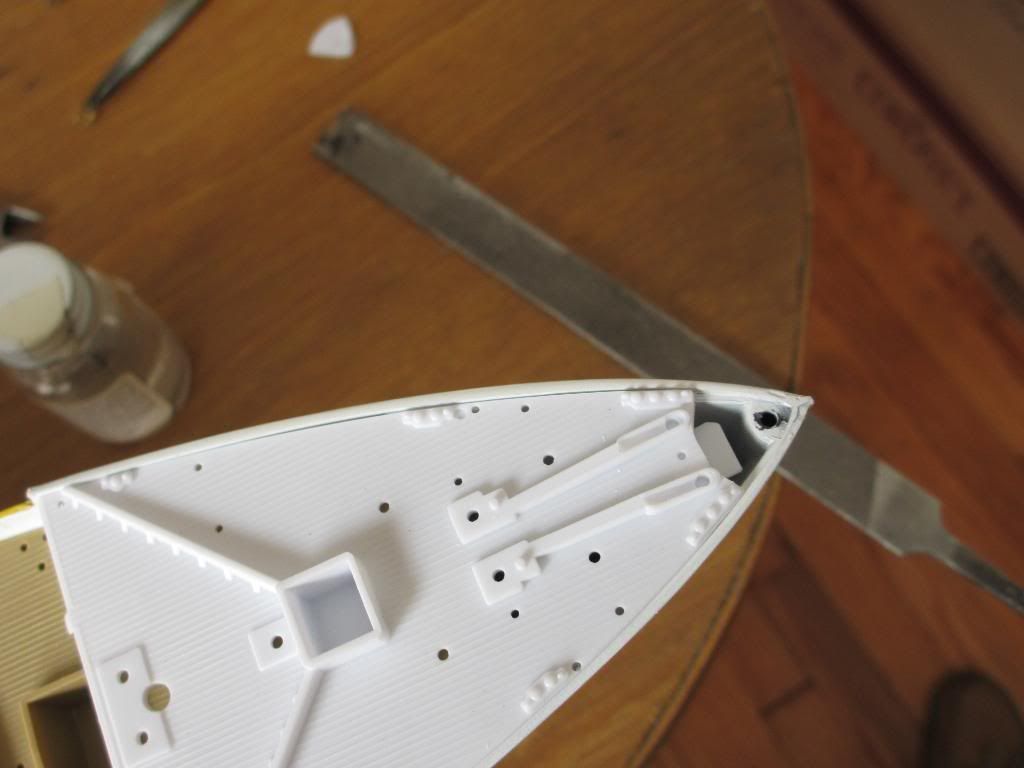
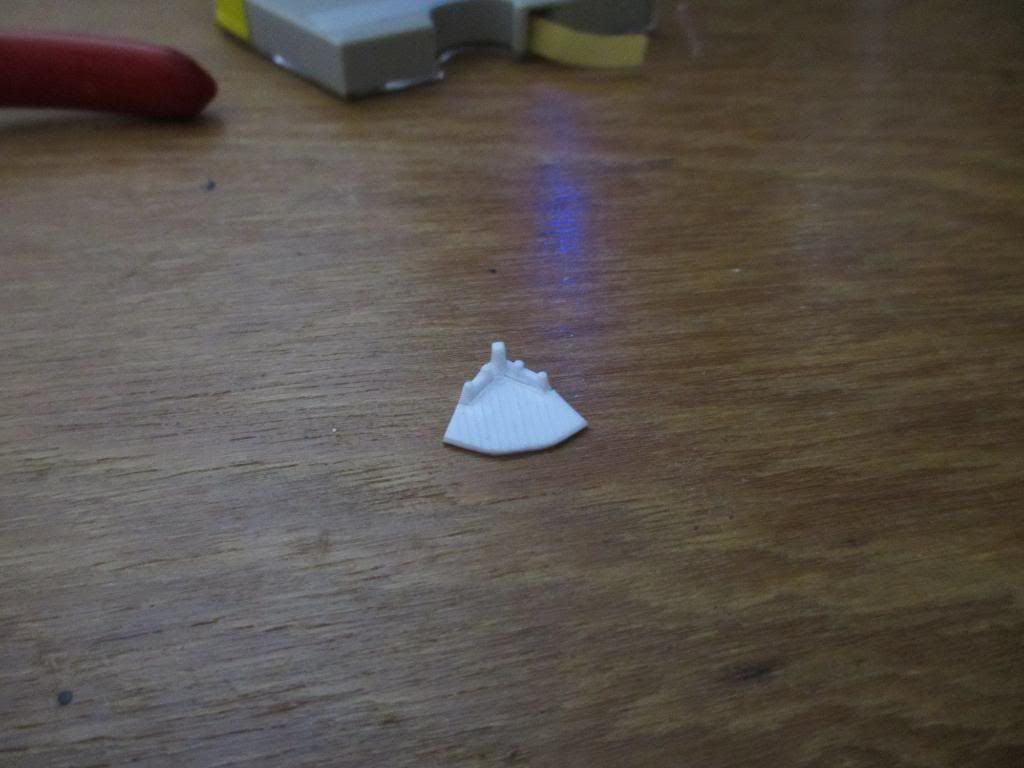
A little more to show. The bow has a very prominent stem piece, molded to the deck that I had to cut away to make the anchor well. So this morning I cut this piece away from the discarded piece of the deck, and later I'll fit it back to the bow. Here's a pic of how it is suppossed to look.
Just a series of what I'm trying to do.

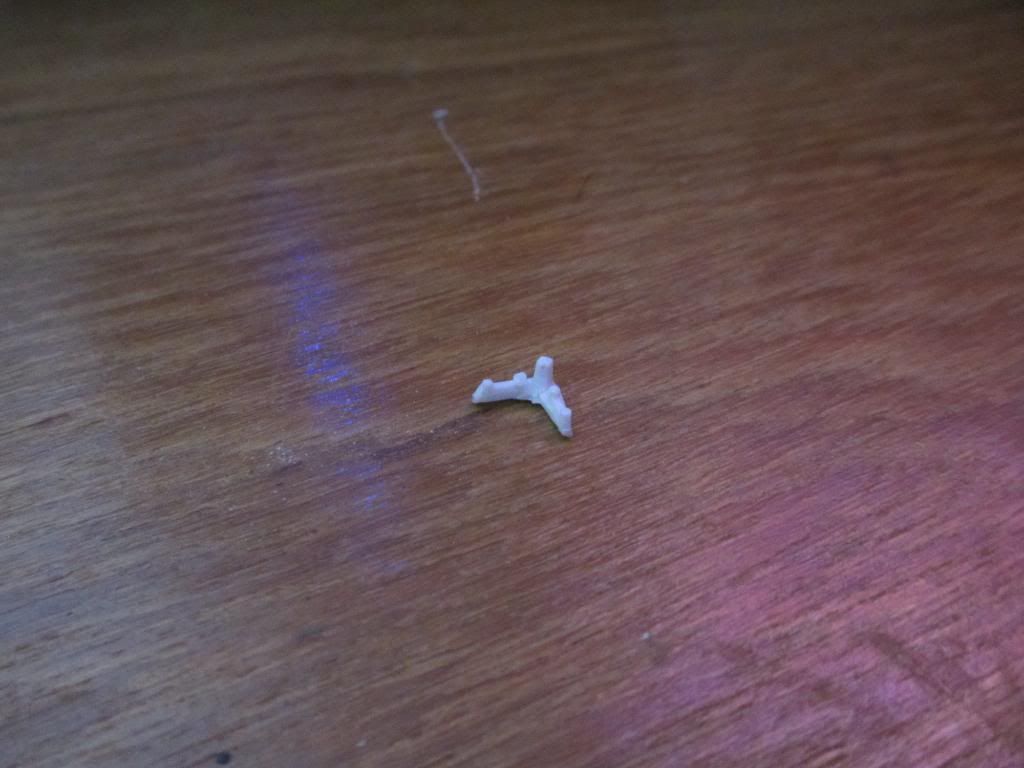
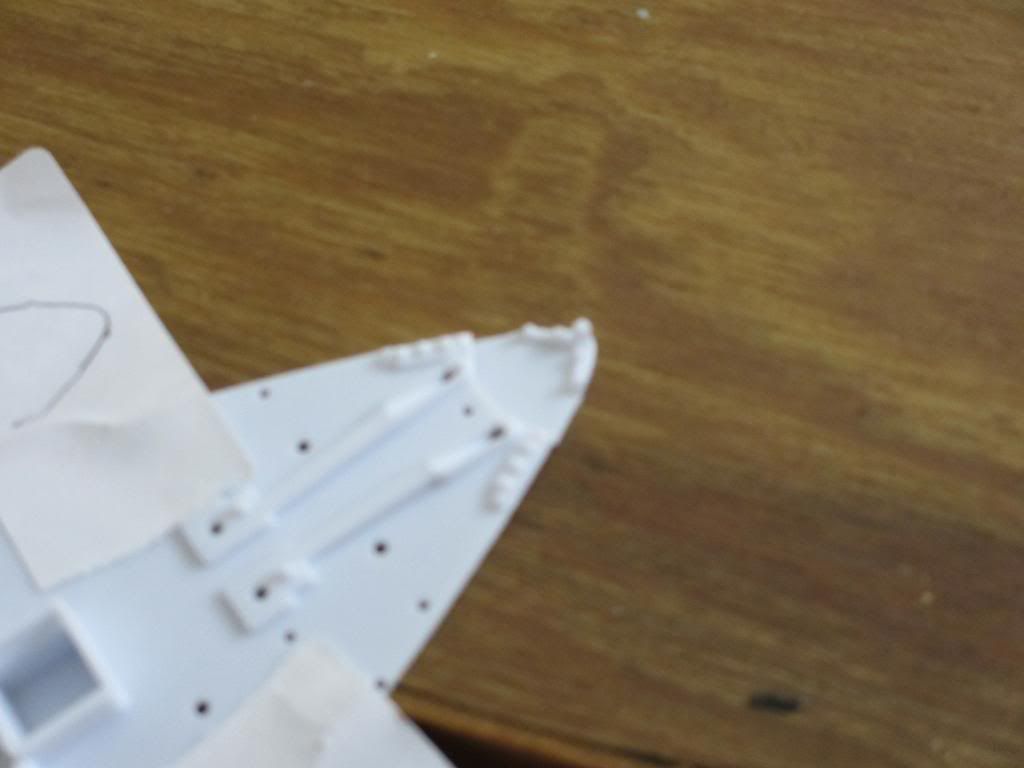
So what about the anchor well deck? I took what was left of it and what do ya know... A near enough fit to use as the deck. A little filler and paint and an anchor with the PE grate over it and viola I'll have it.

That's all for today and thanks for looking.
edit. This is the book that first picture came from. I need to credit that pic.
A little more to show. The bow has a very prominent stem piece, molded to the deck that I had to cut away to make the anchor well. So this morning I cut this piece away from the discarded piece of the deck, and later I'll fit it back to the bow. Here's a pic of how it is suppossed to look.
Just a series of what I'm trying to do.
So what about the anchor well deck? I took what was left of it and what do ya know... A near enough fit to use as the deck. A little filler and paint and an anchor with the PE grate over it and viola I'll have it.
That's all for today and thanks for looking.
edit. This is the book that first picture came from. I need to credit that pic.
Similar threads
- Replies
- 4
- Views
- 2K
- Replies
- 10
- Views
- 3K
- Replies
- 23
- Views
- 2K
- Replies
- 54
- Views
- 12K