• Modelers Alliance has updated the forum software on our website. We have migrated all post, content and user accounts but we could not migrate the passwords.
    This requires that you manually reset your password.
    Please click here, http://modelersalliance.org/forums/login to go to logon page and use the "Forgot your Password" option.

Meng 1/32 Me163B "Komet"

DougN

Member
I've always thought the "Komet" was a cool looking aircraft, and having been inspired by the likes of Les's excellent build of this kit, I am in with this:


Some parts and the aftermarket I intend to use:


This kit has significant interior detail and is designed to allow the builder to have access panels off, and even the rear fuselage removed to show off the rocket motor. This seems to be a common trend these days, which I am guessing is fueled by some CAD designers wanting to show off their skills ;) As I like my models all "buttoned up" it should be an interesting challenge to get it all to fit without problems.

Doug
 
Its light years ahead of the old Hasegawa kit I think. I know I really enjoyed building mine.
Watching with interest.
James
 
Be glad I could not find the guy with the 'bama hat at the show Doug cause I would have spent my lunch money on it, and some other items, instead of the Spirit. Looking forward to your progress :popcorn
 
The kit cockpit out of the box looks quite nice, but there is room for a little improvement. To start, the kit tub is missing the horizontal strap that runs along each side. Although there are nice PE sets out there that allow you to replace all the straps if you desire, I opted to just use some styrene strip to add it to my kit. Additionally, there are two fuel lines that run from the cockpit side tanks up and through the back cockpit wall to the engine. The kit has a raised line to represent this. In this pic, I have added the horizontal straps and scraped off one of the molded fuel lines:


There are also some control linkages/rods that are next to the seat. Here you can see the first attempt at adding the linkages as well as the completed fuel lines:


I didn't really like the linkages, so I decided to try again and am happy with these:


I got the appropriate bits attached and then painted everything flat black as a base for my RLM66 cockpit color:


That's it for now.

Thanks for looking! Comments/critique/questions always welcome!

Doug
 
Thanks guys!

A bit more progress. The kit provides the option for either a standard plastic instrument panel (IP), with very nice molded details, or a plastic panel with PE covers. The kit also provides decals for the instruments, however these somehow were reversed to be white faces with black details, rather than the correct black faces with white details. Fortunately, Airscale provide some very nice instrument decals, so I decided to use those.

As they are individual decals, it might be a challenge to get them aligned correctly with the holes in the PE covers. So, after painting the plastic part of the IP RLM66 and clear coating it in preparation for decals, I simply laid each PE cover part in place, and then used a fine tip marker to trace a circle where each instrument should go:


After I was done I had a nice "map" to place the decals on:


I then applied the decals, and coated again with clear coat and then applied the PE covers:


The kit also provides PE seat belts, which I decided to try and see how they would look. After painting and attaching to the seat I decided they looked fine so I went with them:


I also painted up the rest of the cockpit parts, and got them all ready for final assembly and installation when the time comes. Overall I am pleased with the outcome, although I may weather it just a tiny, tiny bit (as the Komet was not in service for very long at all) before it's installed:


That's it for now. Thanks for looking, comments/critique/questions always welcome!

Doug
 
Looking very nice. Great simple idea for mapping the instrument layout. Maybe you could put that description and pictures in our Sprue U section? https://www.modelersalliance.com/forum/sprue-u-tips-and-techniques
So simple yet something I bet most dont even think of.

:popcorn
James
 
Doug,

Nice attention to and execution of details. Early pit works is really nice. Looking forward to your continued posting...

Geoff
 
Thanks guys! I'll try to get the bit on the IP written up and put in the tips section James.

Had a bit of a delay, as I was out of town visiting the beach with the family. Busy getting caught up with work, but wanted to take a quick break and update this thread :)

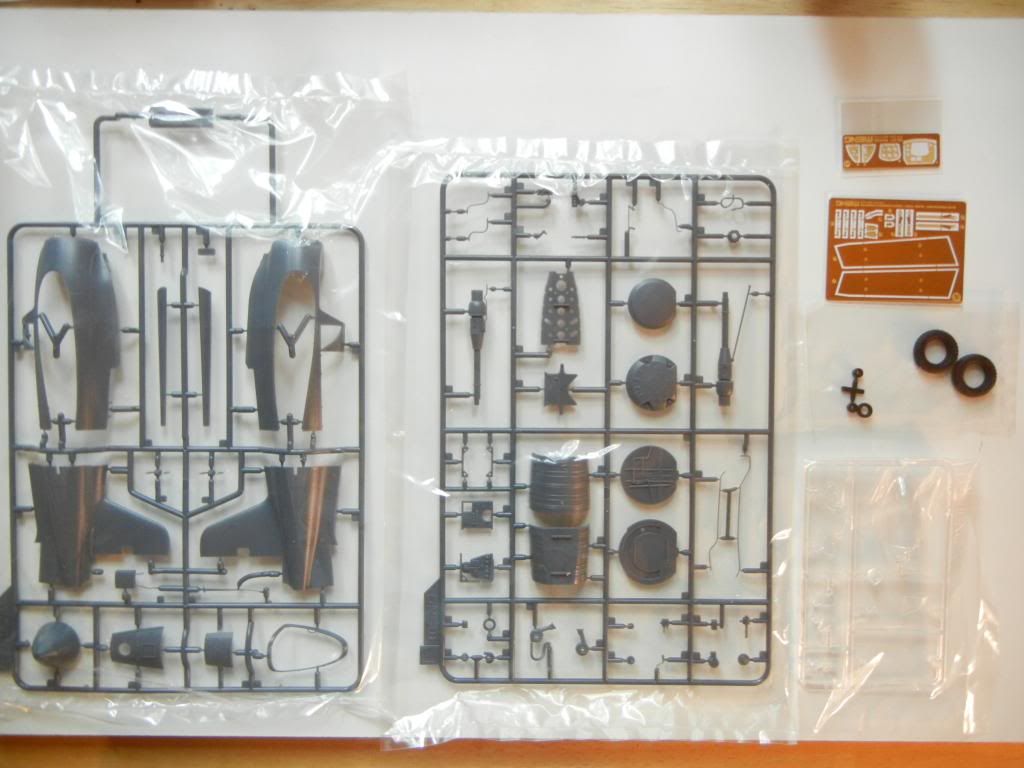
As mentioned, I plan to build this one all sealed up, so with that in mind, I am only assembling the minimum necessary to do so. While the kit provides a very nicely detailed fuselage interior, with fuel tanks, engine, ammo trays, etc., I am leaving most of that out. I think this is the minimum I need for the rocket motor and more importantly, the fuselage support:


I'm not going to bother painting it as only the end of the rocket motor will be seen, and there is a "cap" part that is the visible part anyway.

In reading other builds, it seem getting the wings attached properly without the fairing sticking out too far, and the front/rear fuselage join are the biggest challenges with this build. In order to minimize fit issues, I've spent a lot of modeling time thinking about the best way to go about assembling this kit. The instructions would have you go about it in the usual way, assembling the forward fuselage, and then the rear, attaching the wings, etc.

After this process, I've decided to try adding the wings to each forward fuselage half, then adding the rear fuselage half, and then finally joining the two fuselage halves together. We'll see how that turns out ;)

One builder comment that stuck out was the idea that the wings were a bit too "fat" to fit properly. So before joining the wings, I paid careful attention to them to see if that was the case. I noticed that the inner "support" on the top and bottom wing parts near the wing root seemed to have a "rough" surface, as it seem there are some sort of ejector marks on it:


Looking at the two wing halves dry fit, there is indeed a gap there:


So, before joining, I sanded the support down a bit and I think this improved the fit of the wingroot fairing to the fuselage.


Another interesting thing is the MK108 30mm canons. The instructions have you assemble them and would have you attach one to each wingroot as shown here:


However, the keen-eyed amongst you will note that the tubes on each barrel have an angle to them. It would seem clear that the angle is designed to match the curve of the wing leading edge, but if you assemble/install them as instructed, they would be the opposite. Since I had already put the attachment supports on mine I simply installed them in the opposite sides. I would recommend to future builders to install the opposite supports on each canon so that they are oriented properly. Note that this does not apply to the 20mm canons, as those barrels stick out of the wing.


That's all for now, thanks for looking! Comments/questions/critique always welcomed!

Doug
 
Thanks guys :)

I've made some progress on this beastie. Unfortunately, it's not pretty. With the kit being engineered to be all opened up, I expected to have some fit challenges of course. As mentioned above, other builds have indicated that getting the wings and tail attached to the fuselage is a challenge, so I did some dry fitting and found that I could get a good fit on the wings if I was able to put pressure on the join from the inside of the fuselage.

So, as mentioned above, I decided to be a bit unorthodox and build this kit by attaching the completed wings to each fuselage half, and then attach each tail section to each half, and finally join the two halves of the aircraft together.

But, before I could do that, I had to do a couple other things. I finished off the cockpit by adding the control rods to the control horns I made previously:


Although you could probably fit the rear quarter windows pretty easily when the build is finished, I decided to play it safe and attach them now. One note of caution, the plastic Meng uses is pretty brittle, so trim the part from the sprue leaving plenty of "stub" and then sand that down to remove it. Otherwise you could end up fracturing the clear part. I also noticed that the Gunze "type S" cement I use turns all the Meng plastic whitish where applied, and as such, the join between the clear part and the fuselage was a bit whitish as well. So, I masked by cutting some thin strips of Tamiya tape and outlining the clear part just inside of the join. I then filled that in with liquid mask:


Now that part is over, the fun part can begin. I started by attaching the wings to each fuselage half. As this required at least 5 hands and 80 fingers, I didn't manage to get a photo of it as things were moving pretty quickly as I had to manually apply pressure on the join to get it to fit. The good news is I am pretty happy with the fit, and the wing fillets don't stick out as much as they do on some other builds.

I then attached the tail (and tail fillet) to the wing/fuselage half and got two aircraft halves. Good for mounting on a plaque I guess ;) As you can see the fit is not prefect but it's pretty good considering:


I left the upper rear fuselage join between the fuselage and tail loose as I'll need to be able to pull it in to fit the spine cover once the fuselage is joined:


Since I was "on a roll" I stuffed everything inside the fuselage that needed to be there and glued them together. Starting to look like a "Komet" now!


I'm pretty happy so far as I've managed to get a pretty decent fit without filler so far, and after I get things wrapped up I am certain I can correct the few small issues with a little Mr. Surfacer. The good news is that my model will probably have a better panel fit than the real thing, in spite of the Meng's engineer's efforts to the contrary ;)

Sorry I didn't photographs of all the stages, hopefully the ones above are enough to illustrate what I am describing.

Thanks for looking! Comments/critique/questions always welcome!

Doug
 
Looking good Doug.

The liquid mask, everytime I try to use it it beads up from the edges making it useless. Does the tape outline help keep that from happening?

:popcorn
 
Back
Top