• Modelers Alliance has updated the forum software on our website. We have migrated all post, content and user accounts but we could not migrate the passwords.
    This requires that you manually reset your password.
    Please click here, http://modelersalliance.org/forums/login to go to logon page and use the "Forgot your Password" option.

Jagdpanzer Spinne

Dave Diaz

Member
Hello fellow modelers and good friends.

This is what I have been working for the past week. It started when me and Ruben got into a conversation about how vehicles for an alternate universe would look like. (What a mental trip..and we were sober!!!)

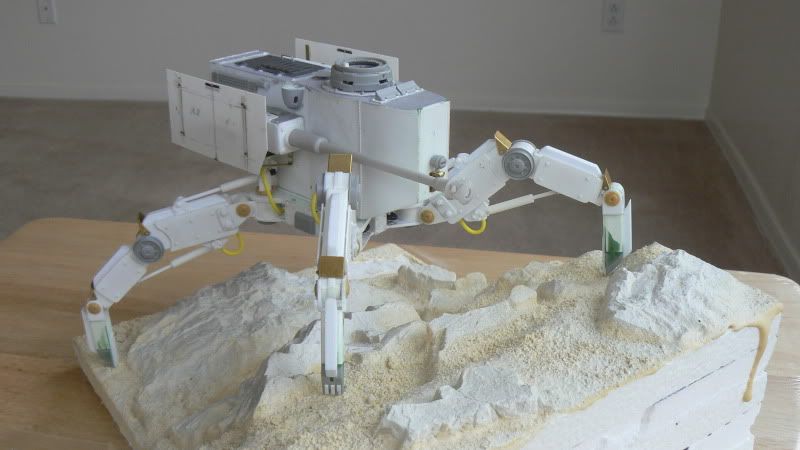
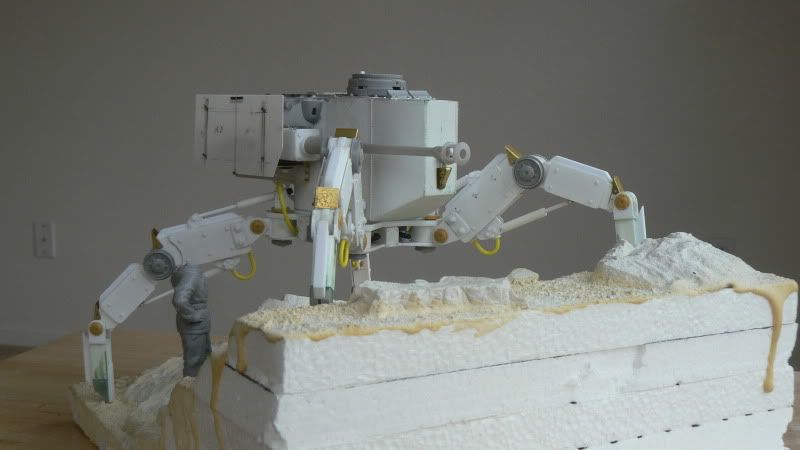
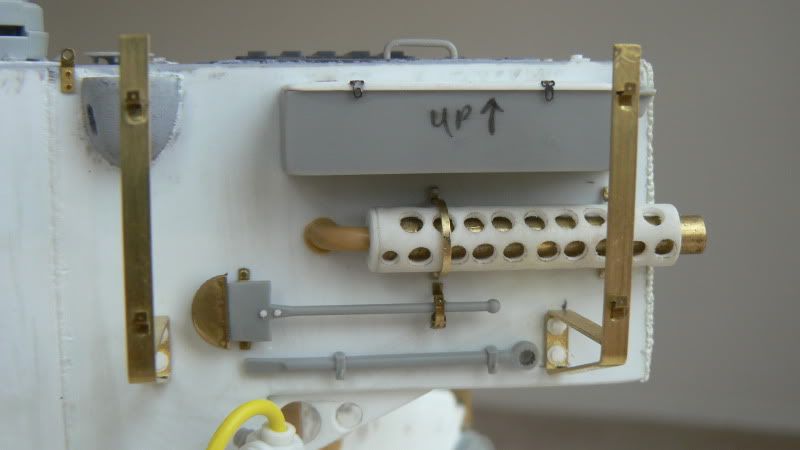
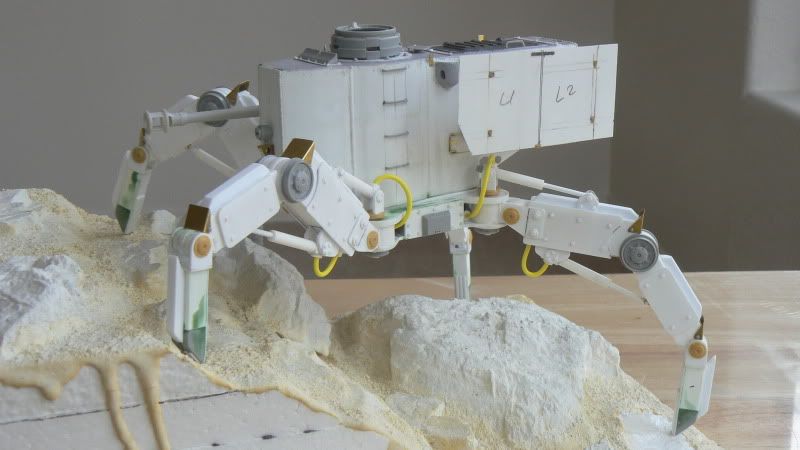
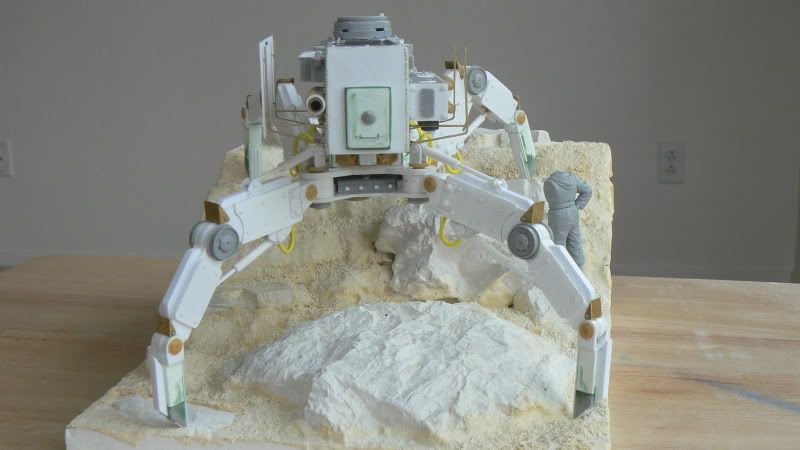
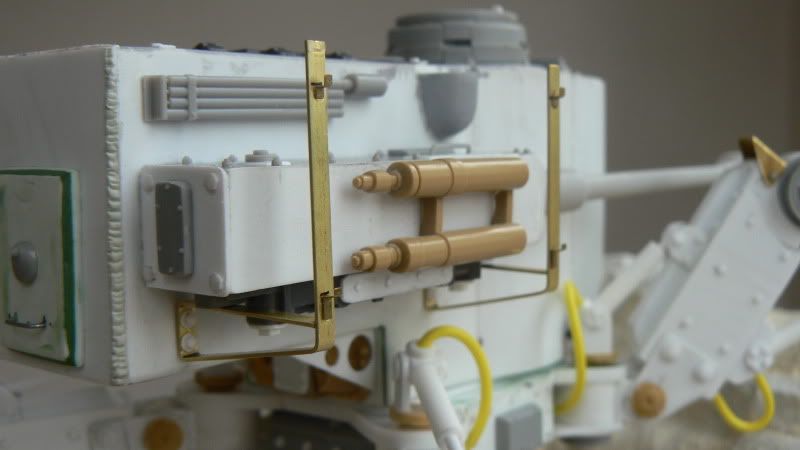
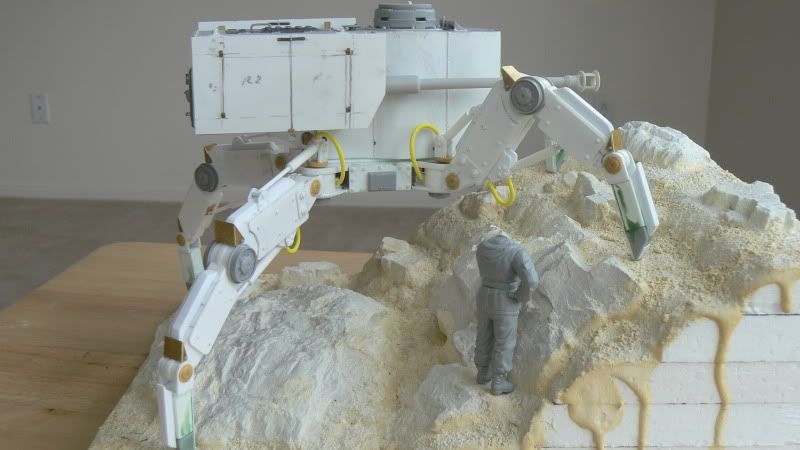
Anyways, this vehicle would be the equivalent of am Assault gun of Jagdpanzer. I used the copula and gun from a Panzer IV, a few random bits and lots and lots of plastic! I hope you guys like it, any suggestions are greatly appreciate it, especially color wise I am still unsure as to what scheme to use for it.

dave

01.jpg


02.jpg


03.jpg


04.jpg


05.jpg


06.jpg


07.jpg


08.jpg


010.jpg
 
Holly crap that is toooo cool. What a great way to use some extra dragon, Tamiya parts. Man I can't wiat to see that thing painted.

Rob
 
So. You are standing by your claim of "sober" :hmmm ;)

Well. It really looks great to me :) . I personally like stuff like this, but I am afraid of it because of the same reason that Laura is afraid of doing a Sherman (being sucked into the bottomless vortex of not wanting to do anythine else once I get started) :lol:
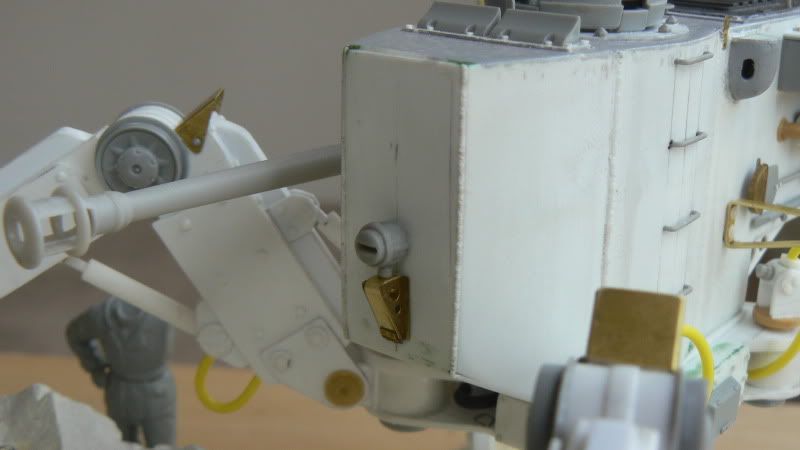
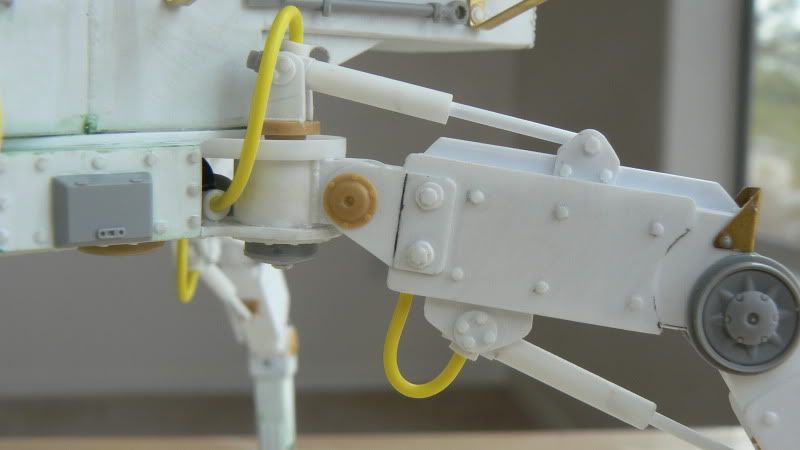
. It is interesting to see both the scratch work, and the use of pirated kit parts. It reminds me of the Star Wars X-wing fighters with all the Tamiya Panther pieces all over it.

As far as color, I would suggest to get some type of camo with a base that matches what ever color you are going to paint the groundwork and any vegitation.

Gary B)
 
Awesome build! I love the sci-fi stuff and can't wait to see it painted. This would look very funky in an ambush scheme or perhaps the King Tiger Octopus pattern? ;-)
 
Thanks for the kind words.

I have been wondering about color schemes and I think I will get some work on the base and once that is done I will decide on a color for the beast.

Happy New Year!!

dave
 
Maybe something like an Avatar two tone blue tiger stripe with blue ground and glowing thingy-ma-jiggys for plants.

:blink ;) :silly:

Gary B)
 
I'm still thinking Panzer Grey, with dark shading and grey highlights. WICKED!
 
Hello fellow modelers and dear friends,

Its time for another update. As I decided last time I will continue work on the base before painting the walker. I had originally envisioned it operating in a wooded area so I set out to make some trees.

For this I followed Anthony Reeves excellent tutorial on how to make trees out of wire.

Here is the armature of the trunk made of wire.

1-1.jpg


Next I covered it using masking tape

2-1.jpg


Here you can see the roots on the terrain.

3-1.jpg


Once I was happy with the position of the roots and limbs I made a mixture of Vinyl Spackling, Plaster, Water, a few drops of liquid soap and fine sand. This is how it looked.

4-1.jpg


I applied the mixture to the entire tree to create the bark. I was careful to cover all the masking tape and wires.

5-1.jpg


I also added some gravel and sand to add variety to the terrain.

6-1.jpg


The base as it is now.

7-1.jpg


Next I will make a smaller tree and start painting the base. Thanks for stopping by.
Until next time

dave
 
Hello once again fellow modelers and dear friends. After a long time without updating my threads I finally found the time to show you guys what has been going on at the "Voodoo Works"

After some suggestions from some of my friends I decided to add more smaller branches to the large tree before continuing with the smaller ones. Here it is with the extra branches.

WK2-1.jpg


WK2-2.jpg


I then went on to make the smaller trees. I built these in the same way as the large one.

WK2-3.jpg


WK2-4.jpg


WK2-5.jpg


After a plaster coat.

WK2-6.jpg


Once all was dry I was ready to start painting the base. I started by airbrushing Vallejo Burnt Umber onto the ground.

WK2-7.jpg


I then painted the rocks and trees in tones of gray. And highlighted the ground with successive shades of lighter earth and tan colors. Now the base is ready for the greenery.

WK2-8.jpg


WK2-9.jpg


Next up I will be adding some static grass, silfor, moss etc…Thanks for watching. Until next time.

dave
 
Oh Wow your base is looking great!! Can't wait to see the walker on that base. WOW!!

Terry B)
 
Back
Top