• Modelers Alliance has updated the forum software on our website. We have migrated all post, content and user accounts but we could not migrate the passwords.
    This requires that you manually reset your password.
    Please click here, http://modelersalliance.org/forums/login to go to logon page and use the "Forgot your Password" option.

Done! 1/350 Yankee Modelworks Los Angeles Class

1/350 Yankee Modelworks Los Angeles Class Sub

Thanks guys!

No pics, but spent some time getting the propeller assembled tonight. Gonna try getting the PE blades bent to shape tomorrow night and get the thrust ring on it as well, and then get it painted later in the week. The sub will sit for at least a week before I move on to the next color, just so I dont have to worry about it messing up.

I realized tonight I hadn't put any of the photoetch parts on it that I was thinking of using, so now I have to decide whether to put them on and repaint, or just skip putting them on and go w/ what I've got.
 
1/350 Yankee Modelworks Los Angeles Class Sub

Finally some progress on this one.

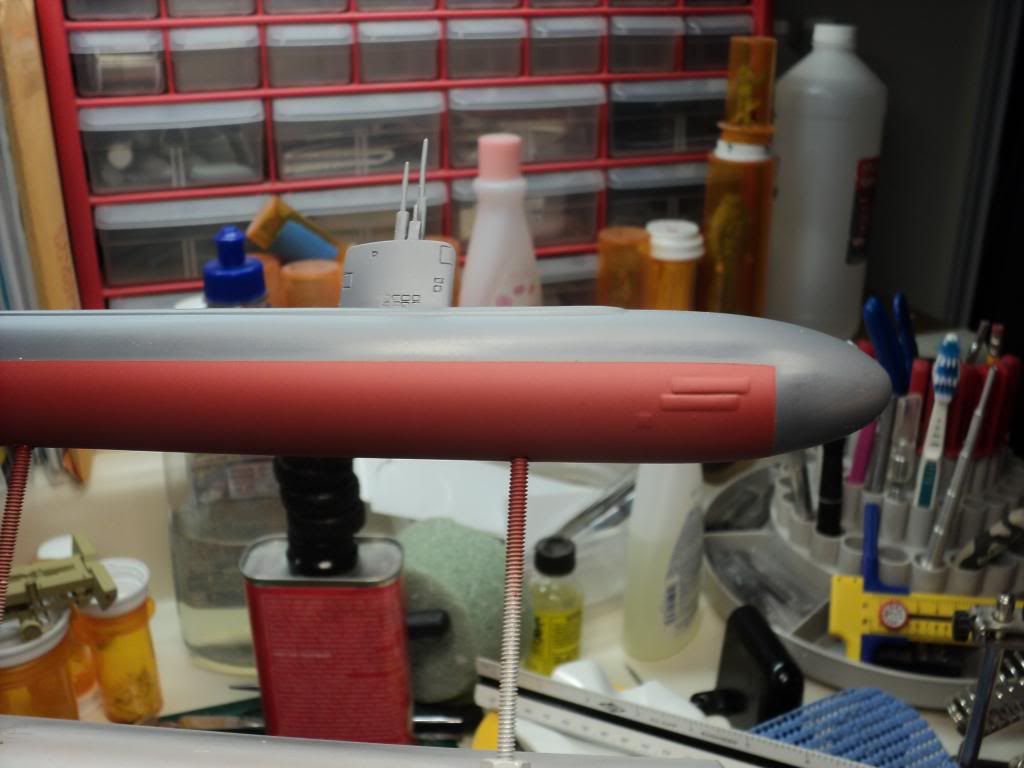
A few weeks ago I painted the anti fouling color on the hull, and unfortunately I wasnt happy w/ it at all. I used Krylon Red Oxide primer, which I thought would be close, and it just ended up being way too brown, and it went down really thick which I also didnt like.

This is about what I was trying to match. This is the USS Greenville, one of the USS Charlotte sister ships.

0102greeneville27-med.jpg


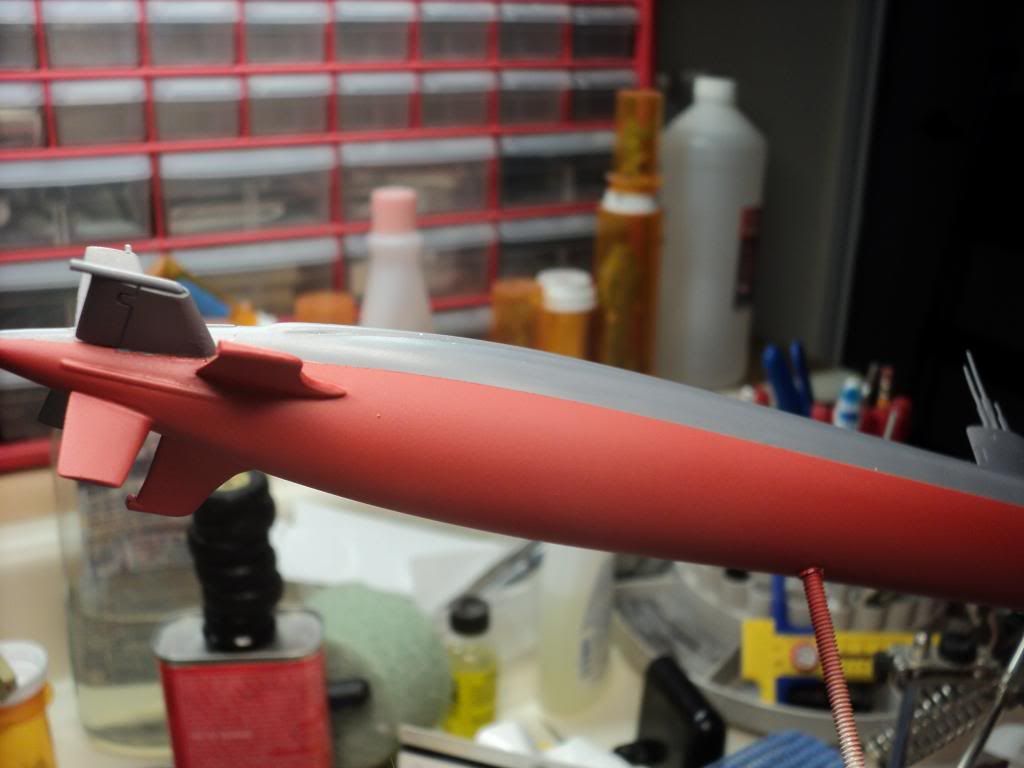
And this was what I ended up w/. As you can see, the color is way off.

DSC02784_zpscef8d926.jpg


So b/c of my frustration w/ it, I just put it aside for a bit until I felt like working on it. Well, on Friday night I pulled it back out and started working on sanding down the paint line so that it wasnt so large, and thankfully I was able to get it sanded down almost flush using 1k grit paper.

I posted on the Steel Navy webforum awhile back asking for tips on what to use to paint the color, and one suggestion that was made was a 50/50 mix of Model Master Insignia Red and MM Rust. Thankfully I've got several bottles of both in my stash so it was real easy for me to do.

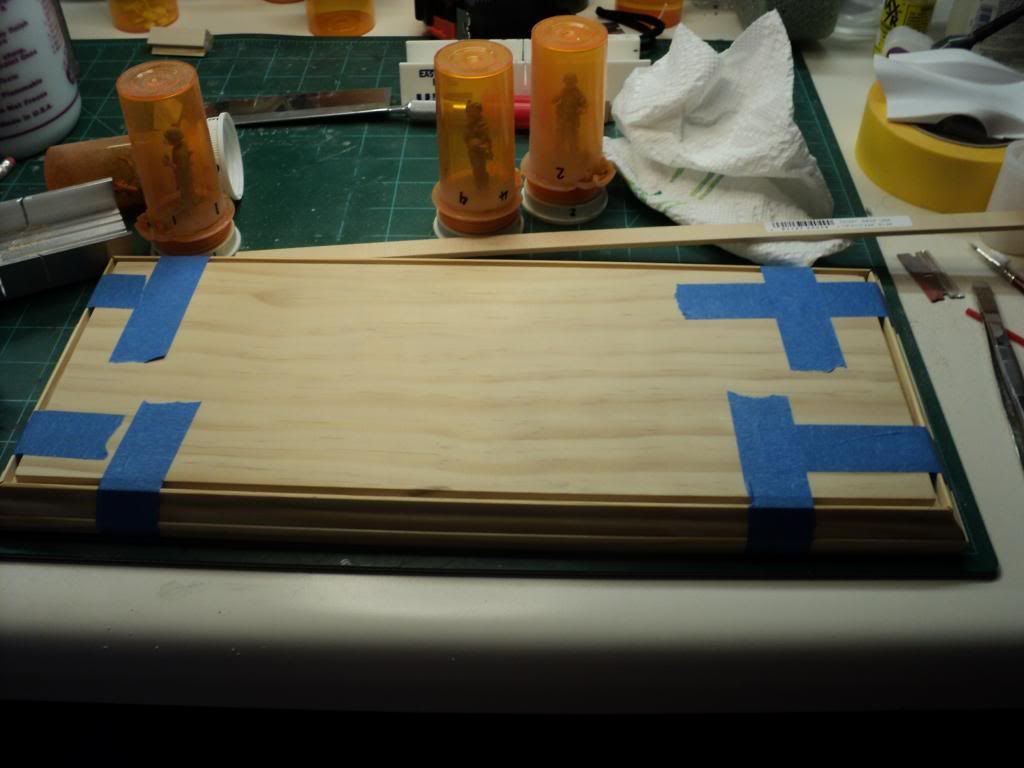
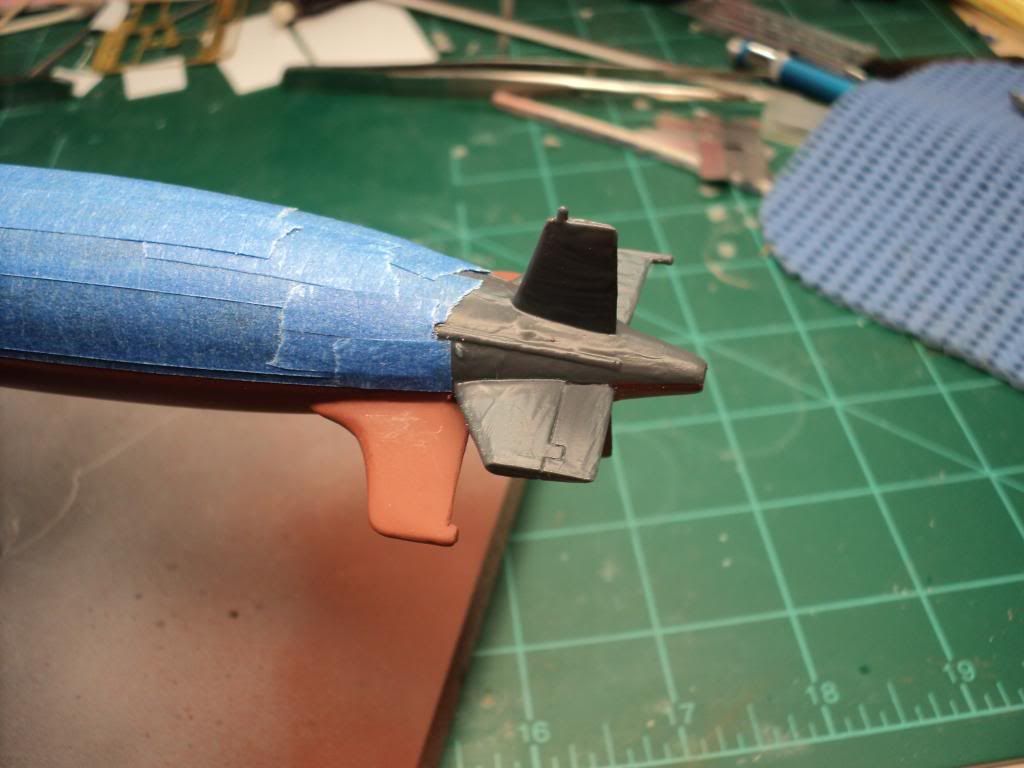
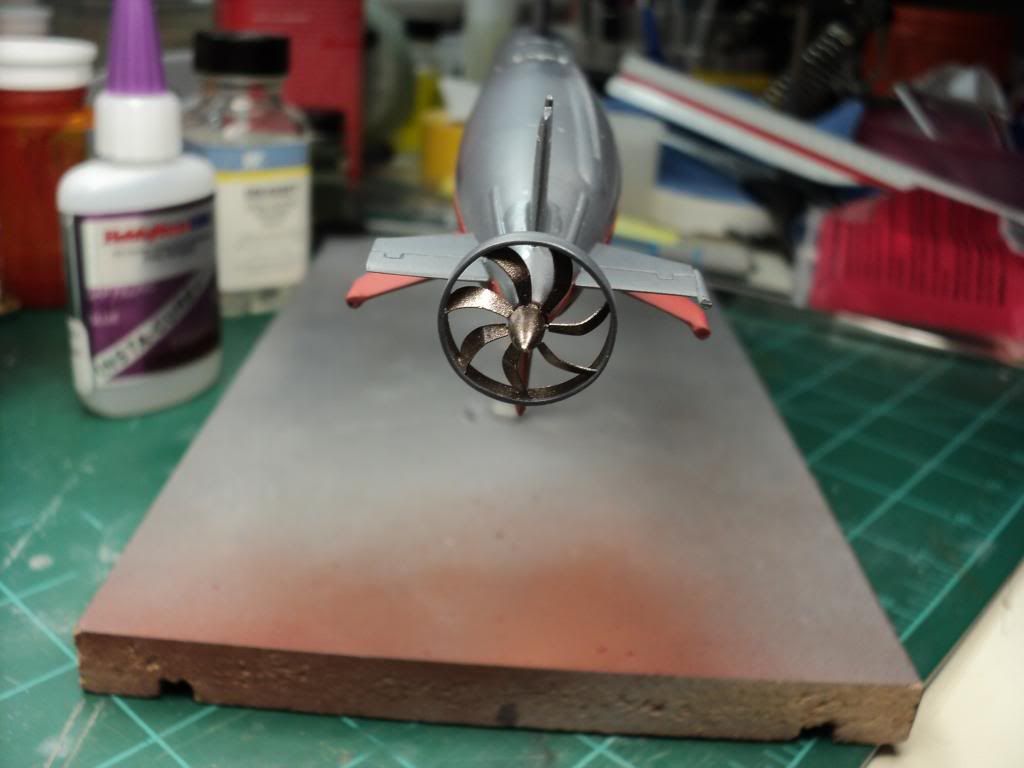
So this morning I started masking to get everything ready. When I painted the Red Oxide, I put tape over the resin & white metal rudder & dive planes, and thankfully nothing broke, but I was nervous as hell the whole time I was pulling tape off. This time, so I didnt have to worry about it, I used my liquid mask to cover everything, and it worked like a charm. Let me mask exactly how I wanted w/o worrying about pulling any of the parts off. Just gave it 4 good thick coats so that it would be thick enough to pull off w/o leaving any of the mask on the model.

DSC02786_zpsb7f52e29.jpg


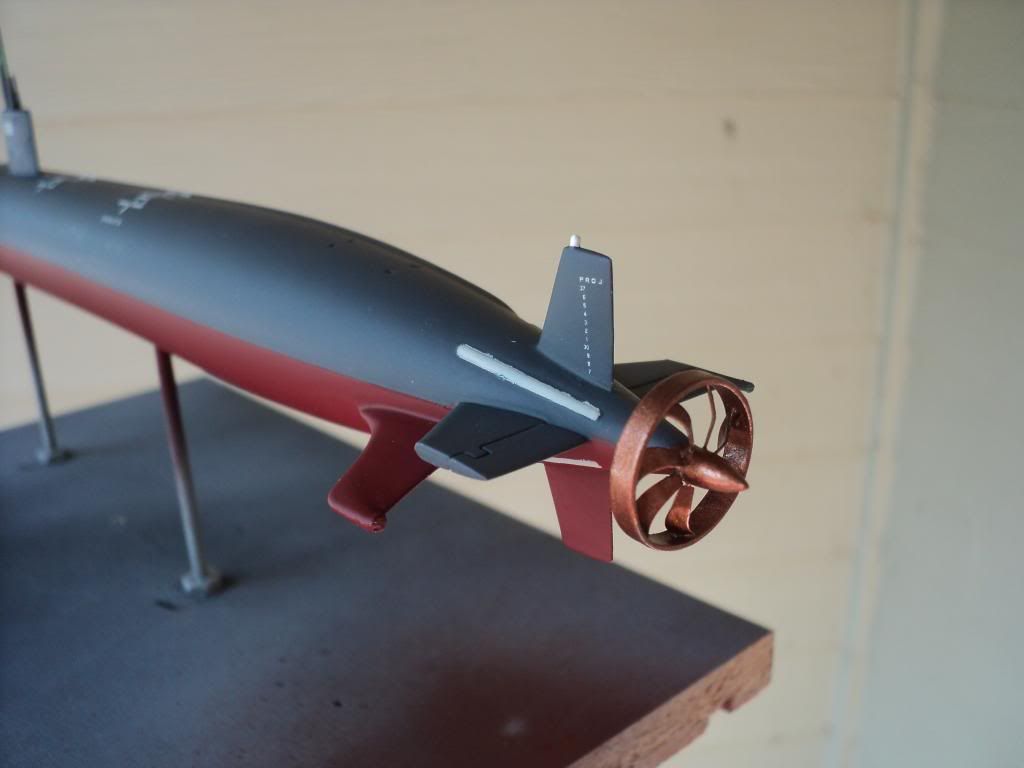
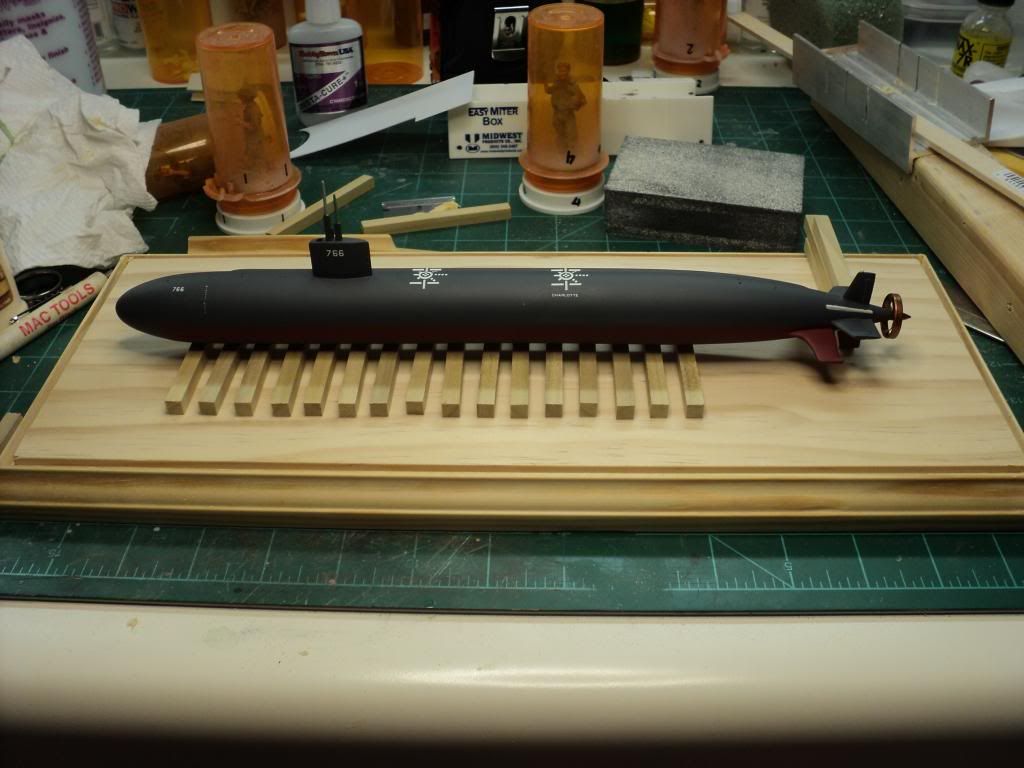
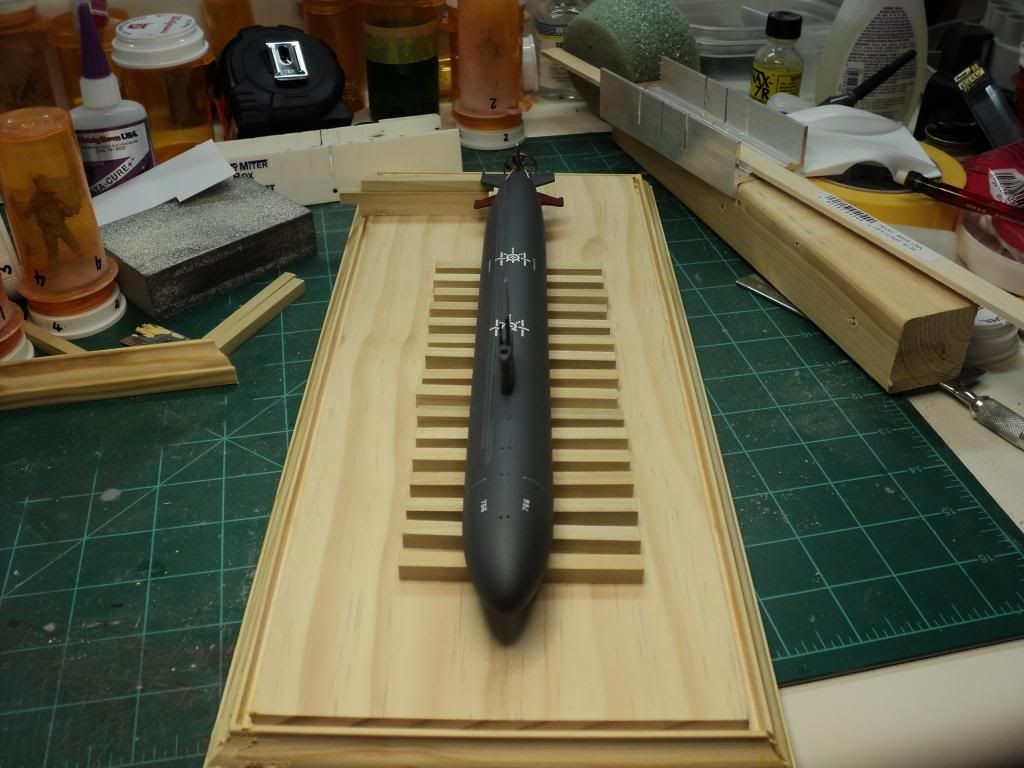
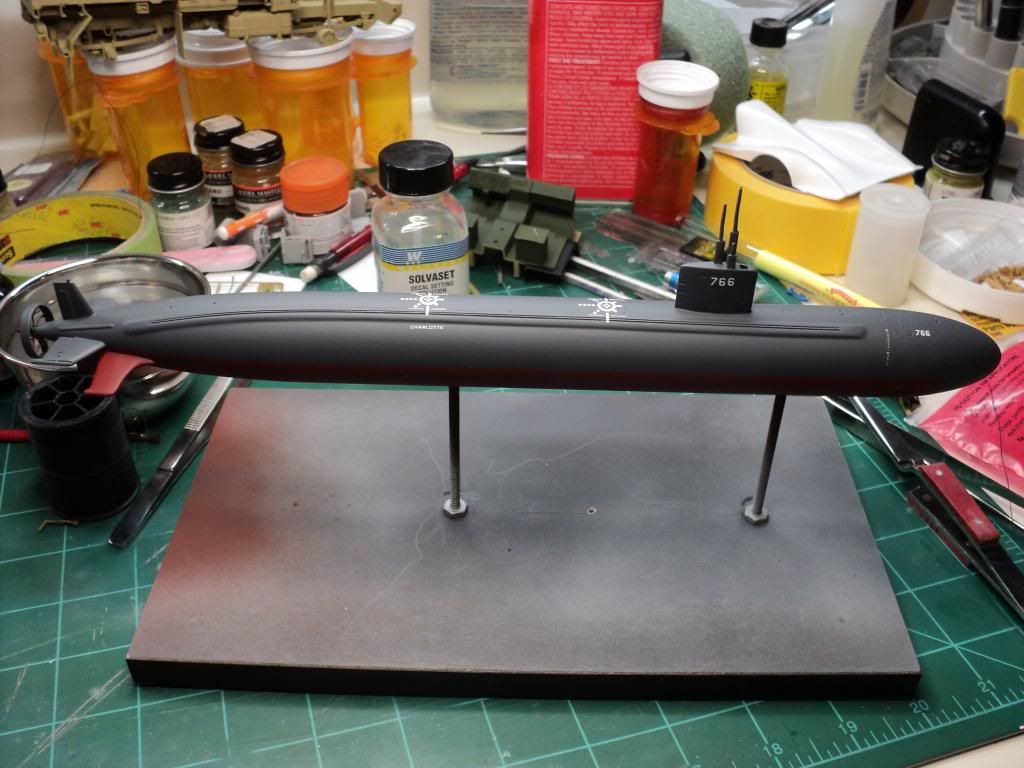
And then about half an hour ago, I finally got a chance to put down some paint, and to say I'm ecstatic about the results would be an understatement. I think the color looks almost perfect. I think it might be a touch brown when compared to the pic of the Greenville, but I think its extremely close, and on top of that, it went down flawlessly.

DSC02787_zps399e019b.jpg


DSC02788_zpsfbe8afbb.jpg


DSC02789_zps2de58e0c.jpg


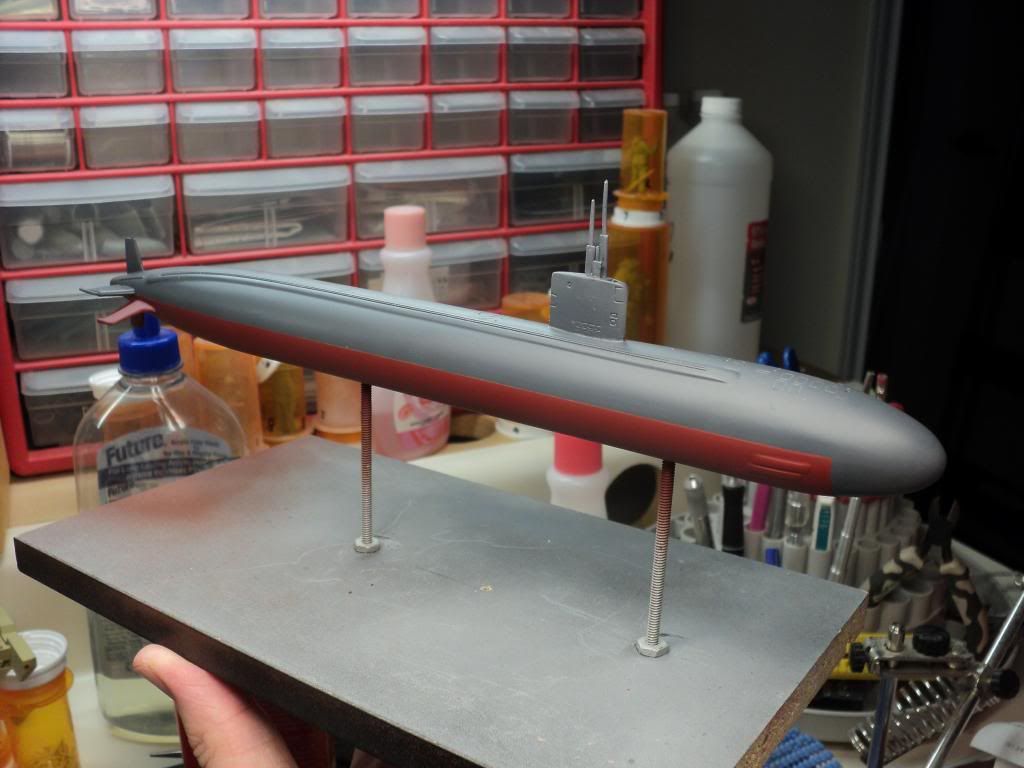
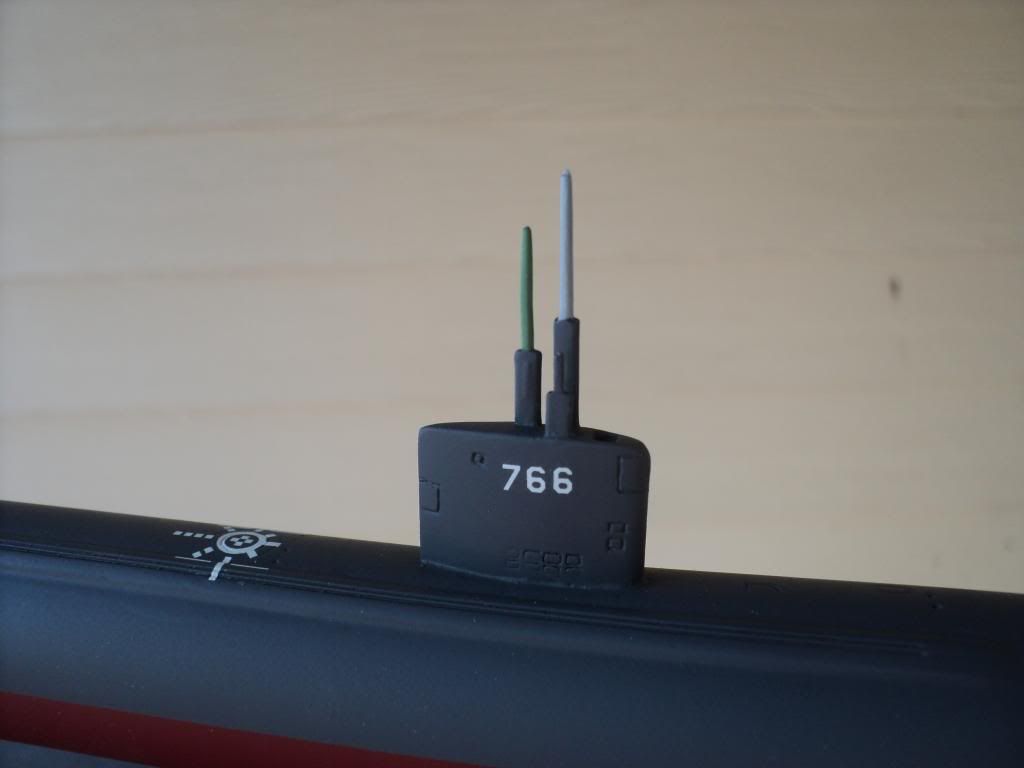
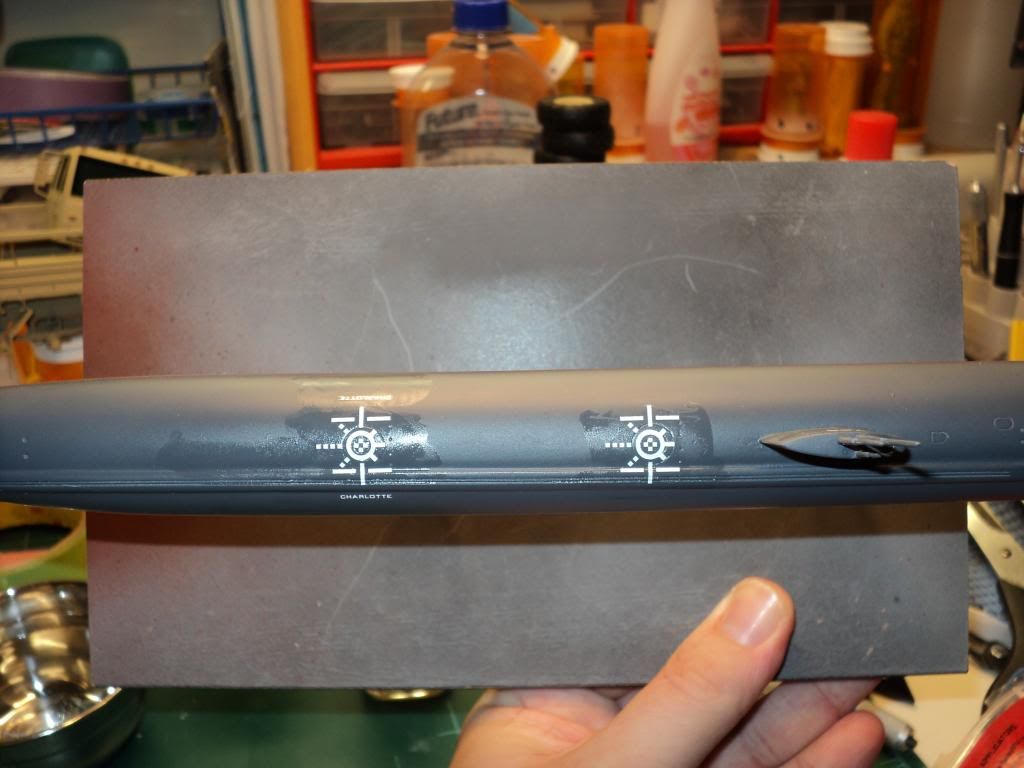
So now I'm finally about in the home stretch. I'll let this dry for a few days, and then I'll start working on decals. Active duty subs generally have very few markings beyond the draft marks at the bow & stern. Is's rare for them to even have their names or any other markings, but I plan on putting the sub name & number on the hull, along w/ a couple other markings to help break up the large open area of the hull. B/c it has so few decals, I'm probably going to skip on putting down a full coat of future on the whole kit, and instead probably just brush on future by hand in the areas where the decals will be, and then when I'm done, I'll give it an overall flat coat to seal everything up. And then all that I have to do is build the base.
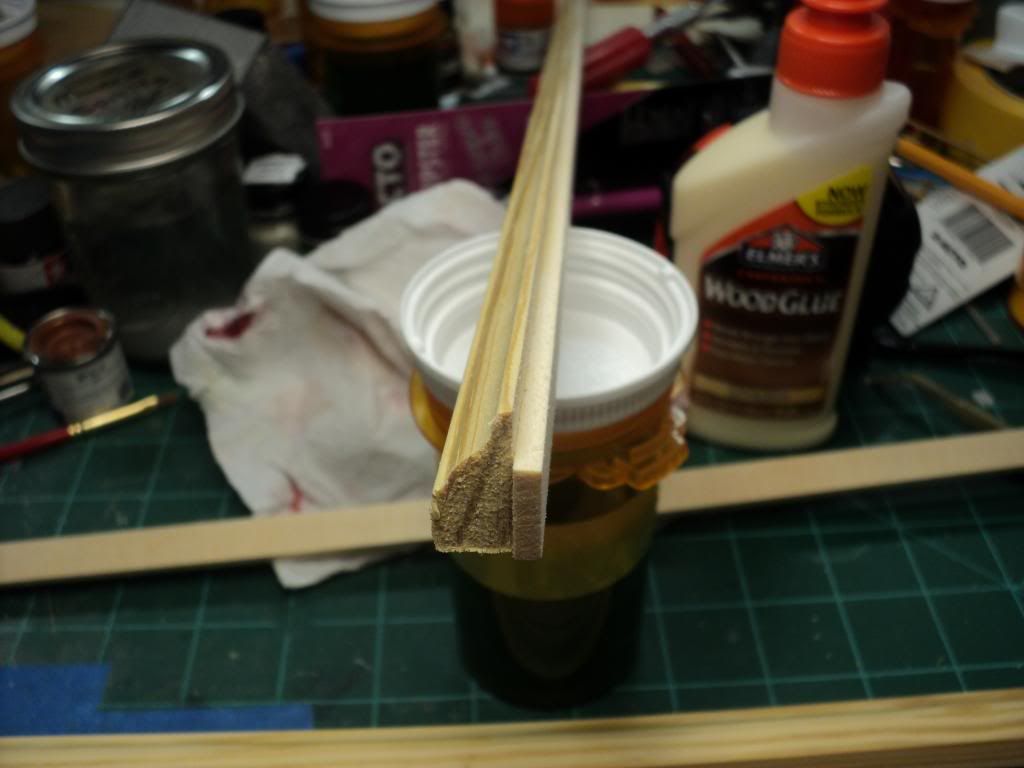
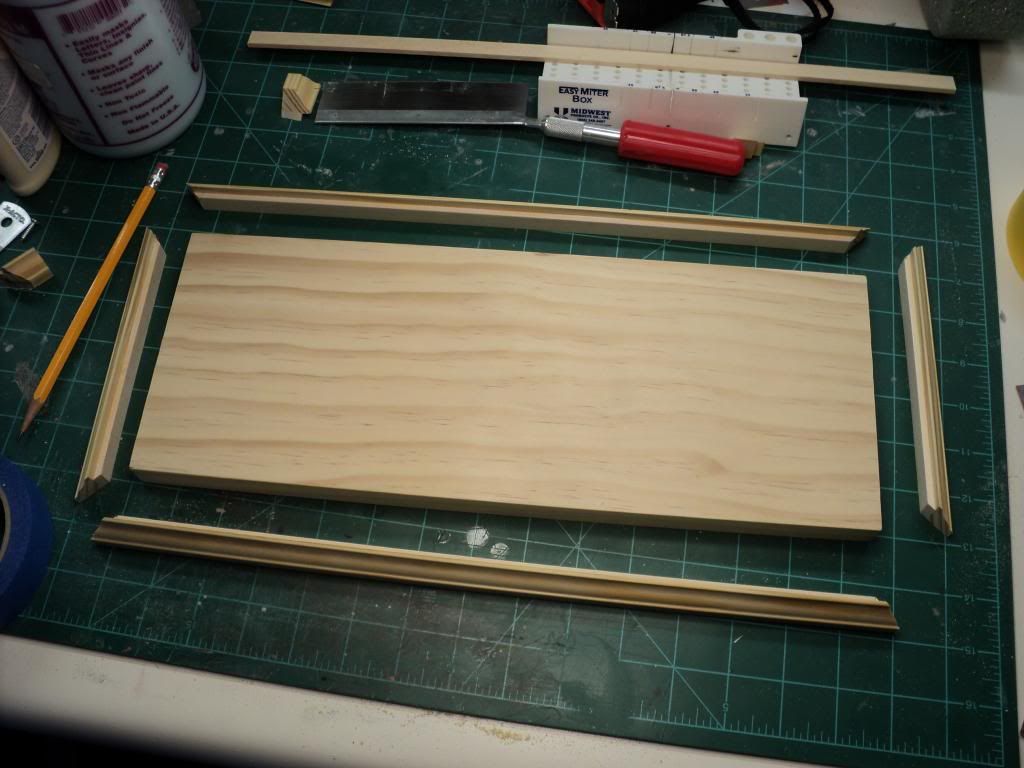
 
1/350 Yankee Modelworks Los Angeles Class Sub

That looks terrific. She really came out well. Is there a special occaision when they would put the name on? Do they ever carry numbers or anything?
JAmes
 
1/350 Yankee Modelworks Los Angeles Class Sub

It was listed in the instruction sheet when it normally carried markings, but I cant seem to find it. I think its mostly for special ceremonies & such that they apply all the markings.

I have found a few pictures of the Charlotte & the Greenville both having numbers on the sail, so it appears that maybe they do run some markings some, or all, of the time.
 
1/350 Yankee Modelworks Los Angeles Class Sub

Spent time on this tonight. Was able to get all of the decals on. Instead of gloss coating the whole thing, I brushed on Future where the decals needed to go, and then put the decal down in the puddle of future.

DSC02790_zps1bf52200.jpg


DSC02791_zpsc4ae7141.jpg


DSC02792_zps12d76fbc.jpg


I also glued on the propeller that I got assembled & painted a few weeks ago.

DSC02794_zps143fa66e.jpg


So, all thats left for this build is the final flat coat and then its all done finally. Still have to build the base for it, but thats gonna be a bit before it happens. Gotta route an edge on it w/ my moms router table, and then glue all the cribbing in place and stain it.
 
1/350 Yankee Modelworks Los Angeles Class Sub

Very cool. The markings do add to it also. Will you satin or dull coat the whole thing? I dont imagine there is a lot of weathering on these is there?
James
 
1/350 Yankee Modelworks Los Angeles Class Sub

I'm planning on dull coating the whole thing.

From the pictures I've found, the only real weathering is the fading of the color on the hull. When first commissioned, they appear almost black, but then it fades out to a dark grey, pretty close to what I have down, so I wont do much of anything from where I'm at now. From what I can tell, there's not really any rust anywhere, so thankfully I dont have to deal w/ that.
 
1/350 Yankee Modelworks Los Angeles Class Sub

Calling this one done!

Its far from perfect, but overall I'm happy w/ the results. Unfortunately where I brushed on the future for the decals, is showing through the flat coat, which I wasnt expecting, and I'm not entirely sure how to correct. I may try using some polishing films to smooth out the flat coat and then flat the model again, but now going to worry about that right now.

DSC02928_zps9f82f7cd.jpg


DSC02927_zpsfca7b846.jpg


Got a couple places I think I might go back later and change. The model has several dimples for the photoetch railing stanchions included w/ the kit, and unfortunately it didnt occur to me to fill them until I was flat coating the model. I think it should be fairly easy to make the areas off and putty and repaint them, so I will probably do it, just not going to worry about it right now.

DSC02933_zps03328d84.jpg
 
Thanks guys. I'm really happy to finally have this one done. It was an interesting build, to say the least. Learned a lot on this one.
 
Thanks guys!

The base will be started this weekend when I go down to my mom's place. I'll pull out the router table so I can route a nice edge on the base, and then I'll start the staining. Need to get the stain still, so I can start that next week. Trying to decide whether to glue the cribbing on and then stain, or stain the cribbing separately. Leaning toward separate, so that I can sand all of it between coats of stain.

I posted this on the Steel Navy forum, and got a few tips on some stuff to add as far as painting is concerned, which I'll probably work on this evening. I found out the prop ring should be the same color as the prop, and then there are zinc anodes between the rudders that should be a kind of off-white color, there's a beacon light on top of the top rudder that needs to be painted, and I should paint the periscopes either a light grey, or a light green color, and all this should hopefully add a bit more visual interest to the model.
 
Thanks guys.

Here's some updated pictures I took just now w/ the painting suggestions I mentioned earlier.

DSC02938_zps336a7d90.jpg


DSC02942_zpse9abb917.jpg


Definitely gives more color, and I like the color of the prop a lot better. I originally painted it w/ Tamiya Bronze, which was just way way too dark. I repainted it using Humbrol Bronze, which I think is a ton closer to what it should look like.
 
I guess I'll just keep adding to this thread, even though the model itself is complete.

Spent some time today working on the base.

Base is 1" Yellow Pine, 5 1/2" wide by 13" long. This morning I picked up some trim moulding from lowes, and some 1/8 x 1/2 basswood strips from Hobby Lobby.

Here's the moulding I decided to go w/

DSC02944_zpse299d760.jpg


What I did was trimmed the moulding to 24" lengths to match the basswood strips, and then glued the basswood to the moulding strip. The purpose for this is to give a channel for the acrylic cover that I will make to sit into. This model is pretty fragile, w/ all the various bits sticking off of it, so I'd really like to protect it, and keep dust off of it, I dont ever want to have to try to dust the model and risk breaking anything.

DSC02948_zps7e0d7b47.jpg


Once glued I then got all the pieces cut. This was a pretty frustrating part. Twice I cut my angles backwards and had to start over. But I was finally able to get all of the pieces cut how I wanted. And then it was all glued together.

DSC02949_zps51af8754.jpg


DSC02952_zpsdf54df71.jpg


Unfortunately my joints didnt come out as tight as I was hoping, but they arent so bad that I cant fill them w/ a bit of wood putty and sand them smooth.

This is basically what I'm hoping for the final look.

DSC02953_zpsce9449e0.jpg


DSC02954_zpsf1c9353c.jpg


Right now the cribbing strips are cut 3" wide, giving 1.25" all around the sub, including at the bow & stern. To mount the sub in place, I'll drill holes to line up w/ the threaded inserts that are in it, that I've been using to hold it to the construction base.

I'm thinking about trimming the cribbing some, possibly up to half of what I have htem at now, and then putting a brass name plate down, and also possibly a ships patch. I've found patches for the Charlotte on eBay for about 6 bucks. I did find ship's officers challenge coins, which I think would be a very cool conversation piece to add to it, but the challenge coins were going for 60-70 dollars, which is just way too expensive for something like this.
 
Looks good. Maybe you could write to the ebayers selling the coin and ask if they would make a cast of it. Or better still write to the ship and ask for a coin, and send them some pics. Military people are usually pretty good about stuff like this.
 
Back
Top