Great going Adam, really a good finish. Glad you shared your comeback with us buddy!Done!!
Got it flatted and assembled today.
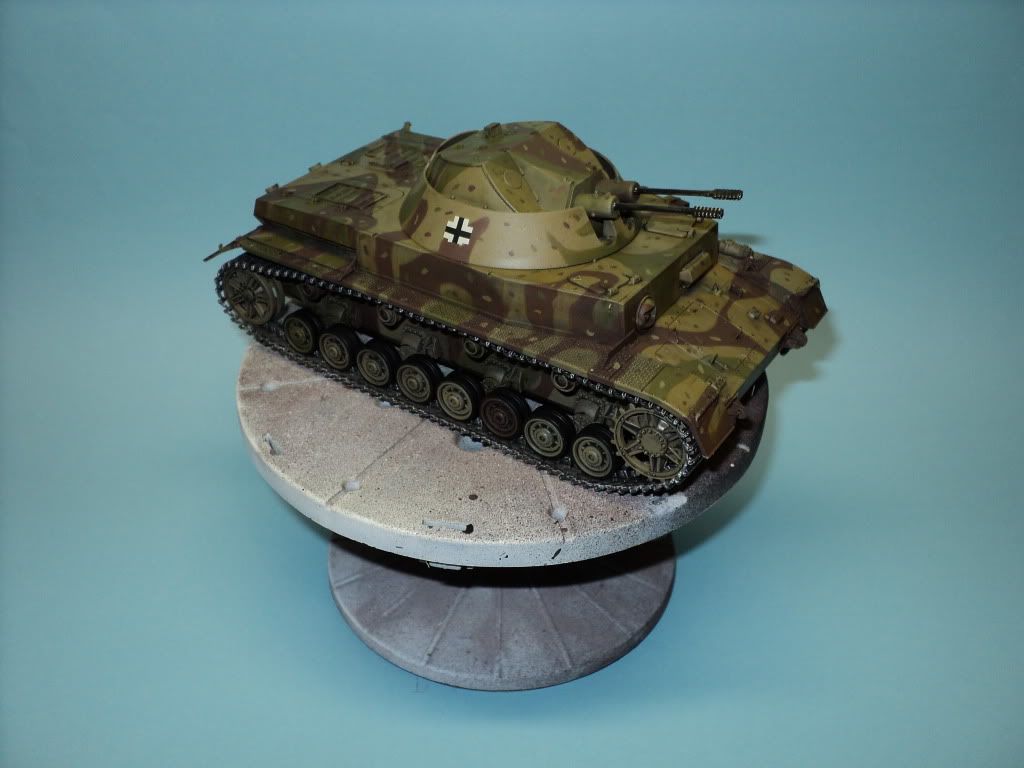
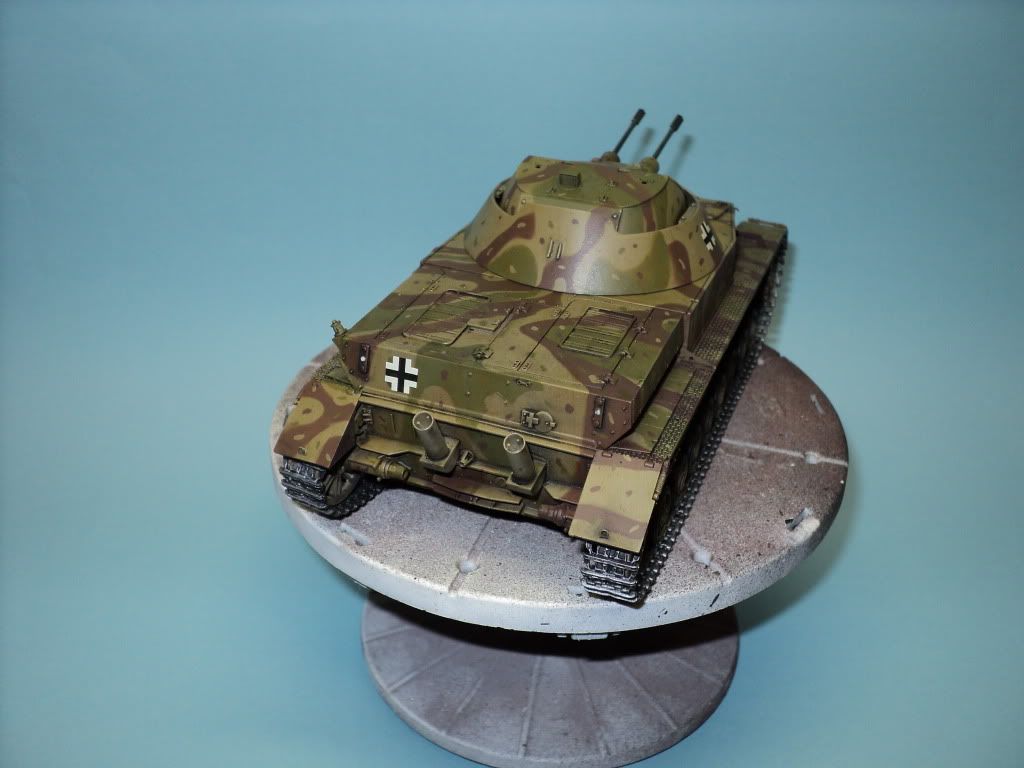
Been an interesting build, thats for sure. Learned some new techniques, and learned a few processes that make assembly much easier.
This is my fist finished build in a little bit over 3 years. Last completed build was in Nov. of 2008.
-
Modelers Alliance has updated the forum software on our website. We have migrated all post, content and user accounts but we could not migrate the passwords.
This requires that you manually reset your password.
Please click here, http://modelersalliance.org/forums/login to go to logon page and use the "Forgot your Password" option.
You are using an out of date browser. It may not display this or other websites correctly.
You should upgrade or use an alternative browser.
You should upgrade or use an alternative browser.
DML 1/35 Flakpanzer IV Kugelblitz
- Thread starter Adam Baker
- Start date
panzerace007
Active member
ADAM ,
Yeah ! I too Dig th Camo !! Great Job ..... & Hey you finished a model thisYear !! Let's double that next year !!
Looks really Cool !!
:drinks
Yeah ! I too Dig th Camo !! Great Job ..... & Hey you finished a model thisYear !! Let's double that next year !!
Looks really Cool !!
:drinks
Adam Baker
Active member
Now that this build is finished, I've started working on the base I'm going to put it on.
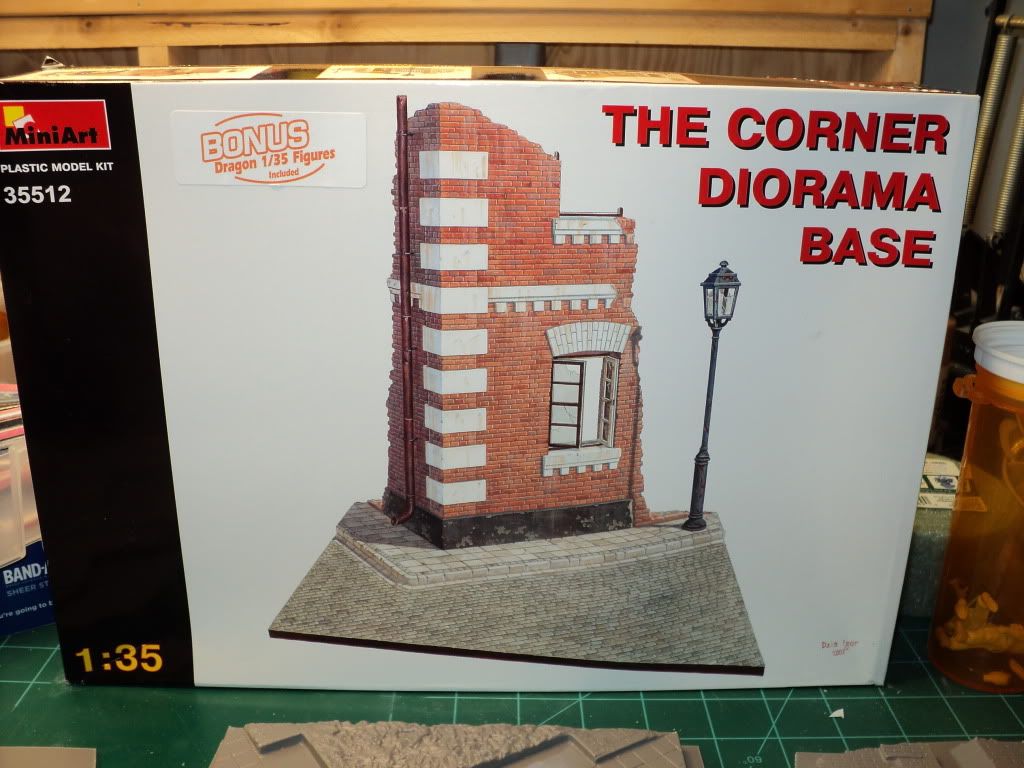
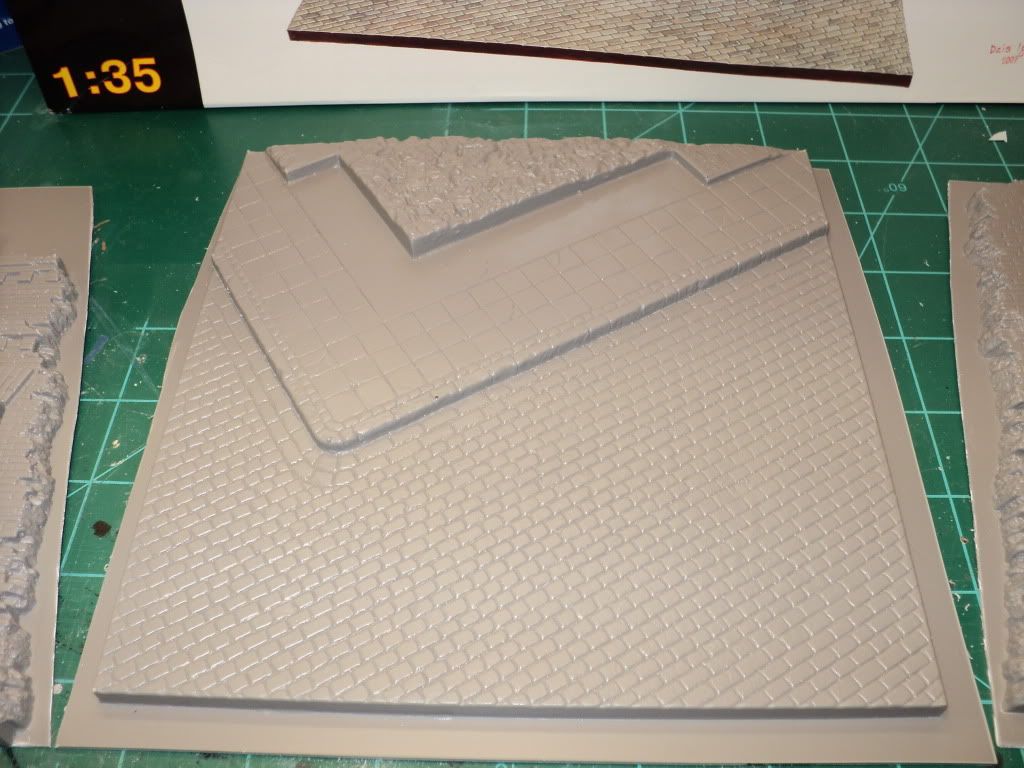
This weekend I acquired some models from Iron Mike, one of them being a Mini Art "The Corner" dio base.
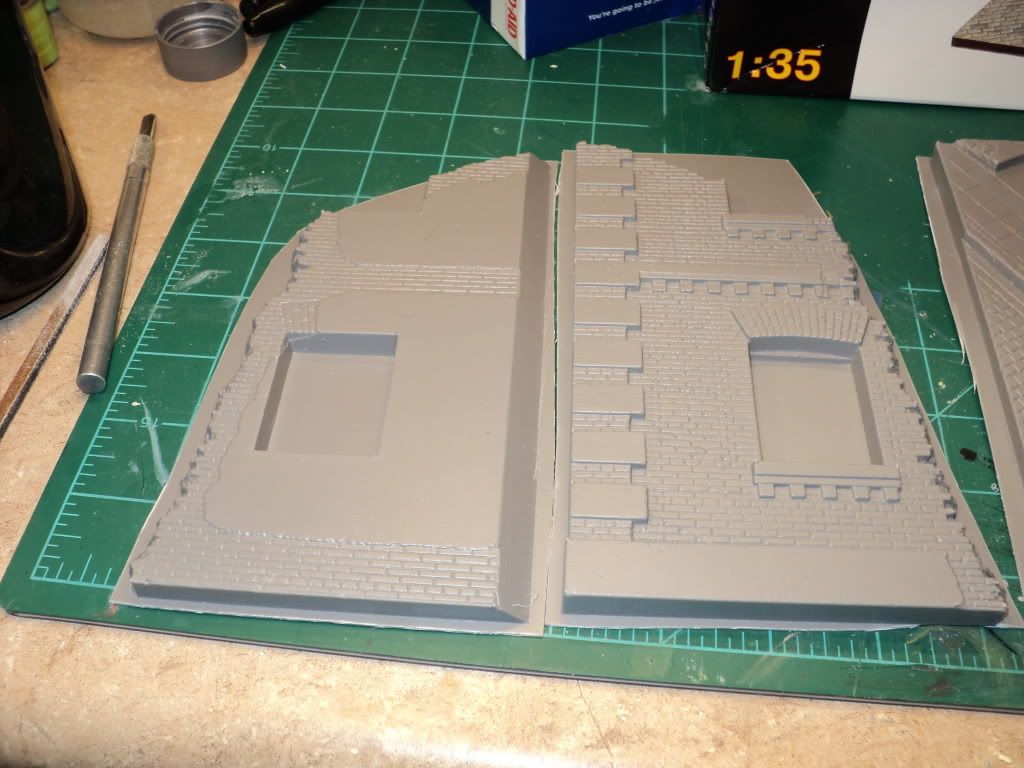
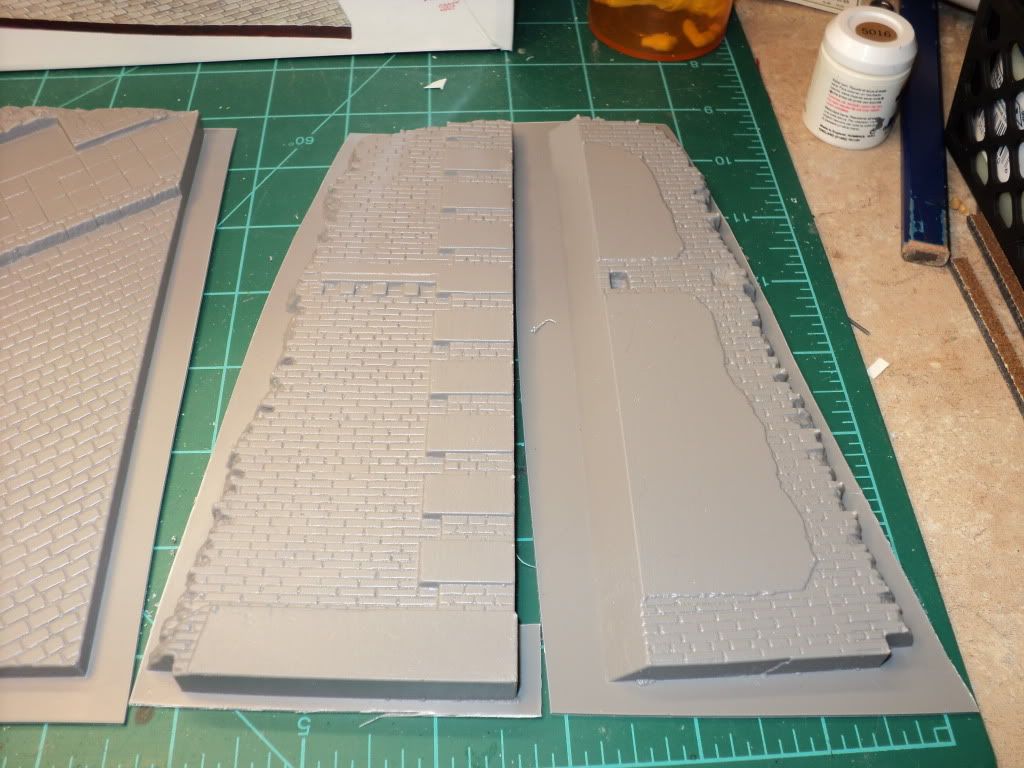
And a couple shots of the 'blitz sitting on the base.
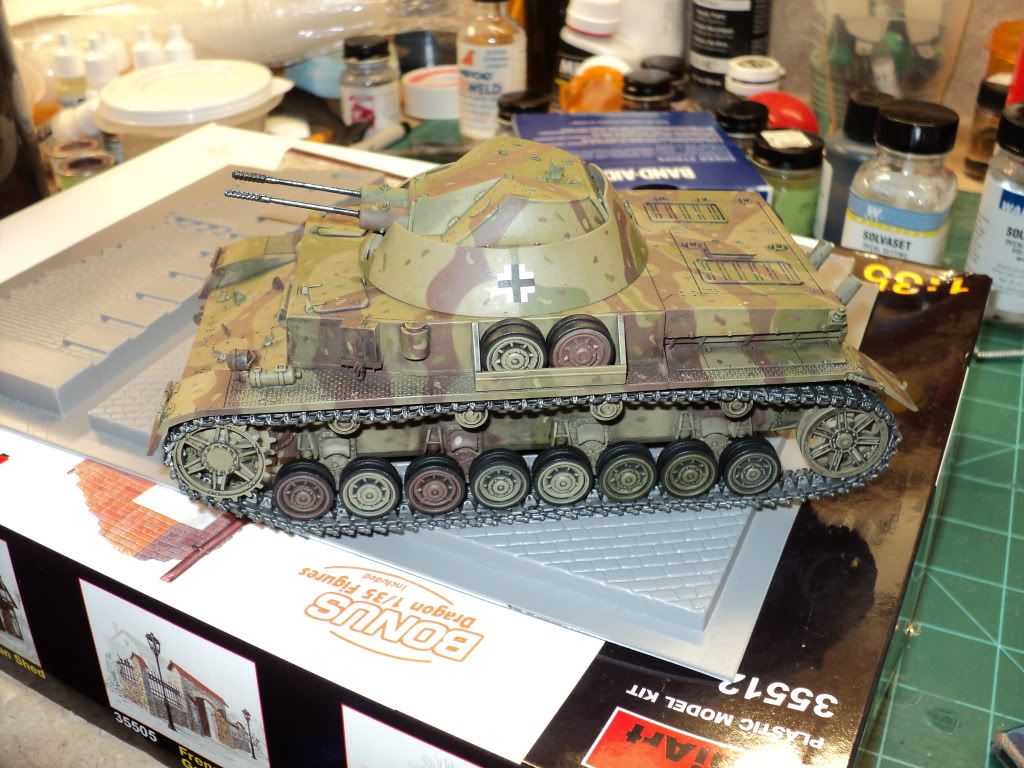
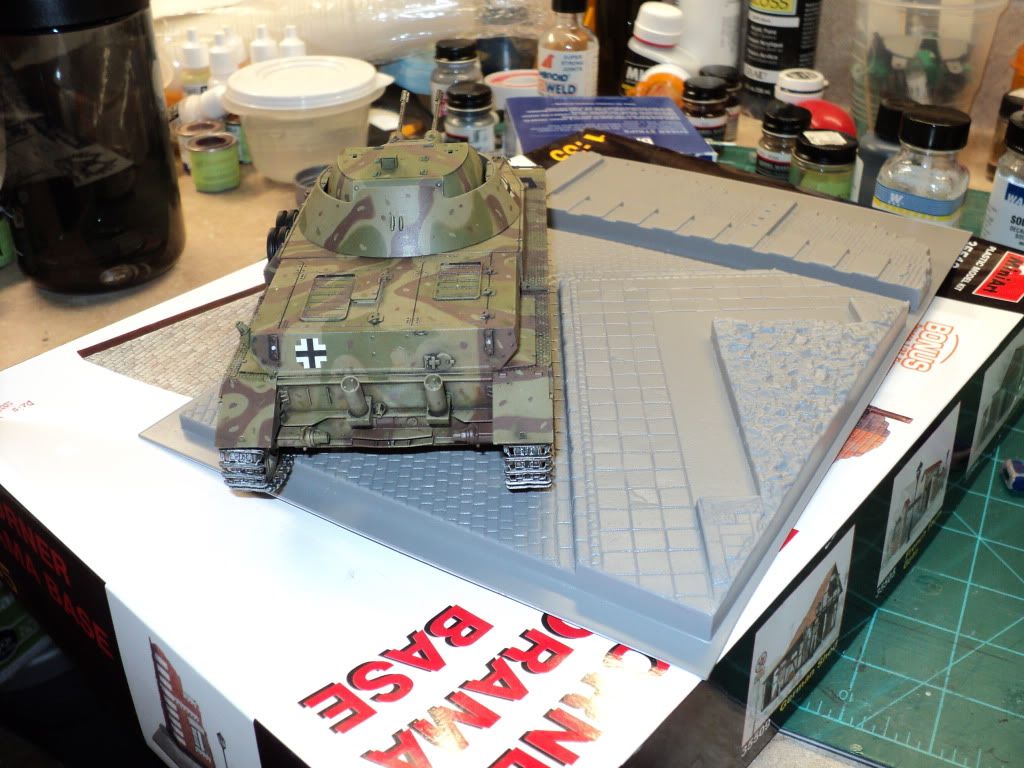
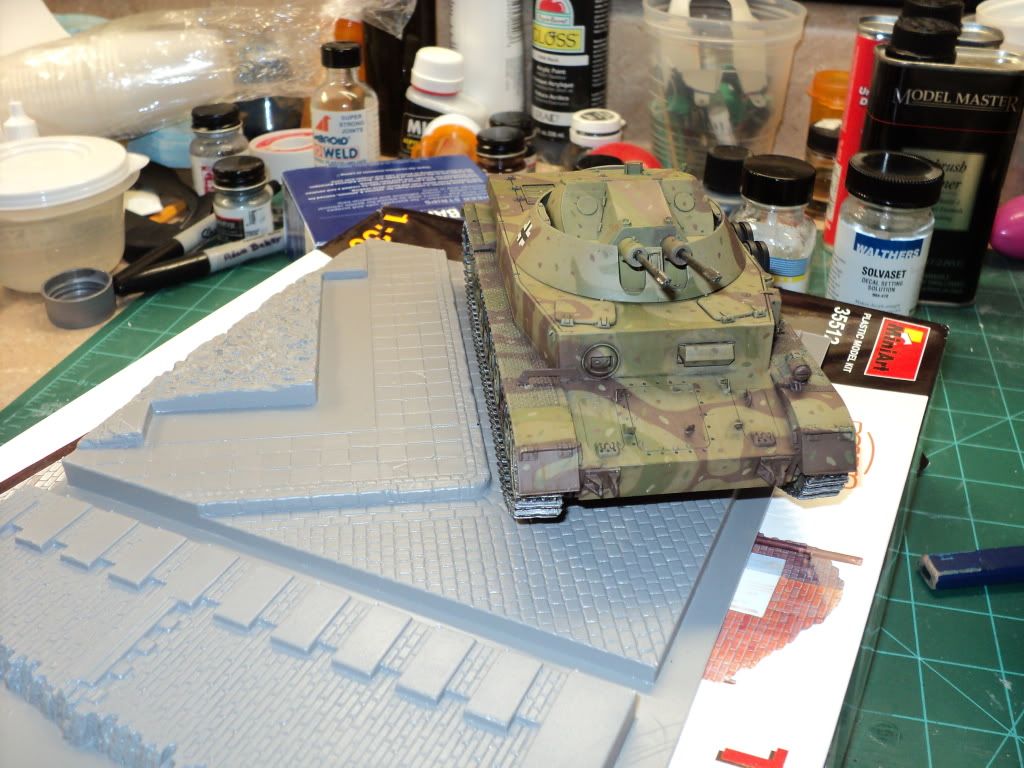
I knew that the model was most likely going to hang off the edge of the base, but unfortunately I didn't expect it to hang off as much as it does. So, w/ the help of Iron Mike, I've decided that I'm going to make the street portion of the base larger, by using blue foam insulation and I'll cut the brick street into it. I'm probably going to try picking up the blue foam tomorrow at Lowes during my lunch break.
On the base, I'm thinking about adding debris around the base of the building, as well as inside. I'm also thinking about trying to frame together a second floor for the inside of the building. I figure I'll probably use balsa wood for the exposed wood framing. The nice part is that the wall panels already had a couple openings for floor joists, so just I'd only have to add a couple more openings in the 2nd wall panel, and I should be good to go.
This weekend I acquired some models from Iron Mike, one of them being a Mini Art "The Corner" dio base.


And a couple shots of the 'blitz sitting on the base.


I knew that the model was most likely going to hang off the edge of the base, but unfortunately I didn't expect it to hang off as much as it does. So, w/ the help of Iron Mike, I've decided that I'm going to make the street portion of the base larger, by using blue foam insulation and I'll cut the brick street into it. I'm probably going to try picking up the blue foam tomorrow at Lowes during my lunch break.
On the base, I'm thinking about adding debris around the base of the building, as well as inside. I'm also thinking about trying to frame together a second floor for the inside of the building. I figure I'll probably use balsa wood for the exposed wood framing. The nice part is that the wall panels already had a couple openings for floor joists, so just I'd only have to add a couple more openings in the 2nd wall panel, and I should be good to go.
kryptosdaddy
Well-known member
Wow! :woohoo: Calm down Adam, this is getting crazy! That street scene looks like fun.
Looks like it's going to be busy! 

jknaus
Administrator
This may be too late, but one of the ways I read to build these buildings is to glue the walls together without removing the excess plastic. Then drilling a hole in something like the base of the wall and shooting in a small amount of expanding foam.Not too much or it will break it. Then when is has filled in the center removing the excess plastic and cutting out the doors and windows. It is more rigid and easier to work with. I havent tried it myself, but thats what I read. hth
James
James
phantom II
Master at Arms
Hey Adam, that cammo scheme came out really sharp. Looks like you're gonna be busy with the buildings ! :fencing
Cheers, Christian B)
Cheers, Christian B)
Adam Baker
Active member
Thought I'd post up a short update on this project. Havent gotten nearly as much done as hoped this weekend, but I've been "distracted". Friday night I picked up a 37" flat screen TV and a PS3, so I've spent most of my weekend watching movies & playing video games. But I was able to get some work done on this last night and this morning.
Got all the wall panels cut apart, had the first panel done last week, finished the 2nd one last night. I've now started working on cleaning up the joints, which is going to take a lot of time and careful work. The joint between the 2 walls is going to be a real task, but I'll get it. Just going to have to take it very slowly, making sure it all matches like it should.
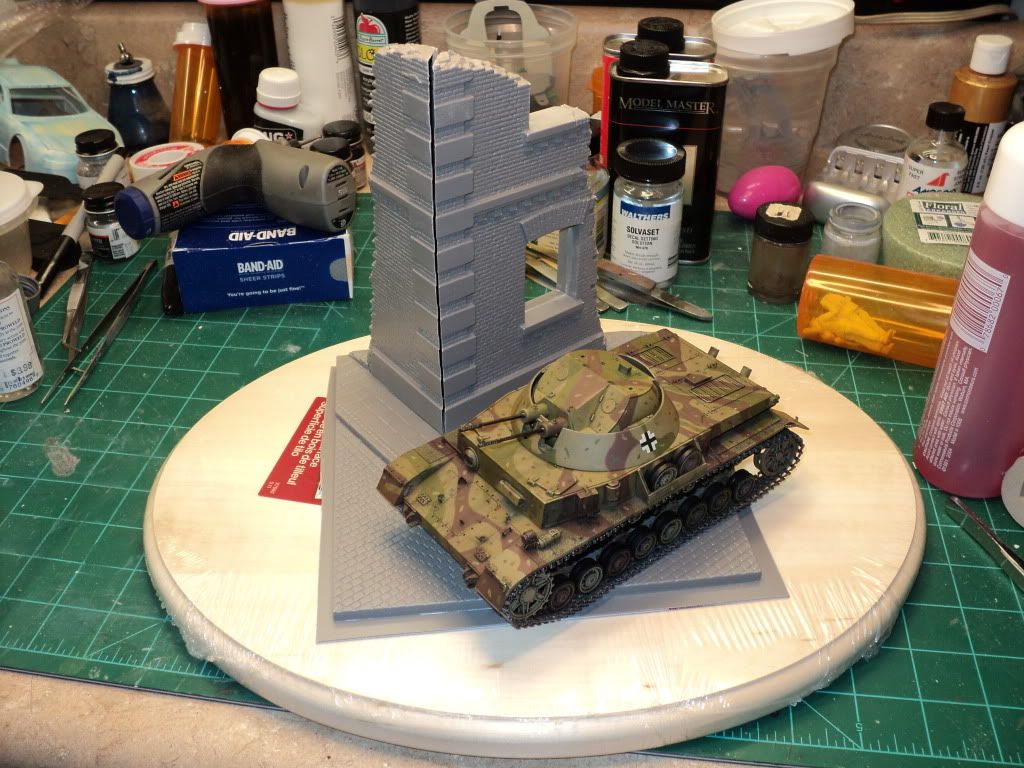
This past week I picked up a panel of the Dow blue foam insulation, that I will use to make a new street. The street on the base will be cut off, and replaced completely, so that the Kugelblitz wont hang off as badly as it is now, hopefully I can get the spacing right, where it wont hang off at all, but we'll see.
Got all the wall panels cut apart, had the first panel done last week, finished the 2nd one last night. I've now started working on cleaning up the joints, which is going to take a lot of time and careful work. The joint between the 2 walls is going to be a real task, but I'll get it. Just going to have to take it very slowly, making sure it all matches like it should.

This past week I picked up a panel of the Dow blue foam insulation, that I will use to make a new street. The street on the base will be cut off, and replaced completely, so that the Kugelblitz wont hang off as badly as it is now, hopefully I can get the spacing right, where it wont hang off at all, but we'll see.
Thought I'd post up a short update on this project. Havent gotten nearly as much done as hoped this weekend, but I've been "distracted". Friday night I picked up a 37" flat screen TV and a PS3, so I've spent most of my weekend watching movies & playing video games.
That's it, he's gone, see ya when the new wares off.
Shame because it's looking soo good! :drinks
Adam Baker
Active member
Haha, pretty close, haha. Having the PS3 will definitely affect the amount of time I might have spent modeling, haha.
I'm hoping to be to the point where the 2 wall panels are glued together tonight, but I'm not holding my breath. I would like to have all the seams sanded down before I glue them together, so we'll see what happens.
I'm hoping to be to the point where the 2 wall panels are glued together tonight, but I'm not holding my breath. I would like to have all the seams sanded down before I glue them together, so we'll see what happens.
Adam Baker
Active member
Progress!!
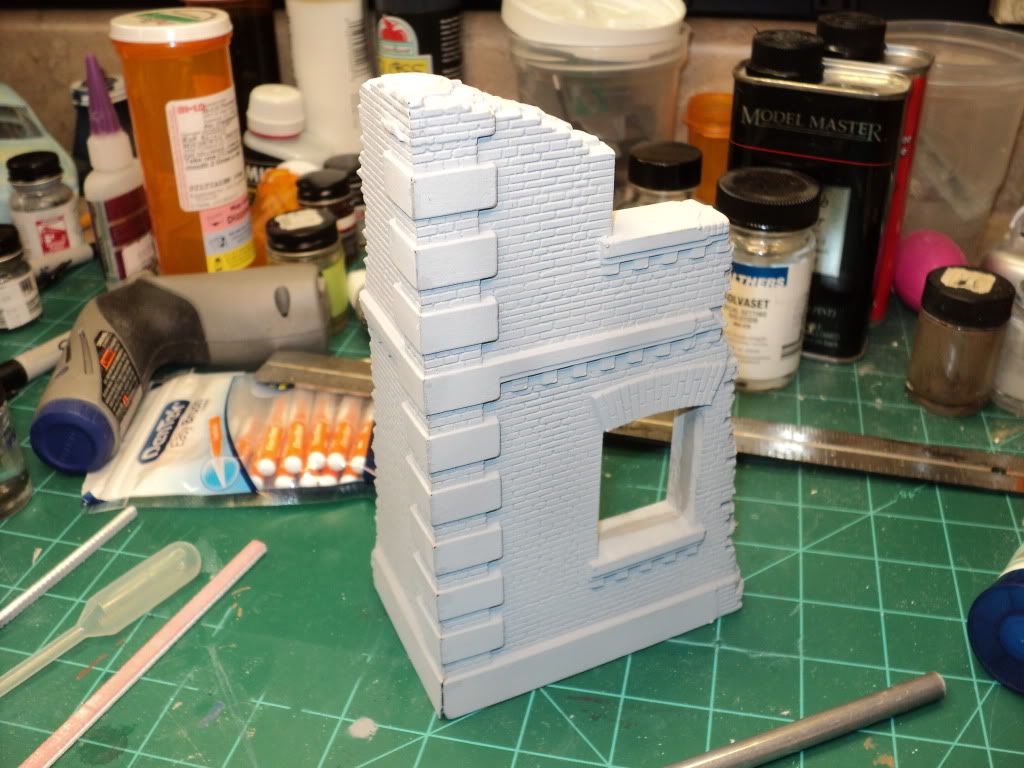
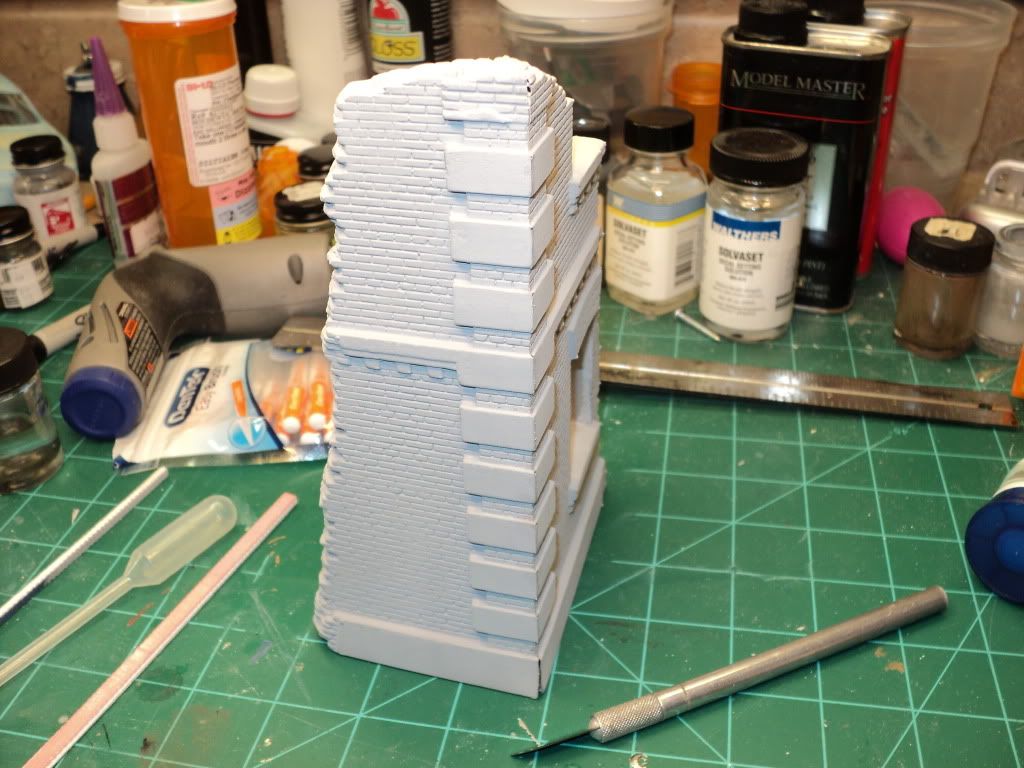
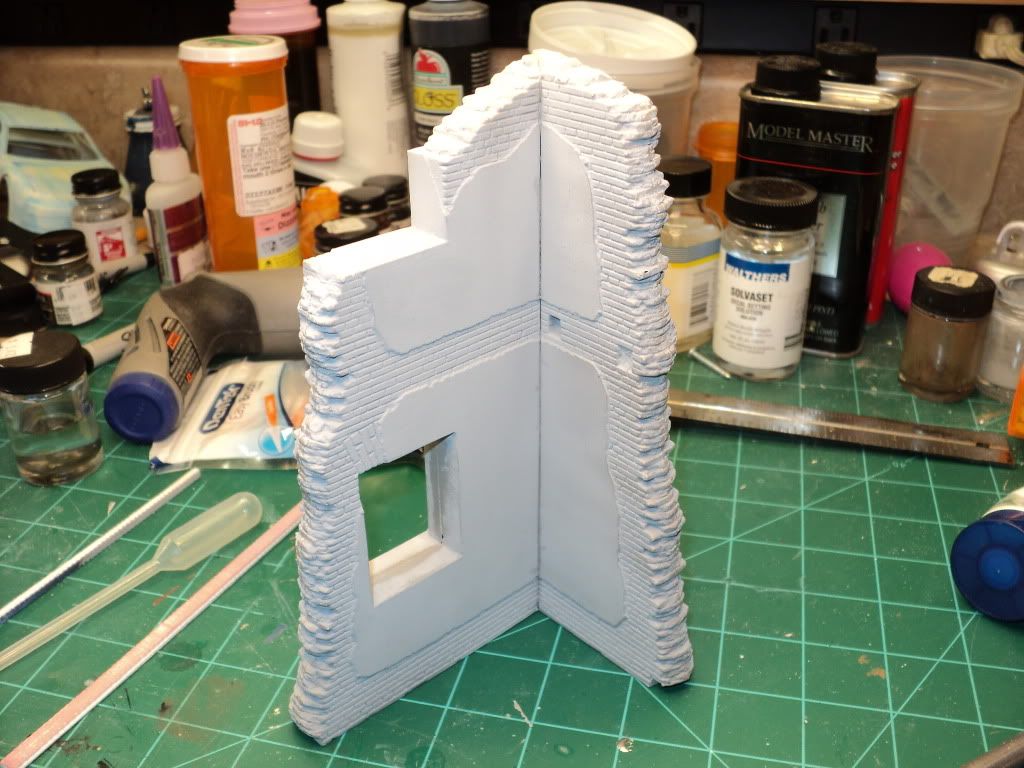
I've spent the last couple weeks working on the wall panels. The seams along the broken part of the walls, were huge, and took a lot of scraping and sanding to get looking better. I've been able to get them cleaned up quite a bit, but I think there's still some work left, but I can also hide areas that arent real good, w/ debris & such once I get that far.
Tonight I decided that the seams were far enough along, that it was time to go ahead & glue the panels together.
I started by laying out glue on the inside portion of the walls, that is the largest mating surface for the 2 halves. After that dried for a couple of minutes, I started stitching my way down the outside from the top down. I think it came out pretty good, but I do have a few areas that will have to be worked on. One major issue is that the plastic was really thin to begin with, at the bottom edge on the outside, so Im going to have to find some way to reinforce the joint so I can glue it. I've got some .1" square rod, that I think might work well for reinforcing the corner, but I'm going to let the parts dry overnight, and then tomorrow I'll work the bottom most corner. Hopefully tomorrow evening I'll be at a point where I can hit it w/ some more primer to see what areas need more work. And then maybe next week I might actually be able to start the colors.
On to the pictures.


Adam Baker
Active member
More progress!
I think this might be the first time I've posted updates 2 days in a row on this project, haha.
Got home from some family stuff this afternoon, and pulled the walls out and started working on it again.
Last night, one of the things I noticed after they were glued together, was a mismatch in the brick pattern at the corner joint. At the top, the mortar joints align pretty nicely, but as you get lower on the wall, the joints start to move apart, and by the time you get to the bottom of the wall, its off by almost half a brick.
Here's what it looked like.
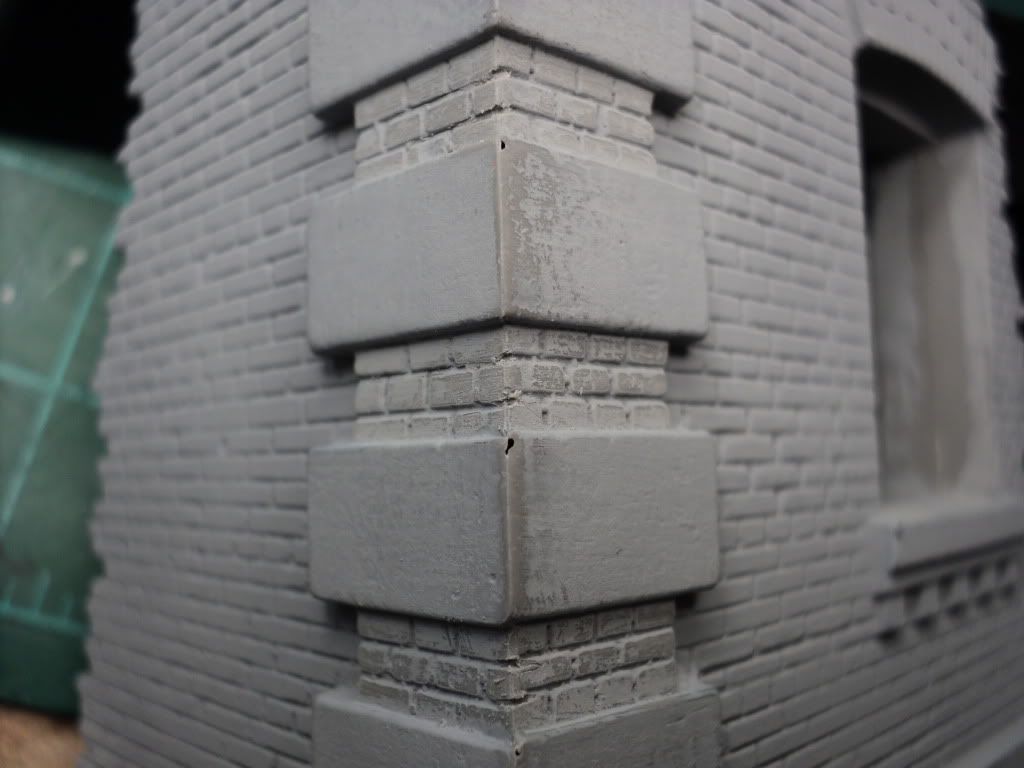
At first I thought I could fix it by just carefully working the joints w/ an x-acto blade and one of my razor saw blades, but after awhile I realized this just wasn't possible, as you can see in the picture above.
So I started thinking about my options for fixing it. One thought I had, was to fill the mortar joints in w/ superglue, and then re-scribe the the joints, but I really didn't like that idea. I've never done much scribing, so I figured it wouldn't come out real good, plus its pretty tight in the opening, only about .225" wide, so not a lot of room to work w/. So I started thinking about just covering up the bricks. I've seen architecture where there are concrete or stone at the corner, so I started looking for images last night, and came up w/ this one, and it was exactly what i had in mind.

You can see how all the corner joints are stone/concrete w/ the rest of the wall being brick. Incidentally, Iron Mike informed me this morning, after much painful searching last night, that the term for this is Quoin (pronounced Coin), which thus yielded all kinda of wonderful examples of what I was looking for, haha. Its amazing what you can find, when you know what something is called.
So anyway, the plan is to cover the mismatched brick pattern w/ sheet styrene, and then I'll paint the whole corner up to look like brick.
I started by measuring the openings and pulled out my Chopper II and cut several strips that were close to what I needed, but ended up being slightly over-sized, which I think worked out for the best.
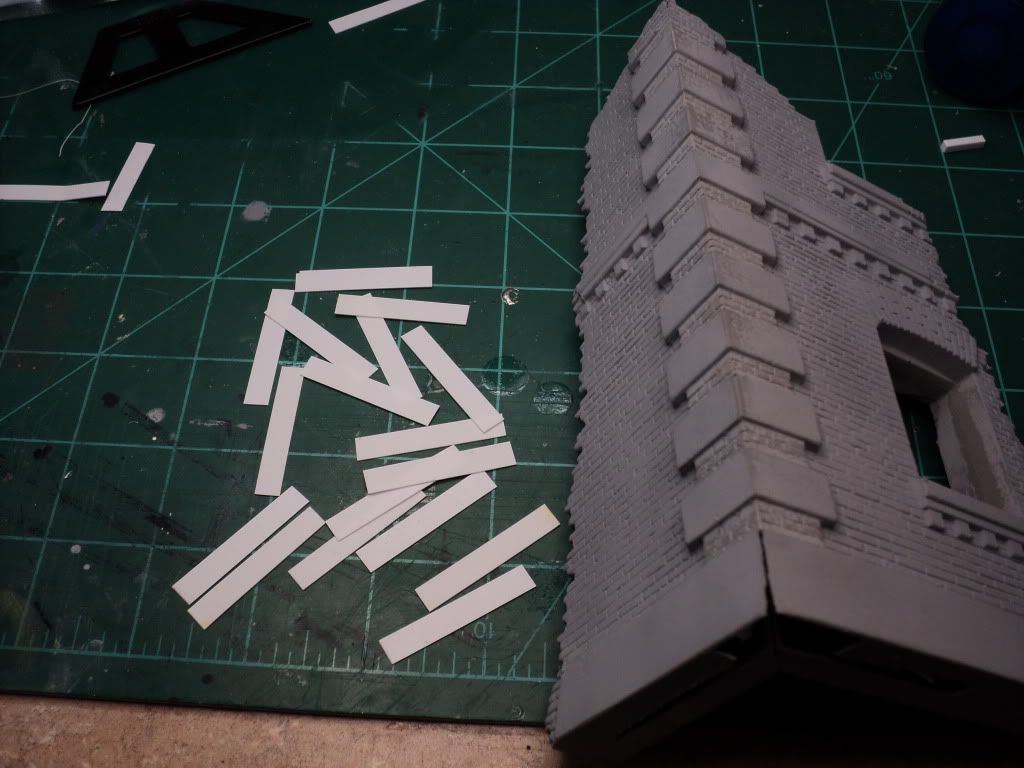
What this let me do, is fine tune each strip for the opening it would be used in. I found that the openings weren't all the same size, so I pulled out an Emory file and sanded each one till they fit.
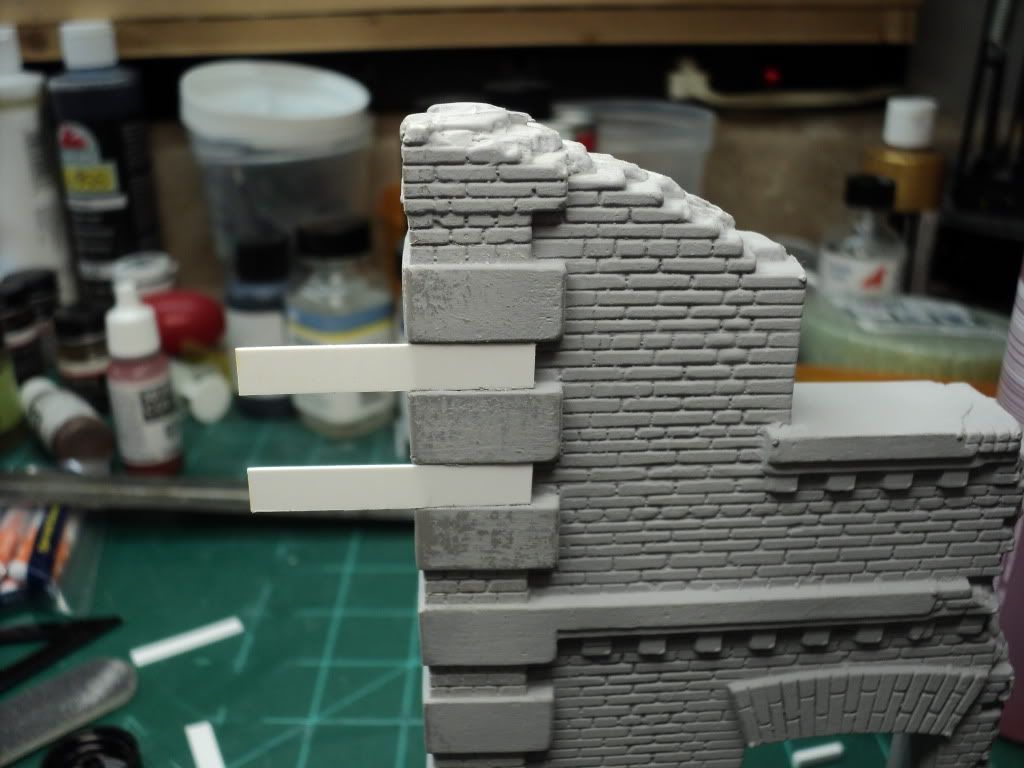
I then glued each one in place, and cut short the extra material.
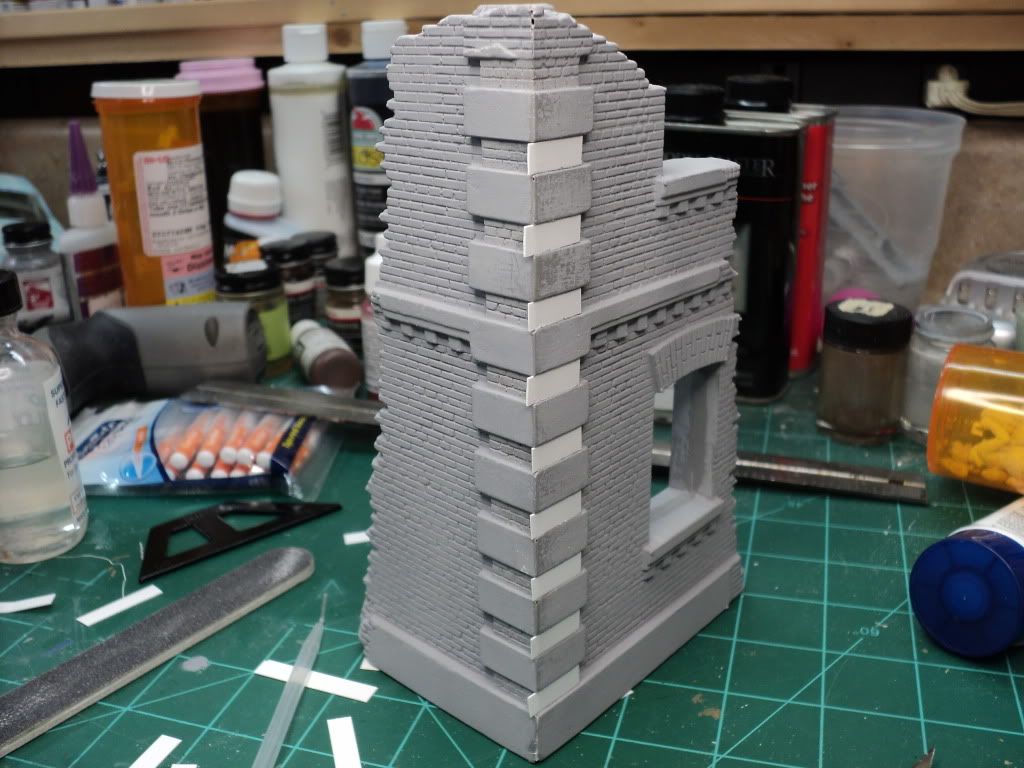
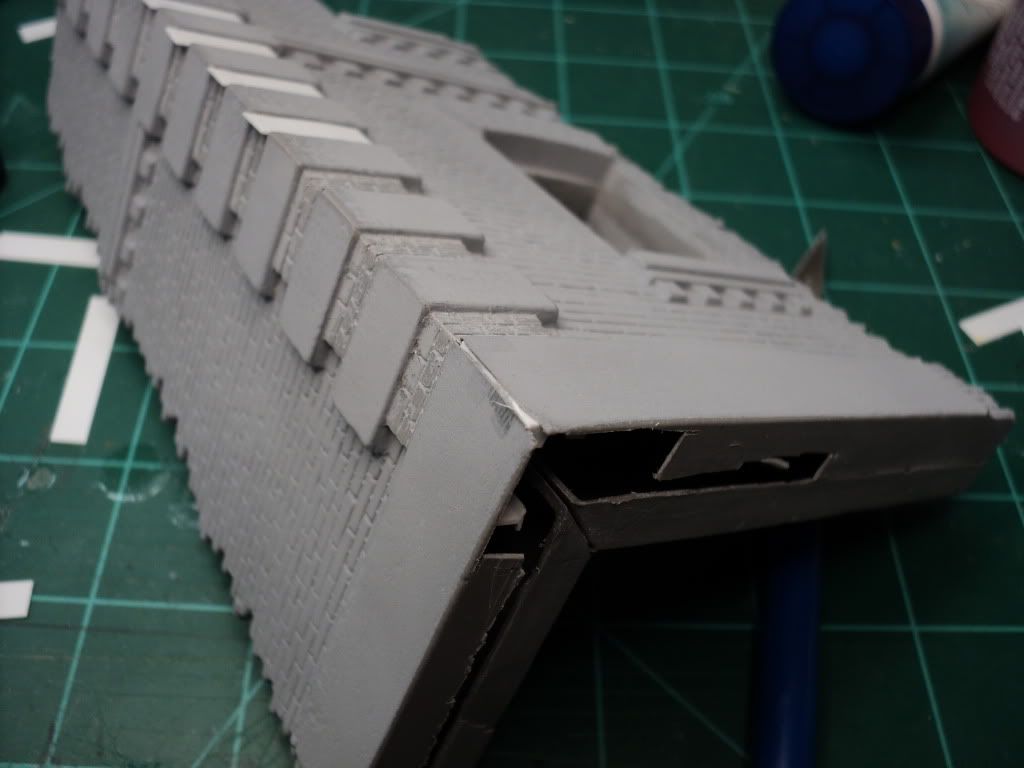
The plan is to let the glue dry overnight, and then tomorrow (a paid holiday I have to add :yipee ) I'll carefully trim the extra plastic off and then sand it flush, and I'll repeat the process on the second side. I think that for the side opposite the corner, I'm going to add a small amount of Mr. Surfacer 500 instead of trying to add a very narrow strip of plastic that may, or may not, work how I would like it to.
Also tonight, I was able to finish gluing the wall. As mentioned last night, I cut the bottom of the wall panel, to give access to the inside of the joint at the bottom.
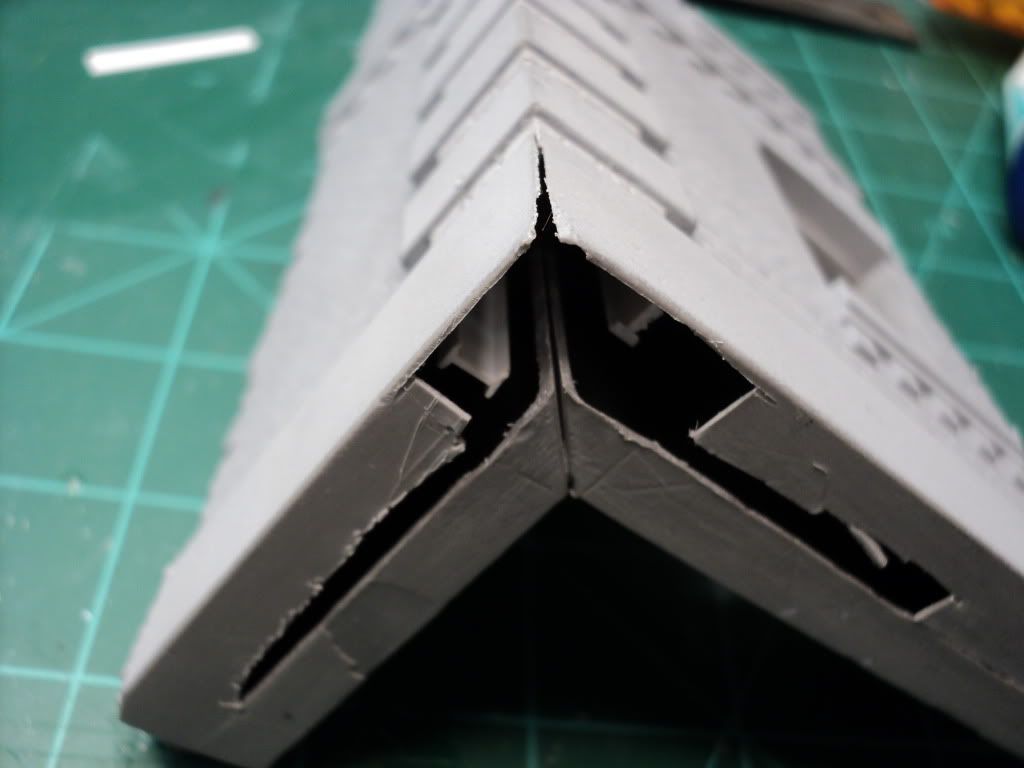
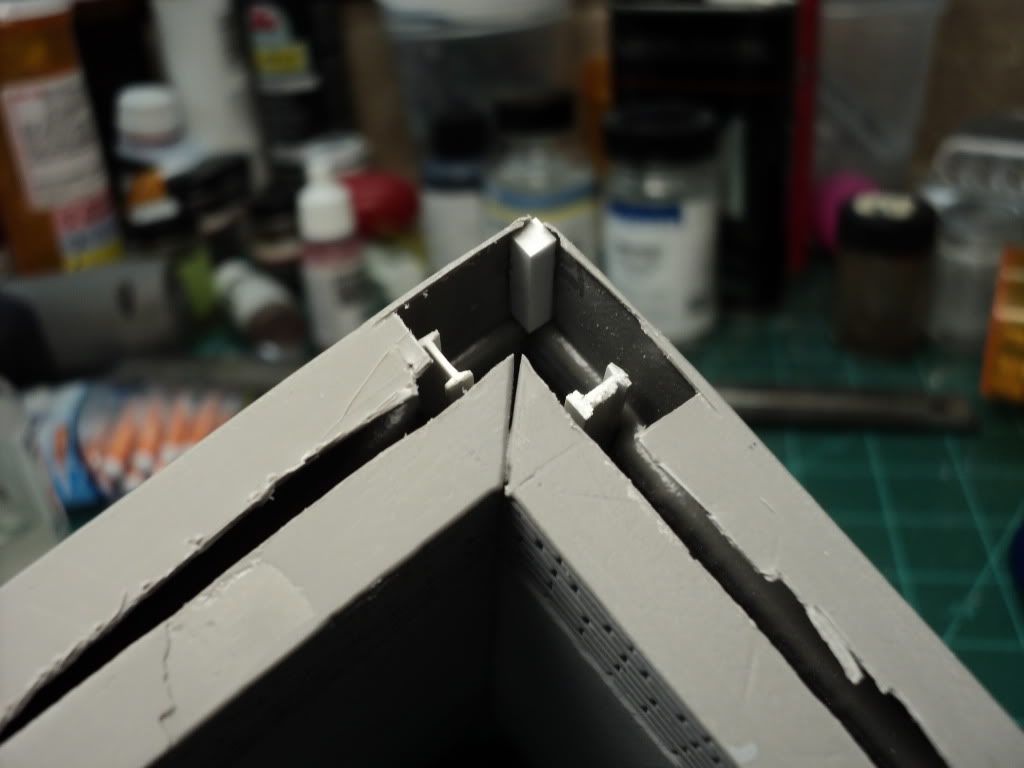
Once this was done, I measured the length of the faces, and then cut a piece of the .1" square rod I had, and carefully glued it to the first face. After a couple of minutes, I then applied glue along the rod and the 2nd face, and it seems to have worked quite well. The corner feels tight, and it doesn't move at all. Now I just need a little bit of putty, and no one will ever know that there was a problem w/ this corner joint.
I think this might be the first time I've posted updates 2 days in a row on this project, haha.
Got home from some family stuff this afternoon, and pulled the walls out and started working on it again.
Last night, one of the things I noticed after they were glued together, was a mismatch in the brick pattern at the corner joint. At the top, the mortar joints align pretty nicely, but as you get lower on the wall, the joints start to move apart, and by the time you get to the bottom of the wall, its off by almost half a brick.
Here's what it looked like.

At first I thought I could fix it by just carefully working the joints w/ an x-acto blade and one of my razor saw blades, but after awhile I realized this just wasn't possible, as you can see in the picture above.
So I started thinking about my options for fixing it. One thought I had, was to fill the mortar joints in w/ superglue, and then re-scribe the the joints, but I really didn't like that idea. I've never done much scribing, so I figured it wouldn't come out real good, plus its pretty tight in the opening, only about .225" wide, so not a lot of room to work w/. So I started thinking about just covering up the bricks. I've seen architecture where there are concrete or stone at the corner, so I started looking for images last night, and came up w/ this one, and it was exactly what i had in mind.

You can see how all the corner joints are stone/concrete w/ the rest of the wall being brick. Incidentally, Iron Mike informed me this morning, after much painful searching last night, that the term for this is Quoin (pronounced Coin), which thus yielded all kinda of wonderful examples of what I was looking for, haha. Its amazing what you can find, when you know what something is called.
So anyway, the plan is to cover the mismatched brick pattern w/ sheet styrene, and then I'll paint the whole corner up to look like brick.
I started by measuring the openings and pulled out my Chopper II and cut several strips that were close to what I needed, but ended up being slightly over-sized, which I think worked out for the best.

What this let me do, is fine tune each strip for the opening it would be used in. I found that the openings weren't all the same size, so I pulled out an Emory file and sanded each one till they fit.

I then glued each one in place, and cut short the extra material.

The plan is to let the glue dry overnight, and then tomorrow (a paid holiday I have to add :yipee ) I'll carefully trim the extra plastic off and then sand it flush, and I'll repeat the process on the second side. I think that for the side opposite the corner, I'm going to add a small amount of Mr. Surfacer 500 instead of trying to add a very narrow strip of plastic that may, or may not, work how I would like it to.
Also tonight, I was able to finish gluing the wall. As mentioned last night, I cut the bottom of the wall panel, to give access to the inside of the joint at the bottom.

Once this was done, I measured the length of the faces, and then cut a piece of the .1" square rod I had, and carefully glued it to the first face. After a couple of minutes, I then applied glue along the rod and the 2nd face, and it seems to have worked quite well. The corner feels tight, and it doesn't move at all. Now I just need a little bit of putty, and no one will ever know that there was a problem w/ this corner joint.


Adam Baker
Active member
Worked on this for awhile today, and made some decent progress.
I trimmed all the tabs from the first side I glued on last night, then I glued all the tabs on for the 2nd side. I let the glue dry for a couple of hours, and then finished it all up.
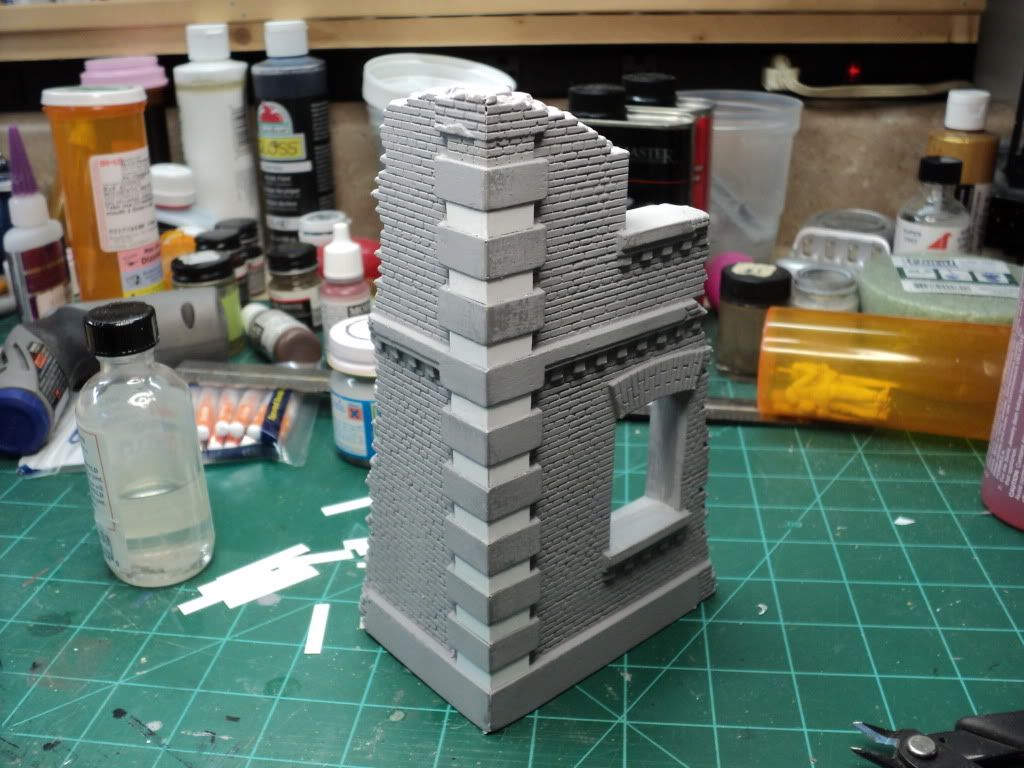
I have to say for a total & complete wag, Im pretty happy so far w/ the results. I have a few places I'm going to have to use some putty, most likely I'll use the Mr. Surfacer 500 that I've got.
I might actually manage to get some color on it this week. Just have to figure out what colors to use, and see whether I actually have any.
Mike, any suggestions for Model Color paints? Might stop by Glen's to see what he's got that I could use for this. I'd need the red brick, and something for the stone. I think you said the concrete color was sold out when we were there last week.
I trimmed all the tabs from the first side I glued on last night, then I glued all the tabs on for the 2nd side. I let the glue dry for a couple of hours, and then finished it all up.

I have to say for a total & complete wag, Im pretty happy so far w/ the results. I have a few places I'm going to have to use some putty, most likely I'll use the Mr. Surfacer 500 that I've got.
I might actually manage to get some color on it this week. Just have to figure out what colors to use, and see whether I actually have any.
Mike, any suggestions for Model Color paints? Might stop by Glen's to see what he's got that I could use for this. I'd need the red brick, and something for the stone. I think you said the concrete color was sold out when we were there last week.
No suggestions from me, never done this stuff. I'm just here for the popcorn... 

AndyFettes
Master at Arms
Nice build on the building Adam !
The Flak is absolutely superb
The Flak is absolutely superb
Similar threads
- Replies
- 50
- Views
- 5K
- Replies
- 78
- Views
- 6K
- Replies
- 38
- Views
- 5K

