• Modelers Alliance has updated the forum software on our website. We have migrated all post, content and user accounts but we could not migrate the passwords.
    This requires that you manually reset your password.
    Please click here, http://modelersalliance.org/forums/login to go to logon page and use the "Forgot your Password" option.

Crossing the Bay of Biscay, 1/72 Revell IXC

ausf

Master at Arms
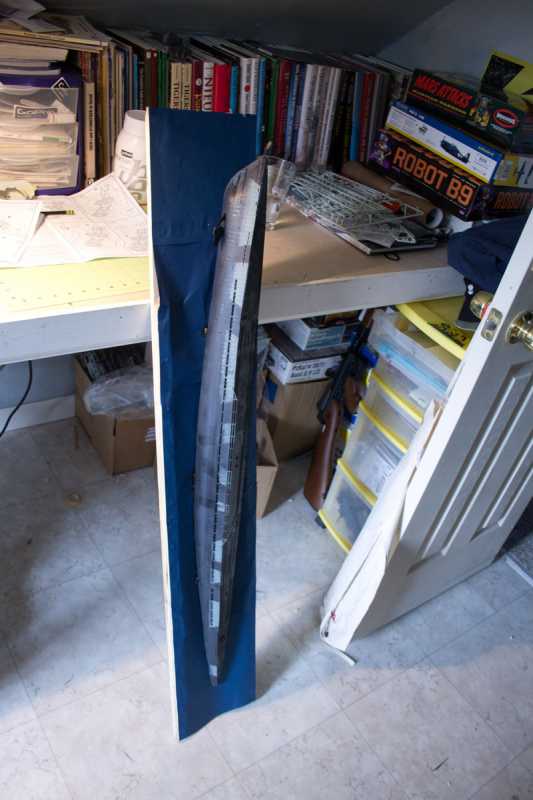
Got this beast started, It's a big puppy. The base will be four feet long. :S

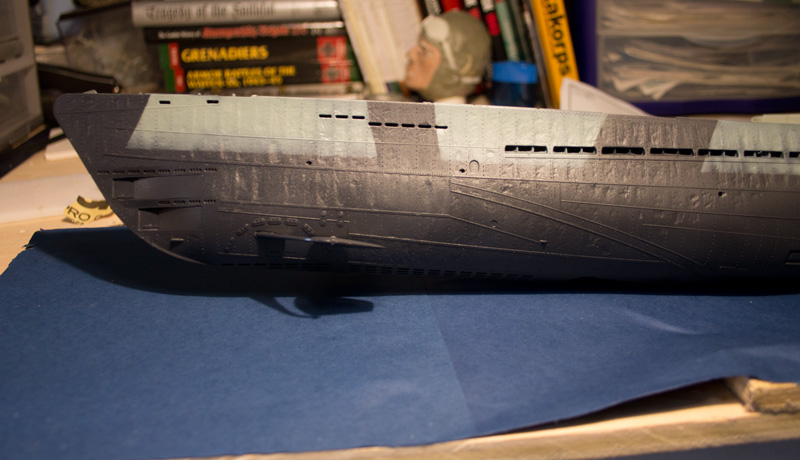
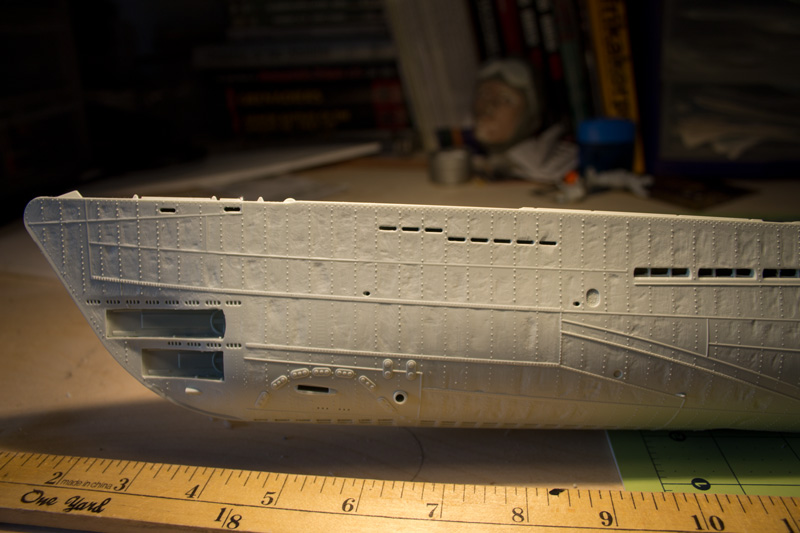
Hope I don't upset anyone, but I mutilated the hull before I even used a drop of glue. Cut it lengthwise then went on to carve out the sheet metal sections between the supports and drilled out all the openings in the outer hull.

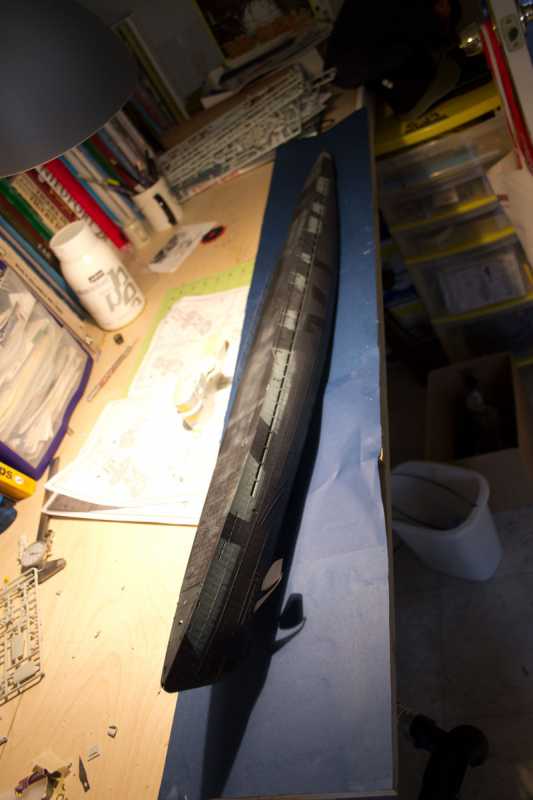
Here's the hull as it sits now:
hbc696ac.jpg


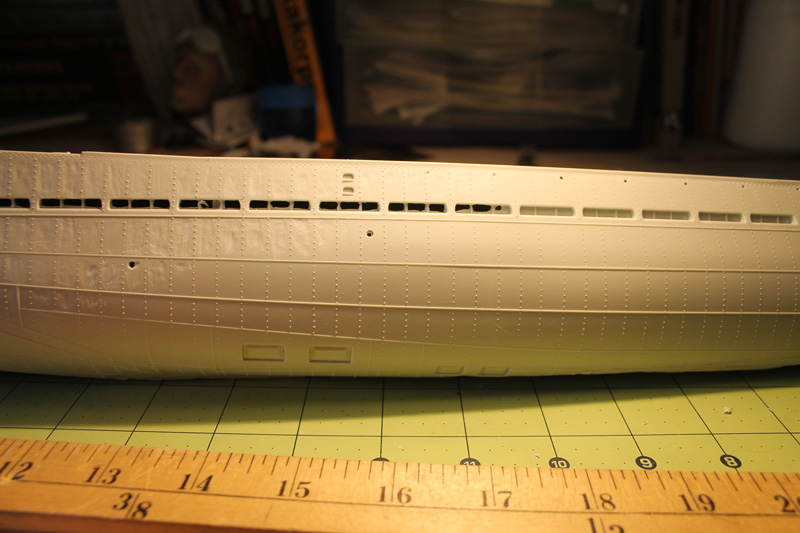
The texturing of the sheet metal:
ha5adda5.jpg


Comparison between the kit untextured and my texturing:
hb965b34.jpg


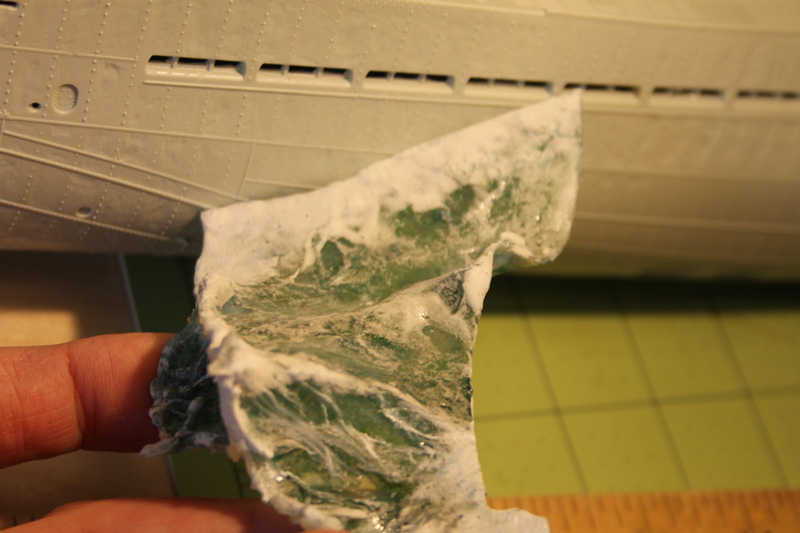
And finally where I'm shooting with the water effect:
h9726131.jpg


Anything you see or suggest, please let me know.

I've been reading a bunch of memoirs and there are quite a few mentions of phosphorescence being a problem with being seen from the air, so I'm seriously considering adding some green LEDs under the tail since the water effect is translucent. :hmmm

Thanks for looking!
 
Wait wait wait...just saying you're texturing it ain't enough. HOW! Several aircraft could benefit from this, though more subtle maybe.

(y)

:popcorn
 
Thanks guys.

Bob, as I was texturing this, I was thinking I'm glad I don't build AC because panel scribing would be my undoing. I enjoy rolled armor pitting and bullet splashes on tanks, but this was pretty tedious.

Most good photos I came across had subtle denting in between the supports. Granted they were mostly on the smaller type VIIs, but when I was doing research, the construction of these are a pressure hull surrounded by a superstructure that is covered with relatively thin sheet metal. Thin enough that MG fire would penetrate. In between the supports, due to wave action, etc (I's imagine depth charging too) would cause the metal to dent which they called oil canning.

I put the smallest cone shaped bit in my dremel (with the flex shaft) on the lowest speed and scored the areas between the rivets. I rotated the hull and hit different corners to make it random but still making the center the deepest part. After I went back over everything with an X-acto that I ground to a curved shape. That cleaned up all the debris from the grinding and then the final bit was scored with a curved dental tool to burnish out any lines left from the blade.

It would be much easier to hit the area with fine grit sandpaper or a stick, but I couldn't find a way to keep from removing rivets. If you do something like this on larger panels, that would be the best way.

The photos show it at it's harhest in terms of direct lighting from above. It'll appear more subtle in normal light and dark paint. I can take some pics of the tools used if you guys would like. I'm glad you like the effect. I was worried that it's too exaggerated.
 
Thanks guys.

Chuck, I don't know about US construction, but since misery loves company, yes, you must. :evil:

I threw on the first coat of color, most of the painting will be after I figure out the waves since close to half of what you see will be under them. And since there's only about 2/3s of a boat, I guess that means there will only be about a third of Revell seen. I wonder if they pro rate what you use? :blink

It's Vallejo Black primer, followed by Panzer Aces Feldgrau highlights I for the lighter color and MA German Grey for the dark. The deck hasn't been really touched, just shaded. A misting of Future to lock in all in for now while I manhandle the thing to the base and plot the styrene sheets for the waves.

The base is 48" X 8" and I was planning to paint it dark blue. The waves will be slightly translucent and the under lying color makes a difference. I remembered I had a bunch of dark blue card stock, so I opted for that instead of brushing out a bunch of acrylics.

The details are kind of clunky on the conning tower and I'm not waiting for PE (deck as well), so I'm opting for an ice encrusted superstructure to cover any issues.

Here's where it sits, the base is huge:

h40777a9.jpg


hf98de2e.jpg


haac6bc9.jpg


h38582da.jpg
 
Sweet! Looks like a great start :popcorn

Send the bottom half to Ian and let him make a sunken wreck out of it.
 
Back
Top