• Modelers Alliance has updated the forum software on our website. We have migrated all post, content and user accounts but we could not migrate the passwords.
    This requires that you manually reset your password.
    Please click here, http://modelersalliance.org/forums/login to go to logon page and use the "Forgot your Password" option.

T62 in Iraq Tamiya 1:35

Background:
A member at my model club recently had this kit for sale (very cheaply $20) and I couldn’t resist for some reason so I purchased it. I started building it almost straight away.

The real vehicle:
A browse of the internet using google provided the reference photos below. This is an Iraqi army T62 main battle tank that has obviously been abandoned along a road (due to mechanical failure I’d guess).

t-62_27_of_28.jpg


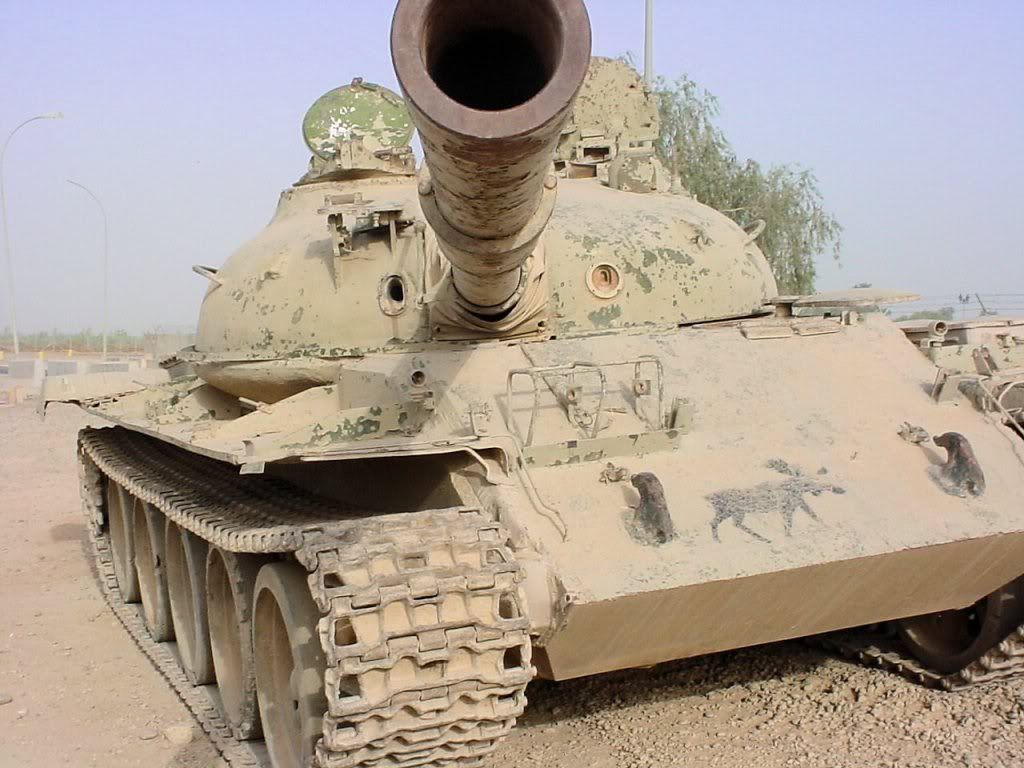
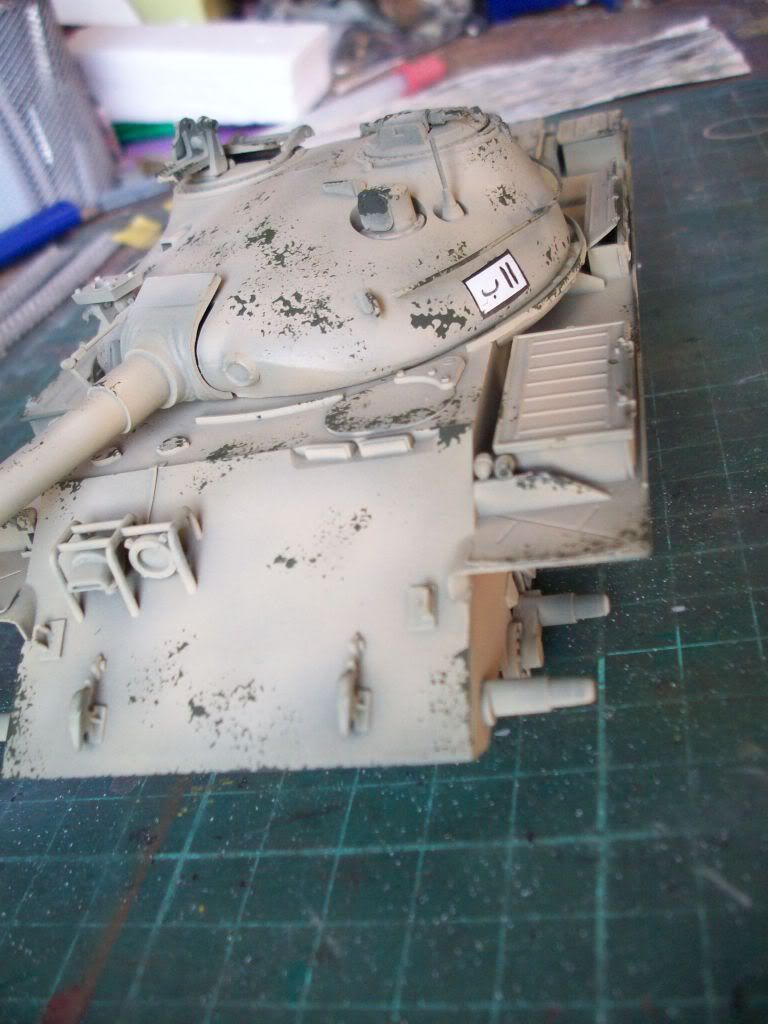
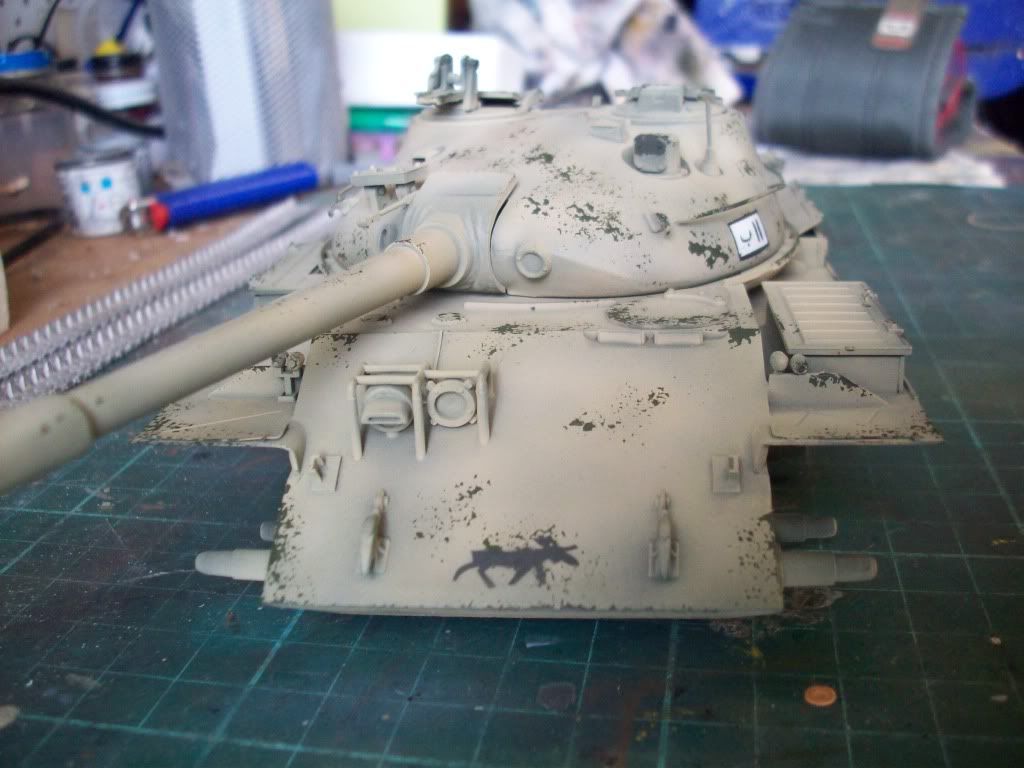
As you can see in the reference photos the tank is in a fairly run down condition with the Iraqi sand coloured paint very faded and chipping off all over the tank to reveal the original soviet armour green colour.

The Arabic characters painted on the turret read 11B (the tanks number I’m guessing). The reason & origin for the moose on the front glacis plate is unknown, I’m guessing put there by some American soldier.

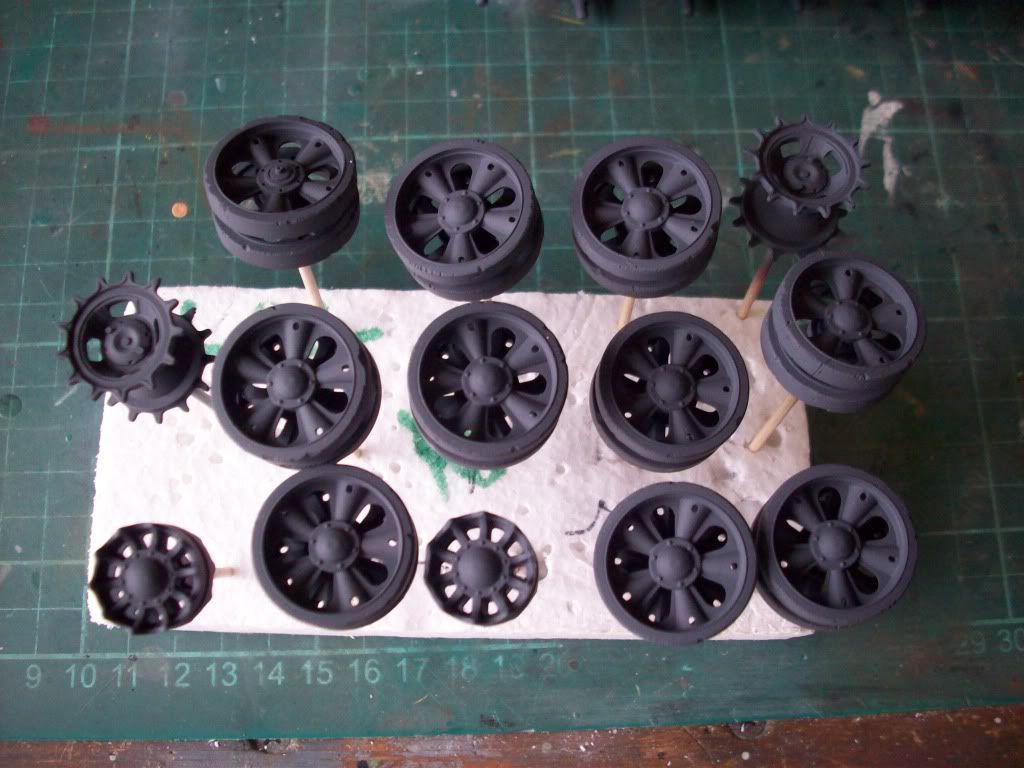
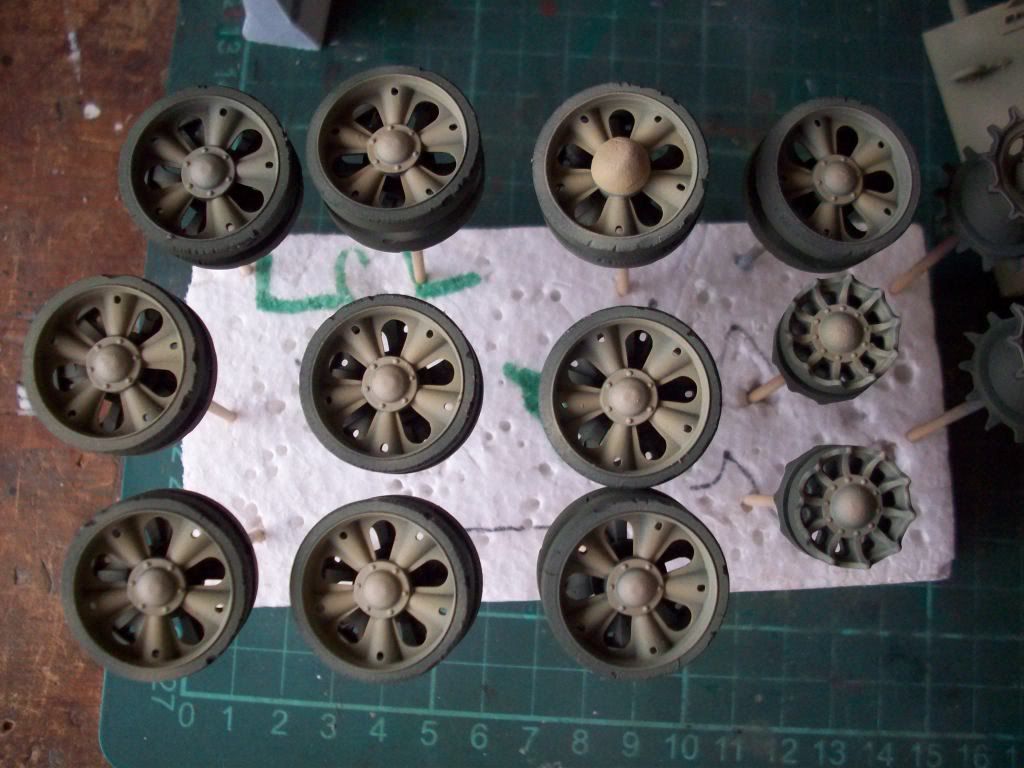
You can also see that many of the fittings on the turret and hull are missing as well as the front two and one of the rear fenders. One of the wheels has a hub cap missing and the rubber road tyres are damaged to varying degrees.

These are all features I want to incorporate into my model and are the reason I was attracted to the photos. I will however be modelling the engine cover closed and the hatches on the turret etc. just open a little bit (to suggest an abandoned vehicle) as there is no interior at all included in the kit

Construction of the Tamiya Kit:
Upon examining the kit parts I had some mixed feelings, while most of the parts were excellently moulded with fine details the kit tracks were a simple vinyl “rubber band” affair that would ultimately spoil the look of the finished model.

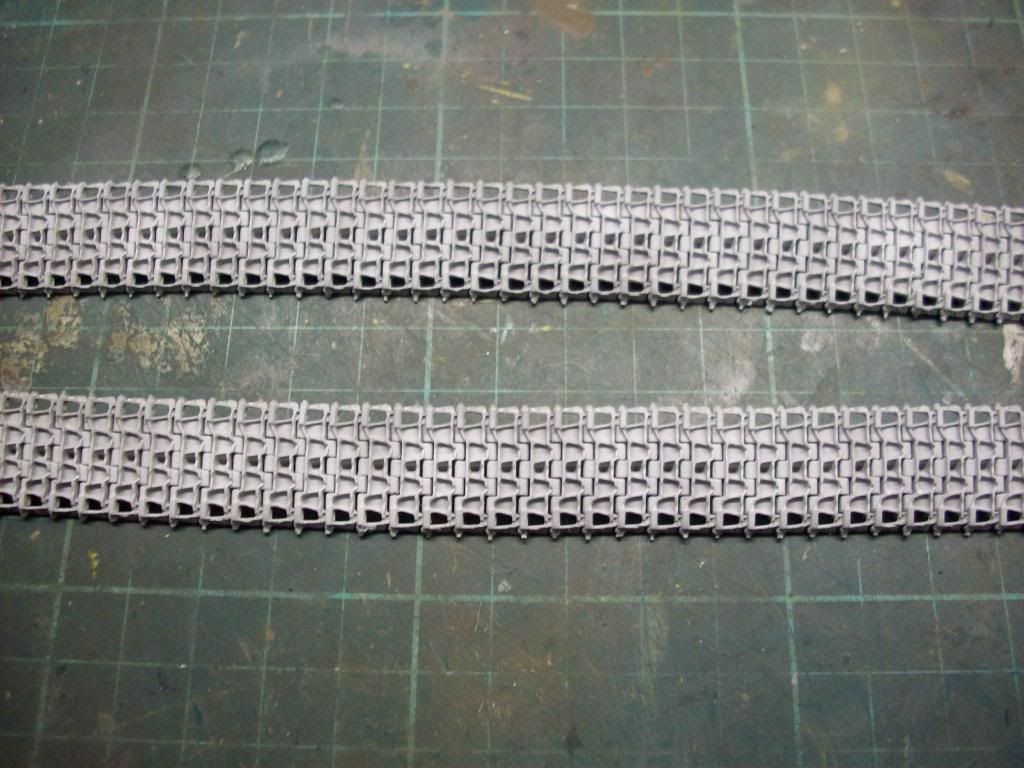
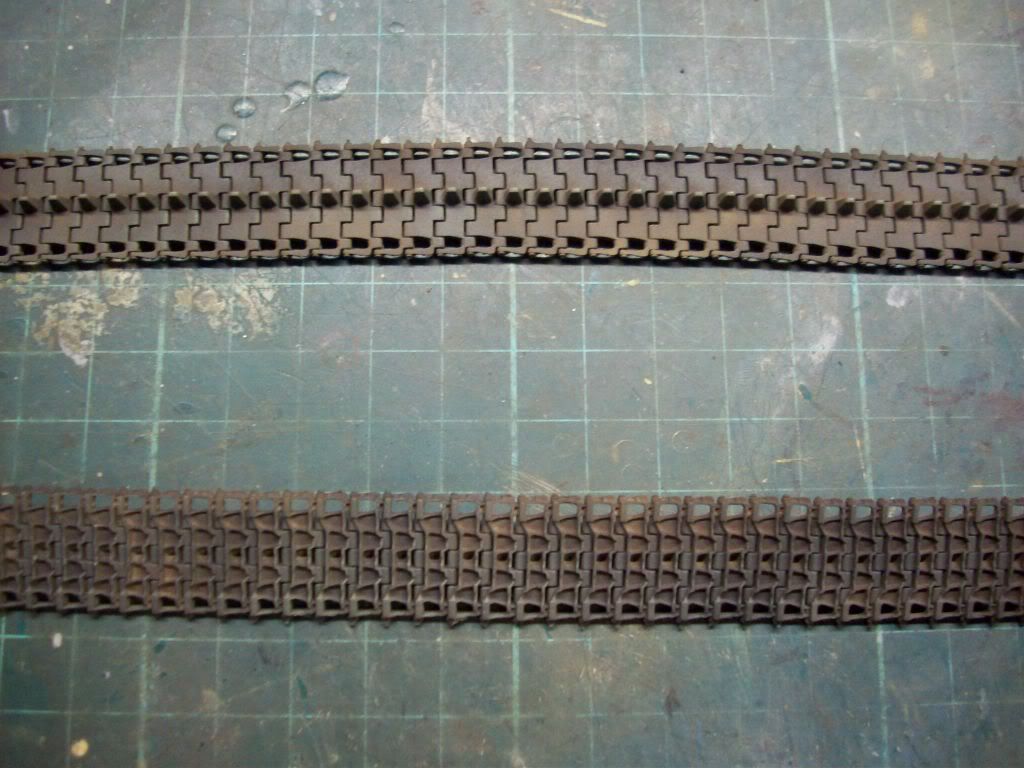
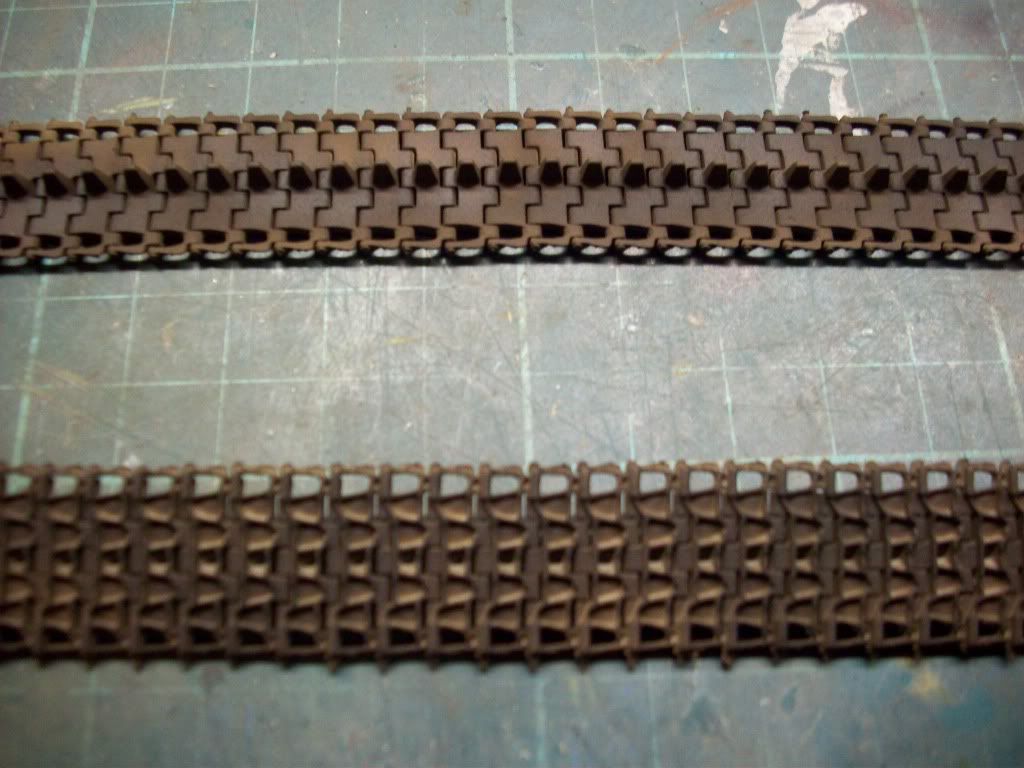
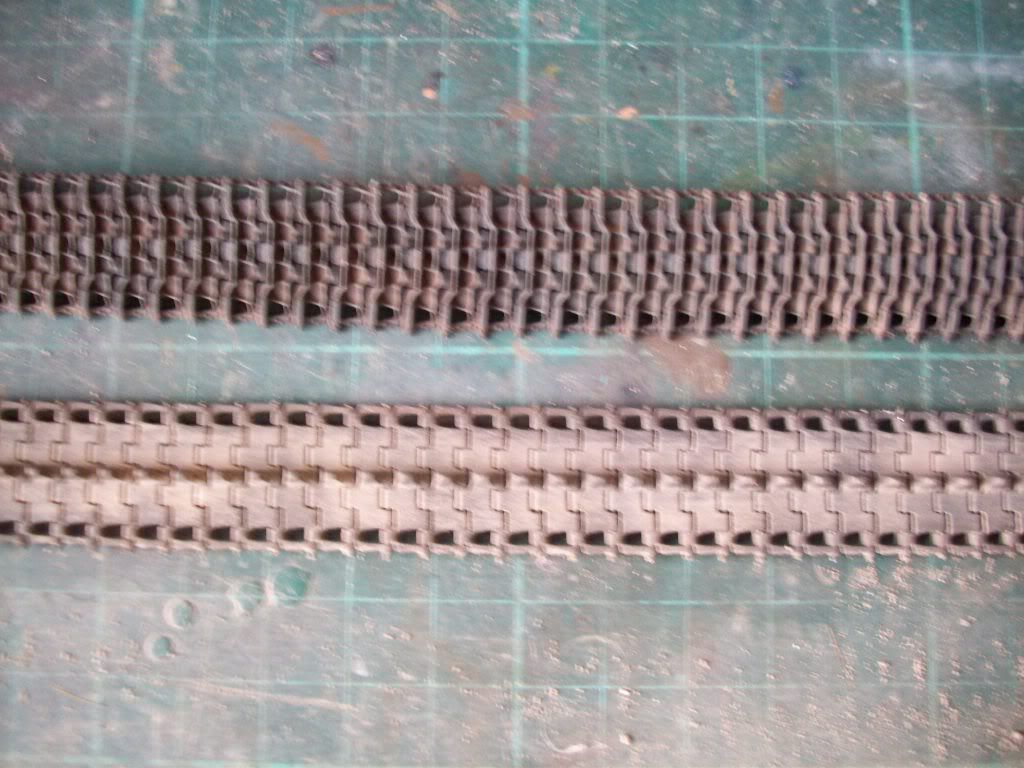
A quick look on line and a phone call secured a set of the “Rolls Royce” of model tank tracks….. Fruilmodelisimo tracks….. Made in the Czech Republic.
These are a set of cast metal individual track links that are pinned together with wire… just like the real thing… It doesn’t get any better than this!

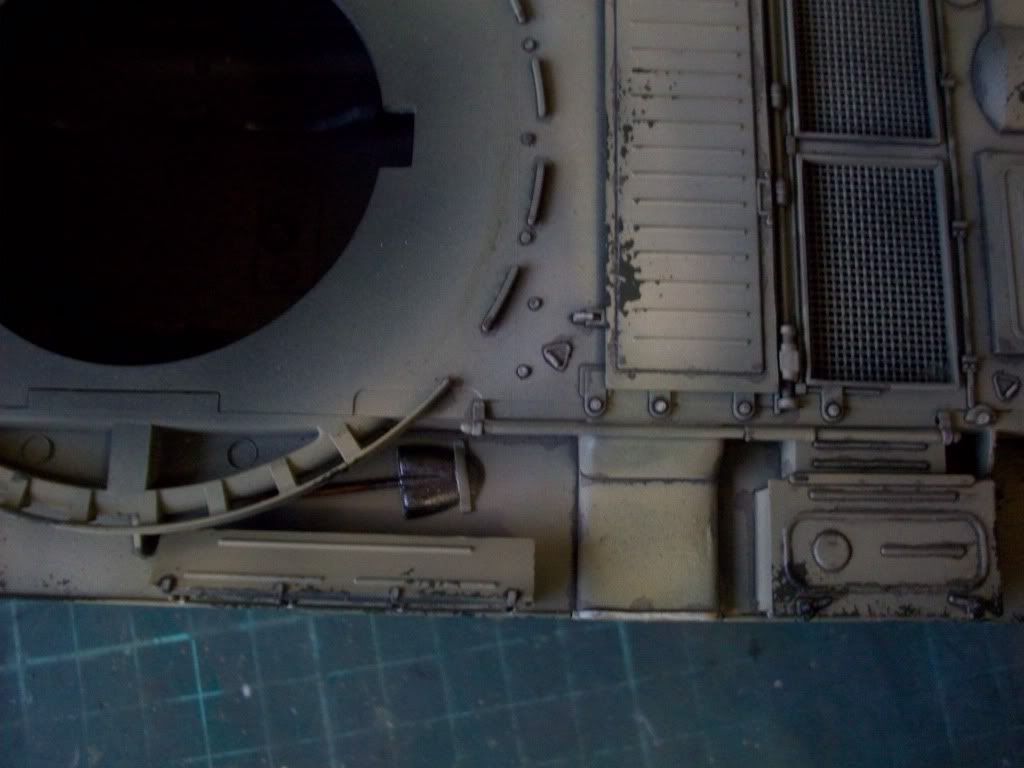
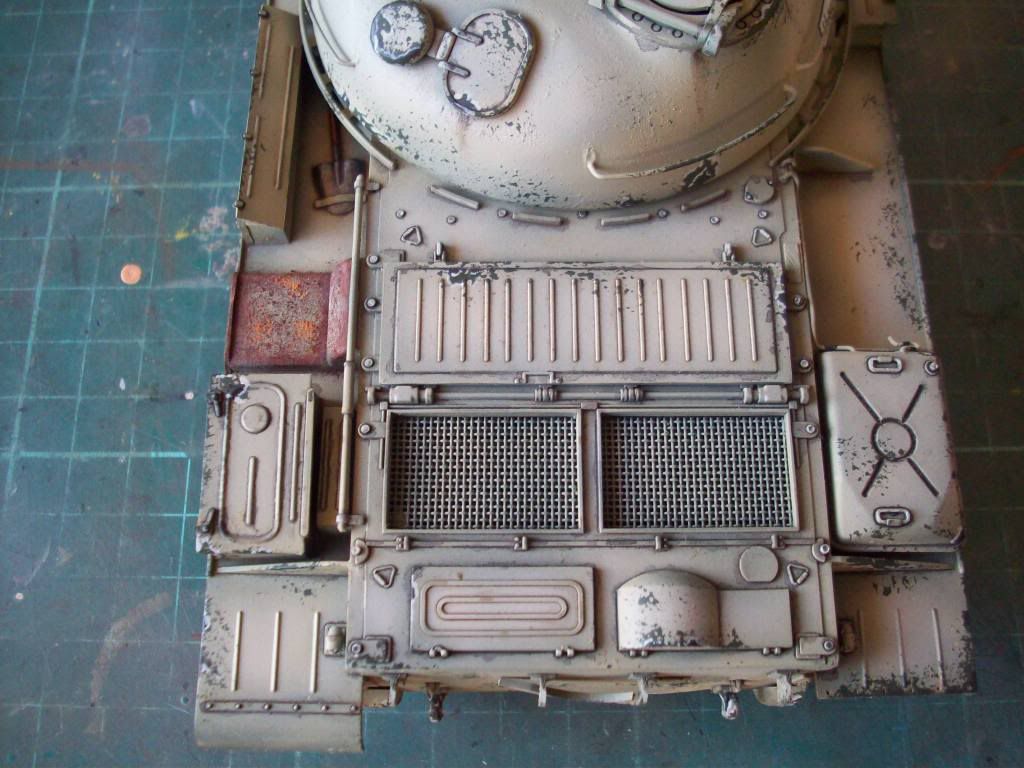
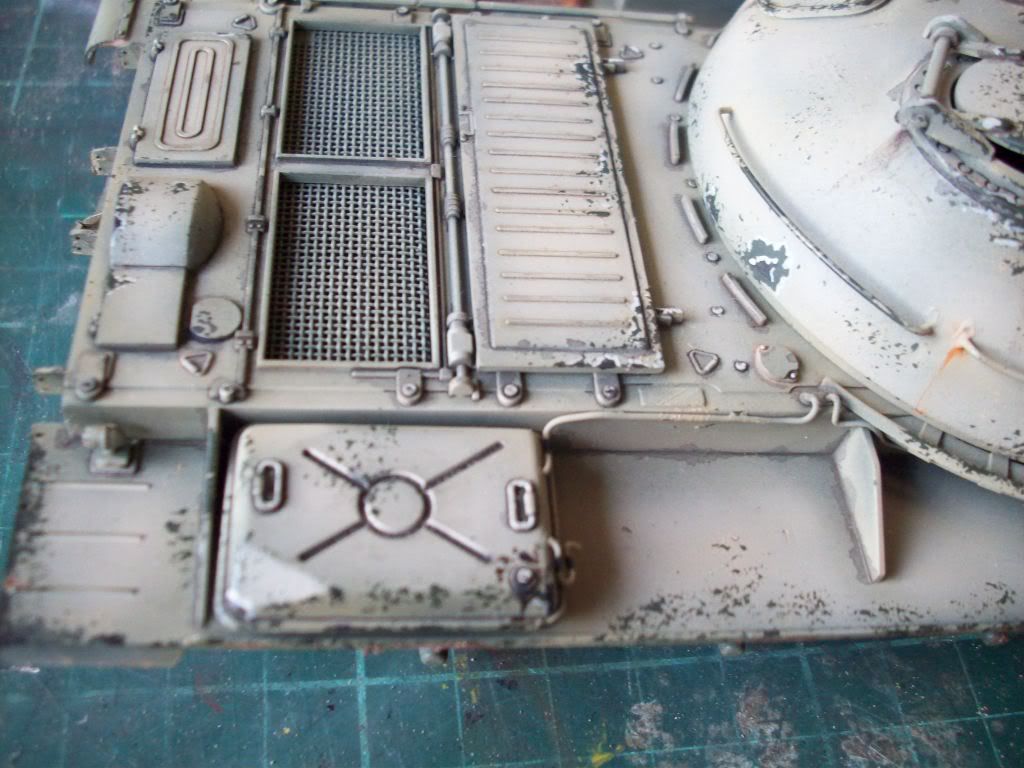
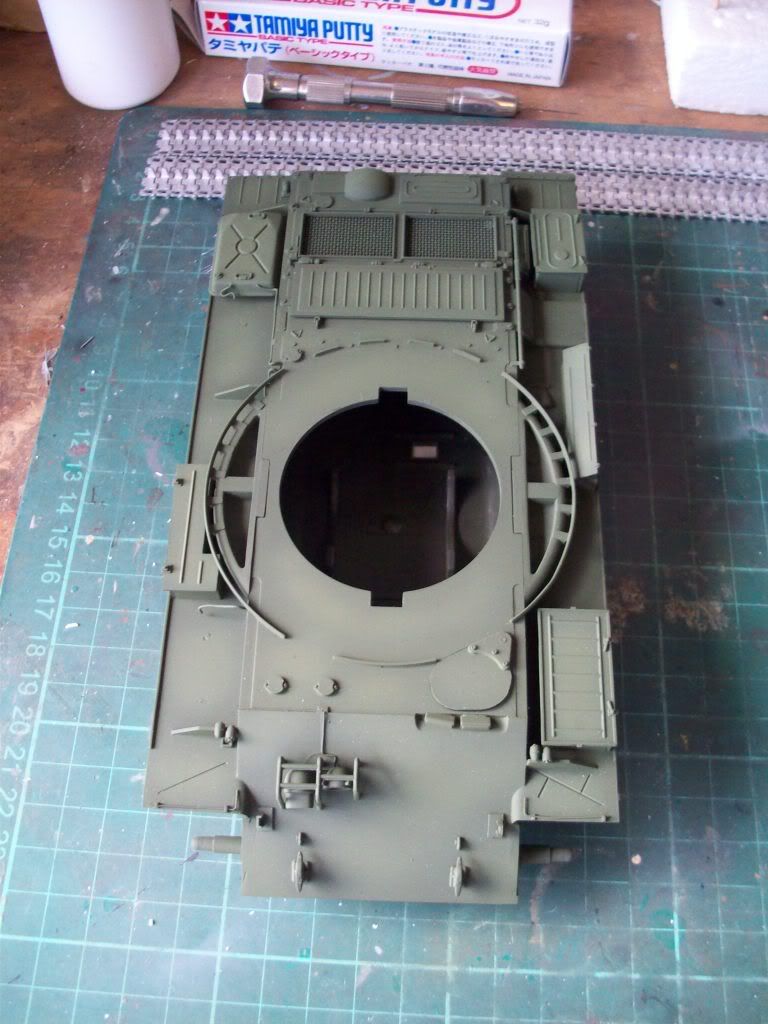
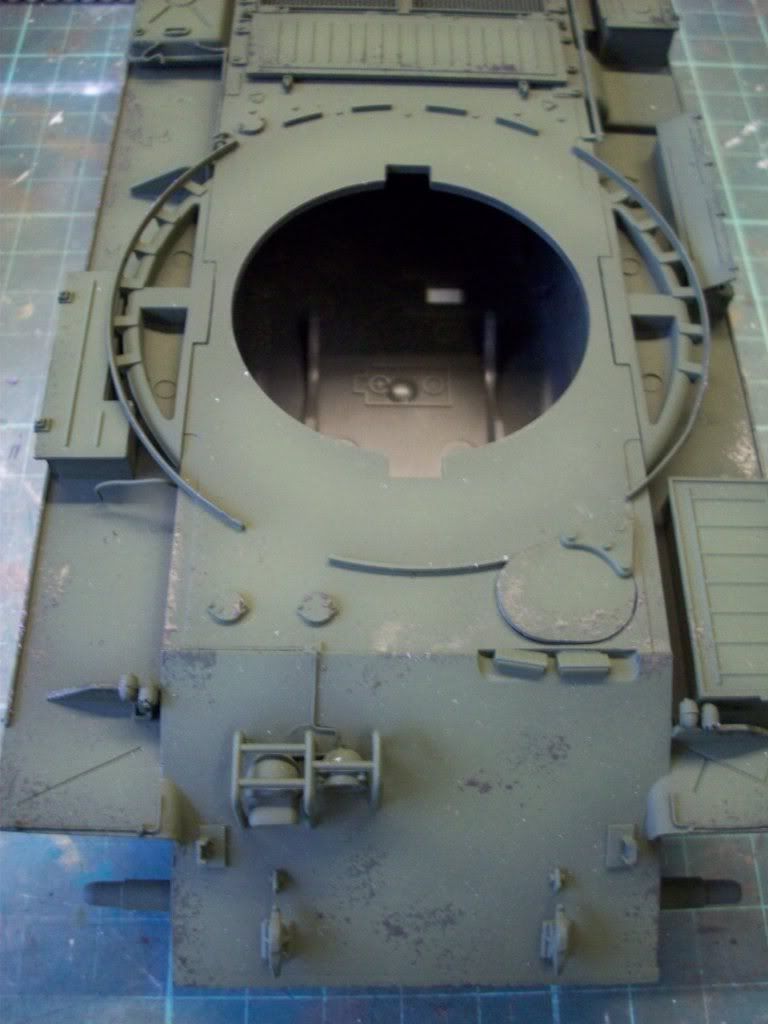
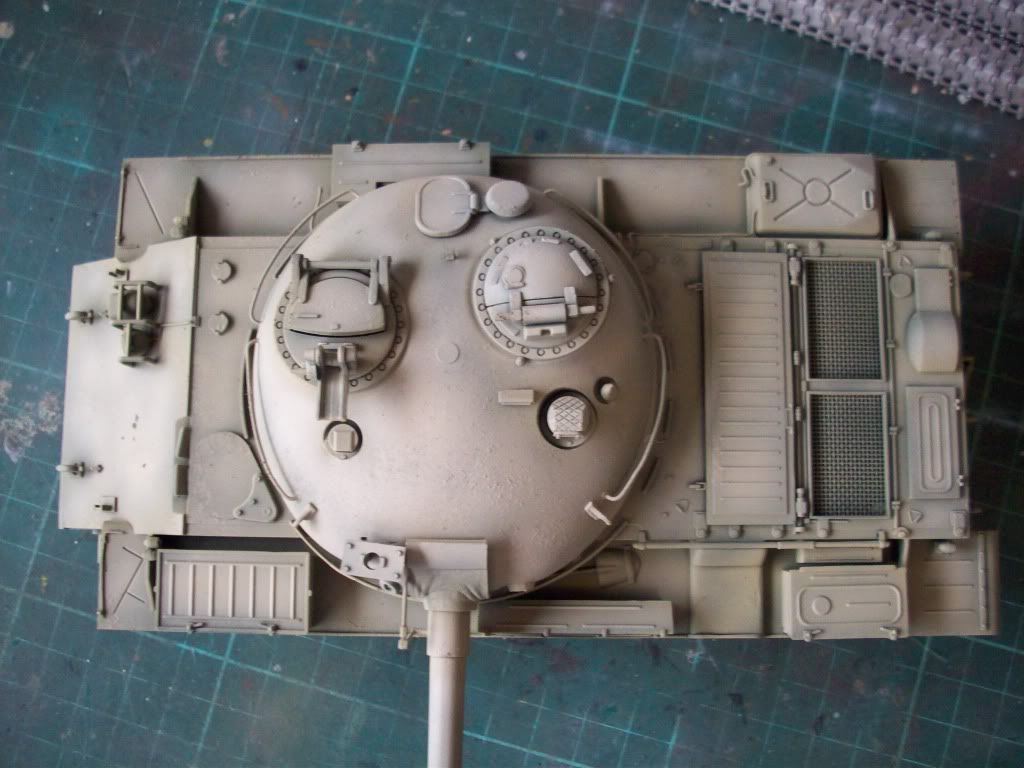
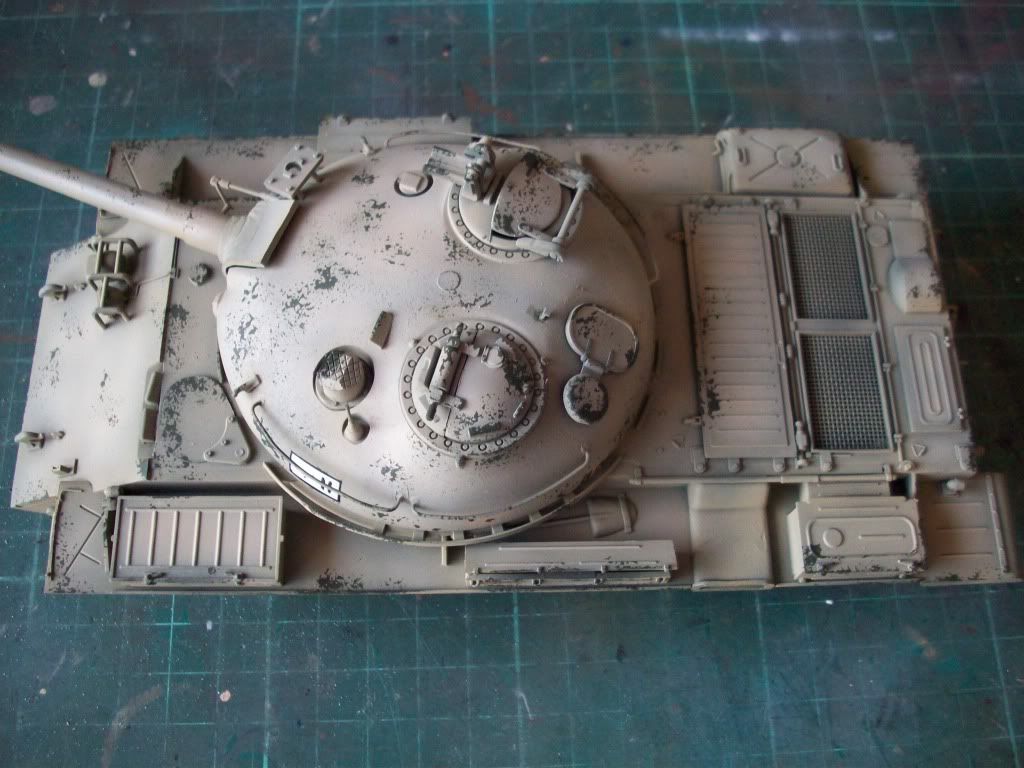
The basic hull and turret parts were assembled. Tamiya supply a section of wire grille for the engine air intake on the top of the engine deck at the rear which looks great.

13_OCT_2009002.jpg


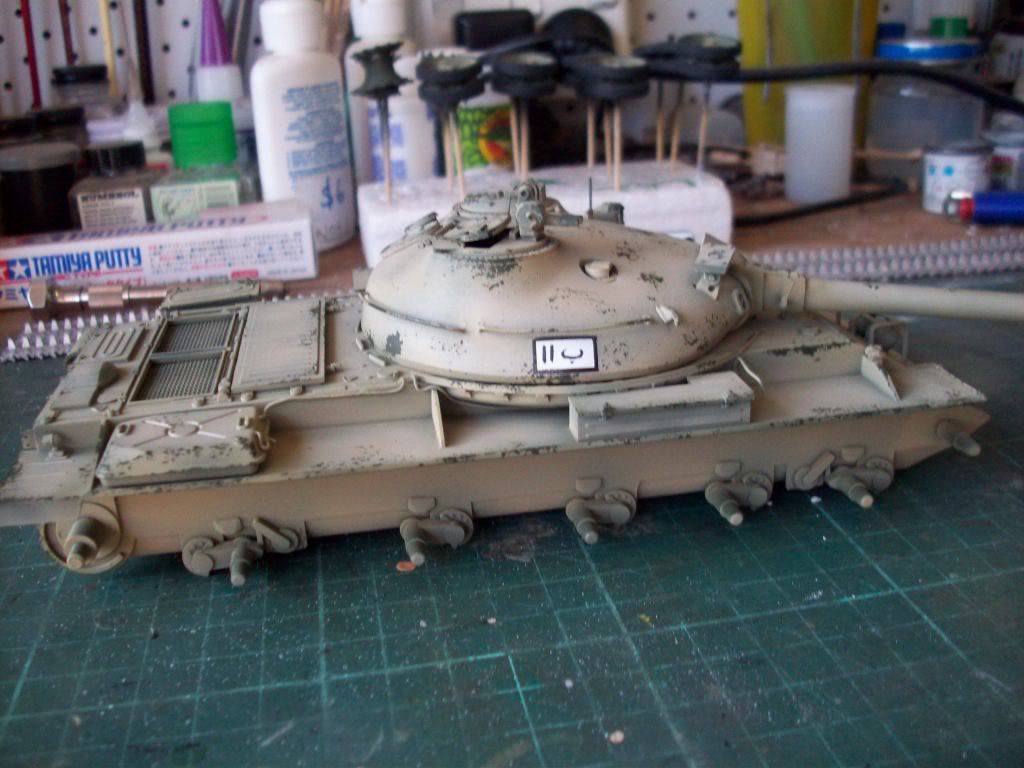
The kit detail parts were then examined and compared to the real tank in the reference photos to determine which parts need to go on the tank and which will be left off. I had some decisions to make at this point as it would require a fair amount of work to leave off most of the tool boxes so I decided to include them all but pose one open (to reinforce the abandoned look of the vehicle). The references show that all of the external fuel cells are also removed…. However I really liked the look of these so I used just one…

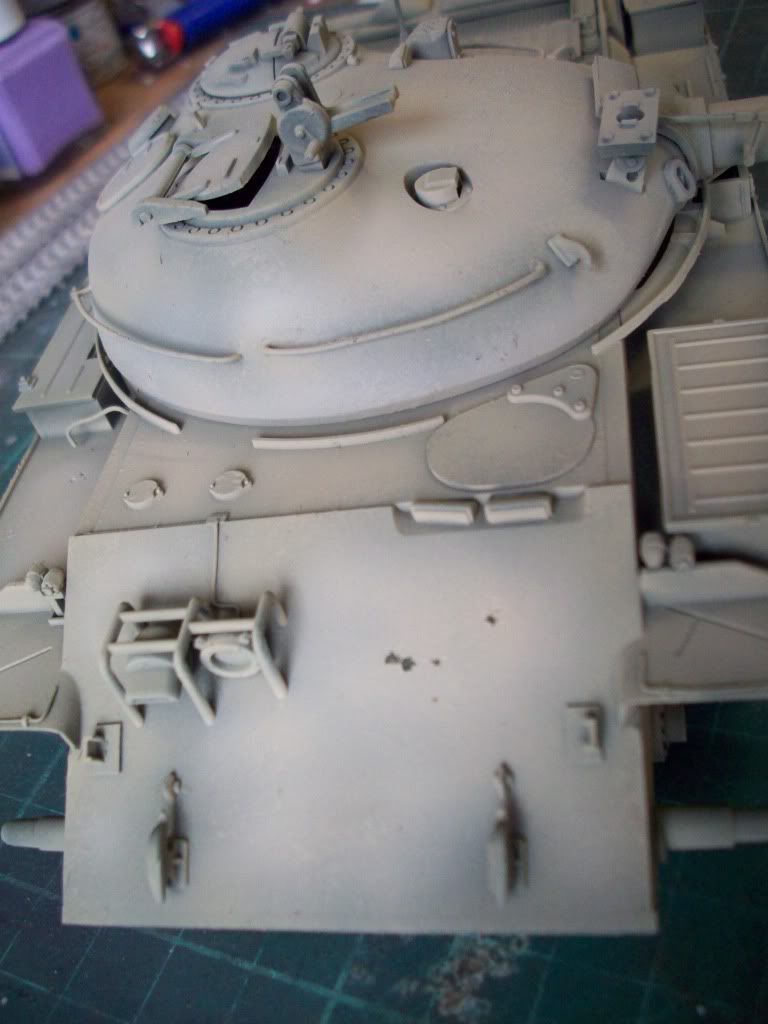
The exhaust outlet needed some holes drilled around the outer lip and the surface was textured using liquid putty called Mr Surfacer. This was applied with a short stiff brush in a stippling manner

05_OCT_2009006.jpg


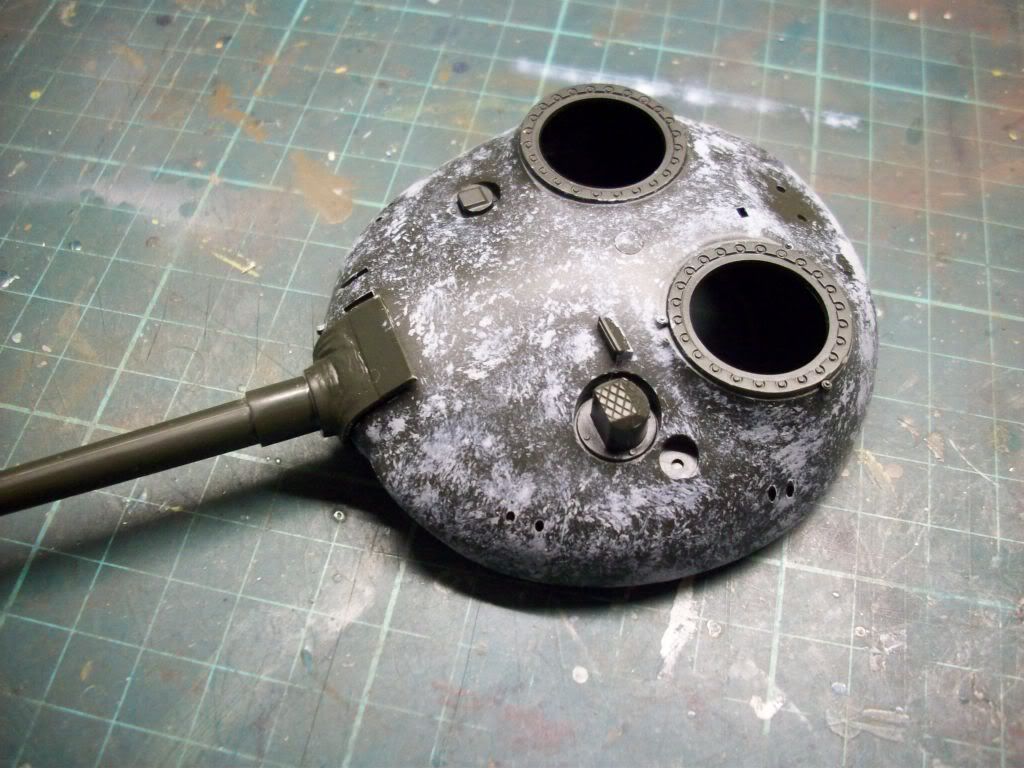
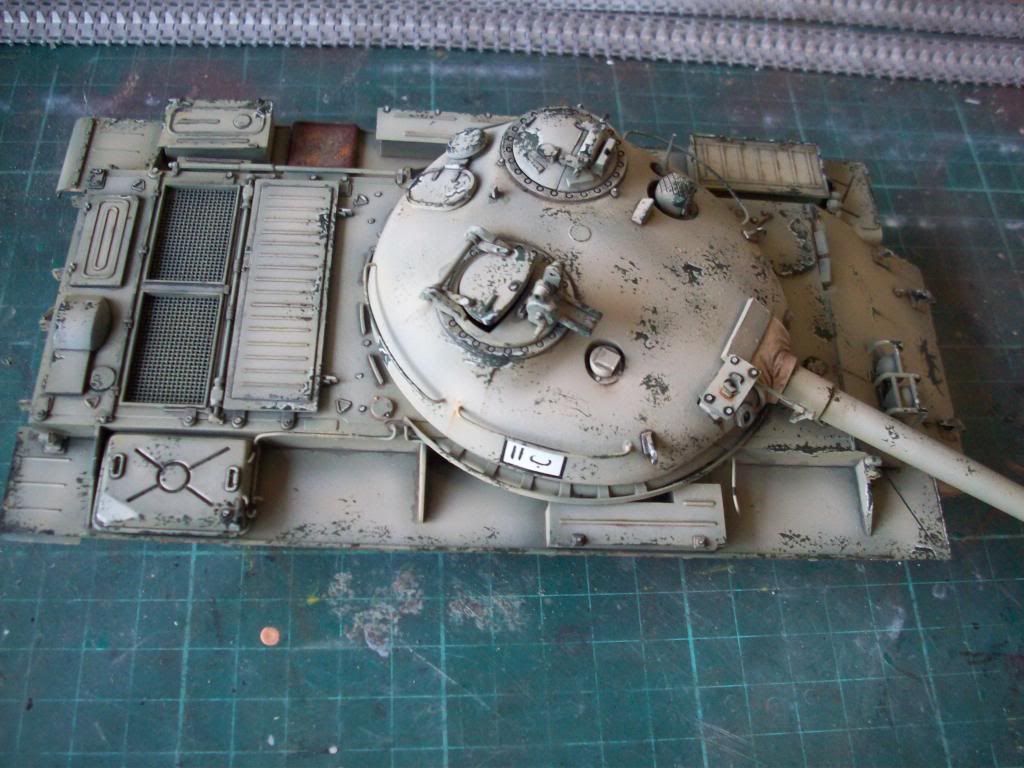
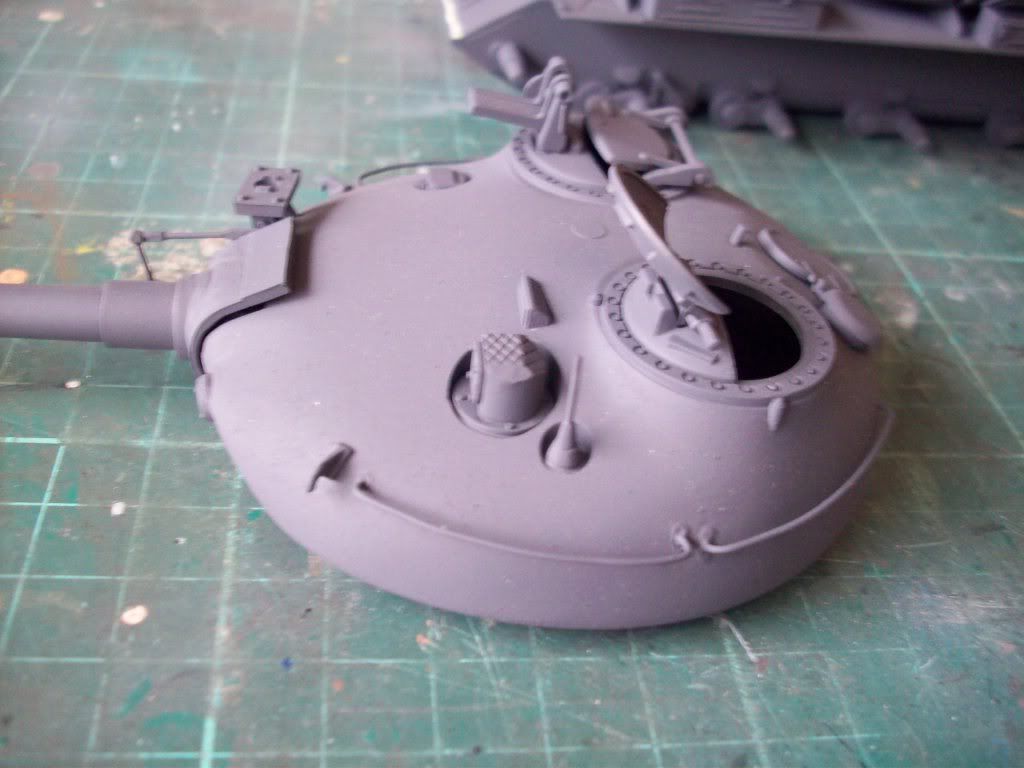
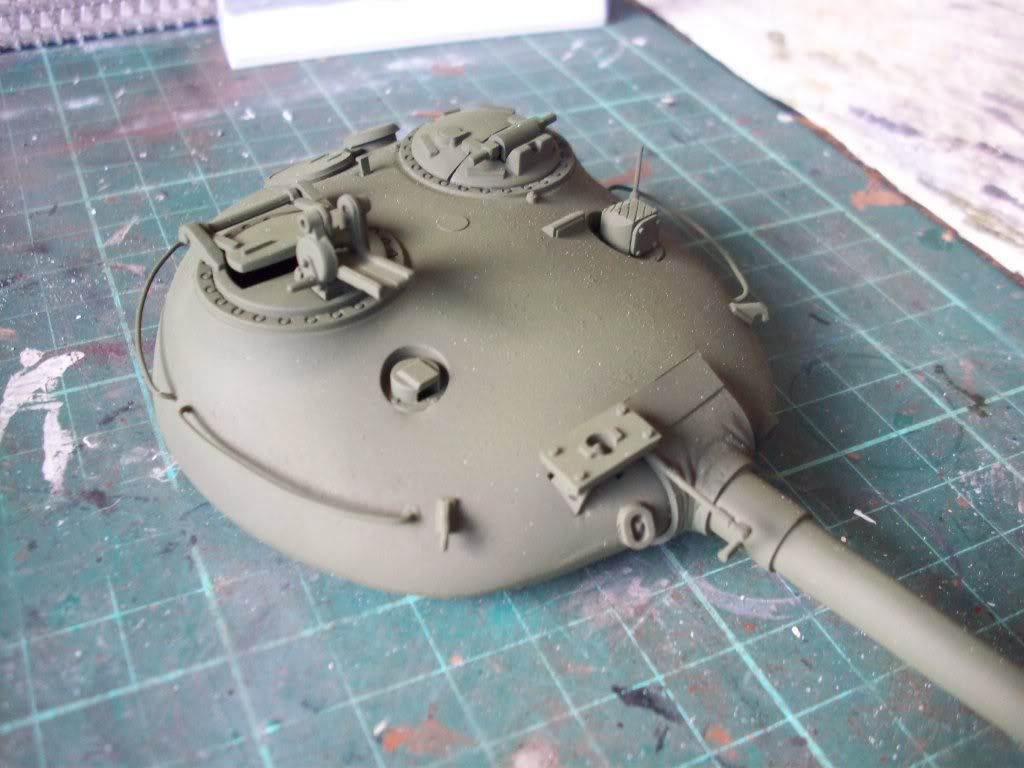
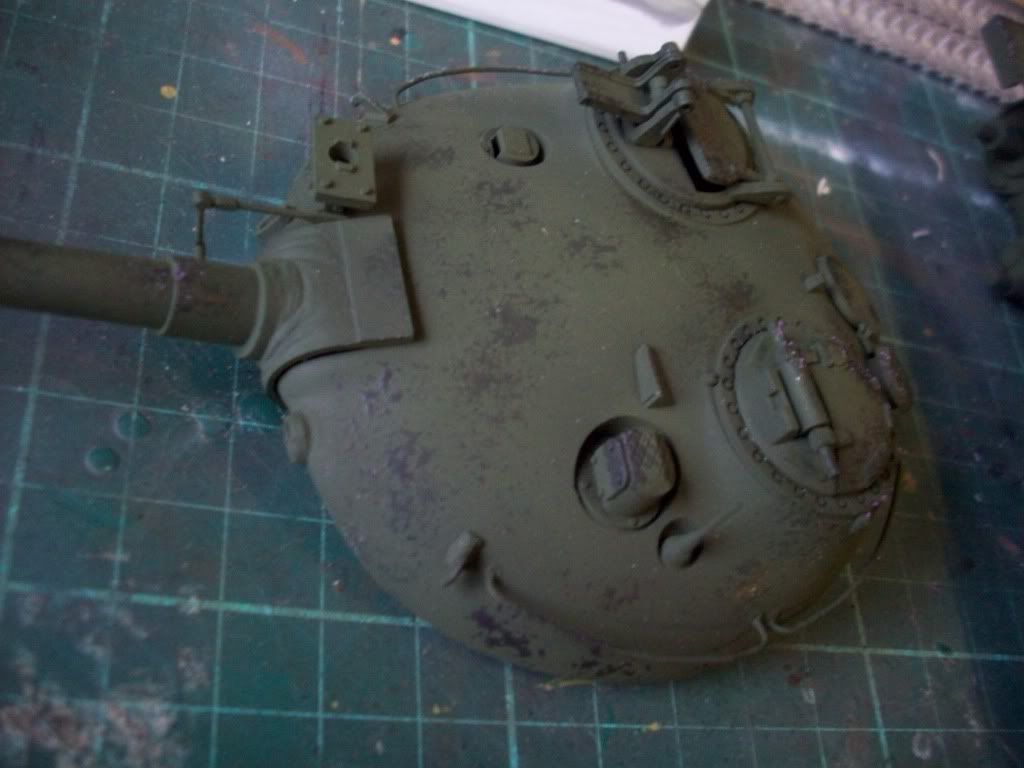
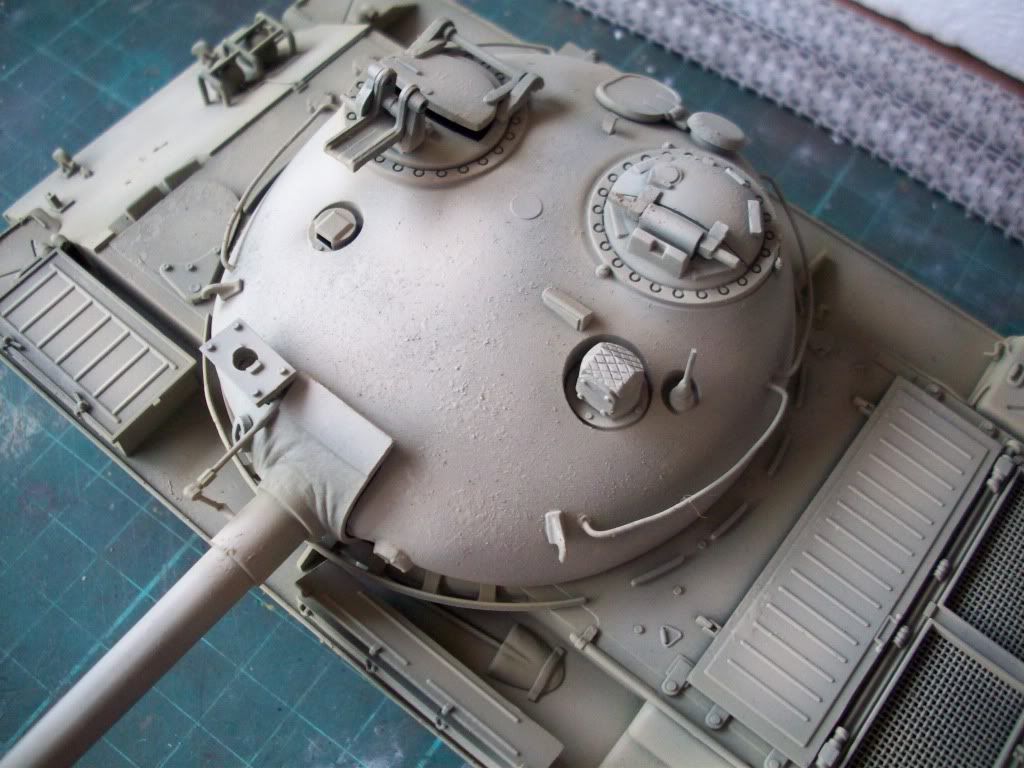
On the real tank the turret is a massive single piece of steel cast in a sand mould like an upside down frying pan. To duplicate the rough cast steel surface I again stippled on the Mr. Surfacer.

13_OCT_2009001.jpg


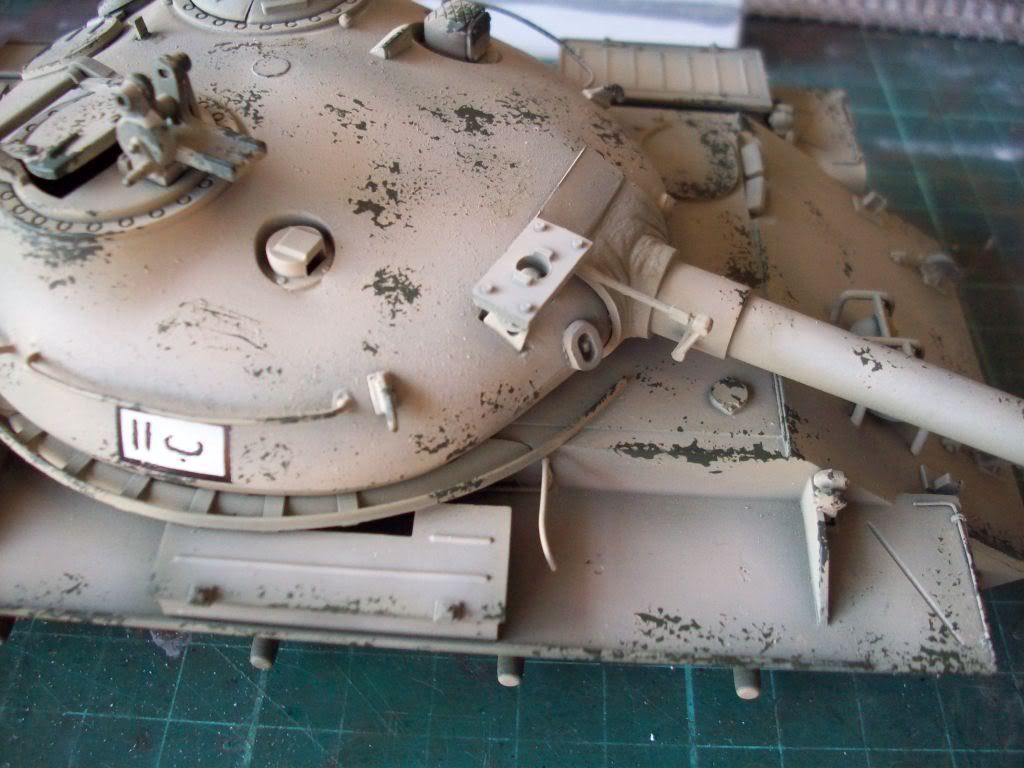
I added mounting brackets for a stowage board from plastic shapes and added the lights (although again they are not present on the photos). Cabling for the lights was added from fine copper wire.

Plumbing for the external fuel cells was added from fine solder wire (this stuff is easy to shape and bend).

15_OCT_2009001.jpg


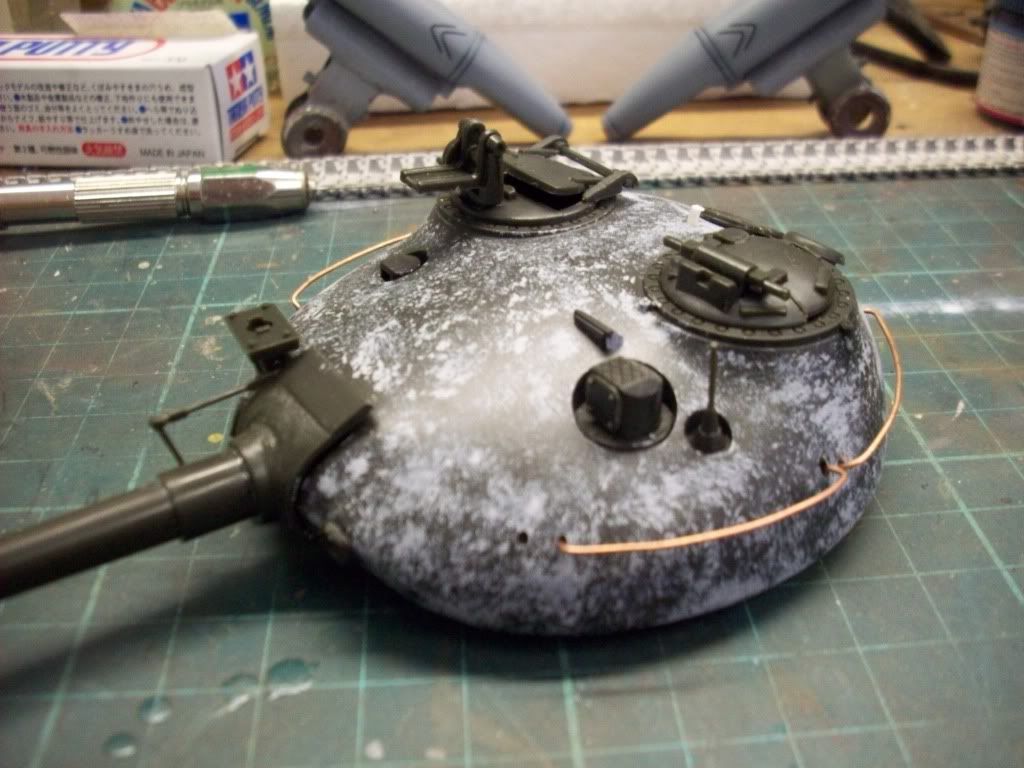
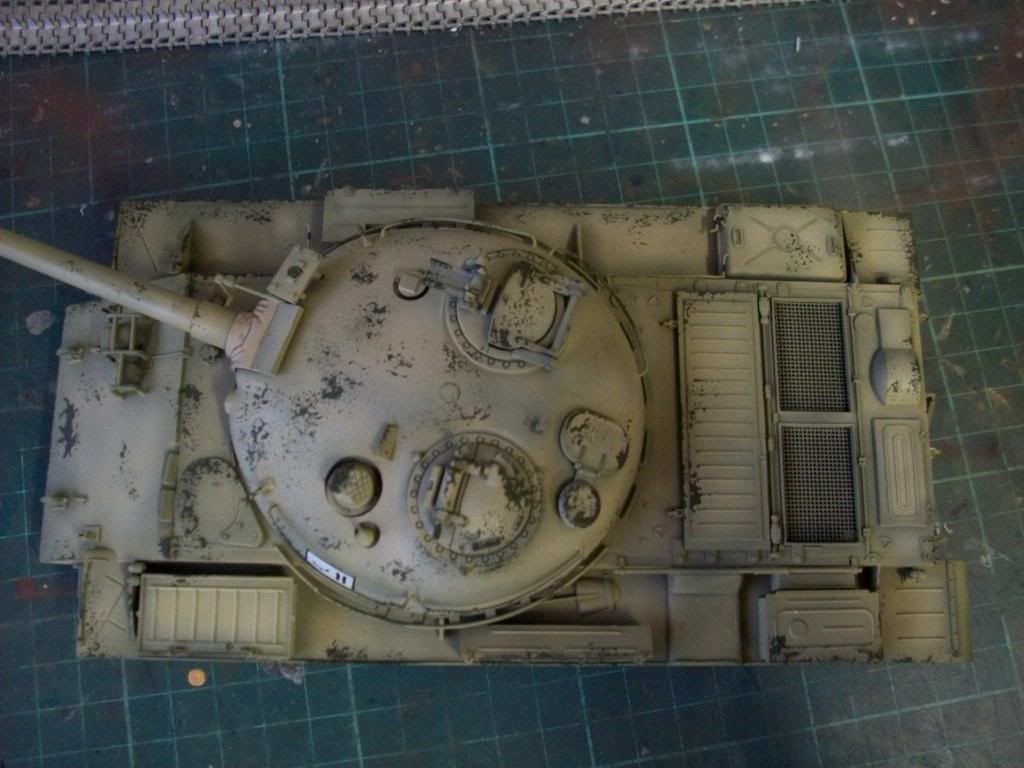
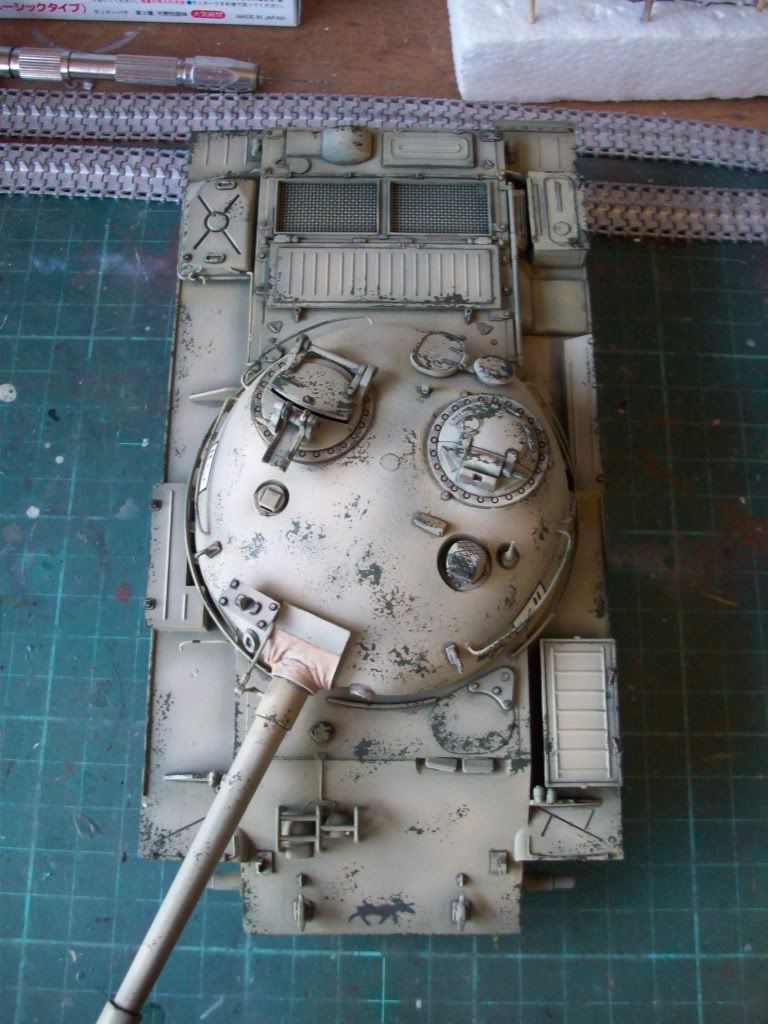
Grab handles are added to the turret from copper electrical wire that I stripped out of some house hold electrical cabling (the kit supplied plastic ones being far too fat).

20_OCT_2009014.jpg


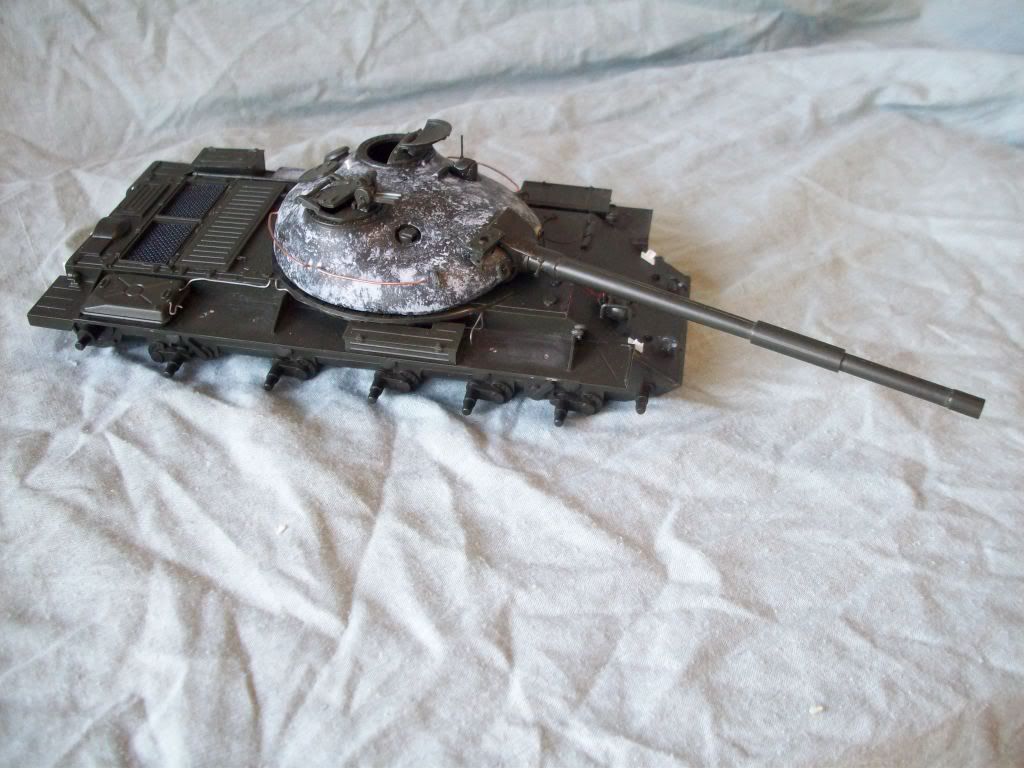
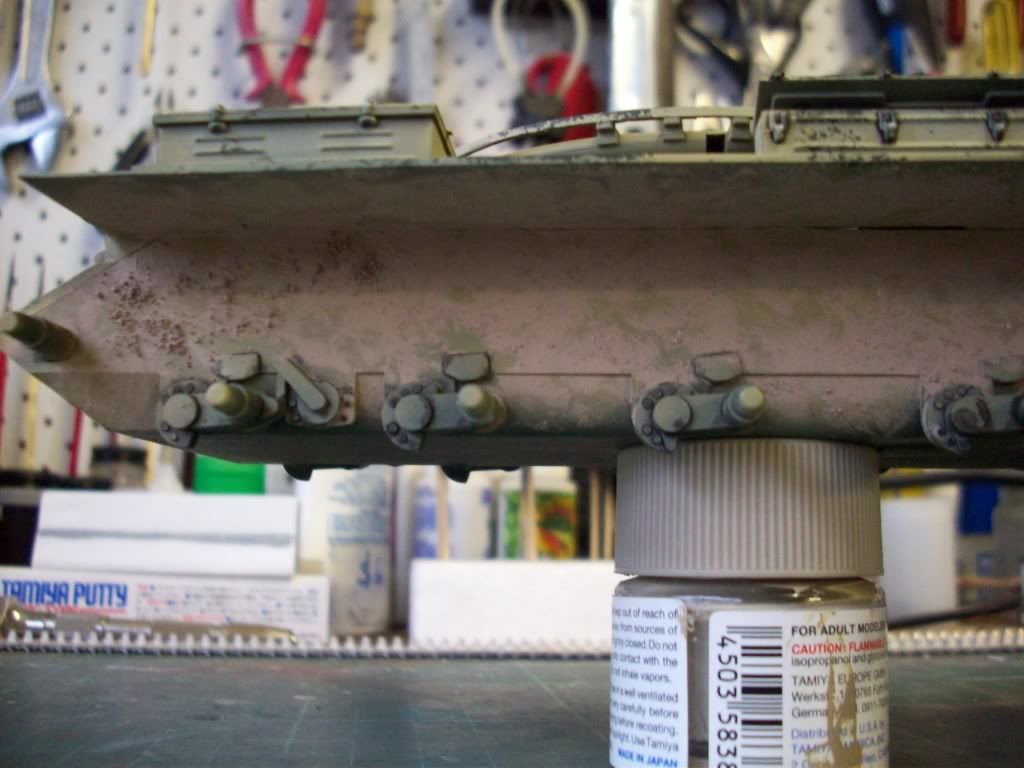
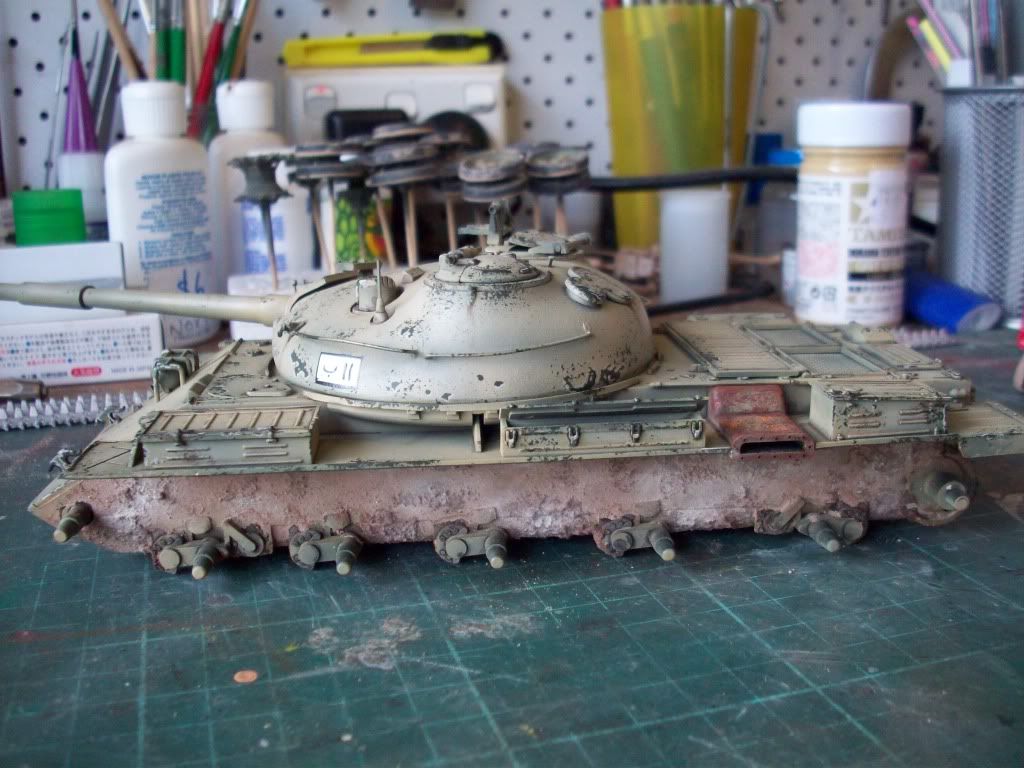
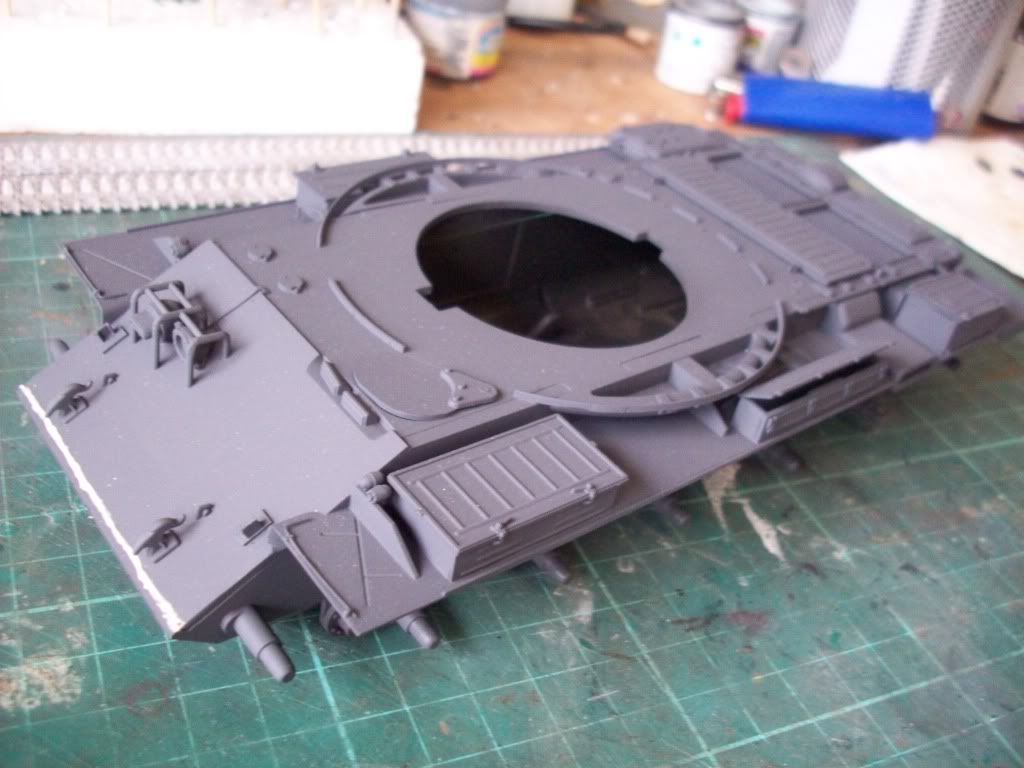
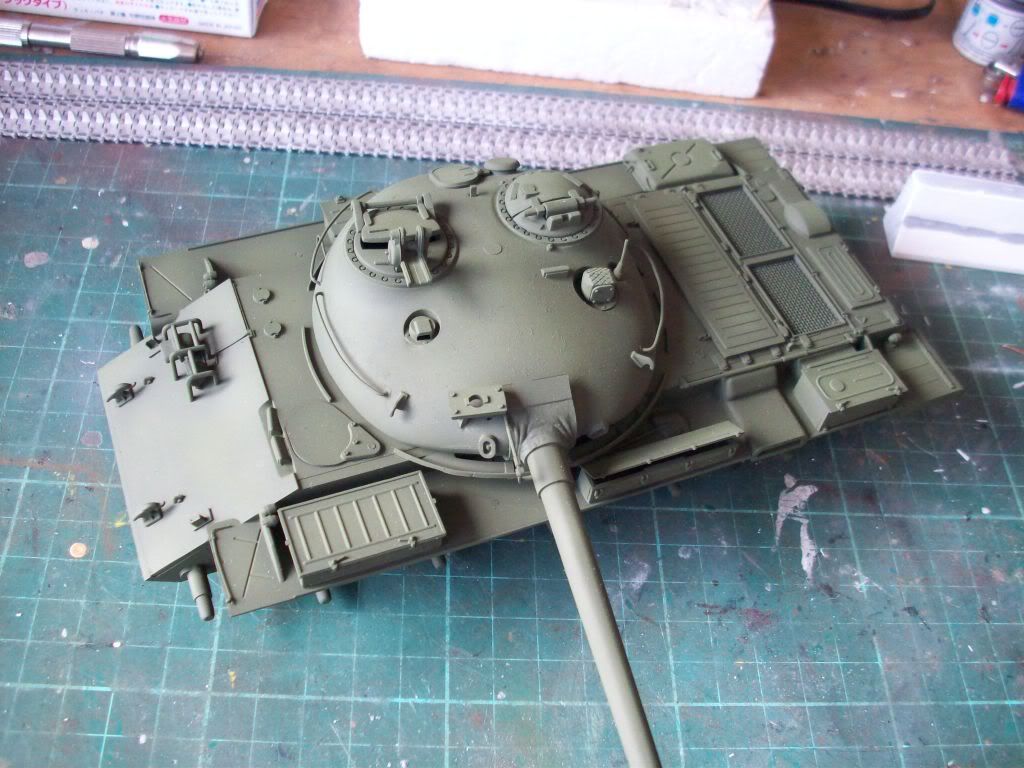
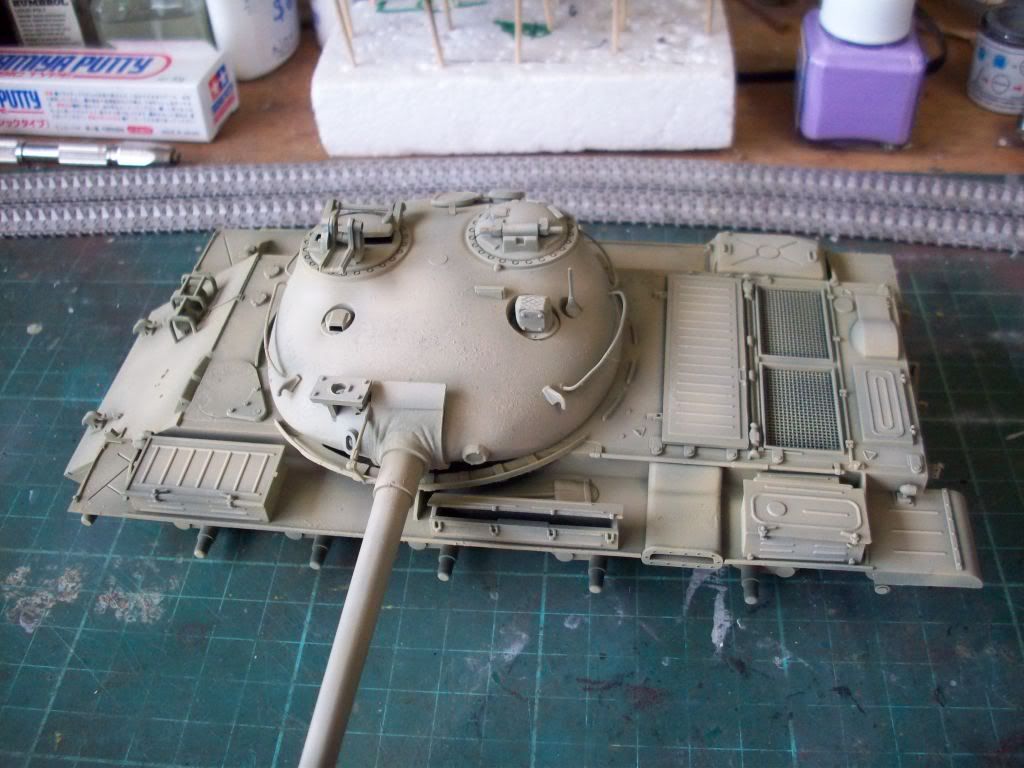
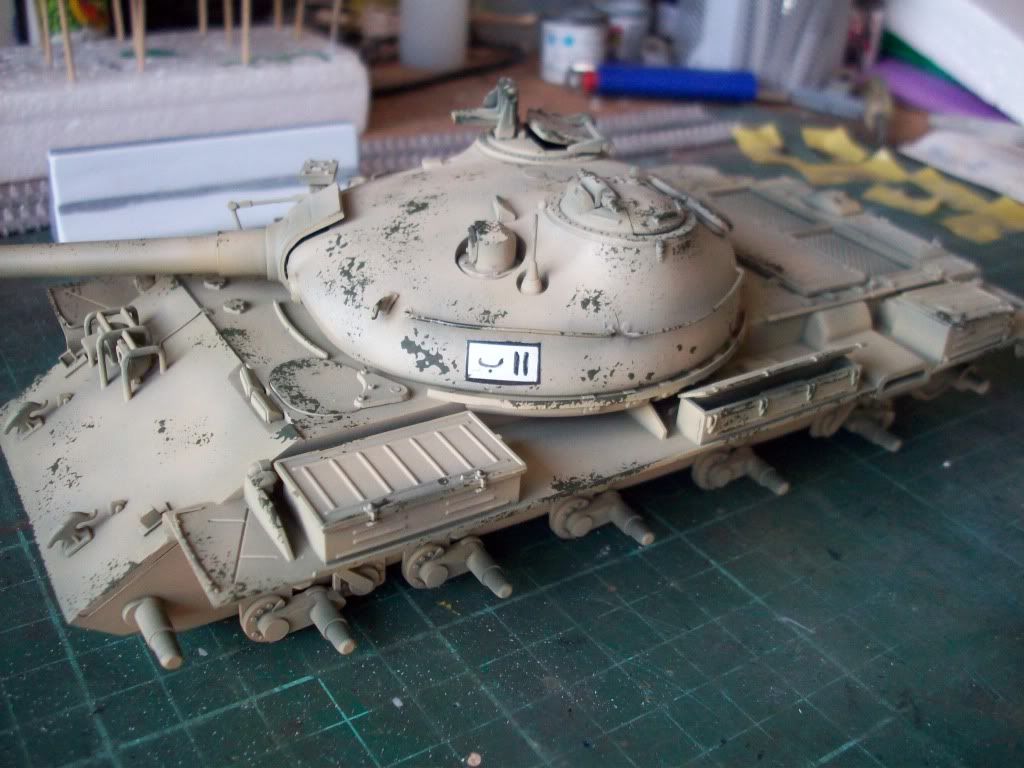
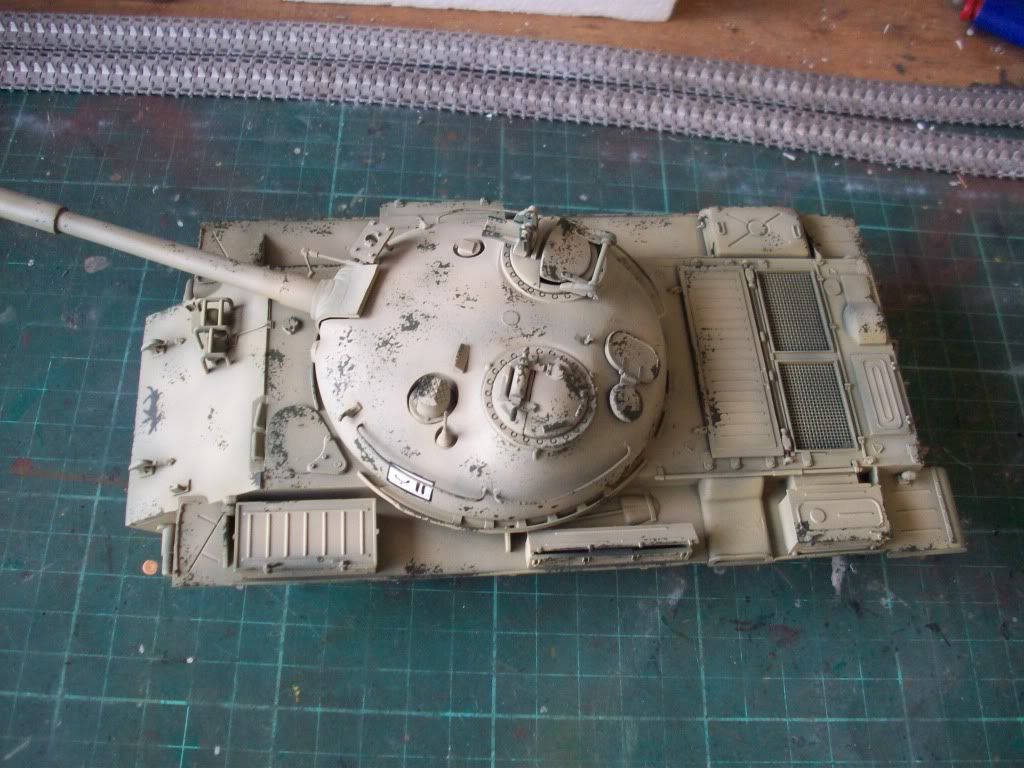
The completed tank minus wheels and tracks.

20_OCT_2009015.jpg


20_OCT_2009016.jpg


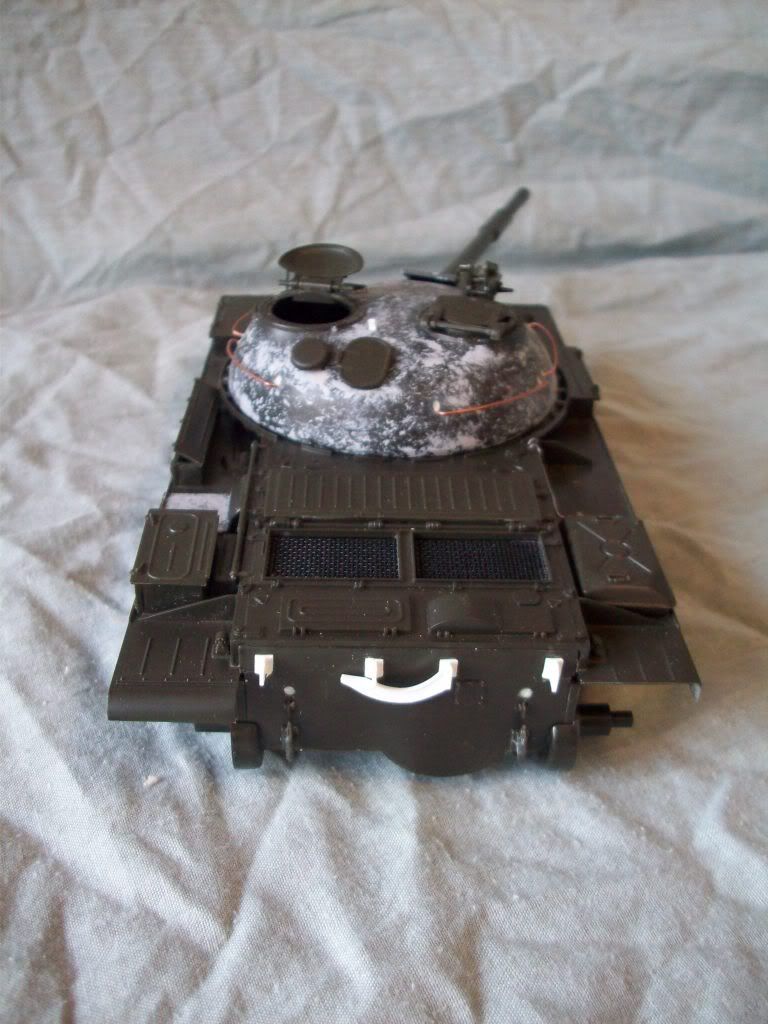
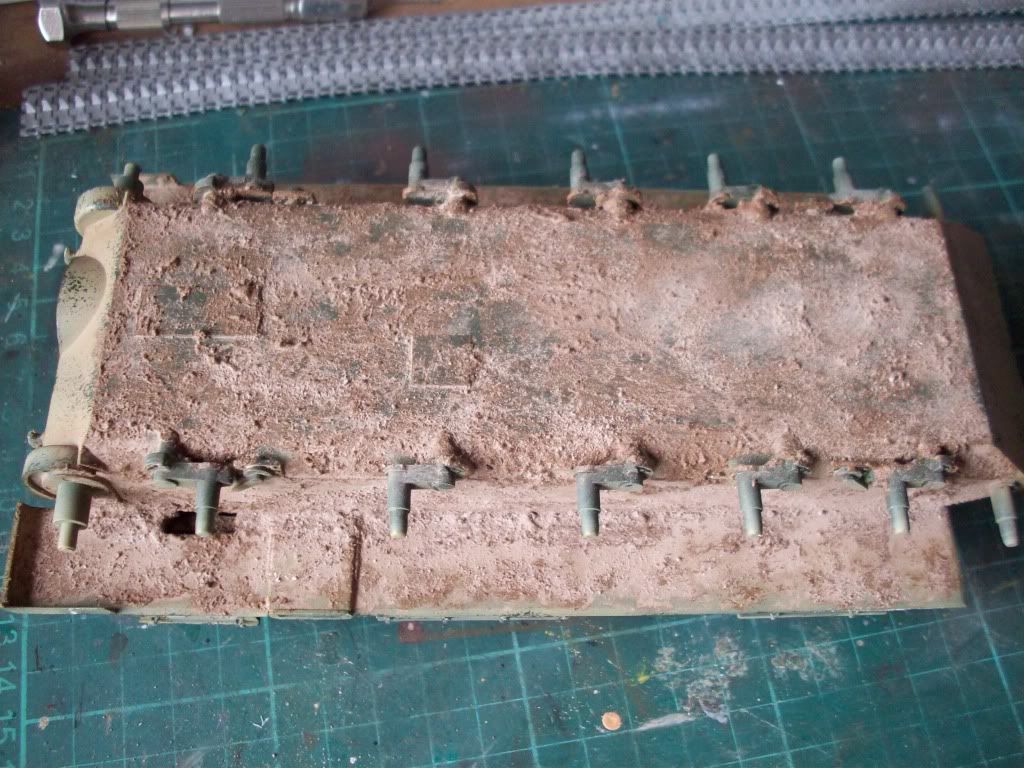
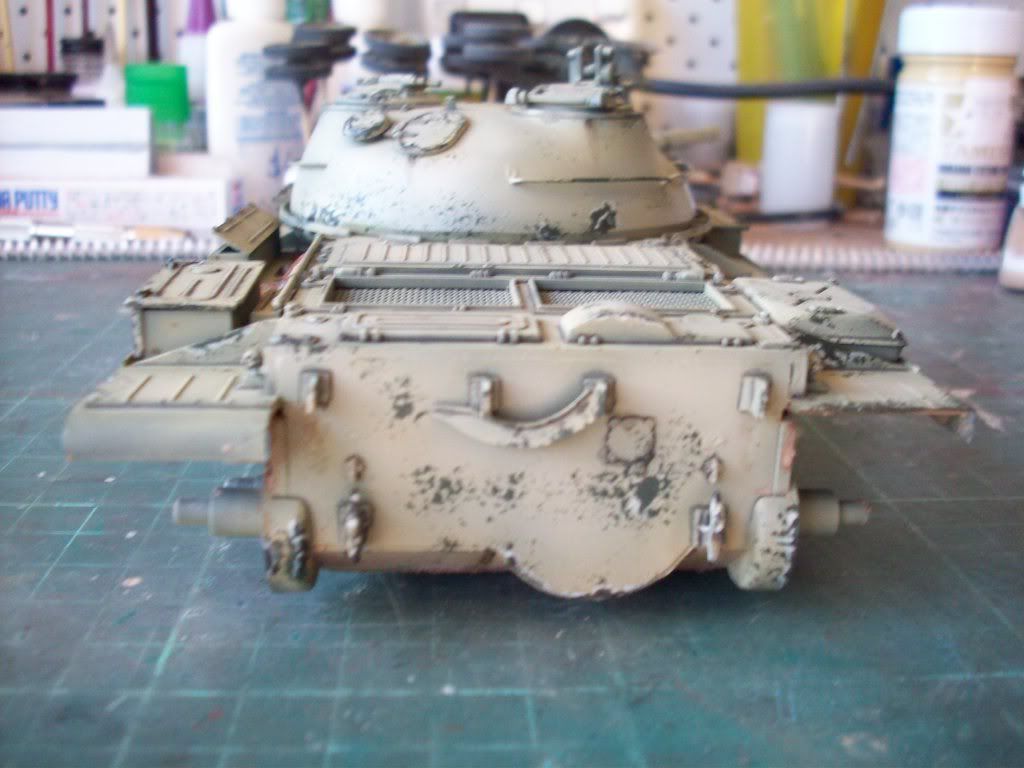
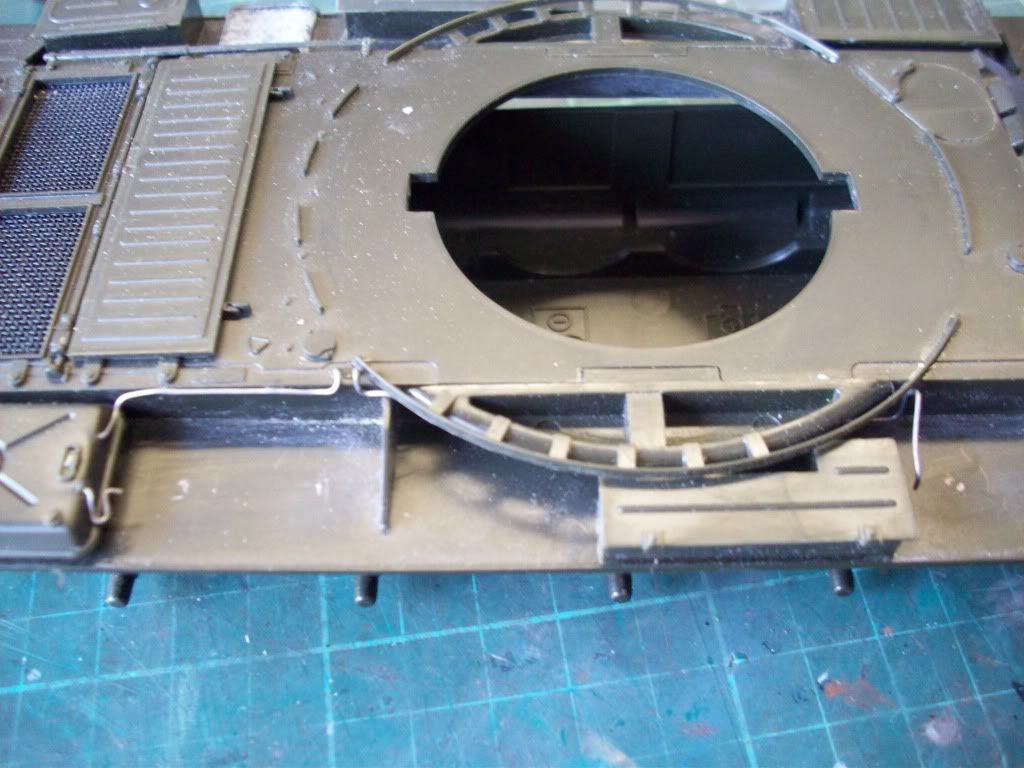
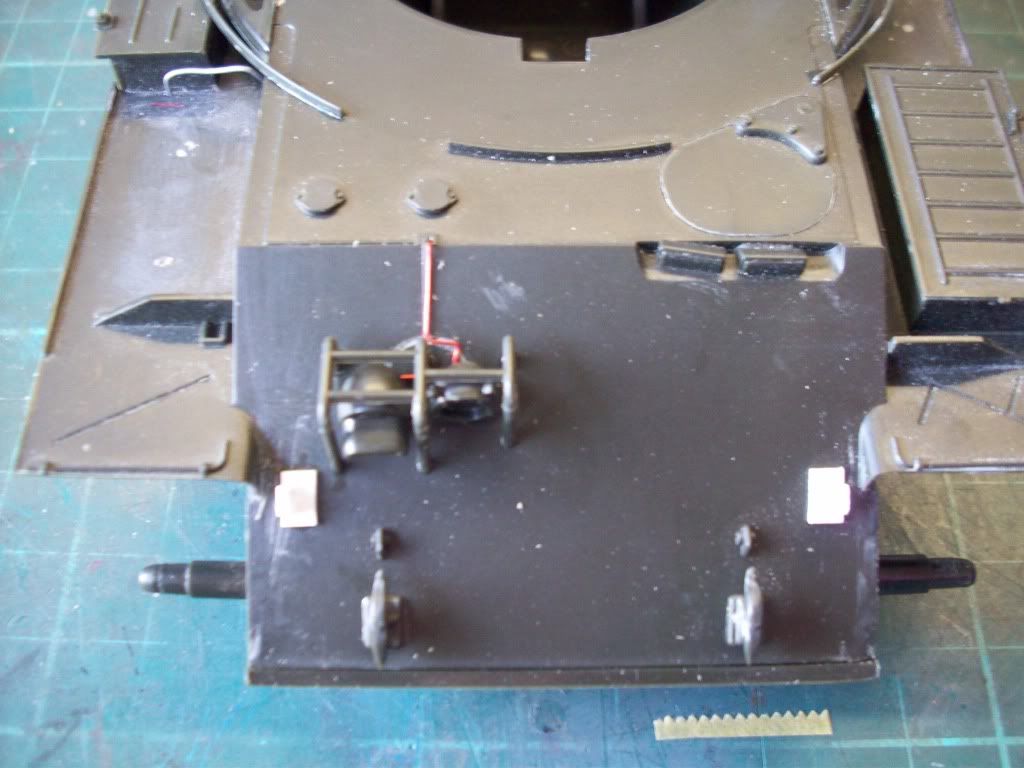
The rear hull plate showing a few modifications. The Soviet tanks had two huge 205 litre fuel drums attached to the rear plate. Upon examining the photos only the mounting brackets and one support are left on this tank. I made these details out of plastic shapes.

21_OCT_2009002.jpg


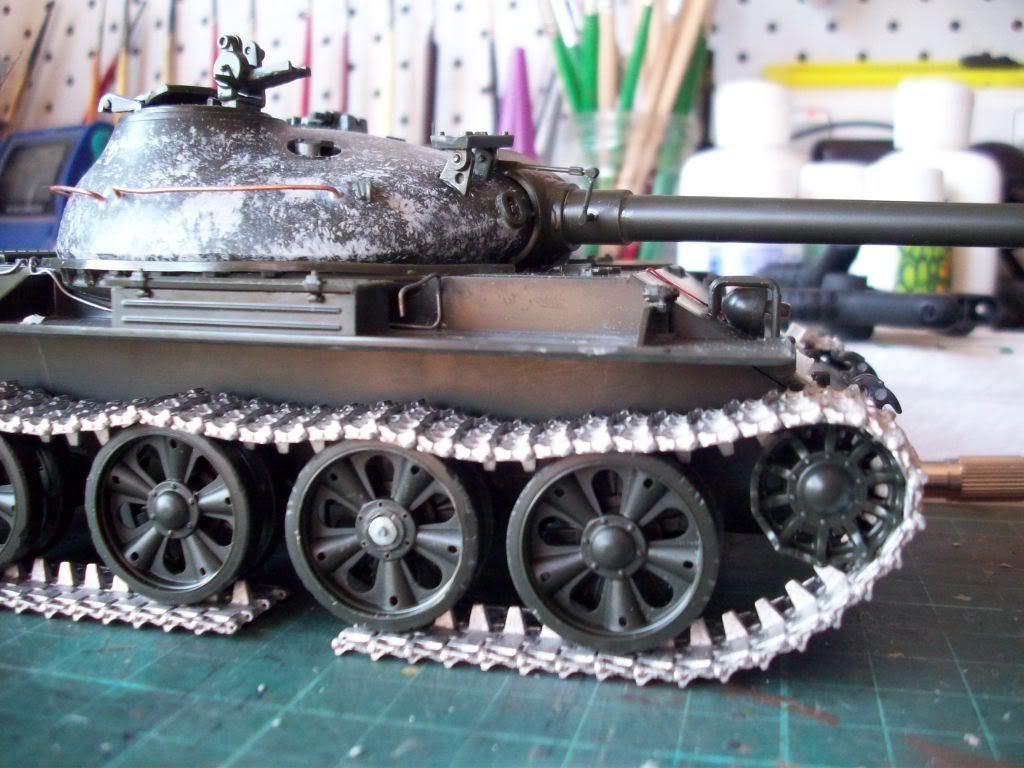
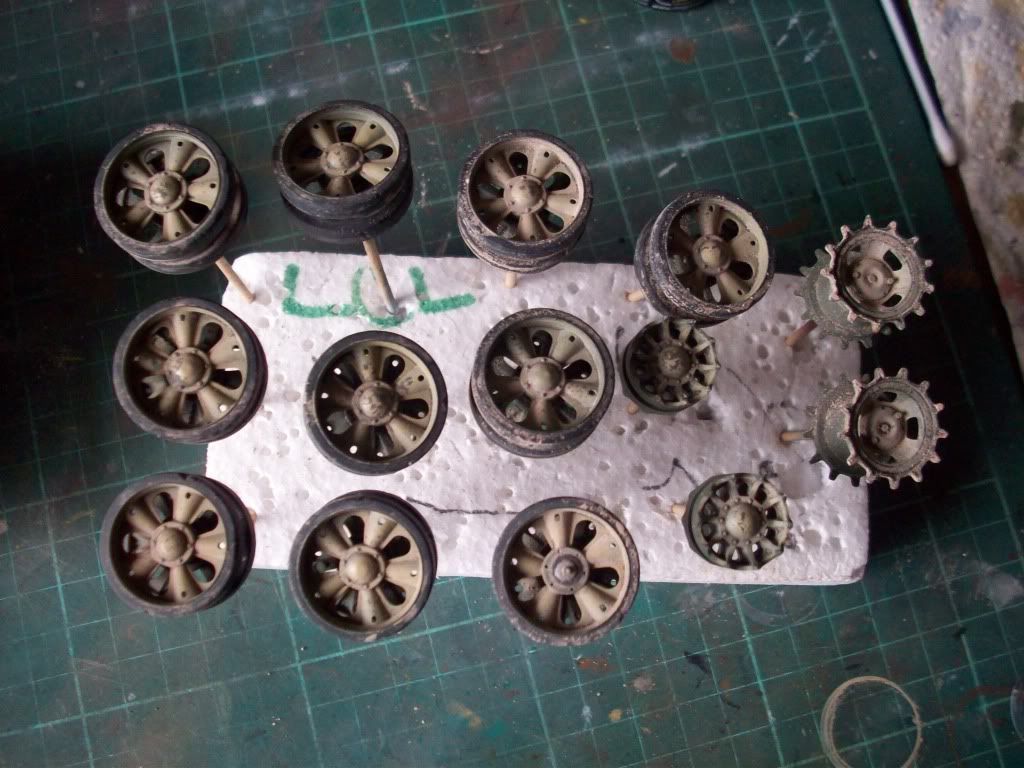
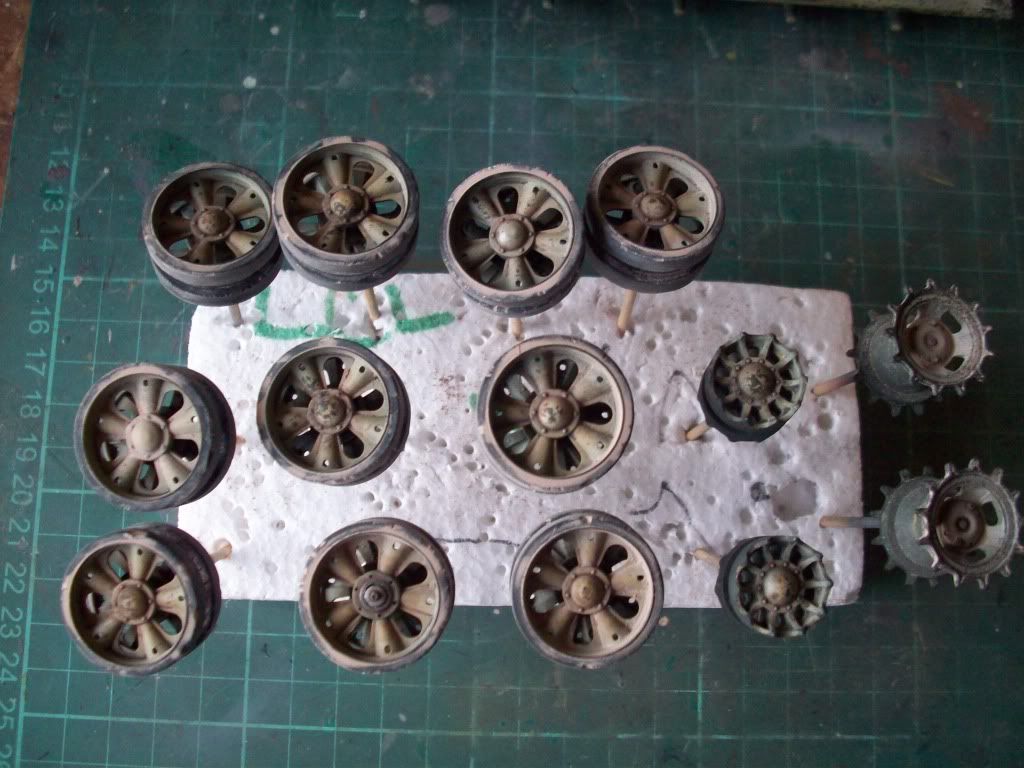
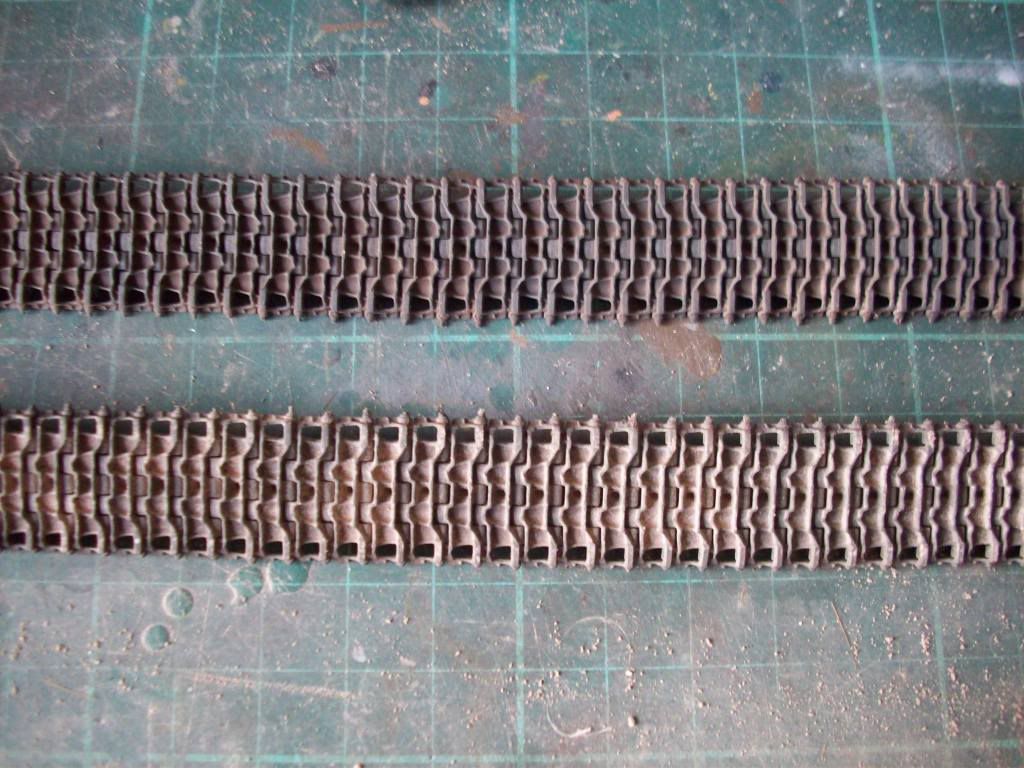
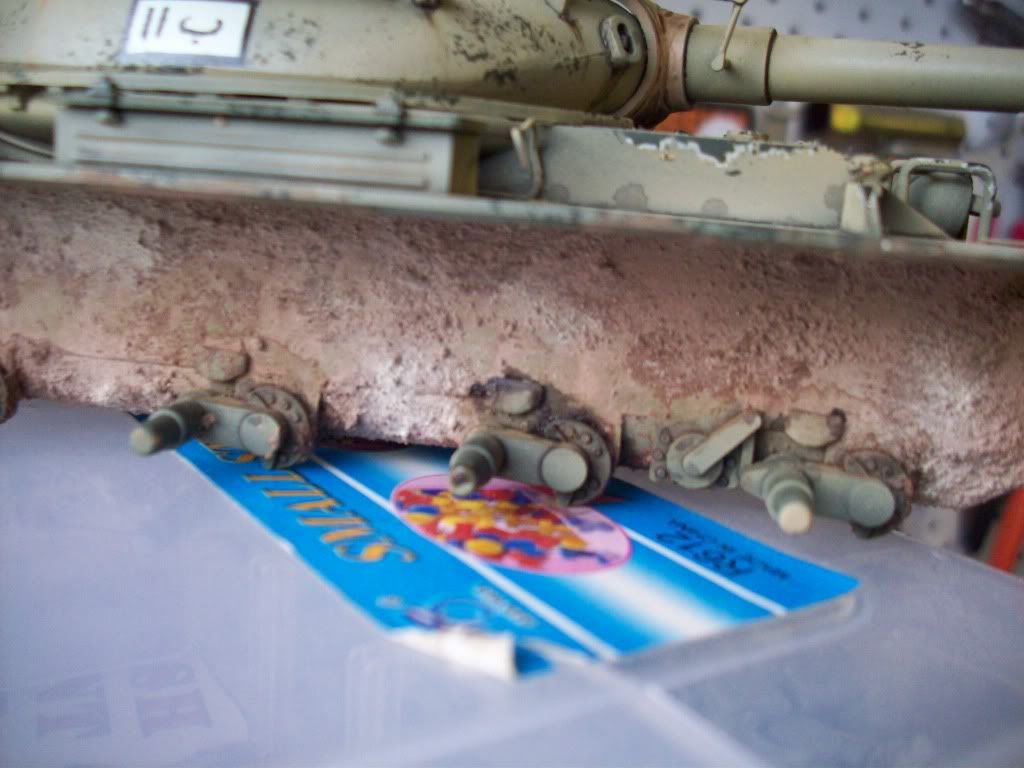
Test fit of the Fruil metal track links and wheels. The metal tracks are the closest thing to the ‘real item’ you can get. Notice how realistically they sag over the tops of the road wheels (compare to the real photos). It took maybe 6 hours to clean up and pin the 150 odd links per side together. Worth it though – they look cool!

To be continued....

Cheers,

Jase.
 
Nice! As a Russian tank nut (I here there is a 12 step program I can get into! LOL) nice use of a old kit. I love what you have done with it! Can't wait to see some paint! Ryan B)
 
Hi Jase.

You have picked out an oooooollllldd kit to work with here. But for the price, it is still not to bad. And you seem to have a great start on this one. I really like all the work with the wiring and the fuel lines on the external tanks.

Just one thing to suggest that will make a big diffrence in the final apperance and it's not to hard, is to fix the front of the turret. The most notable mistake that Tamiya made on this kit is the "undercut" on the front portion of the turret. It should not be there. It should simply come off the upper round contour and then go to a straight vertical face on the front. It should not be to hard to fix with some two part epoxy if you have any. If not, you could use a couple of layers of regular old body putty. But dont' do it all at once if you use the putty, as it will shrink and crack quite bad if it is all in one heavy layer. Just put on a couple of thinner layers letting each layer set and harden before you try the next. One more problem is that the turret height is a bit low on the kit. But that is really not that bad, and you could skip fixing that and it would still look OK. But I would really suggest that you consider fixing the front of the turret, as it is something that you could still do, at this point, and it's not that hard to do.


Gary B)
 
Painting:
As there has been several different material types used in the construction process (copper wire, Mr. surfacer & white plastic), I will need to apply a primer coat of paint to the vehicle to bring it back to a uniform colour tone. This will provide a uniform tone for subsequent colour coats and also is useful for checking for construction flaws and problems.

26_OCT_2009001.jpg

26_OCT_2009002.jpg

26_OCT_2009003.jpg


I damaged the rubber parts of the road wheels with a scalpel blade, I got quite rough with this as the real vehicles rubber wheels are badly damaged. I removed the hub cap from one of the wheels with a micro chisel and drilled out the hole. I scratch build the axle and hub from stretched sprue and drilled out the bolt holes for the hub.

A dark grey lacquer based paint was applied for the primer coat for two reasons. Firstly the lacquer paint really sticks well to the plastic and provides good holding power for the following paint coats and secondly the dark grey colour will act as a pre-shade to provide depth to the subsequent colours.

I immediately noticed that the seam at the front of the glacis plate was overlooked and needed work. This was filled with putty and sanded smooth then the primer re-applied to this area. All was now good so it is on with the colour coats.

As I mentioned earlier on the original tank you can see the original soviet armour green colour showing through where the sand paint has chipped off. Therefore green is going to be the first real colour applied.

I chose Tamiya olive green for my base colour and this was sprayed on with the air brush to achieve an uneven base coat with some areas having a quite thin covering. This allows the underlying dark grey primer to darken the shade of green in these areas. An essential aspect if we are to achieve a realistic paint finish.

Once I was happy with the base green colour, I loaded the air brush with a thinner than usual mix of Tamiya nato green (which is a lighter shade of green). This was then sprayed in a controlled cloudy pattern to the centre of plate panels and details. This is our highlight and sun fading effect. Essentially the model now has 3 subtle but distinct green shades.

28_OCT_2009001.jpg

28_OCT_2009002.jpg

28_OCT_2009003.jpg

28_OCT_2009004.jpg


Now that we have a nicely faded Russian green tank the real fun can begin! A product called Humbrol Maskol (a liquid rubber masking fluid that dries to a rubbery solid that can be peeled off) is applied to the vehicle using a small square of foam sponge packing material. This will be used to produce the chipped areas of sand paint. The maskol protects the underlying green from the subsequent paint coats and can be removed after they dry.

I concentrated on areas of logical wear, around external edges and crew access hatches as well as maintenance hatches and covers. All these are areas where paint could be damaged by everyday use.

29_OCT_2009001.jpg

29_OCT_2009002.jpg


To be continued.....

Jase.
 
Panzerfaust,
If you need the moose, I have a paper punch that would be perfect.
You could make a stencil, or I can punch one out (which I already
have done a bunch in white decal paper).
Shawn
 
Thanks very much for the offer there Shawn,

The truth is I have already finished this baby.....

Thank you very much for you generous offer of support - much appreciated.

Cheers,

Jase.
 
Panzerfaust wrote:
Thanks very much for the offer there Shawn,

The truth is I have already finished this baby.....

Thank you very much for you generous offer of support - much appreciated.

Cheers,

Jase.

No Worries. Anytime.
Shawn
 
Sand Paint:

30_OCT_2009001.jpg


The sand coloured paint is next to go on. The colours I chose for this were Tamiya buff as a base colour and a colour from Gunze called misleadingly light brown for the highlights (this is in fact a very light sand colour!). I chose all of my colours by matching the paint bottles by eye to the reference photos.

The buff was sprayed on first; again leaving some of the areas thin so that the greens below darken the sand colour to produce some depth. The light brown followed, also highlighting the centre of panels and details to add a sun faded look to the vehicle.

30_OCT_2009002.jpg

30_OCT_2009003.jpg

30_OCT_2009004.jpg

30_OCT_2009005.jpg


The paint now needs to dry and harden for a full 24 hours. The maskol masking can then be removed. This is done by picking bits off and using a blob of blutac to gently rub at the surfaces. The great thing happening here is the paint chipping that appears. The model is starting to take on a real life appearance.

30_OCT_2009006.jpg


01_NOV_2009001.jpg


The next item for attention, the turret Arabic lettering. Arabic numerals 11B…. hmm how do I create this?

I decided to back myself here and hand paint the characters. First the white background and thin black border need to be painted. This was all done using masking tape and the air brush. I then carefully applied the Arabic lettering using black paint, a fine brush, steady hands and nerves of steel!

A good result was achieved and I’m quite proud the be able to say I hand painted that!

01_NOV_2009002.jpg

01_NOV_2009003.jpg

01_NOV_2009005.jpg

01_NOV_2009006.jpg


Now the moose on the glacis plate. The only way to do this successfully is to make a paper stencil that I can use to air brush paint through.

A copy of the photo of the moose was printed out on paper and I determined the reduction ratio needed on the photocopier to make it the exact right size for the model. This copy was then taped down to the cutting mat and the moose was carefully cut out with a new sharp scalpel blade.

02_NOV_2009003.jpg

02_NOV_2009002.jpg


The paper moose stencil was then secured to the glacis plate with enough masking tape to protect the surrounding paint work from overspray. The moose was then sprayed using a mix of 4 parts nato black and 1 part buff. Masking and stencil was then removed. Successful I think!

To be continued....
 
Hi Jase...you sneak...You didn't say you had posted this....As I have already seen the real thing, I don't need to tell you how good it looks...You've got the midas touch. :laugh: :silly: :laugh:
 
Weathering

At this point I painted the canvas mantlet cover in varying shades to give depth to the folds. The entire model then received a ‘filter’ of ochre oil paint. You will notice in the photo below the vehicle has a yellowish tinge that is not present on the last photo in the previous post which was taken prior to the ochre filter.

03_NOV_2009002.jpg


A filter is made up of a small amount of oil paint dissolved and diluted with artists white oil (a kind of odourless turps used by artists in oil painting.) These ‘filters’ behave very much like the photography type of filter. That is they subtly change the colour hue of the subject. This has two main effects, firstly it noticeably darkens the vehicles finish and secondly it unifies all of the colours used on the tank. You will notice that the moose now seems less stark and blends in with the overall vehicle better. Also the colour highlights seem to stand out a little better.

04_NOV_2009.jpg


Next up in the weathering process is the pin wash. I used a ready made product from Mig Productions called dark wash but a wash can also be made from oil paint artist white spirit mix.
This dark colour is loaded in to a fine brush and this is just touched to details, the wash flows out of the brush and creeps around the little nooks and crannies and into corners. This has the effect of accentuating 3 dimensional details.

09_NOV_2009002.jpg


After the pin wash the tools were painted in with acrylic paint for the metal areas and oil paint streaked on for the timber handles.

05_NOV_2009003.jpg

05_NOV_2009002.jpg


I wanted to portray the caked on earth and dust on the lower part of the tank especially under the fenders and around the running gear and underside of the vehicle. I used Mig Productions pigment powder for this, using a couple of different techniques. Firstly the photo above shows the results of mixing the pigment powder with thinner for washes and applying it wet, a thin dusty appearance. I was after a bulkier amount of material so another technique was needed. The photo below shows the result of an application of pigment powder mixed with acrylic resin, plaster and sand (from Townsville!) The result is a bulkier amount of earth and dust. Pigment applied dry now enhances the dustyness of the finish.

09_NOV_2009001.jpg

13_NOV_2009003.jpg


The wheels also needed to be very dusty but do not need the bulky effect that I have on the hull, so the pigment was applied both wet and dry. This will be repeated again for a dustier look.

11_NOV_2009006.jpg


Heavy paint chipping was now added using a mixture of red brown & black acrylic paint. The aim of this was to show where bare metal has been exposed. Positive chipping was then applied with a fine brush and a light coloured paint (deck tan). This highlights the edges of the heavier chips and adds depth to them.

Rust streaks were made with a dot of oil paint (raw umber) from the end of a toothpick. This was dotted onto the heavily chipped areas and streaked downwards with a brush dampened with clean white spirit.

A raw umber wash was also applied around selected details. The rusty exhaust was created by dampening the area with pigment fixer and applying old rust & light rust pigments in a dabbing motion with a stiff brush.

12_NOV_2009002.jpg

11_NOV_2009005.jpg


Lighter coloured fresh rust streaks were then applied (but only a few) as this is a dry environment.

Fuel staining was added using life colour tesacrom oil and smoke colours applied around the external fuel cell and plates on the engine deck. This effect will be built up in stages in between coats of dust for a more authentic look.

12_NOV_2009004.jpg


Lighter coloured pigment was added to the lower hull then some dark wash was added around the suspension arms to simulate oil & grease leaks.

12_NOV_2009005.jpg


Wheels were given a similar treatment of dry pigment powder for dust then an oil paint wash of burnt umber applied to the hubs. This creeps along the pigment out to the spider rims and simulates oil & grease leaks.

Tracks were painted in the following process. White primer (helps further paint layers stick to the metal), A coat of Tamiya flat black and red brown mixed 50:50, dry mud Mig pigment powder applied dry, mig thinner for washes to settle the pigment into the detail, mig pigment fixer to permanently fix the pigment, a final coat of Mig pigment powder applied dry for a dusty finish.

19_NOV_2009001.jpg

19_NOV_2009004.jpg

19_NOV_2009003.jpg

20_NOV_2009001.jpg

20_NOV_2009002.jpg


Tracks after the final dusting of Mig pigment powder – dry mud.

20_NOV_2009003.jpg


A leaky bearing on the suspension arm that carries the wheel without the hub was simulated with Lifecolour paint oil Tesacrom.

To be continued.....
 
Back
Top