
-
Modelers Alliance has updated the forum software on our website. We have migrated all post, content and user accounts but we could not migrate the passwords.
This requires that you manually reset your password.
Please click here, http://modelersalliance.org/forums/login to go to logon page and use the "Forgot your Password" option.
You are using an out of date browser. It may not display this or other websites correctly.
You should upgrade or use an alternative browser.
You should upgrade or use an alternative browser.
Build log 1:32 Tamiya F-15C with lots of goodies
- Thread starter NSX_Guy
- Start date
New build 1:32 Tamiya F-15C with lots of goodies
Getting about time for an update eh?
Getting about time for an update eh?
New build 1:32 Tamiya F-15C with lots of goodies
Yes, I suppose it is. It's been a hectic several weeks spent mostly away from the bench with family, 1:1 scale modelling and with the weather in canuckistan finally turning, a little bit of yard work.
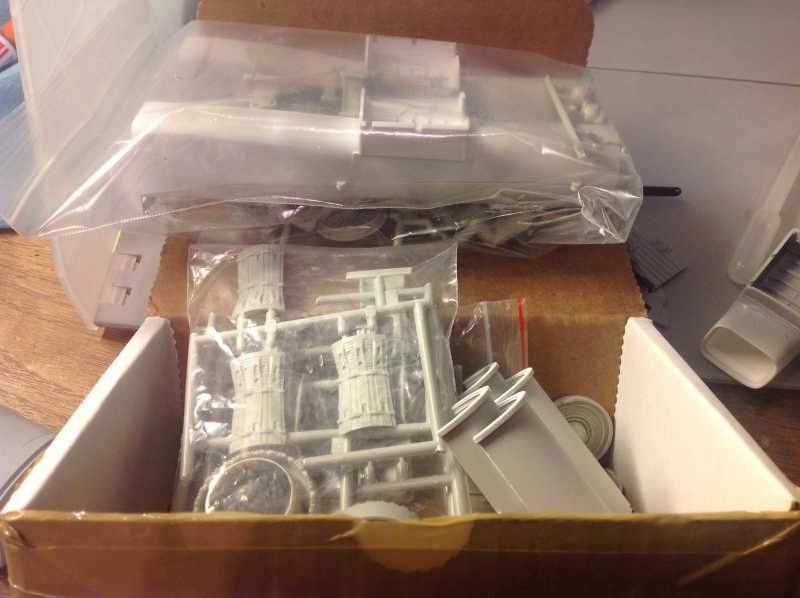
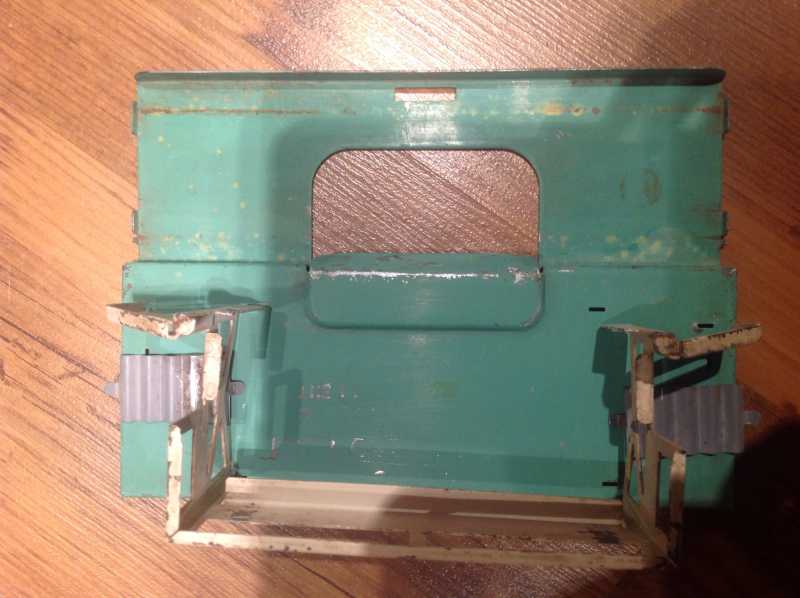
First off, I don't think I've shown this, but this is the ever growing pile of tamiya parts that won't be used in the completion of this build.
That said, I got the intakes finished up. Rhino models do a helluva job with their resin, and it adds an awesome weight to the fuse. I painted the back half of the intakes white, let dry and did a subtle wash with Vallejo dirt and oily black. Just when I thought I hadn't used enough, I stopped! That was a victory in itself. I'm actually pretty happy with how it came out.
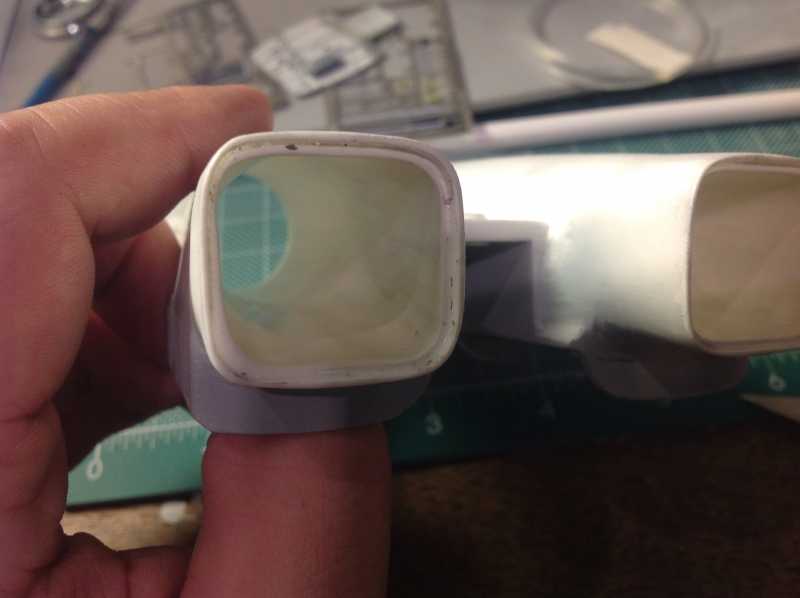
Here's the intake set in the fuse. I set it in place, used about a metric tonne of Cyanoacrylate to hold it down and filled the very small resultant gap where I hogged out the intake in one of my first posts.
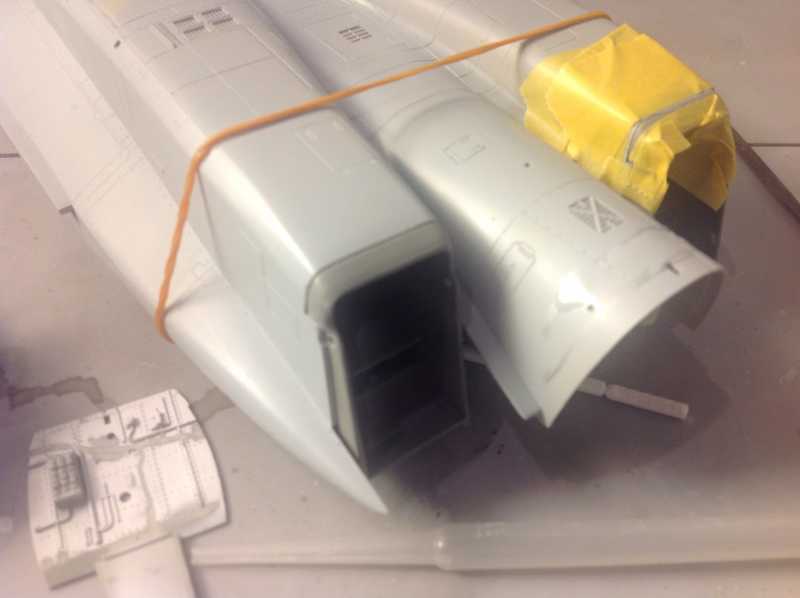
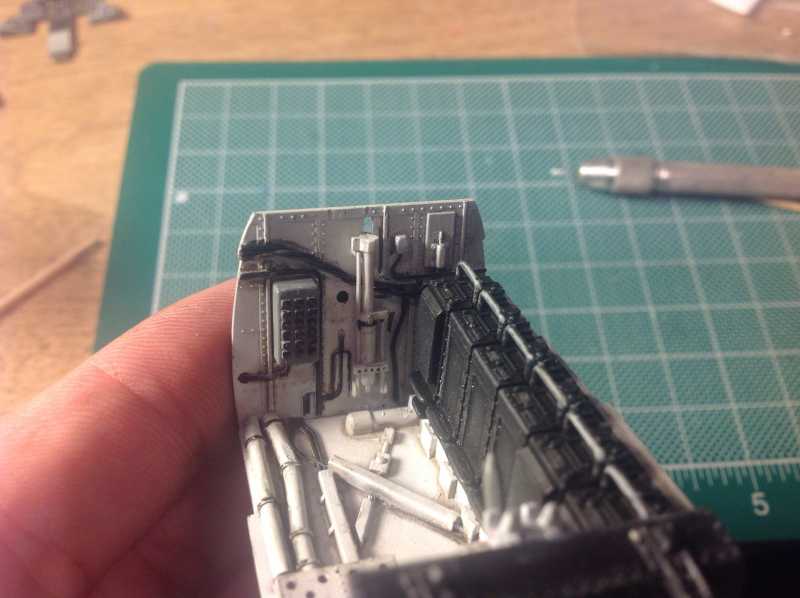
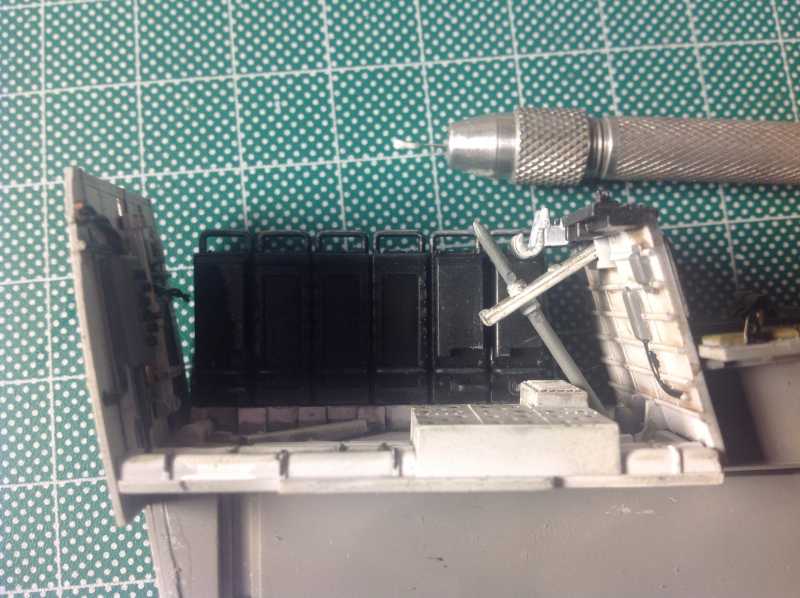
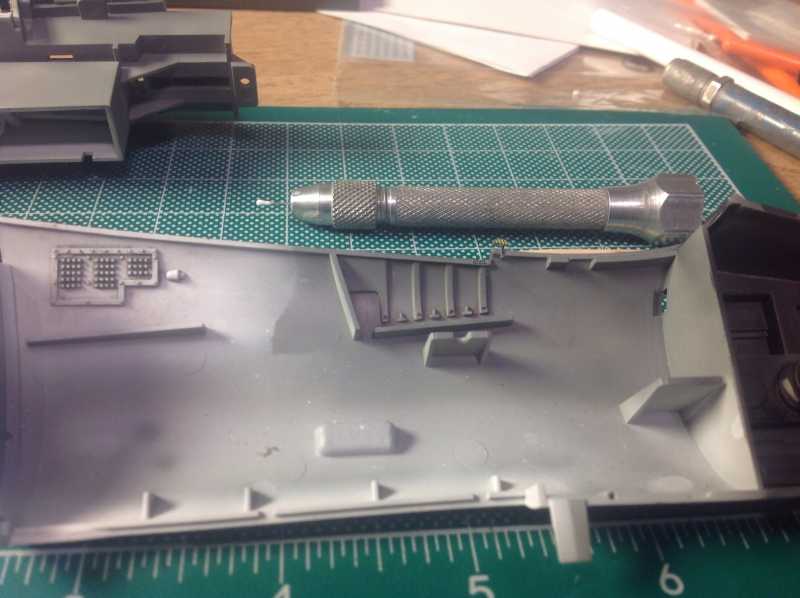
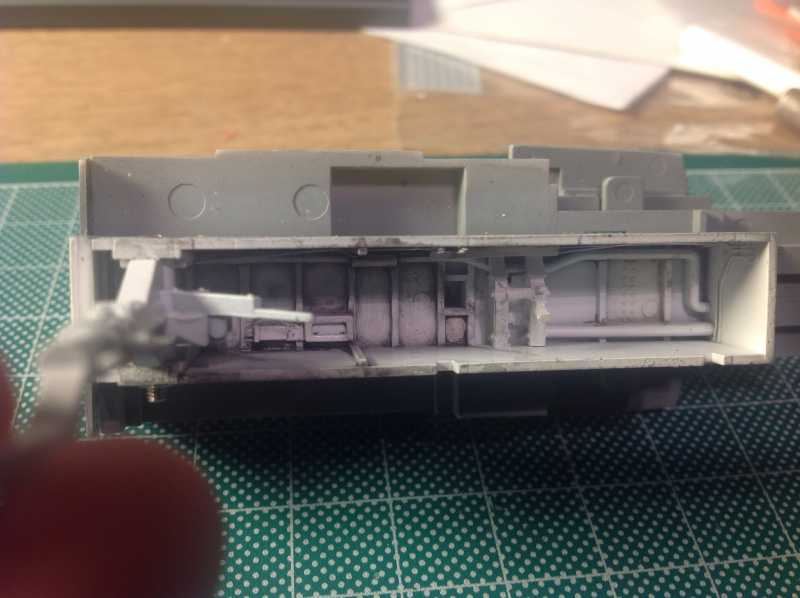
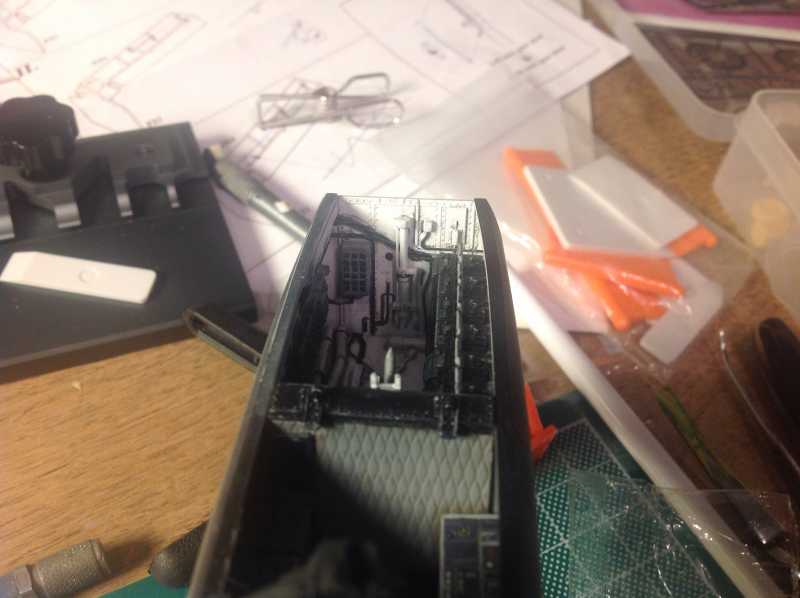
I then turned my focus back to the 'pit, where I took care of bay 5. In this picture, you'll see well over 100 pieces of masking tape to separate the flat white from the FS 36231. I tried liquid mask (twice) and didn't like the results in this busy and cramped space, so I went to the old faithful route.
After that, I sprayed!
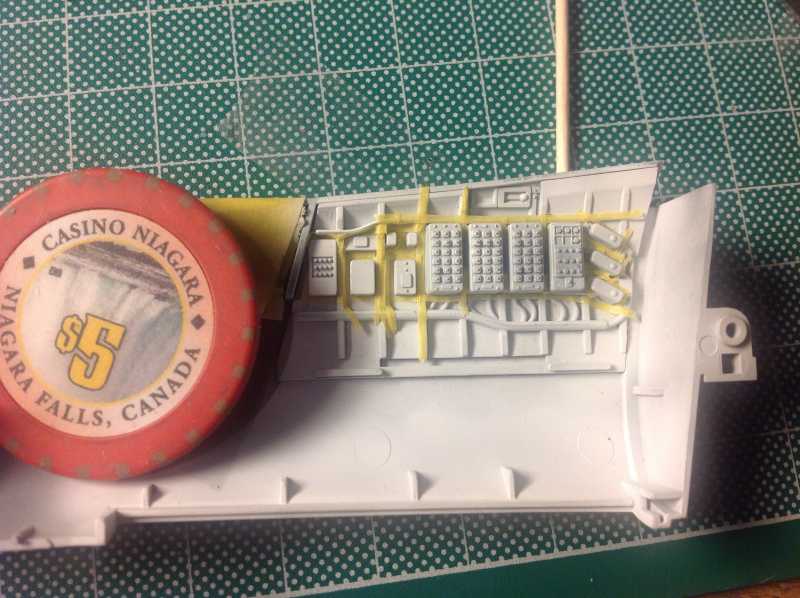
It came out well in my opinion. Since this photo was taken, I picked out all the knobs in flat black and NATO black. I still have the cabling to finish, and then washing and chipping.
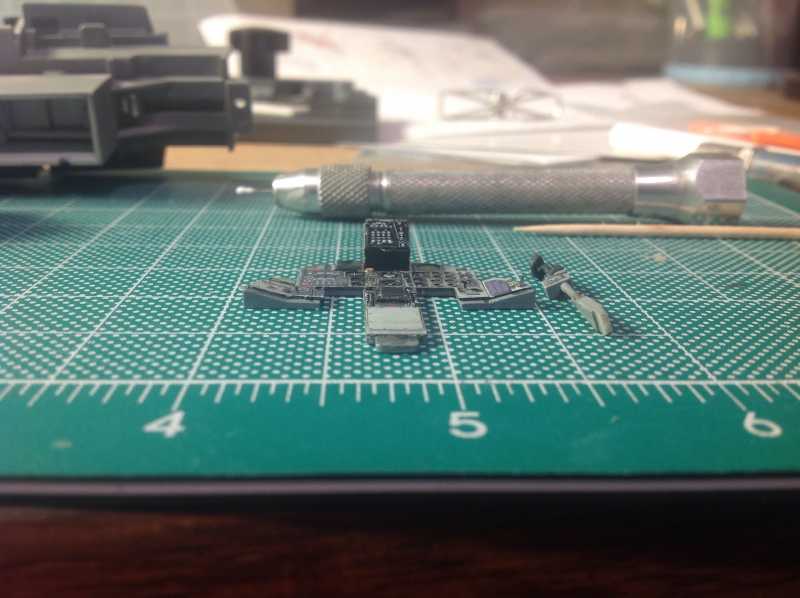
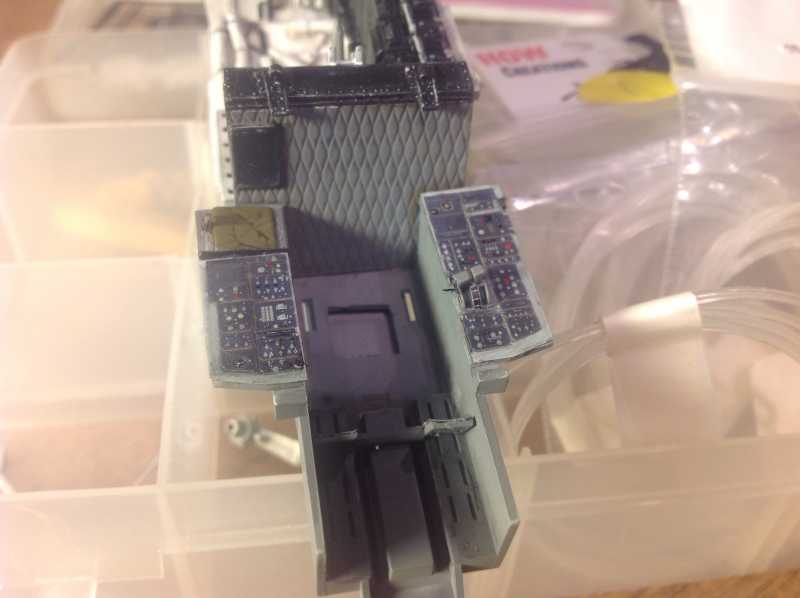
I also decided I didn't like the molded in detail on the rear bulkhead of bay 5, so I built up a wire loom from thin gauge copper wire. In my opinion, it doesn't look bad now, but hopefully looks better after weathering.
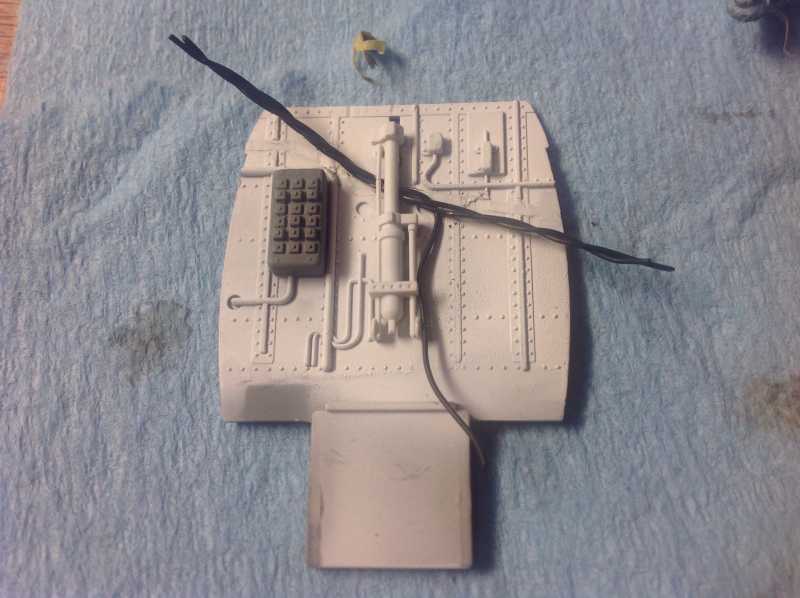
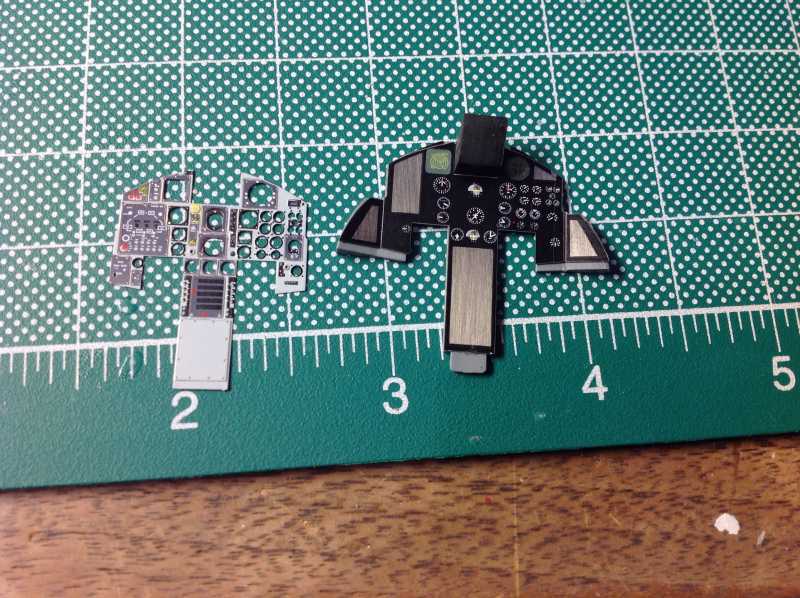
Onto the instrument panel. I used the laminated pieces from the Eduard set, and supplemented with the heat vent from the Wolfpack set and I'll also likely add in the updated screen from that set as well.
Anyways, as I promised myself over a month ago, I hope t have the pit stitched up soon. Then I can move onto the exterior. Sounds easy, right?!?!
As always, I welcome comments, critiques and suggestions.
Getting about time for an update eh?
Yes, I suppose it is. It's been a hectic several weeks spent mostly away from the bench with family, 1:1 scale modelling and with the weather in canuckistan finally turning, a little bit of yard work.
First off, I don't think I've shown this, but this is the ever growing pile of tamiya parts that won't be used in the completion of this build.
That said, I got the intakes finished up. Rhino models do a helluva job with their resin, and it adds an awesome weight to the fuse. I painted the back half of the intakes white, let dry and did a subtle wash with Vallejo dirt and oily black. Just when I thought I hadn't used enough, I stopped! That was a victory in itself. I'm actually pretty happy with how it came out.
Here's the intake set in the fuse. I set it in place, used about a metric tonne of Cyanoacrylate to hold it down and filled the very small resultant gap where I hogged out the intake in one of my first posts.
I then turned my focus back to the 'pit, where I took care of bay 5. In this picture, you'll see well over 100 pieces of masking tape to separate the flat white from the FS 36231. I tried liquid mask (twice) and didn't like the results in this busy and cramped space, so I went to the old faithful route.
After that, I sprayed!
It came out well in my opinion. Since this photo was taken, I picked out all the knobs in flat black and NATO black. I still have the cabling to finish, and then washing and chipping.
I also decided I didn't like the molded in detail on the rear bulkhead of bay 5, so I built up a wire loom from thin gauge copper wire. In my opinion, it doesn't look bad now, but hopefully looks better after weathering.
Onto the instrument panel. I used the laminated pieces from the Eduard set, and supplemented with the heat vent from the Wolfpack set and I'll also likely add in the updated screen from that set as well.
Anyways, as I promised myself over a month ago, I hope t have the pit stitched up soon. Then I can move onto the exterior. Sounds easy, right?!?!
As always, I welcome comments, critiques and suggestions.
New build 1:32 Tamiya F-15C with lots of goodies
I plan on having a series of colour test spoons with paint gradients to help ease the decision. It's a pain regardless.
I hate having this problem. I'd be interested in seeing what the colours look like next to each other when faded dramatically. Even if done uniformly.
I'm glad you're tackling this problem before I start in on my F-16.
I plan on having a series of colour test spoons with paint gradients to help ease the decision. It's a pain regardless.
ij001
Well-known member
New build 1:32 Tamiya F-15C with lots of goodies
Best IP I've seen for a long time. Bravo Zulu, sir.
Ian.
As always, I welcome comments, critiques and suggestions.
Best IP I've seen for a long time. Bravo Zulu, sir.
Ian.
New build 1:32 Tamiya F-15C with lots of goodies
Nailed it!
Nailed it!
New build 1:32 Tamiya F-15C with lots of goodies
Thanks guys, I wish I could take all the credit, but the IP was pre-painted from Eduards set. I still have to chip it up a bit to make it my own, but if you are ever building a kit that Eduard has done this for, I highly reccomend it.
As always, I welcome comments, critiques and suggestions.
Best IP I've seen for a long time. Bravo Zulu, sir.
Ian.
Fantastic IP")
Luiz
Nailed it!
Thanks guys, I wish I could take all the credit, but the IP was pre-painted from Eduards set. I still have to chip it up a bit to make it my own, but if you are ever building a kit that Eduard has done this for, I highly reccomend it.
New build 1:32 Tamiya F-15C with lots of goodies
Yeah but you got it sandwiched in there without big giant glue blobs like some people I know.
Yeah but you got it sandwiched in there without big giant glue blobs like some people I know.
Skinny_Mike
Well-known member
New build 1:32 Tamiya F-15C with lots of goodies
Looking good man!
Mike
Looking good man!
Mike
New build 1:32 Tamiya F-15C with lots of goodies
OK guys, get it together.... :coolio
Are you done yet?
Okay, I haven't been able to accomplish anything either.
OK guys, get it together.... :coolio
New build 1:32 Tamiya F-15C with lots of goodies
Literally.
OK guys, get it together.... :coolio
Literally.
New build 1:32 Tamiya F-15C with lots of goodies
Hold on a minute. Don't tell me you guys got in this hobby to actually finish things!?!?!? I don't believe that for one minute.
OK guys, get it together.... :coolio
Literally.
Hold on a minute. Don't tell me you guys got in this hobby to actually finish things!?!?!? I don't believe that for one minute.
New build 1:32 Tamiya F-15C with lots of goodies
So here we go. I'm married with two kids; so what do I do on a rousing Saturday night? I put the kids to bed, have a glass of wine with SWMBO and go to the bench. I sure know how to party.
Tonight was a decent night at the table, I managed to get a lot done, but I know I haven't done a proper update in a few weeks, so this may get a bit out of hand.
A few months ago, a good friend of mine brought over some old junky Lionel train parts for a strip and a repaint.
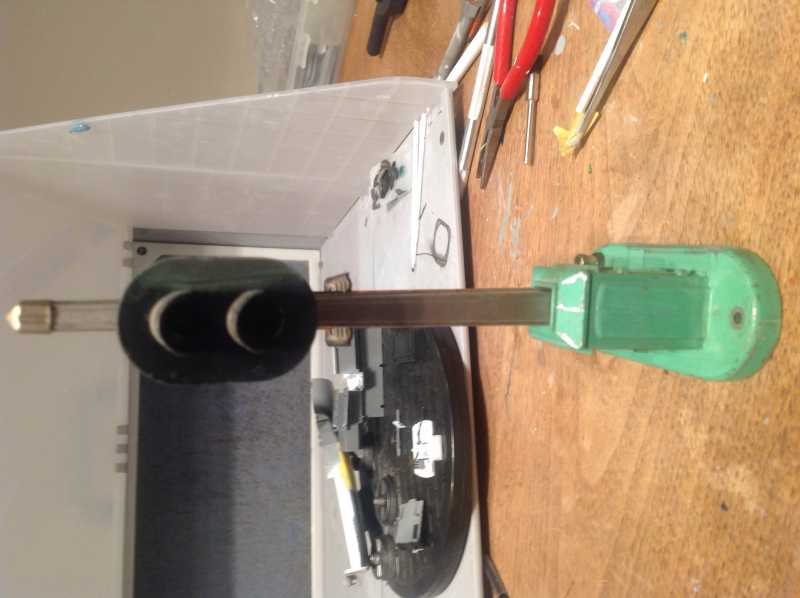
That's how I got them (at New Years, cough). As of now I've stripped, primed and intend all the parts; and they're curing awaiting a clear and final assembly. I just needed a mental break from all this photoetch assembly, and it provided a welcome one. I'll post some final follow up pictures when I'm done.
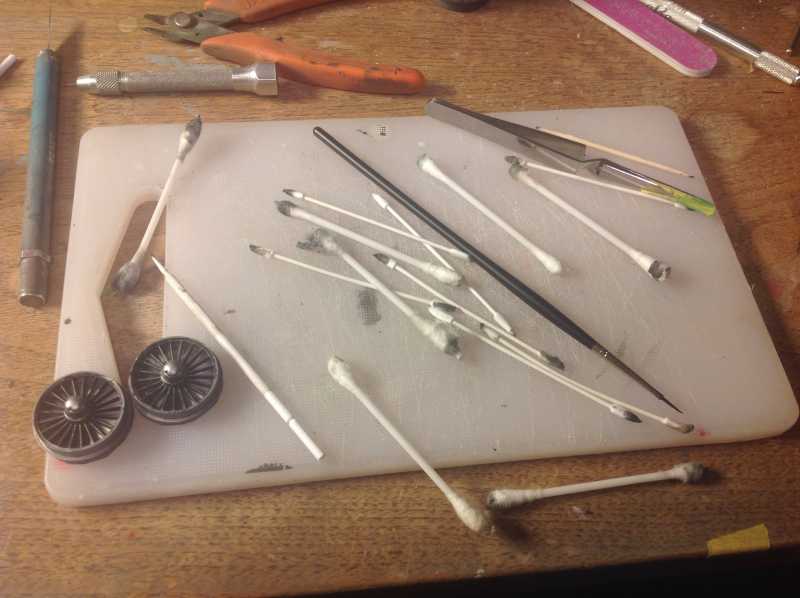
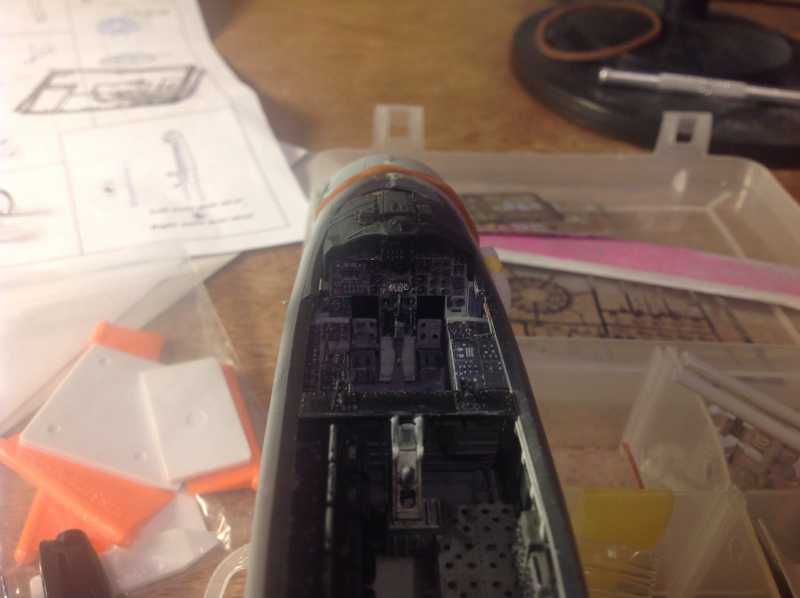
But back to the scheduled programming. As you saw in the last update, I was almost ready for the wash and assembly of the 'pit. Well, Wednesday night saw me get the wash and Q-tips out to take care of bay 5 and the main office.
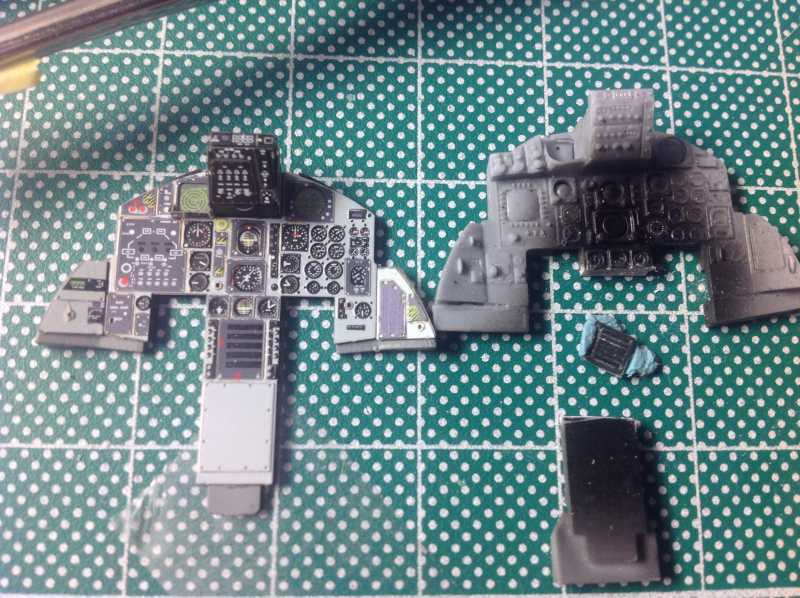
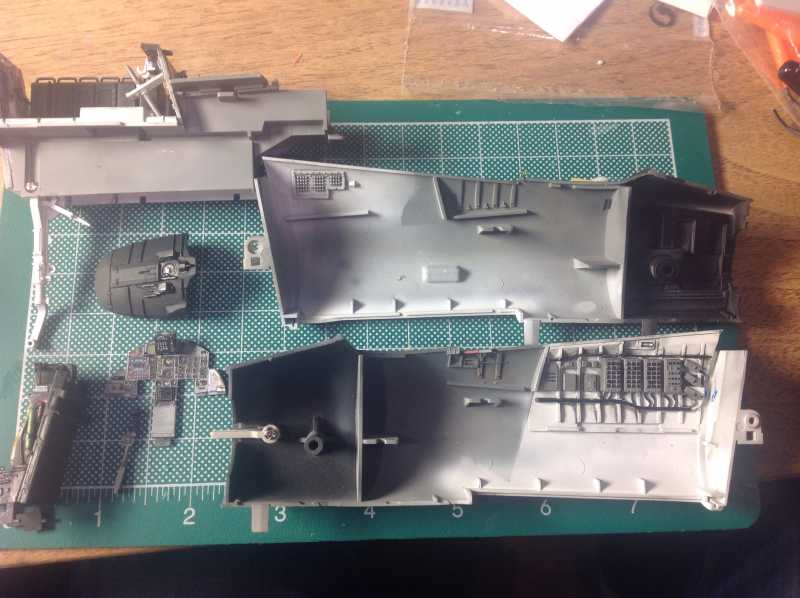
This is what it looked like after the wash had dried.
With the aftermath.
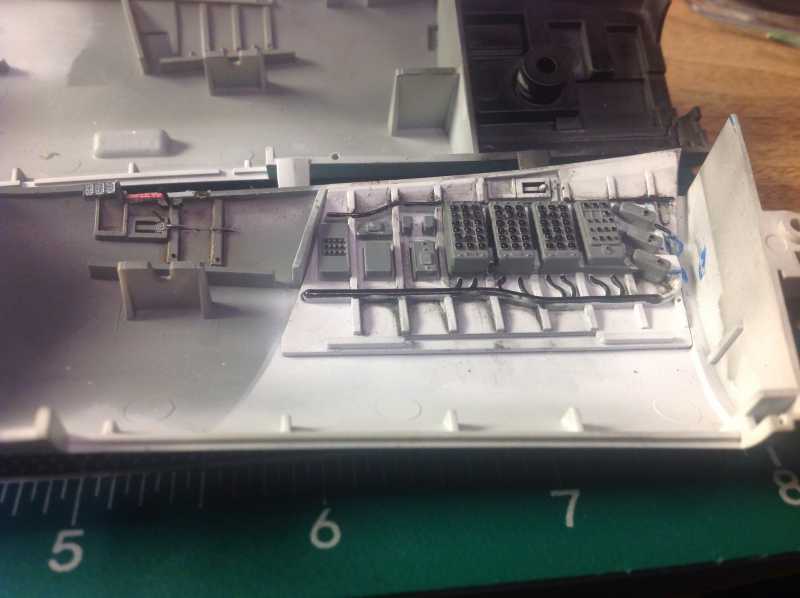
Eduard had you laminate the instrument panel with various pieces of photoetch, and add handles and knobs in the final step. Those sick, sadistic bastards.
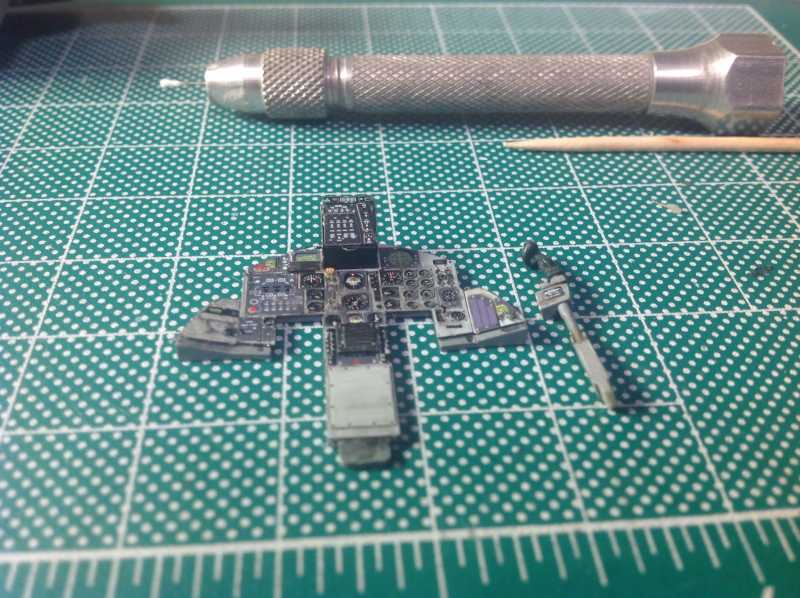
Looks pretty good though, in my opinion.
Finally! I'm ready to out the whole thing together, so in an odd turn of events, I actually took some parts, and glued them together!
So here we go. I'm married with two kids; so what do I do on a rousing Saturday night? I put the kids to bed, have a glass of wine with SWMBO and go to the bench. I sure know how to party.
Tonight was a decent night at the table, I managed to get a lot done, but I know I haven't done a proper update in a few weeks, so this may get a bit out of hand.
A few months ago, a good friend of mine brought over some old junky Lionel train parts for a strip and a repaint.
That's how I got them (at New Years, cough). As of now I've stripped, primed and intend all the parts; and they're curing awaiting a clear and final assembly. I just needed a mental break from all this photoetch assembly, and it provided a welcome one. I'll post some final follow up pictures when I'm done.
But back to the scheduled programming. As you saw in the last update, I was almost ready for the wash and assembly of the 'pit. Well, Wednesday night saw me get the wash and Q-tips out to take care of bay 5 and the main office.
This is what it looked like after the wash had dried.
With the aftermath.
Eduard had you laminate the instrument panel with various pieces of photoetch, and add handles and knobs in the final step. Those sick, sadistic bastards.
Looks pretty good though, in my opinion.
Finally! I'm ready to out the whole thing together, so in an odd turn of events, I actually took some parts, and glued them together!
New build 1:32 Tamiya F-15C with lots of goodies
Well, it looks like there's a limit of 12 pictures per reply, but I'm not done yet!
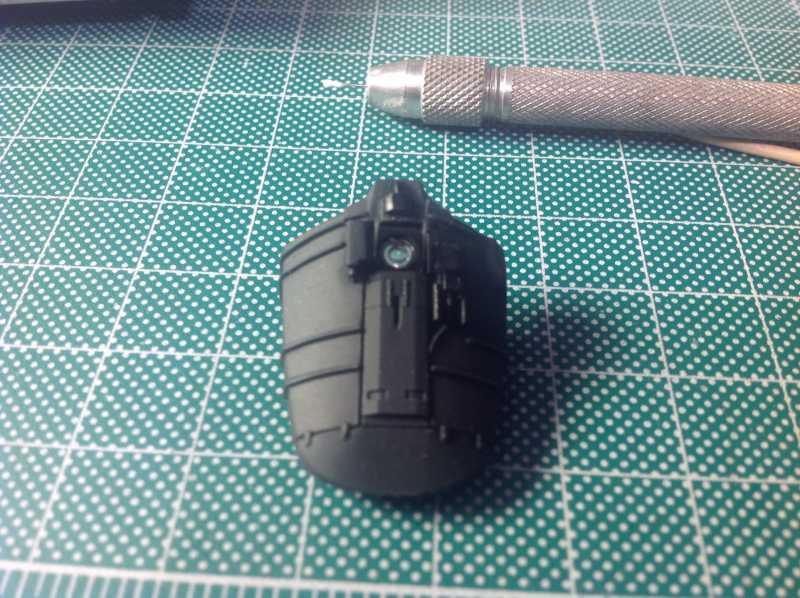
That's the updated Wolfpack part. I'm only going to install it temporarily right now so I'll chip it up later.
This is a 30 year old airframe, so I used a fairly heavy hand with the wash on the nose gear bay. It will also be modelled with the doors closed, as is typical on the F-15, so I didn't spend too much time here.


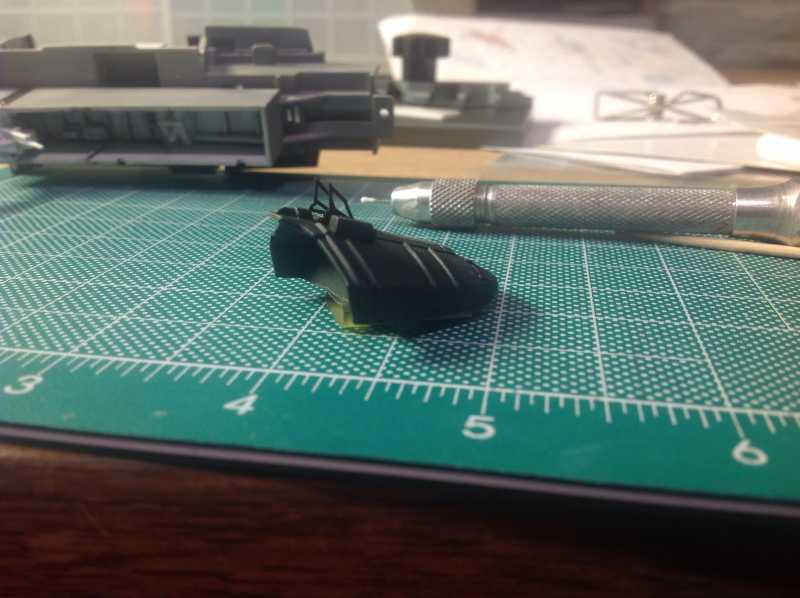
Ejection seat painted. I'm not happy with the seat pad, so I will go over it with a more tan tinted O.D. Then chip and dull cote. Since it's not going to be installed until the final step,I've got some time.
Finally, I closed her up!
I'll do a final dull cote later.
I think that's it's for now. I've passed a major milestone, but there's still a long way to go. As always, comments, concerns, and constructive criticism are welcome.
Well, it looks like there's a limit of 12 pictures per reply, but I'm not done yet!
That's the updated Wolfpack part. I'm only going to install it temporarily right now so I'll chip it up later.
This is a 30 year old airframe, so I used a fairly heavy hand with the wash on the nose gear bay. It will also be modelled with the doors closed, as is typical on the F-15, so I didn't spend too much time here.
Ejection seat painted. I'm not happy with the seat pad, so I will go over it with a more tan tinted O.D. Then chip and dull cote. Since it's not going to be installed until the final step,I've got some time.
Finally, I closed her up!
I'll do a final dull cote later.
I think that's it's for now. I've passed a major milestone, but there's still a long way to go. As always, comments, concerns, and constructive criticism are welcome.
Similar threads
- Replies
- 104
- Views
- 21K
- Replies
- 54
- Views
- 11K
- Replies
- 11
- Views
- 3K