
-
Modelers Alliance has updated the forum software on our website. We have migrated all post, content and user accounts but we could not migrate the passwords.
This requires that you manually reset your password.
Please click here, http://modelersalliance.org/forums/login to go to logon page and use the "Forgot your Password" option.
You are using an out of date browser. It may not display this or other websites correctly.
You should upgrade or use an alternative browser.
You should upgrade or use an alternative browser.
1/48 scale Bf 109's x 2
- Thread starter matrixone
- Start date
Barney
Well-known member
We get used to the beautiful work done by current mould makers and forget how rough some kits were/are. I have a 1959 Hawk Neiuport 17.... By today's standards it is junk; but to me it is the most wonderful kit: The first one I ever built by myself.
extra work... extra putty... scratch building... Gotta Love those old kits....
extra work... extra putty... scratch building... Gotta Love those old kits....
Les I cleared the cache on the server, clear your local cache on your browser. Let me know. :zen


Stabilizers? 
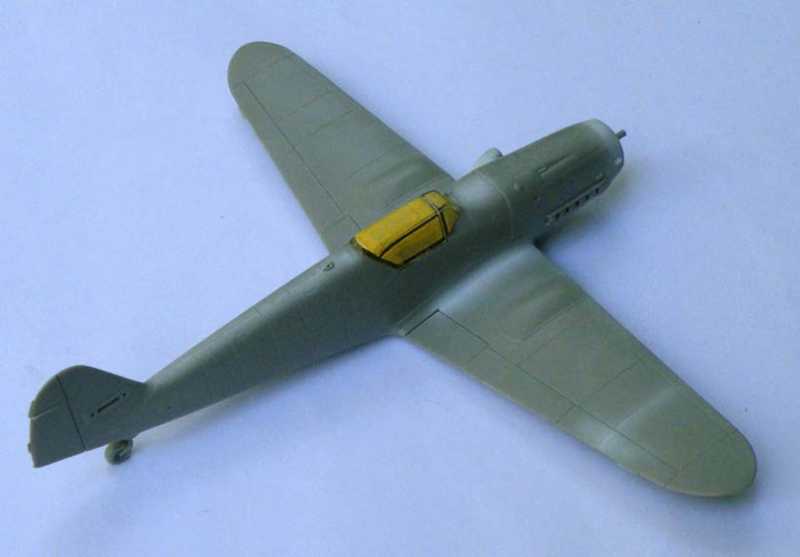
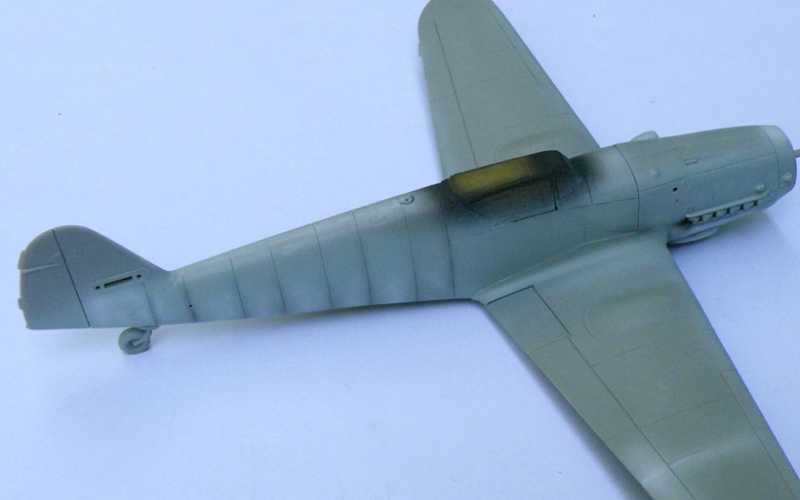
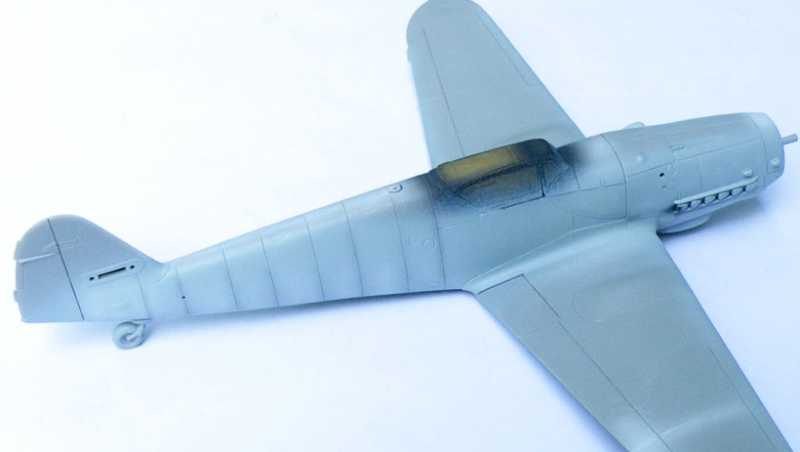
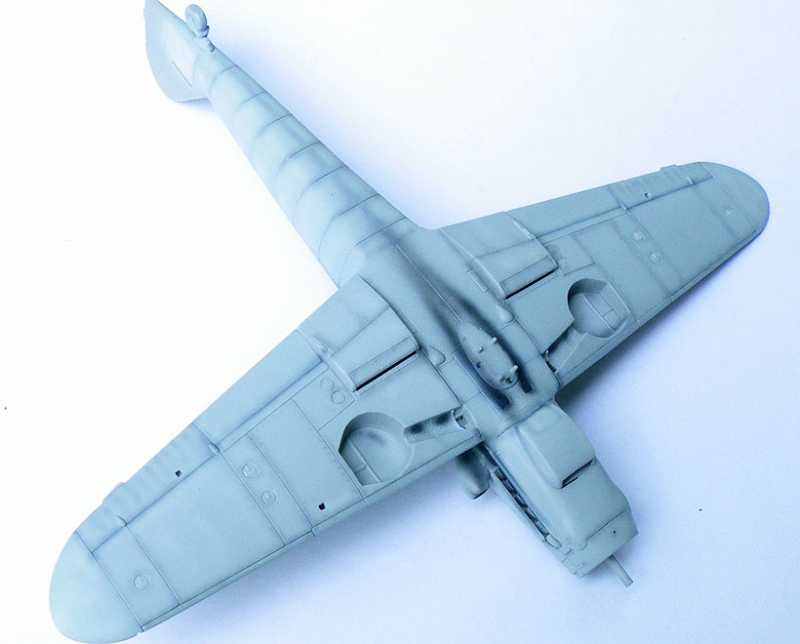
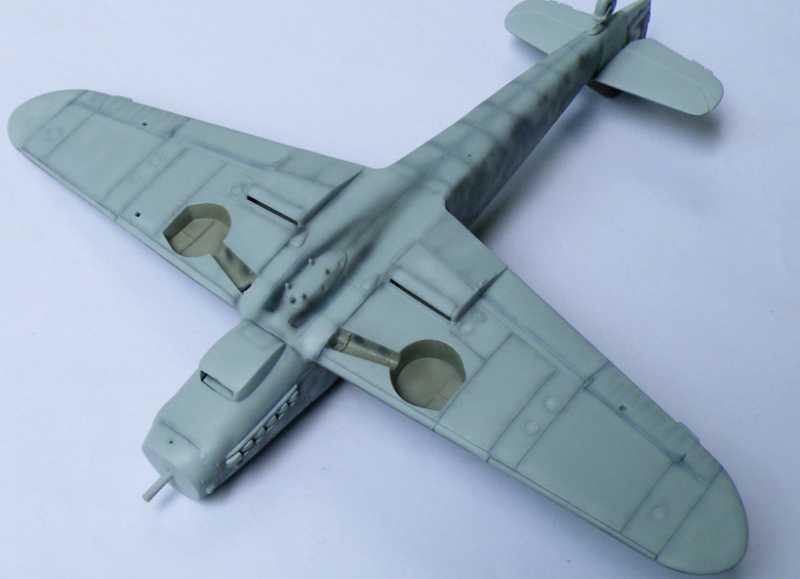
Finally, some paint was added to the Revell Bf 109G-10! ")
A thin coat of pale RLM 76 was sprayed on followed by some black and gray pre-shading, after the paint dries a bit more some white will be sprayed on a few random panels and other places to add some highlights and then a coat of thin RLM 76 will be sprayed on to tone dome the pre-shading and highlights.
Matrixone
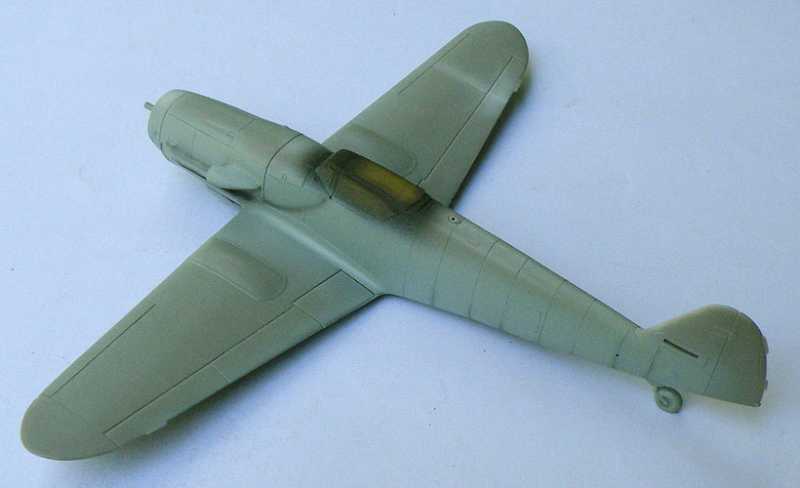
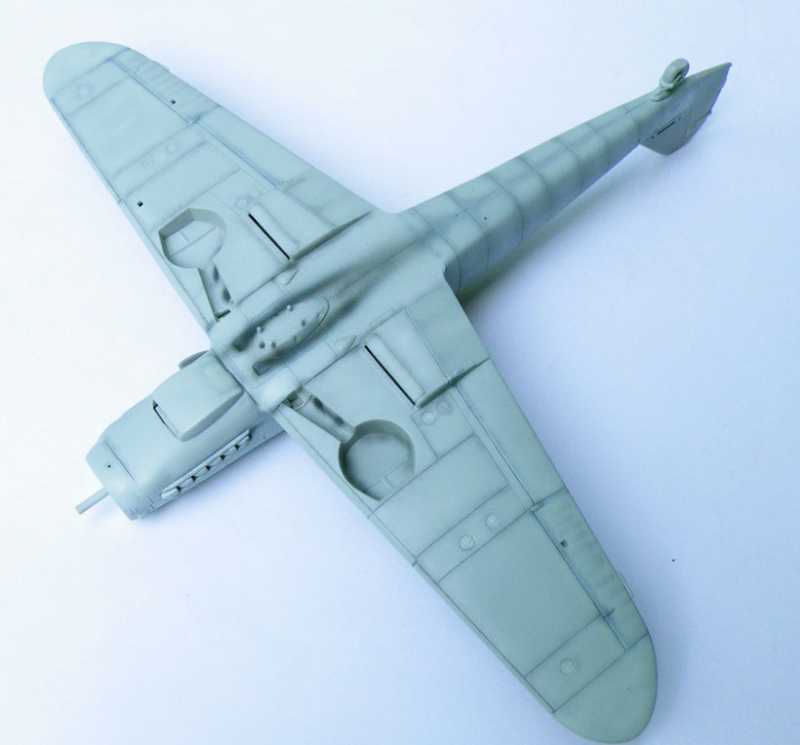
I added the white highlights and then sprayed on a thin coat of lightened RLM 76 to tone everything down, this model is now ready for the upper surface colors to be sprayed on.
First the pics of the highlights....
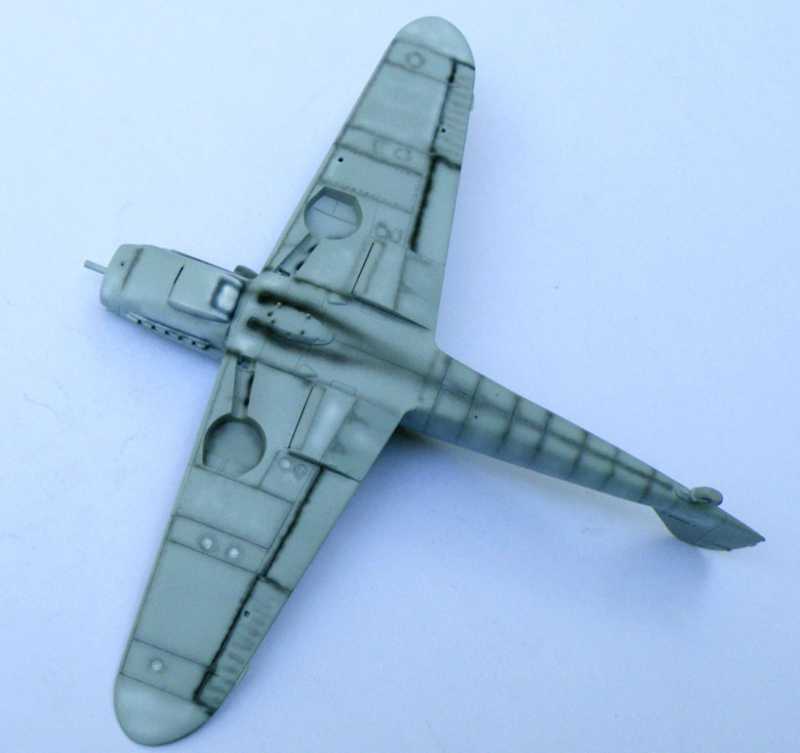
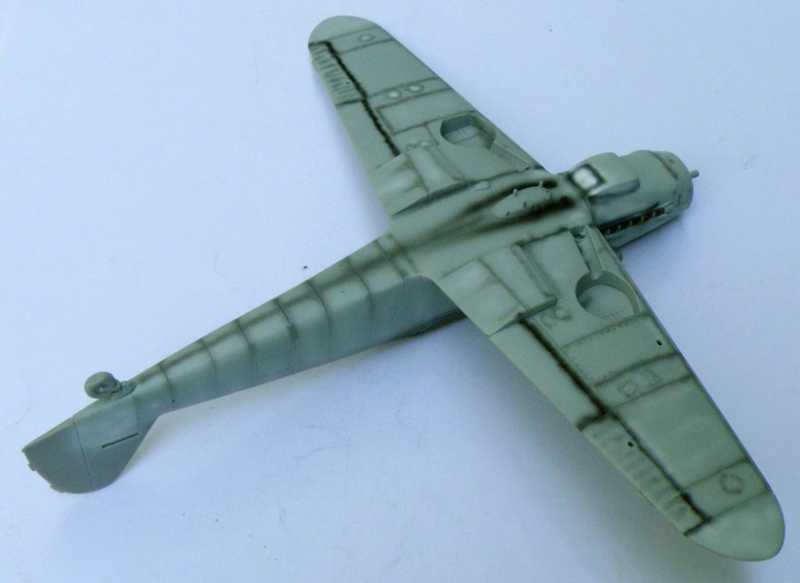
...and below the pre-shading and highlights have now been toned down.
Matrixone
First the pics of the highlights....
...and below the pre-shading and highlights have now been toned down.
Matrixone
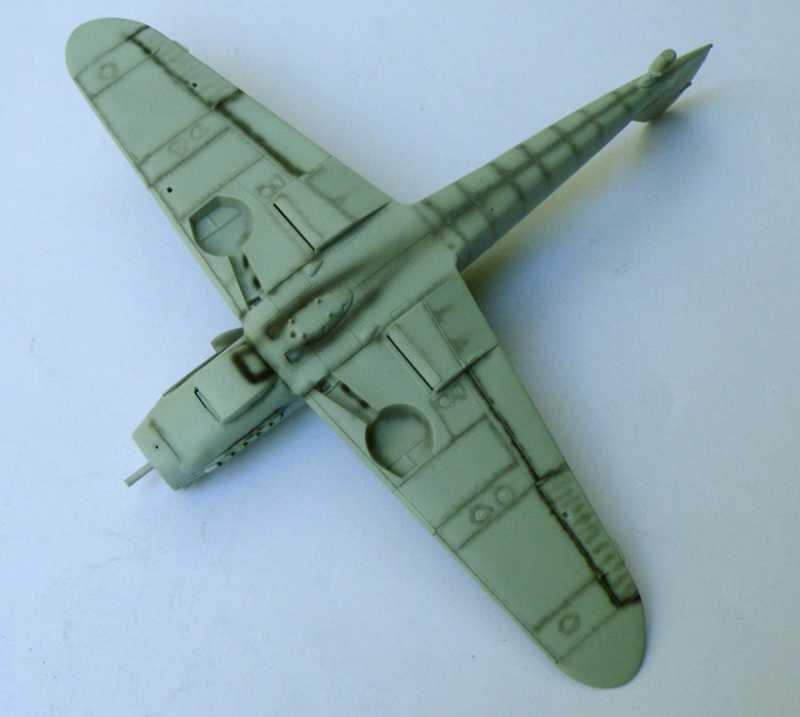
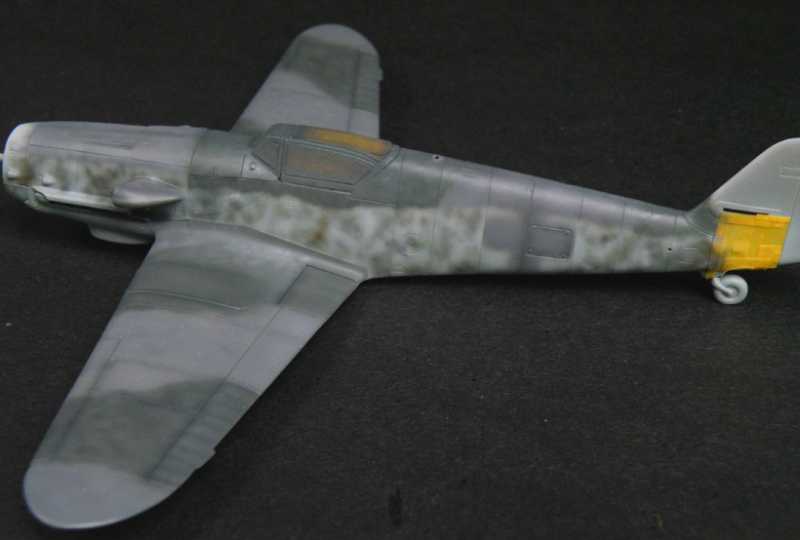
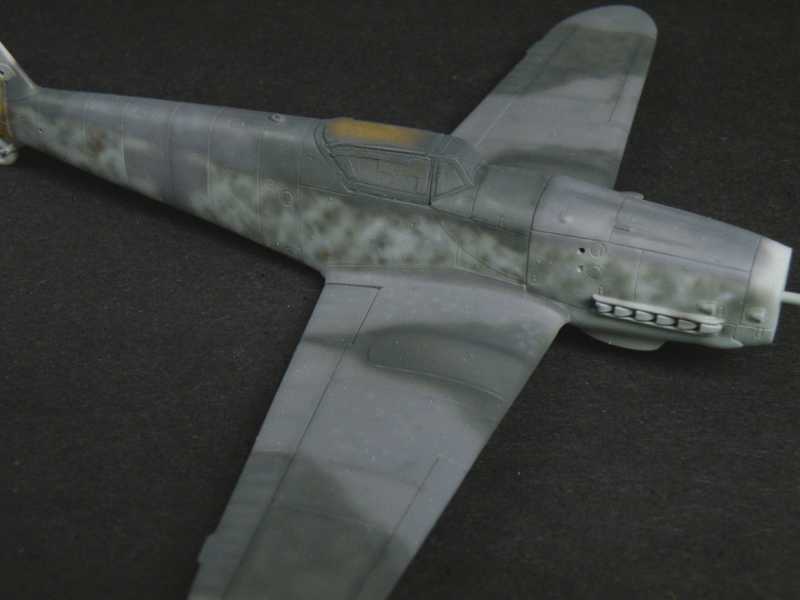
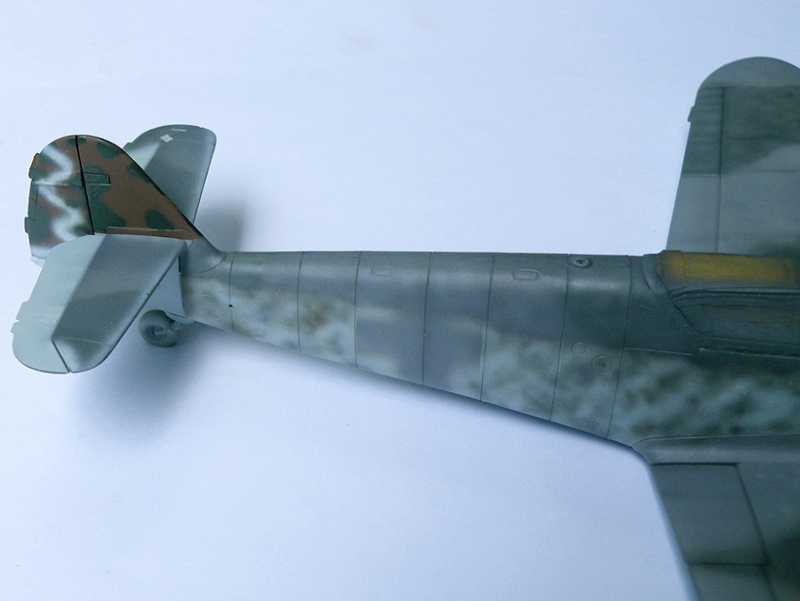
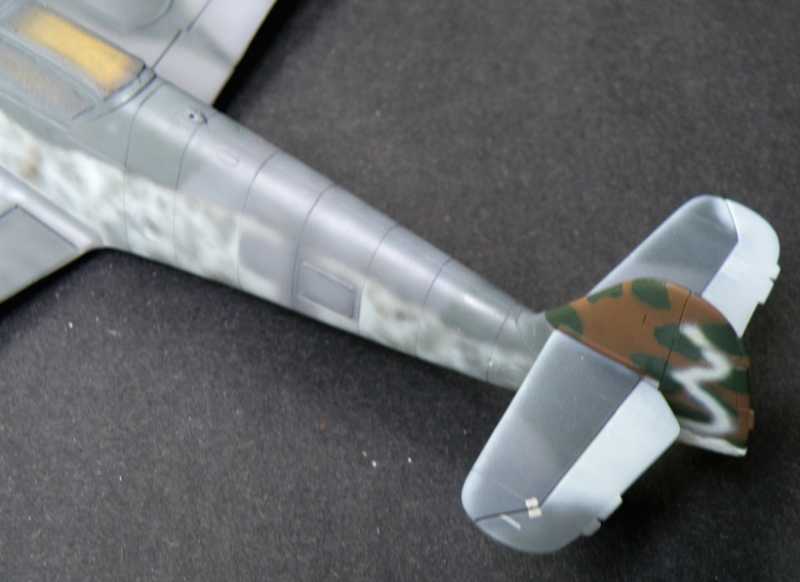
Almost all the painting has been done on the Revell Bf 109G-10, the tail and nose are all that's left to paint on this one. The tail will get the late war stencil applied camouflage pattern followed by some 'snakes' of pale RLM 76 sprayed on the rudder...this is why I could not attach the tail planes earlier in this build because it would have been more difficult to work around them whilst painting. Nearly all the camouflage pattern was airbrushed free handed, there were a few spots like the wing roots that needed a sharp edge so I was forced to mask those places.
I did about two hours worth of painting on this model, pre-shading and post fading was done with each color...first the base color coat, the pre-shading, and then post fading, a lot of work to be sure but this is proof to the naysayers out there that pre-shading CAN work just fine with multi-colored upper surfaces on models.
Thanks to the sucktacular western Oregon weather the wind was blowing the rain inside my carport so in some of these pictures you might see rain drops on the model.

Matrixone
I did about two hours worth of painting on this model, pre-shading and post fading was done with each color...first the base color coat, the pre-shading, and then post fading, a lot of work to be sure but this is proof to the naysayers out there that pre-shading CAN work just fine with multi-colored upper surfaces on models.
Thanks to the sucktacular western Oregon weather the wind was blowing the rain inside my carport so in some of these pictures you might see rain drops on the model.
Matrixone
Well worth the effort Les, fine paint job so far. 
Thanks for looking guys!
Ian,
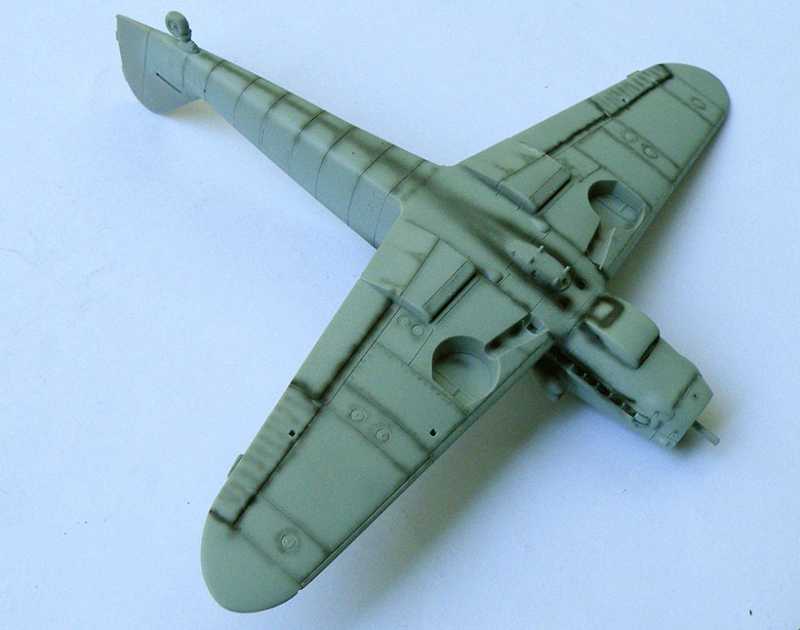
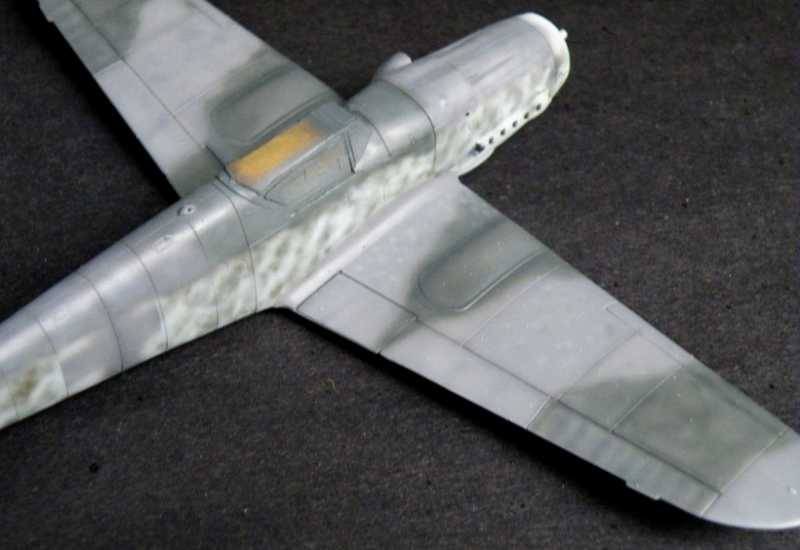
The mottle on this 109 is a bit different than the Hasegawa G-14, the Hasegawa G-14 was a model of an Erla built aircraft, this Revell kit is being painted as a Regensburg built example which were painted with a different style of mottling. The mottling looks pretty dark on the model right now but that will be toned down later by spraying on some thinner tinted with pale RLM 76 to blend the colors in a little better plus the weathering and flat coat will further mute the mottling.
More painting done...this time the tail was given its very distinctive camouflage pattern, also the wheel wells were masked off and painted.

The tail planes are not yet glued on, I just pressed them into place for these pictures.
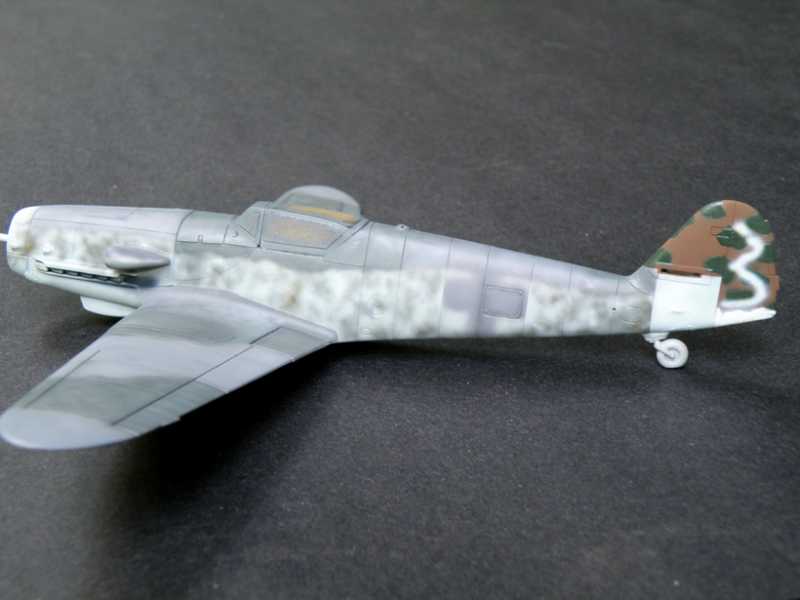
Matrixone
Ian,
The mottle on this 109 is a bit different than the Hasegawa G-14, the Hasegawa G-14 was a model of an Erla built aircraft, this Revell kit is being painted as a Regensburg built example which were painted with a different style of mottling. The mottling looks pretty dark on the model right now but that will be toned down later by spraying on some thinner tinted with pale RLM 76 to blend the colors in a little better plus the weathering and flat coat will further mute the mottling.
More painting done...this time the tail was given its very distinctive camouflage pattern, also the wheel wells were masked off and painted.
The tail planes are not yet glued on, I just pressed them into place for these pictures.
Matrixone
Nice fit on those stabilizers!
Looking sweet Les
Looking sweet Les
Similar threads
- Replies
- 104
- Views
- 22K