
-
Modelers Alliance has updated the forum software on our website. We have migrated all post, content and user accounts but we could not migrate the passwords.
This requires that you manually reset your password.
Please click here, http://modelersalliance.org/forums/login to go to logon page and use the "Forgot your Password" option.
You are using an out of date browser. It may not display this or other websites correctly.
You should upgrade or use an alternative browser.
You should upgrade or use an alternative browser.
1/48 scale Bf 109's x 2
- Thread starter matrixone
- Start date

phantom II
Master at Arms
")
Cheers, Christian B)
Les I think you're channeling some Luftwaffe paint crew, I bet they would be envious. 
Thanks guys!
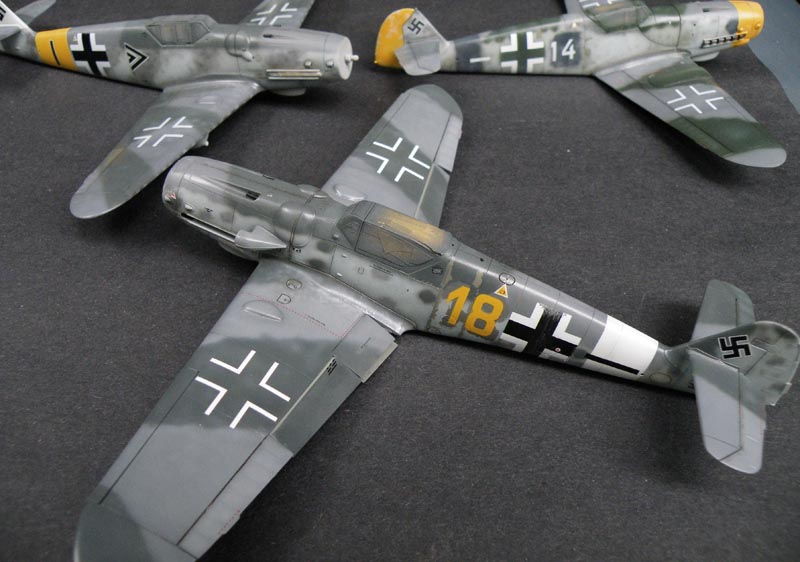
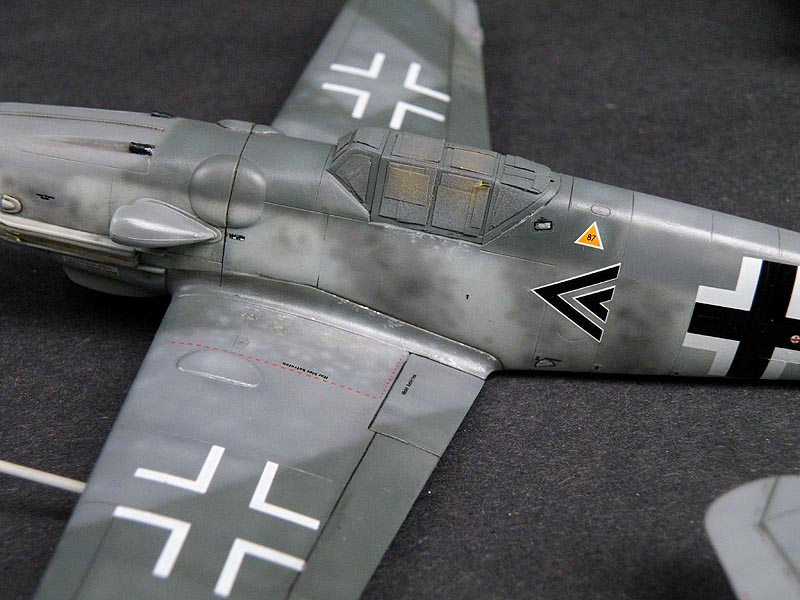
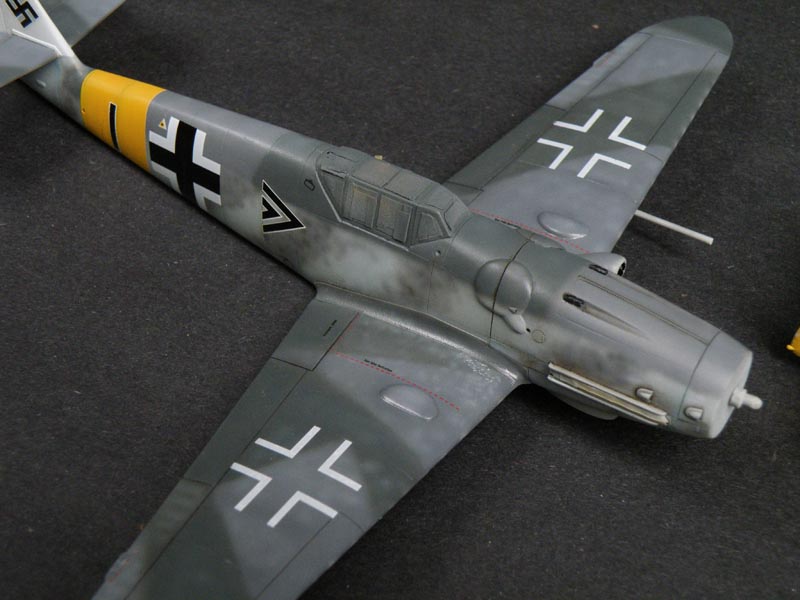
More work done today with oil paints and also some light paint chipping was added. After the flat clear coat is put on the models more subtle paint chipping will be added with a silver artists pencil, the goal is to make it look like the wear and tear on the paint work was done over a period of time and not all at once.
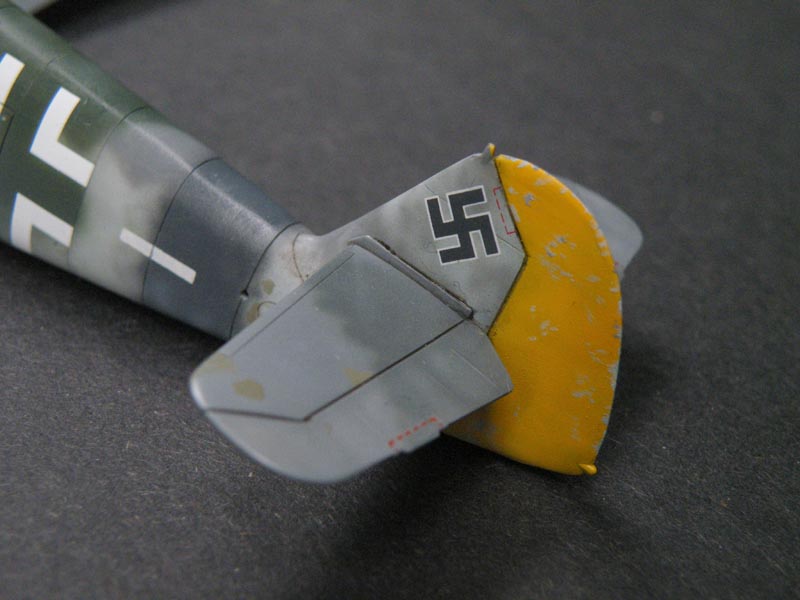
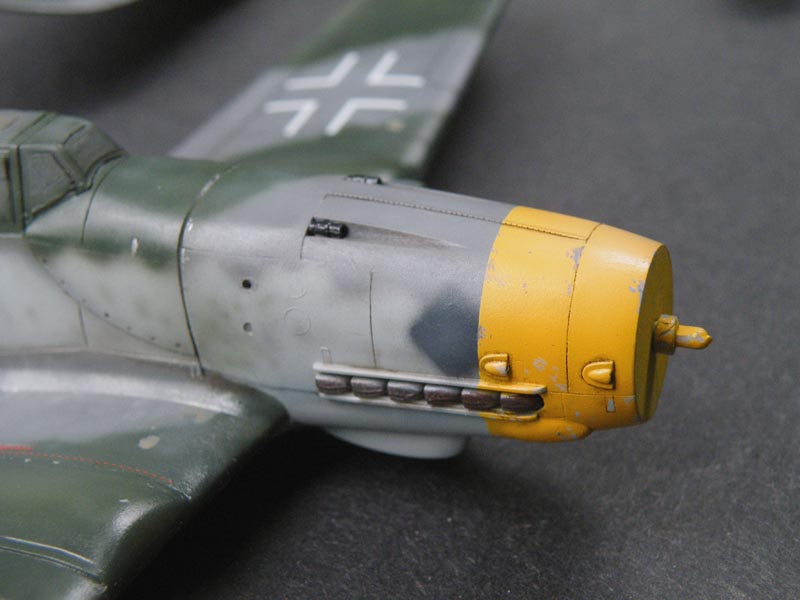
Here are some pictures of the K-4, I wore off some of the temporary yellow I.D. paint on the nose and tail allowing some of the camouflage paint to peek through, these I.D. markings were field applied on the Eastern front and often the paint wore off quickly in the harsh weather conditions at the front.


The Bf 109G-14...
The Bf 109G-6...
Matrixone
More work done today with oil paints and also some light paint chipping was added. After the flat clear coat is put on the models more subtle paint chipping will be added with a silver artists pencil, the goal is to make it look like the wear and tear on the paint work was done over a period of time and not all at once.
Here are some pictures of the K-4, I wore off some of the temporary yellow I.D. paint on the nose and tail allowing some of the camouflage paint to peek through, these I.D. markings were field applied on the Eastern front and often the paint wore off quickly in the harsh weather conditions at the front.
The Bf 109G-14...
The Bf 109G-6...
Matrixone
All I can say Les
Three of these 109's are winding down and the finish line is almost in sight so I can't put off on painting the wheels anymore...this a job I don't really enjoy doing but it has to be done.
The main wheels were first airbrushed gloss black on the hubs and then a custom mixed 'rubber' colored paint was hand brushed on the tires.
Some of the hubs were weathered slightly and others are factory fresh, this was done this way because these models are being finished showing different degrees of wear and tear reflecting the various type of conditions these aircraft were used in.
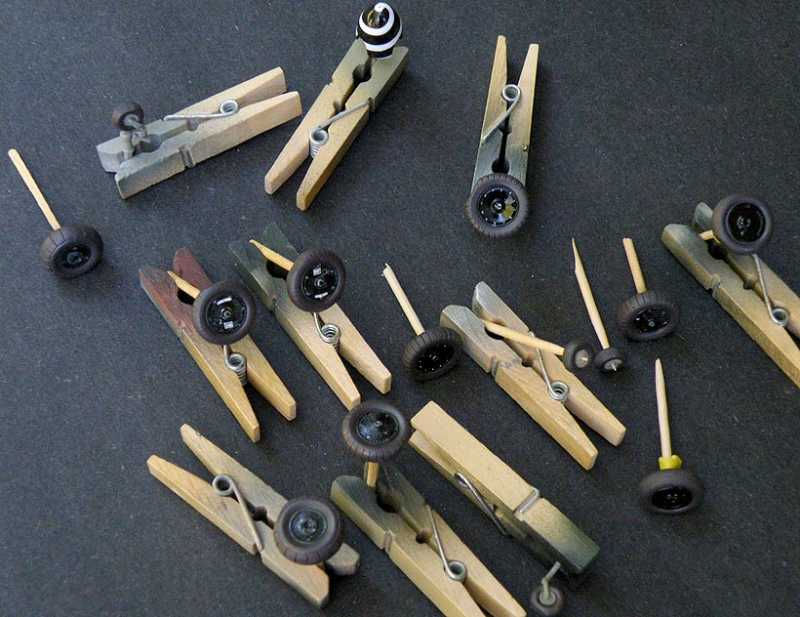
The tail wheels were also painted today but I made some mistakes on two of them and will have to touch them up with RLM 02 paint.
Matrixone
The main wheels were first airbrushed gloss black on the hubs and then a custom mixed 'rubber' colored paint was hand brushed on the tires.
Some of the hubs were weathered slightly and others are factory fresh, this was done this way because these models are being finished showing different degrees of wear and tear reflecting the various type of conditions these aircraft were used in.
The tail wheels were also painted today but I made some mistakes on two of them and will have to touch them up with RLM 02 paint.
Matrixone
White_Wolf
Master at Arms
Really cool stuff Les, great job :drinks
Skinny_Mike
Well-known member
Looking really sweet Matrixone. I love the weather beaten looks of these airplanes!
Thanks Mike and Terry!
One of the good things about building models of some of the late war German birds is adding the weathering to them, its great fun to figure out weathering methods to replicate the extreme weathering seen in the photographs of the aircraft that made it all the way to the end of the war like the Bf 109K-4 I am attempting to model.
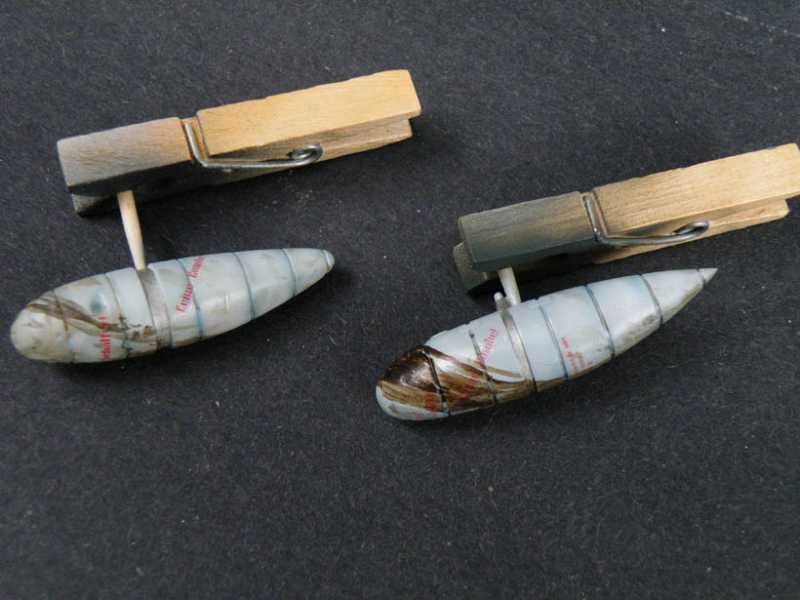
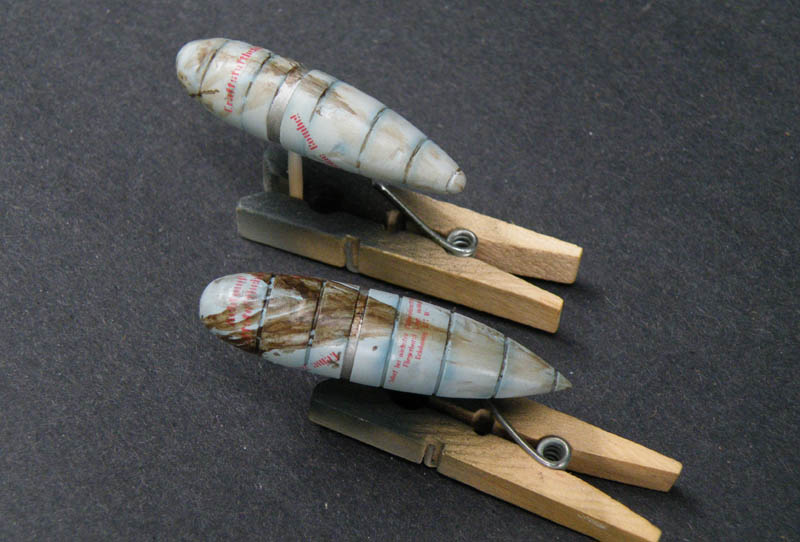
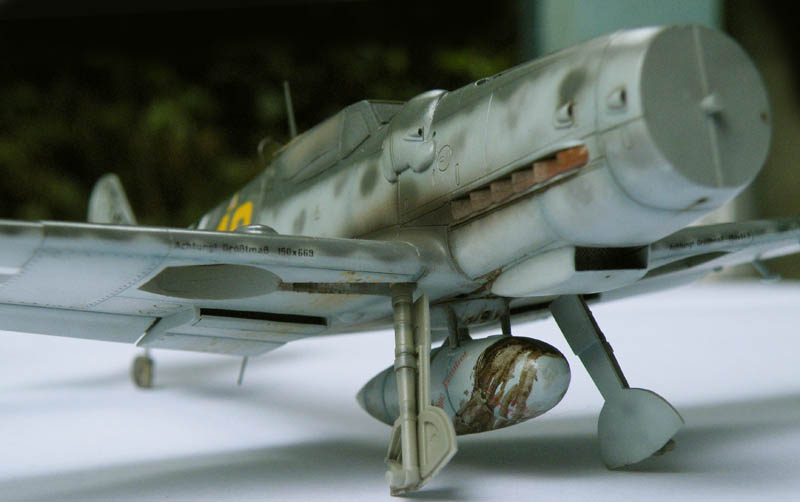
The 109's have their landing legs glued on and whilst they are drying I have added the oil drips to the drop tanks using oil paint. I am not quite finished with the oil streaks just yet, the last of that will take place after the drop tanks are mounted on the models. After I finish with the oil streaks and drips and have added the flat clear coat the final bit of weathering will be brush painting some Future on the oil streaks to restore a 'wet' look to them.
Matrixone
One of the good things about building models of some of the late war German birds is adding the weathering to them, its great fun to figure out weathering methods to replicate the extreme weathering seen in the photographs of the aircraft that made it all the way to the end of the war like the Bf 109K-4 I am attempting to model.
The 109's have their landing legs glued on and whilst they are drying I have added the oil drips to the drop tanks using oil paint. I am not quite finished with the oil streaks just yet, the last of that will take place after the drop tanks are mounted on the models. After I finish with the oil streaks and drips and have added the flat clear coat the final bit of weathering will be brush painting some Future on the oil streaks to restore a 'wet' look to them.
Matrixone
Mighty fine Les, what colors did you use for the oil stains?
Thanks again guys!
Bob,
I used dark brown mixed with a little black for the oil streaks.
No pictures today, a lot of the smaller bits are being glued onto the Messerschmitts and when they are dry I will use the airbrush to paint them. Yes it would be easier to just use a paint brush and hand paint them but using the airbrush leaves no brush strokes and the paint goes on the part(s) with a much thinner coat.
Matrixone
Almost done...all the small bits have been glued on, painted, and a little more weathering was done too on the airframes. The models still have their gloss finish after being sprayed with a light coat of Future to blend in the decals and after the painting that was done earlier today is fully dry I will spray on the clear flat coat, I use Xtracolor clear flat and its one of the better products I have used but it does take a little longer to dry fully.
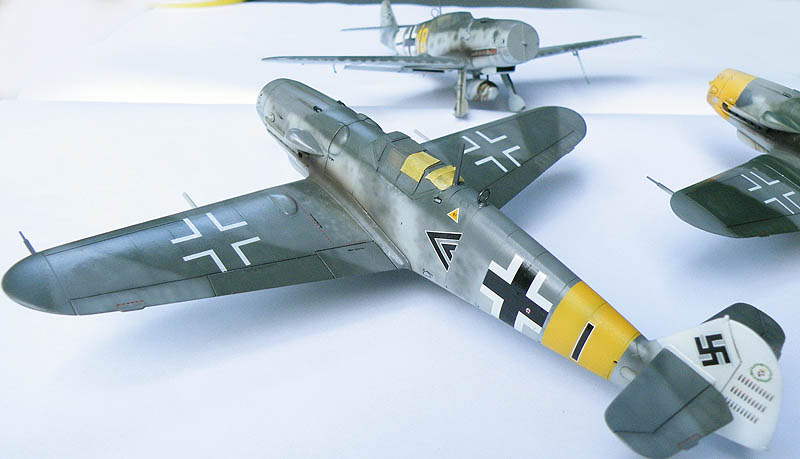
The K-4.
The exhaust stains look way overdone on my model but the full size aircraft had even more extreme exhaust staining than what you see here on my model.
Also the rear of the fuselage was really dirty looking with dirt and mud spattered on it so I sprayed on some 'dirt' colored paint to try and replicate this effect.
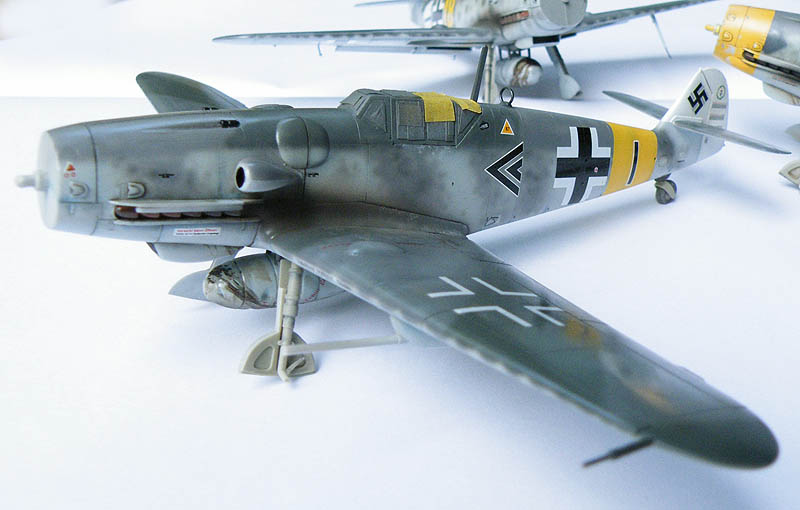
The G-14.
This 109 was flown on the western front and in the available photographs of it this looked to be a well maintained machine so the weathering on my model was kept light.
The G-6.
This mid war aircraft looked like it was very well maintained so like the G-14 above the weathering on my model was kept subtle.
Next pictures of these models will be taken from the airfield. :v
Matrixone
The K-4.
The exhaust stains look way overdone on my model but the full size aircraft had even more extreme exhaust staining than what you see here on my model.
Also the rear of the fuselage was really dirty looking with dirt and mud spattered on it so I sprayed on some 'dirt' colored paint to try and replicate this effect.
The G-14.
This 109 was flown on the western front and in the available photographs of it this looked to be a well maintained machine so the weathering on my model was kept light.
The G-6.
This mid war aircraft looked like it was very well maintained so like the G-14 above the weathering on my model was kept subtle.
Next pictures of these models will be taken from the airfield. :v
Matrixone
Similar threads
- Replies
- 104
- Views
- 22K