
-
Modelers Alliance has updated the forum software on our website. We have migrated all post, content and user accounts but we could not migrate the passwords.
This requires that you manually reset your password.
Please click here, http://modelersalliance.org/forums/login to go to logon page and use the "Forgot your Password" option.
You are using an out of date browser. It may not display this or other websites correctly.
You should upgrade or use an alternative browser.
You should upgrade or use an alternative browser.
British Army Sioux AH-1
- Thread starter paddy
- Start date
It may be a civilian versus military location.
Regards,
Regards,
It may be a civilian versus military location.
Regards,
Perhaps even year model or variants. Paddy's first subject is a military craft with the battery in the cockpit, rather it's presumed to be military and not a civilian drafted.
Perhaps even year model or variants.It may be a civilian versus military location.
Or it can be a manufacturing thing, aside from batch. Perhaps the Augusta manufactured ones moved them into the cockpit as a precaution for the weather? We (at the school. following orders) stored the helicopters in the hangars or covered the helicopter in tarps.
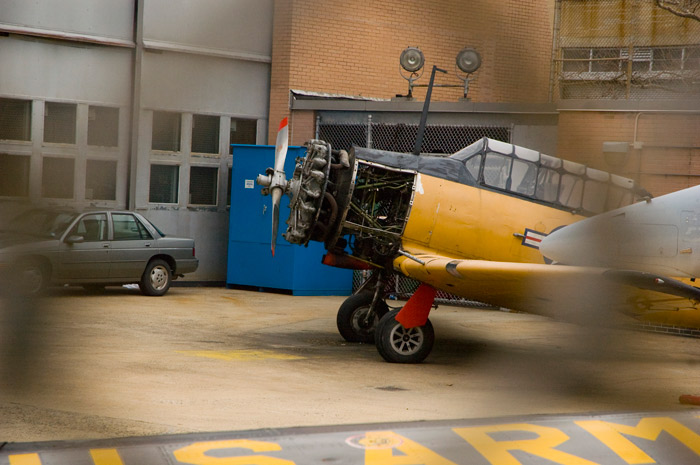
Outside the hangar at Aviation High School:

You think I had some influence?
In the hangar, although my class was the last before the school went coed:


This TA-4 used to be on a Marine base on Staten Island as a gate guard.

Do you think the paint on this SNJ will be too thick?

Here she is, the reason for this post...
This is new, FedEx donated a Boeing 727 to the school as well as space for an annex at JFK!

Regards,
Man that must have been a tough class...
Well then Paddy, got any parts glued yet?
Well then Paddy, got any parts glued yet?
paddy
Well-known member

I have re made the pilots control handles using brass tube, some bits of styrene from the bits box.
The red box ?? as supplied is a bit small so i have made a new one with some fittings. I will attach some cables etc once i know what it is
") . Instrument panel comes plain but i had some decals from a sheet by Airscale that do general cockpit placards in 1/48
. Instrument panel comes plain but i had some decals from a sheet by Airscale that do general cockpit placards in 1/48First helicopter and already good fun !!!

One for Saul
First helicopter and already good fun !!!
Thanks as that one is added to my sharkmouth photo collection!
Your first helicopter looks real good!
Regards,
VERY nice!
paddy
Well-known member
I have put the front end together.


I had to move the glass jar to the side of the red box as it was to close to the perspex dome. I scratched the Red box, shelf, jar and throttle quadrant as well as the floor levers and wiring. Its as close as i can get it to the Army picture i have and should look ok once its got the perspex front on. I think i have a degree of artist licence as they all (Sioux) seem different.
I had to move the glass jar to the side of the red box as it was to close to the perspex dome. I scratched the Red box, shelf, jar and throttle quadrant as well as the floor levers and wiring. Its as close as i can get it to the Army picture i have and should look ok once its got the perspex front on. I think i have a degree of artist licence as they all (Sioux) seem different.
paddy
Well-known member
I had a reply from Jeff at the bell 47 association which you might like to see..
Looks like we were not far off in our guess.
Hi Paddy,
My name is Jeff Jankovics. I'm the Chair for the R/C, Sim, and Models Page of the Bell 47 Helicopter Association.
I'm a retired Army helicopter and fixed wing mechanic and a licensed A&P mechanic.
My wife recently had surgery and I haven't had the chance to check my emails, until now.
To answer your question? Yes. You are correct.
That's the helicopter's main battery. On some 47 models, the battery is located in the nose area, inside the bubble, in front of the instrument pedestal, or on an adjustable "rail" shelf aft of the engine, inside the "oil derrick" tail boom, or to the right side of the engine. These various locations are based on individual aircraft equipment layout configurations (ie radio, avionics packages, or other equipment). When anything is modified, added or removed, to upgrade for newer and more efficiency, the weight of each part (added, removed or replaced) and its "arm" (location in inches) is used to determine if the helicopter's weight and balance (fore and aft, and lateral) is still within specified parameters. This information is used in mathematical computations to determine the best location. This is also why the aircraft battery can sometimes be located in 3 different locations, on the same model 47 ! It's all about weight and balance, so the copter's not nose heavy, tail heavy, or heavy to one side or the other !
The battery cases are available in various colors (black, red, white to name a few) from the manufacture. The choice for color is left up to the customer.
Early model 47's had lead acid batteries, with simple black cases. As battery technology advanced, Ni Cads replaced the older lead acids, providing greater starting power for the larger, more powerful engines. The Ni Cad batteries unfortunately, had a nasty habit of overheating at times, and had to be vented to avoid bulging cases! The vents allowed pressure to exit the battery, but had corrosive fluid that had to be captured. This is why the "jars" you noted were added to the vent system.
I attached several pics to show the different locations I described above.
I hope this little history lesson on Bell 47 battery development was helpful, and not too boring for you.
I was glad to share this info with you, and if you any other questions, feel free to email me.
My friend and fellow Association member, Kerry Eisenhaur, have our 47 scale models on Lance Morgan's (another Association member) excellent, Bell 47 website.
Here's the link to it. http://bell47.net/ There is a lot of 47 history, memorabilia, and endless pics to enjoy !
Take care.
Jeff
Thanks for that! We never had upgrades on the school's helos so the battery was always in the tail boom.
Regards,
Regards,
Now that's an answer! Give him a big thanks Paddy.
Cockpit is looking great, love the multicolored wiring harness, really pops.
Cockpit is looking great, love the multicolored wiring harness, really pops.
paddy
Well-known member
Not a lot to this kit its almost building itself !!
the frame work for the tail boom is way to thick but to put it right would mean making a complete new tail out of brass or plastic rod and to be honest i am quite happy with it as it is.

Odd order of doing things but things need to be painted before you go to far or you will have a nightmare masking job.
the frame work for the tail boom is way to thick but to put it right would mean making a complete new tail out of brass or plastic rod and to be honest i am quite happy with it as it is.
Odd order of doing things but things need to be painted before you go to far or you will have a nightmare masking job.
randy_ditton
Master at Arms
Hello Paddy, Nice looking whirly thingy you got there. Interior details are awesome
Randy
Randy
paddy
Well-known member
another note from Jeff
Hi Paddy,
Thanks for your pics! Woww! Nice work! Your attention to detail is incredible! Your Sioux model kit is less than one inch tall? I thought I'd seen all the 47 model kits ever produced, and I have a good many of these kits in my collection (some are not even opened yet). What company makes your kit and what scale is it, if I may ask ?
I built many scale model kits in my earlier years, and finally was in "47 Heaven", when most of the model companies started producing Bell 47 scale model kits in various scales, versions, and even different 47 variants! Unfortunately, they seemed to stop almost as quickly as they started. Fortunately, I was able to procure all the kits I really wanted. Shortly after that, I got into the flight simulation and R/C side of the 47's. I could show you the gradual evolution of the venerable 47 sim, that started out as simple sticks and odd polygon shapes, to the most photo realistic looking and fairly realistic flying (controllable) models, that current computer technology can offer (I attached a few pics of the latest and greatest of the 47 Sim. Check out the detail on this beauty ! You can actually see the Battery, Vent Hoses, and Collectiom Jar. If you think the pics are detailed, you should see the animation! ). I've been using the sim to hone my "eye and hand" coordination, so I'll be able to control and not over-control my R/C Heli, which is actually more difficult to fly than the full size real ones. You can feel what a real helicopter is doing by the "seat of your pants". Not so in R/C's. Your eyes are your only senses you can rely on. Over controlling is very difficult to overcome, and can easily end in disaster !
The same advancement in realism and control in simulation, can almost be said about Radio Controlled Bell 47 Helicopter models. This is where my interest is now centered. I invested $3000 dollars about 12 years ago for a five foot long Hirobo Bell 47 R/C helicopter, that I dressed out as the 50's TV show famous helicopter, "N975B in The Whirlybirds". I've always been a perfectionist, when it comes to realization and true accuracy as is possible. Over the years, I've been remodelling and redesigning certain parts of this flying helicopter kit. I wasn,'t happy with the tail area, so I redid the tail rotor guard and ventral fin. I changed my fuel tanks to look more like a 47-G or G-2, instead of a G-3, and repositioned them to a more accurate location in relation to the M/R mast. I redesigned the cockpit interior, and custom built a detailed instrument pedestal. The tailboom had a slight raised angle, that was inaccurate, so I lowered the boom about 3/8 of an inch. Finally, I was not happy the way the engine (1 cyl; 2 cycle gasser) was mounted, Critical engine carb adjustments were out of reach, litterally buried under the cockpit seat. In design aspects, I simply rotated the engine 90 degrees around the vertical axis. I had to relocate a few servos and re-rig them. Two words to sum all these changes up; that you're well aware of. Weight and Balance ! I have to see if all my adjustments haven't drastically changed my CG's ! If you'd like to see before and after pics of what I described, let me know.
Jeff


I dont know if anyone here is interested in flight sims but this looks pretty good .
Hi Paddy,
Thanks for your pics! Woww! Nice work! Your attention to detail is incredible! Your Sioux model kit is less than one inch tall? I thought I'd seen all the 47 model kits ever produced, and I have a good many of these kits in my collection (some are not even opened yet). What company makes your kit and what scale is it, if I may ask ?
I built many scale model kits in my earlier years, and finally was in "47 Heaven", when most of the model companies started producing Bell 47 scale model kits in various scales, versions, and even different 47 variants! Unfortunately, they seemed to stop almost as quickly as they started. Fortunately, I was able to procure all the kits I really wanted. Shortly after that, I got into the flight simulation and R/C side of the 47's. I could show you the gradual evolution of the venerable 47 sim, that started out as simple sticks and odd polygon shapes, to the most photo realistic looking and fairly realistic flying (controllable) models, that current computer technology can offer (I attached a few pics of the latest and greatest of the 47 Sim. Check out the detail on this beauty ! You can actually see the Battery, Vent Hoses, and Collectiom Jar. If you think the pics are detailed, you should see the animation! ). I've been using the sim to hone my "eye and hand" coordination, so I'll be able to control and not over-control my R/C Heli, which is actually more difficult to fly than the full size real ones. You can feel what a real helicopter is doing by the "seat of your pants". Not so in R/C's. Your eyes are your only senses you can rely on. Over controlling is very difficult to overcome, and can easily end in disaster !
The same advancement in realism and control in simulation, can almost be said about Radio Controlled Bell 47 Helicopter models. This is where my interest is now centered. I invested $3000 dollars about 12 years ago for a five foot long Hirobo Bell 47 R/C helicopter, that I dressed out as the 50's TV show famous helicopter, "N975B in The Whirlybirds". I've always been a perfectionist, when it comes to realization and true accuracy as is possible. Over the years, I've been remodelling and redesigning certain parts of this flying helicopter kit. I wasn,'t happy with the tail area, so I redid the tail rotor guard and ventral fin. I changed my fuel tanks to look more like a 47-G or G-2, instead of a G-3, and repositioned them to a more accurate location in relation to the M/R mast. I redesigned the cockpit interior, and custom built a detailed instrument pedestal. The tailboom had a slight raised angle, that was inaccurate, so I lowered the boom about 3/8 of an inch. Finally, I was not happy the way the engine (1 cyl; 2 cycle gasser) was mounted, Critical engine carb adjustments were out of reach, litterally buried under the cockpit seat. In design aspects, I simply rotated the engine 90 degrees around the vertical axis. I had to relocate a few servos and re-rig them. Two words to sum all these changes up; that you're well aware of. Weight and Balance ! I have to see if all my adjustments haven't drastically changed my CG's ! If you'd like to see before and after pics of what I described, let me know.
Jeff
I dont know if anyone here is interested in flight sims but this looks pretty good .
I dont know if anyone here is interested in flight sims but this looks pretty good .
While I am not interested in PC flight simulators, I am VERY interested in art and this is definitely art!
Regards and thank him for me,
paddy
Well-known member
If anyone ever wants to try something a little different from the usual two wings and a fuselage then give this a go, I'm having great fun with it


I cant really do a proper WIP because its such a quick and easy build, its so straight forward there is little to say. If someone wanted to really go to town then this is a great practice model, the whole tail lends its self to a remake in brass tube as the stock item is way to thick.
I cant really do a proper WIP because its such a quick and easy build, its so straight forward there is little to say. If someone wanted to really go to town then this is a great practice model, the whole tail lends its self to a remake in brass tube as the stock item is way to thick.
Similar threads
- Replies
- 138
- Views
- 34K
- Replies
- 46
- Views
- 13K