• Modelers Alliance has updated the forum software on our website. We have migrated all post, content and user accounts but we could not migrate the passwords.
    This requires that you manually reset your password.
    Please click here, http://modelersalliance.org/forums/login to go to logon page and use the "Forgot your Password" option.

WnW Albatross D.Va (OAW).

I have a question of you guys with the wings since I'm not up on either WWI or AC. I was thinking of toning down the color a bit with a filte/wash after I seal everything again. Is that a good idea or the stupidest thing you've ever heard? I really don't know. I assume the fabric would wear and fade a bit, but not sure.

I would think they would fade greatly, now would be the best time to do your weathering because once you have it rigged up it's going to be hard to get in between the rigging lines and have consistent weathering pattern.

Another question: I got the turnbuckles. I don't know what I'm looking at, so 1/32 seems okay with me to proceed. I plan on gluing the EZ line into the holes on the underside of the wing before assembly, then trimming and connecting to the turnbuckles after assembly, and CA'ing in place. I'm only going to use them on the bottom (meaning top of lower wing). Is that the way to do it?

Call me crazy but I ended up actually tying the lines on the turnbuckles. Yeah it got tedious! But I tied off both ends of the line a little short of the run. Attach the first turnbuckle and then stretched it the attachment the second one. Should be nice and tight and hangs very naturally out of the eyelet. Be careful of the angle the turnbuckle leaves the attachment point because of course it will be at the same angle that it's being pulled on. Be mindful of the eyelet, might want to give it a quick sanding to make sure the line swings free of any burs.

Jeff this looks amazing...rock on Bro! :drinks :ro:
 
Thanks guys.

Bob, good point on the burs, I could see that getting ugly be snapping line. I was going to tie off the end, CA and then wrap the excess around the line or wrap thin copper wire around it like you would on the end of a rope.

Did they have turnbuckles at both ends? I assumed/hoped only one end since you only need to adjust it from one point. Sheesh I only have 30 buckles and with my typical tweezerpult rate of 43%, that leaves me short.

I plan on finishing almost the entire paint/weather before assembling. Not just because of the rigging, but I'm scared of snapping a support once everything is set up. I'll be carrying the kit on a pillow at that point. :unsure:
 
What you have to be careful about is when you glue the line in that it's coming in at an off set angle, that's why I tied mine in a loop with a bit of slack so when it was pulled it hung naturally.

Yes, from what I've seen there was a turnbuckle on both ends, not sure why, you'd think one would git'er done.
 
Looks fantastic. And only 1 turn buckle per wire located close to the bottom wing.

albatros-d-va-4.jpg


http://20thcenturybattles.com/2014/08/27/albatros-d-va-1-walkaround/

James
 
Yup just 1 turnbuckle needed per wire. The turnbuckles were placed low so they would be easily accessable to adjust the tensioning.

The coloring and patterning of the wood is superb! (y)
 
Thanks for the kind words gentlemen, much appreciated.

Also glad to hear it's only one turn per wire, 'cause 'ain't no way I was doing more than that. 8 per wing, 2 to the nose and 2 on the LG, that's enough for my tastes, even if I had more than 30 on hand.
 
Too kind Luiz. :blush:

Okay, I am whipping out the artistic license here regarding weathering. No photographic evidence whatsoever, but in my disturbed melon, the fabric wings during landing/take off/storage in fields would get pretty encrusted. Maybe, maybe not, but that's my story. I also remember from RC flying, the torque of the prop produces a lot of turbulence to one side of the AC, I can't remember the name of the phenomena, but I'm also assuming it would dust up one side more that the other.

Anyway, here are the faded and dirty wings:

hfead94c.jpg


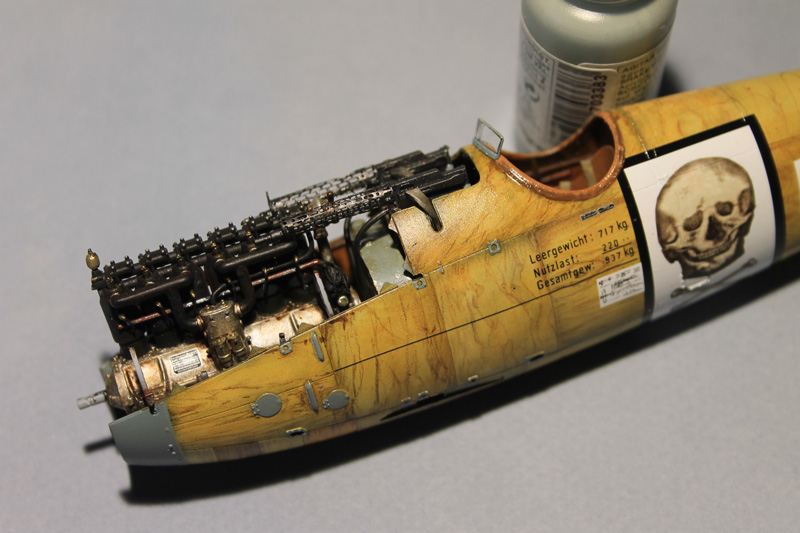
Spandaus and windscreen in place, leather cockpit rim painted.

h6acc0e5.jpg


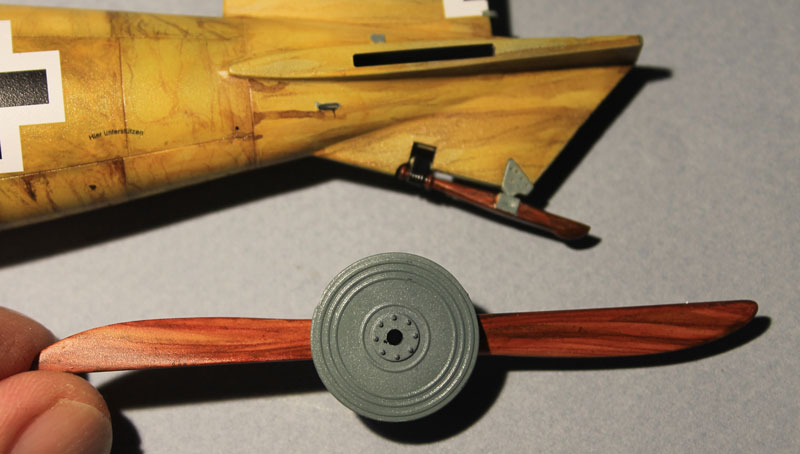
Prop and tail dragger wood patterns:

hde96632.jpg


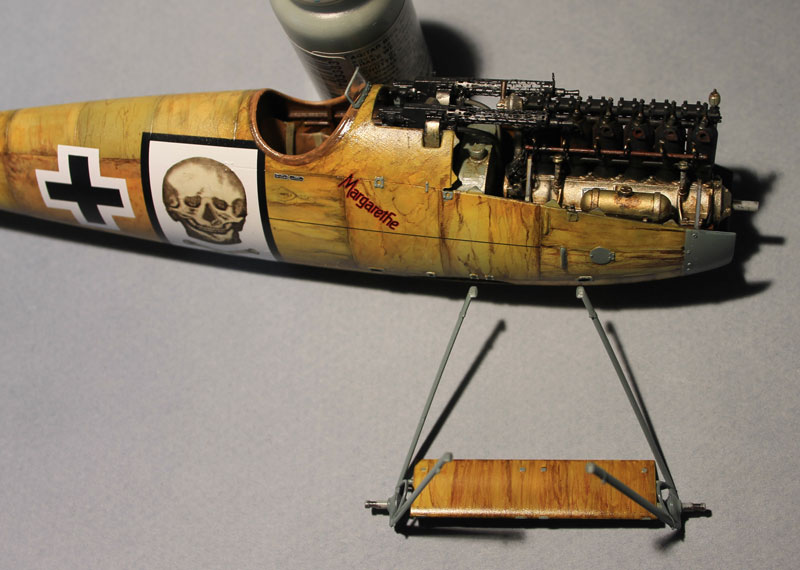
LG setup wood, Hull brown phenolic tube as per James (thanks) and windscreen frame painted black before the green for depth as per Bob (thanks):

hae94d83.jpg


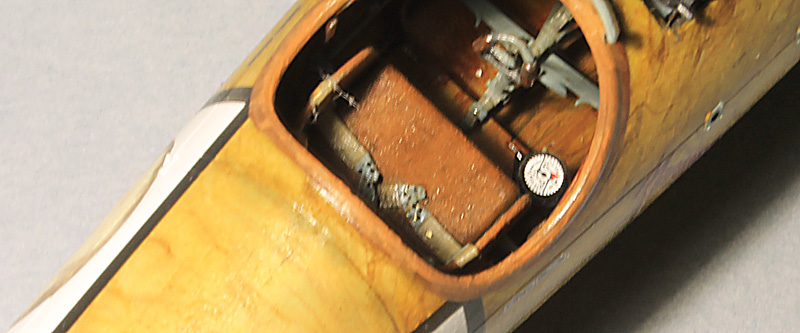
And finally my favorite part of this shebang, which is nearly impossible to get a in focus photo of, the compass on the cockpit floor:

h9d932fe.jpg


I need to put the detail decals on the cabanas, prop, etc and finish the tail plane and assemble. So this is what it's like to build something start to (hopeful) finish?


:side:
 
I like it! I like it!

You'll be weathering those big white decals on the sides....right?

Tom
 
Thanks for the comments gentlemen, glad you like it.

Tom, yes, I'll reluctantly weather the sides, but not as heavily as the wing. I'm figuring a glossly, vertical surface won't get as dirty as the linen wing. At least that's what I'm telling myself so I don't have to cover up all that woodgrain.
 
Just don't over weather the sides, it would be a shame to cover up that artwork. I got carried away with my weathering on the Eindecker because I was having so much fun with it. Also, don't think about how your RC stuff looked because that was 1:1 scale dirt.Your RC stuff would get dirty in the real world, you're trying to replicate dirt in a 1:32 world now, that make sense?
 
Thanks for the comments gentlemen, glad you like it.

Tom, yes, I'll reluctantly weather the sides, but not as heavily as the wing. I'm figuring a glossly, vertical surface won't get as dirty as the linen wing. At least that's what I'm telling myself so I don't have to cover up all that woodgrain.

Ausf, if I may...

I would suggest taking a sharp knife blade and slicing in the panel lines, then hit it with some
more MicroSol. Once it's settled in, accent the panel lines with a dark wash.

After that a bit of light weathering, just so they don't look so white.

Tom
 
Back
Top